.jpg)
So... What is it?
The Oktoberfest Hefeweizen is a traditional German wheat beer with origins in Bavaria, often enjoyed during Oktoberfest celebrations. Known for its hazy, golden appearance, it features a flavor profile that blends banana, clove, and sometimes subtle hints of bubblegum, all derived from the special yeast used in fermentation. This unfiltered beer is brewed with a high proportion of wheat, giving it a soft, creamy mouthfeel and a refreshing finish.
What's ours like?
We are doing Oktoberfest right this year! This Hefeweizen comes in at a generous 5.9% and pours a gorgeous golden blonde, with a thick foamy head that lasts for days and leaves that signature wheat beer lacing on the glass! The bitterness is very subdued & hop character non existent which is just perfect for allowing the true star of the show to shine through, the amazing yeast character! First and foremost an explosion of cloves and cooking spice hits your palate, closely followed by waves of banana and vanilla which just coat the tongue with that beautiful silky German goodness!
Batch Size & Stats
- 19L / 5 gal finished beer
- 22L (6.8 gal) wort
- Starting gravity – 1.057
- Final gravity 1.012
- ABV – 5.9%
- Brewhouse Efficiency 69%
- EBC - 10.2
- IBU - 14
What ingredients?
Water
With sparging
- 16L (4.2 gal) strike water
Ferulic acid rest: 113F (45 C) — 10 min
Beta rest: 135F (57 C) — 30 min
Alpha rest: 156F (69 C) — 30 min
Mash Out — 170F - 77 °C — 10 min
- 15L (4 gal) sparge water at 78°C (172°F)
Without sparging
- 27L (7.1 gal) strike water
Ferulic acid rest: 113F (45 C) — 10 min
Beta rest: 135F (57 C) — 30 min
Alpha rest: 156F (69 C) — 30 min
Mash Out — 170F - 77 °C — 10 min
Malts
Total Grain Bill 5.2kg (11.4 lb)
- Wheat malt – 2.6kg (5.7 lb) 50%
- Pilsner Malt- 1.976 (3.83 lb) 38%
- Rolled Wheat - 520g (1.15 lb) 10%
- Supernova (Melanoidin Malt) - 104g (3.7 oz) 2%
Rice Hulls
- 470g (1 lb)
Hops & whirlfloc tablets
Spalt Spatler (4.2% Alpha Acid)
- 28g (1 oz) 10 IBU - 60 mins
Water Profile
- Ca2+22
- Mg2+ 5
- Na+ 16
- Cl- 32
- SO42- 32
- HCO3- 57
Yeast options & fermentation temperatures
- 11g (1 pkg) — Lallemand (LalBrew) Munich Classic - 22°C (71.6°F)
- Any other bavarian wheat beer yeasts will work as well!
Step by step process
Step 1 – Milling
- Mill grains to medium crush (set mill rollers to a gap of approx. 1.00mm / 0.039 inches (credit card width)
- Just keep in mind roller gap settings are not universal so as you brew more batches you will find the ideal crush size for your setup
- Alternatively if you don’t have a grain mill you can order your grains crushed from most homebrew stores, both online and in person
Step 2 – Mashing
Mash for 60 minutes with the following step mash order
- Ferulic acid rest: 113F (45 C) — 45 °C — 10 min
- Beta rest: 135F (57 C) — 57 °C — 30 min
- Alpha rest: 156F (69 C) — 69 °C — 30 min
- Mash Out — 170F - 77 °C — 10 min
- ensure you mix in the grains thoroughly with a mash paddle to prevent dough balls from forming (big spoons, spatulas or whisks will also work)
- its easier to mash the grains and prevent dough balls if you add a little grain at a time, mix, add more grain and repeat until all the grains are mixed
if you don’t have a mash tun with heating then ensure after you have finished mixing the grains in to insulate your mash tun (thick neoprene or heavy blankets both work well)
Step 3 (optional) – Sparging
- if your setup has the capability to sparge then do so with 15L (4 gal) sparge water at 78°C (172°F)
- if you are not sparging and using a BIAB (brew in a bag) method then remove grains from mash tun and twist and squeeze the bag to get as much liquid out of the grains as possible
- as you start sparging (or straining your BIAB bag) begin raising the temperature of your wort to a boil
Step 4 – Boiling
- once your wort begins to boil start a timer for a 60-minute boil and add your bittering hops, 28g (1 oz) of Spalt Spatler
Step 5 – Whirlpooling / cooling
- After 60 mins of boiling turn off your heat source and start cooling wort down
- Once you’ve reached yeast pitching temperature take an original gravity reading of your wort
Step 6 – Yeast Pitching
- It is best to make a yeast starter before beginning your brew day (ideally 1 day before) to ensure your yeast are as active and healthy as possible before pitching, but not completely necessary – you could also just rehydrate yeast 30 minutes before pitching.
- Wort Aeration (Optional) if you have a paint mixer give your wort a quick blitz before pitching yeast to help add more dissolved oxygen into the wort to help the yeast have a healthier kick start into fermentation
- Now add your tincture of Vanilla extract! (or you can wait till end of fermentation if you prefer)
- Pitch yeast in wort a degree or two higher than the target fermentation temperature to help yeast take off more aggressively
- To make a yeast starter you can use either:
- DME (dry malt extract) at a ratio of approx. 100g per 1L water (3.5 oz per 33 fluid ounces) for gravity of approx. 1.040
- some unfermented wort kept cold and sanitary from a previous brew day
- 70g of table sugar per 1L water (2.5 oz per 33 fluid ounces) – however, it is best to use malt sugar (wort / DME) whenever possible to reduce the chance of shocking the yeast with a different food source from starter to wort pitching
- To rehydrate yeast
- Add yeast to approx. 10 times as much room temperature water as the weight of the yeast e.g. 10g yeast in 100 ml water (0.35 oz yeast in 3.5 fluid ounces water)
Step 7 – Fermentation
- Allow yeast to ferment over the next two weeks (aprox)
- If you have a temperature-controlled system keep the fermenter temperature to the recommended fermentation temperature for each yeast strain (stated in the yeast ingredients section above)
- It's important to note that fermentation times will vary based on your circumstances like temperature, amount of yeast pitched, the healthiness of yeast, the gravity of the wort, pH, etc. so don’t stress be patient and know that these times are just a rough guide
- If you have temp control then when there are 2 days left of fermentation raise the temperature by 2 degrees for a diacetyl rest (once gravity reaches roughly 1.01) & gravity is the same 3 days in a row move onto cold crashing! (Dont worry cold crashing is optional!)

.jpg)
So... What is it?
Mexican lager is a light, crisp, easy drinking beer influenced by European brewing traditions brought over to Central America. Characterized by a golden straw colour, clean mild taste, subtle malt & corn based sweetness, minimal bitterness and relatively light ABV (4-5% normally) it is a fantastic summer beer and palate cleanser!
What's ours like?
Ours is spot on the profile! Showing a beautiful golden straw colour, light body and sweet malt and corn finish its a brilliant summer beer to have beach side! The bitterness is certainly in check, showing only enough IBU's to keep everything in balance without overpowering the rest of the beer. It's clean, easy drinking and perfect for warmer weather and lazy afternoons in the sun!
Batch Size & Stats
- 19L / 5 gal finished beer
- 22L (6.8 gal) wort
- Starting gravity – 1.044
- Final gravity 1.009
- ABV – 4.9%
- Brewhouse Efficiency 88%
- EBC - 4.7
- IBU - 12
What ingredients?
Water
With sparging
- 15L (3.9 gal) strike water approx. 64°C (147°F)
- 15.2L (4 gal) sparge water at 78°C (172°F)
Without sparging
- 27L (7.1 gal) strike water approx. 64°C (147°F)
Malts
Total Grain Bill 5kg (11 4lb)
- Joe White Pilsner malt – 3.14kg (7 lb)
- Flaked Corn (Maize) - 790g (1.74 lb)
Hops & whirlfloc tablets
Spalt Spatler (4.2% Alpha Acid)
- 19g (0.67 oz) 10 IBU - 60 mins
- 30g (1 oz) 2 IBU - 5 mins
Whirlfloc
- 0.75g (0.026 oz) / 1 tablets – 15 minutes left in the boil
Water Profile
- Ca2+22
- Mg2+ 5
- Na+ 15
- Cl- 31
- SO42- 30
- HCO3- 57
Yeast options & fermentation temperatures
- SafLager™ S‑23 – ferment at 14°C (57°F) 23g (0.41 oz) / (1 packets) - Fermented under 10 psi pressure (not necessary but a great option)
- Saflager W34-70 – ferment at 14°C (57°F) 23g (0.41 oz) / (1 packets) - Fermented under 10 psi pressure (not necessary but a great option)
Step by step process
Step 1 – Milling
- Mill grains to medium crush (set mill rollers to a gap of approx. 1.00mm / 0.039 inches (credit card width)
- Just keep in mind roller gap settings are not universal so as you brew more batches you will find the ideal crush size for your setup
- Alternatively if you don’t have a grain mill you can order your grains crushed from most homebrew stores, both online and in person
Step 2 – Mashing
Mash for 60 minutes at 64°C (147°F) with 15L (3.9 gal) of strike water
- Set your strike water to a few degrees above the target mash temperature (you can use the calculator in our website for this)
- ensure you mix in the grains thoroughly with a mash paddle to prevent dough balls from forming (big spoons, spatulas or whisks will also work)
- its easier to mash the grains and prevent dough balls if you add a little grain at a time, mix, add more grain and repeat until all the grains are mixed
if you don’t have a mash tun with heating then ensure after you have finished mixing the grains in to insulate your mash tun (thick neoprene or heavy blankets both work well)
Step 3 (optional) – Sparging
- if your setup has the capability to sparge then do so with 15.2L (4 gal) sparge water at 78°C (172°F)
- if you are not sparging and using a BIAB (brew in a bag) method then remove grains from mash tun and twist and squeeze the bag to get as much liquid out of the grains as possible
- as you start sparging (or straining your BIAB bag) begin raising the temperature of your wort to a boil
Step 4 – Boiling
- once your wort begins to boil start a timer for a 60-minute boil and add your bittering hops, 19g (0.67 oz) of Spalt Spatler
- at 15 minutes left in the boil add 1 whirlfloc tablet (OR granulated whirlfloc 0.7g (0.025 oz)\
- At 5 mins left in the boil add the flameout hops, 30g (1 oz) of Spalt Spatler and start cooling wort
Step 5 – Whirlpooling / cooling
- After 60 mins of boiling turn off your heat source and start cooling wort down
- Once you’ve reached yeast pitching temperature take an original gravity reading of your wort
Step 6 – Yeast Pitching
- It is best to make a yeast starter before beginning your brew day (ideally 1 day before) to ensure your yeast are as active and healthy as possible before pitching, but not completely necessary – you could also just rehydrate yeast 30 minutes before pitching.
- Wort Aeration (Optional) if you have a paint mixer give your wort a quick blitz before pitching yeast to help add more dissolved oxygen into the wort to help the yeast have a healthier kick start into fermentation
- Now add your tincture of Vanilla extract! (or you can wait till end of fermentation if you prefer)
- Pitch yeast in wort a degree or two higher than the target fermentation temperature to help yeast take off more aggressively
- To make a yeast starter you can use either:
- DME (dry malt extract) at a ratio of approx. 100g per 1L water (3.5 oz per 33 fluid ounces) for gravity of approx. 1.040
- some unfermented wort kept cold and sanitary from a previous brew day
- 70g of table sugar per 1L water (2.5 oz per 33 fluid ounces) – however, it is best to use malt sugar (wort / DME) whenever possible to reduce the chance of shocking the yeast with a different food source from starter to wort pitching
- To rehydrate yeast
- Add yeast to approx. 10 times as much room temperature water as the weight of the yeast e.g. 10g yeast in 100 ml water (0.35 oz yeast in 3.5 fluid ounces water)
Step 7 – Fermentation
- Allow yeast to ferment over the next two weeks (aprox)
- If you have a temperature-controlled system keep the fermenter temperature to the recommended fermentation temperature for each yeast strain (stated in the yeast ingredients section above)
- It's important to note that fermentation times will vary based on your circumstances like temperature, amount of yeast pitched, the healthiness of yeast, the gravity of the wort, pH, etc. so don’t stress be patient and know that these times are just a rough guide
- If you have temp control then when there are 2 days left of fermentation raise the temperature by 2 degrees for a diacetyl rest (once gravity reaches roughly 1.01) & gravity is the same 3 days in a row move onto cold crashing and adding gelatin! (Dont worry cold crashing & gelatin are both optional steps to help clarify your beer)
Step 8 (optional) – Cold crashing & Gelatin
- begin cold crashing your fermenter (bring the temperature of your fermenter down to as close to 0°C (32°F) as possible, for 2 days to a week depending on how patient you are, and add 1-2 teaspoons of gelatin dissolved in boiling water and allowed to cool a bit to your fermenter
- If you don’t have a temp-controlled fermenter, you can cold crash by putting your fermenter in a fridge or temp-controlled chest freezer
- After you have finished cold crashing it's time to keg/bottle your beer! If you are bottling your beer from the fermenter uncarbonated, remember to add about 5-7 grams (0.17 - 0.24 oz) of priming sugar to your bottles to carbonate your beer.
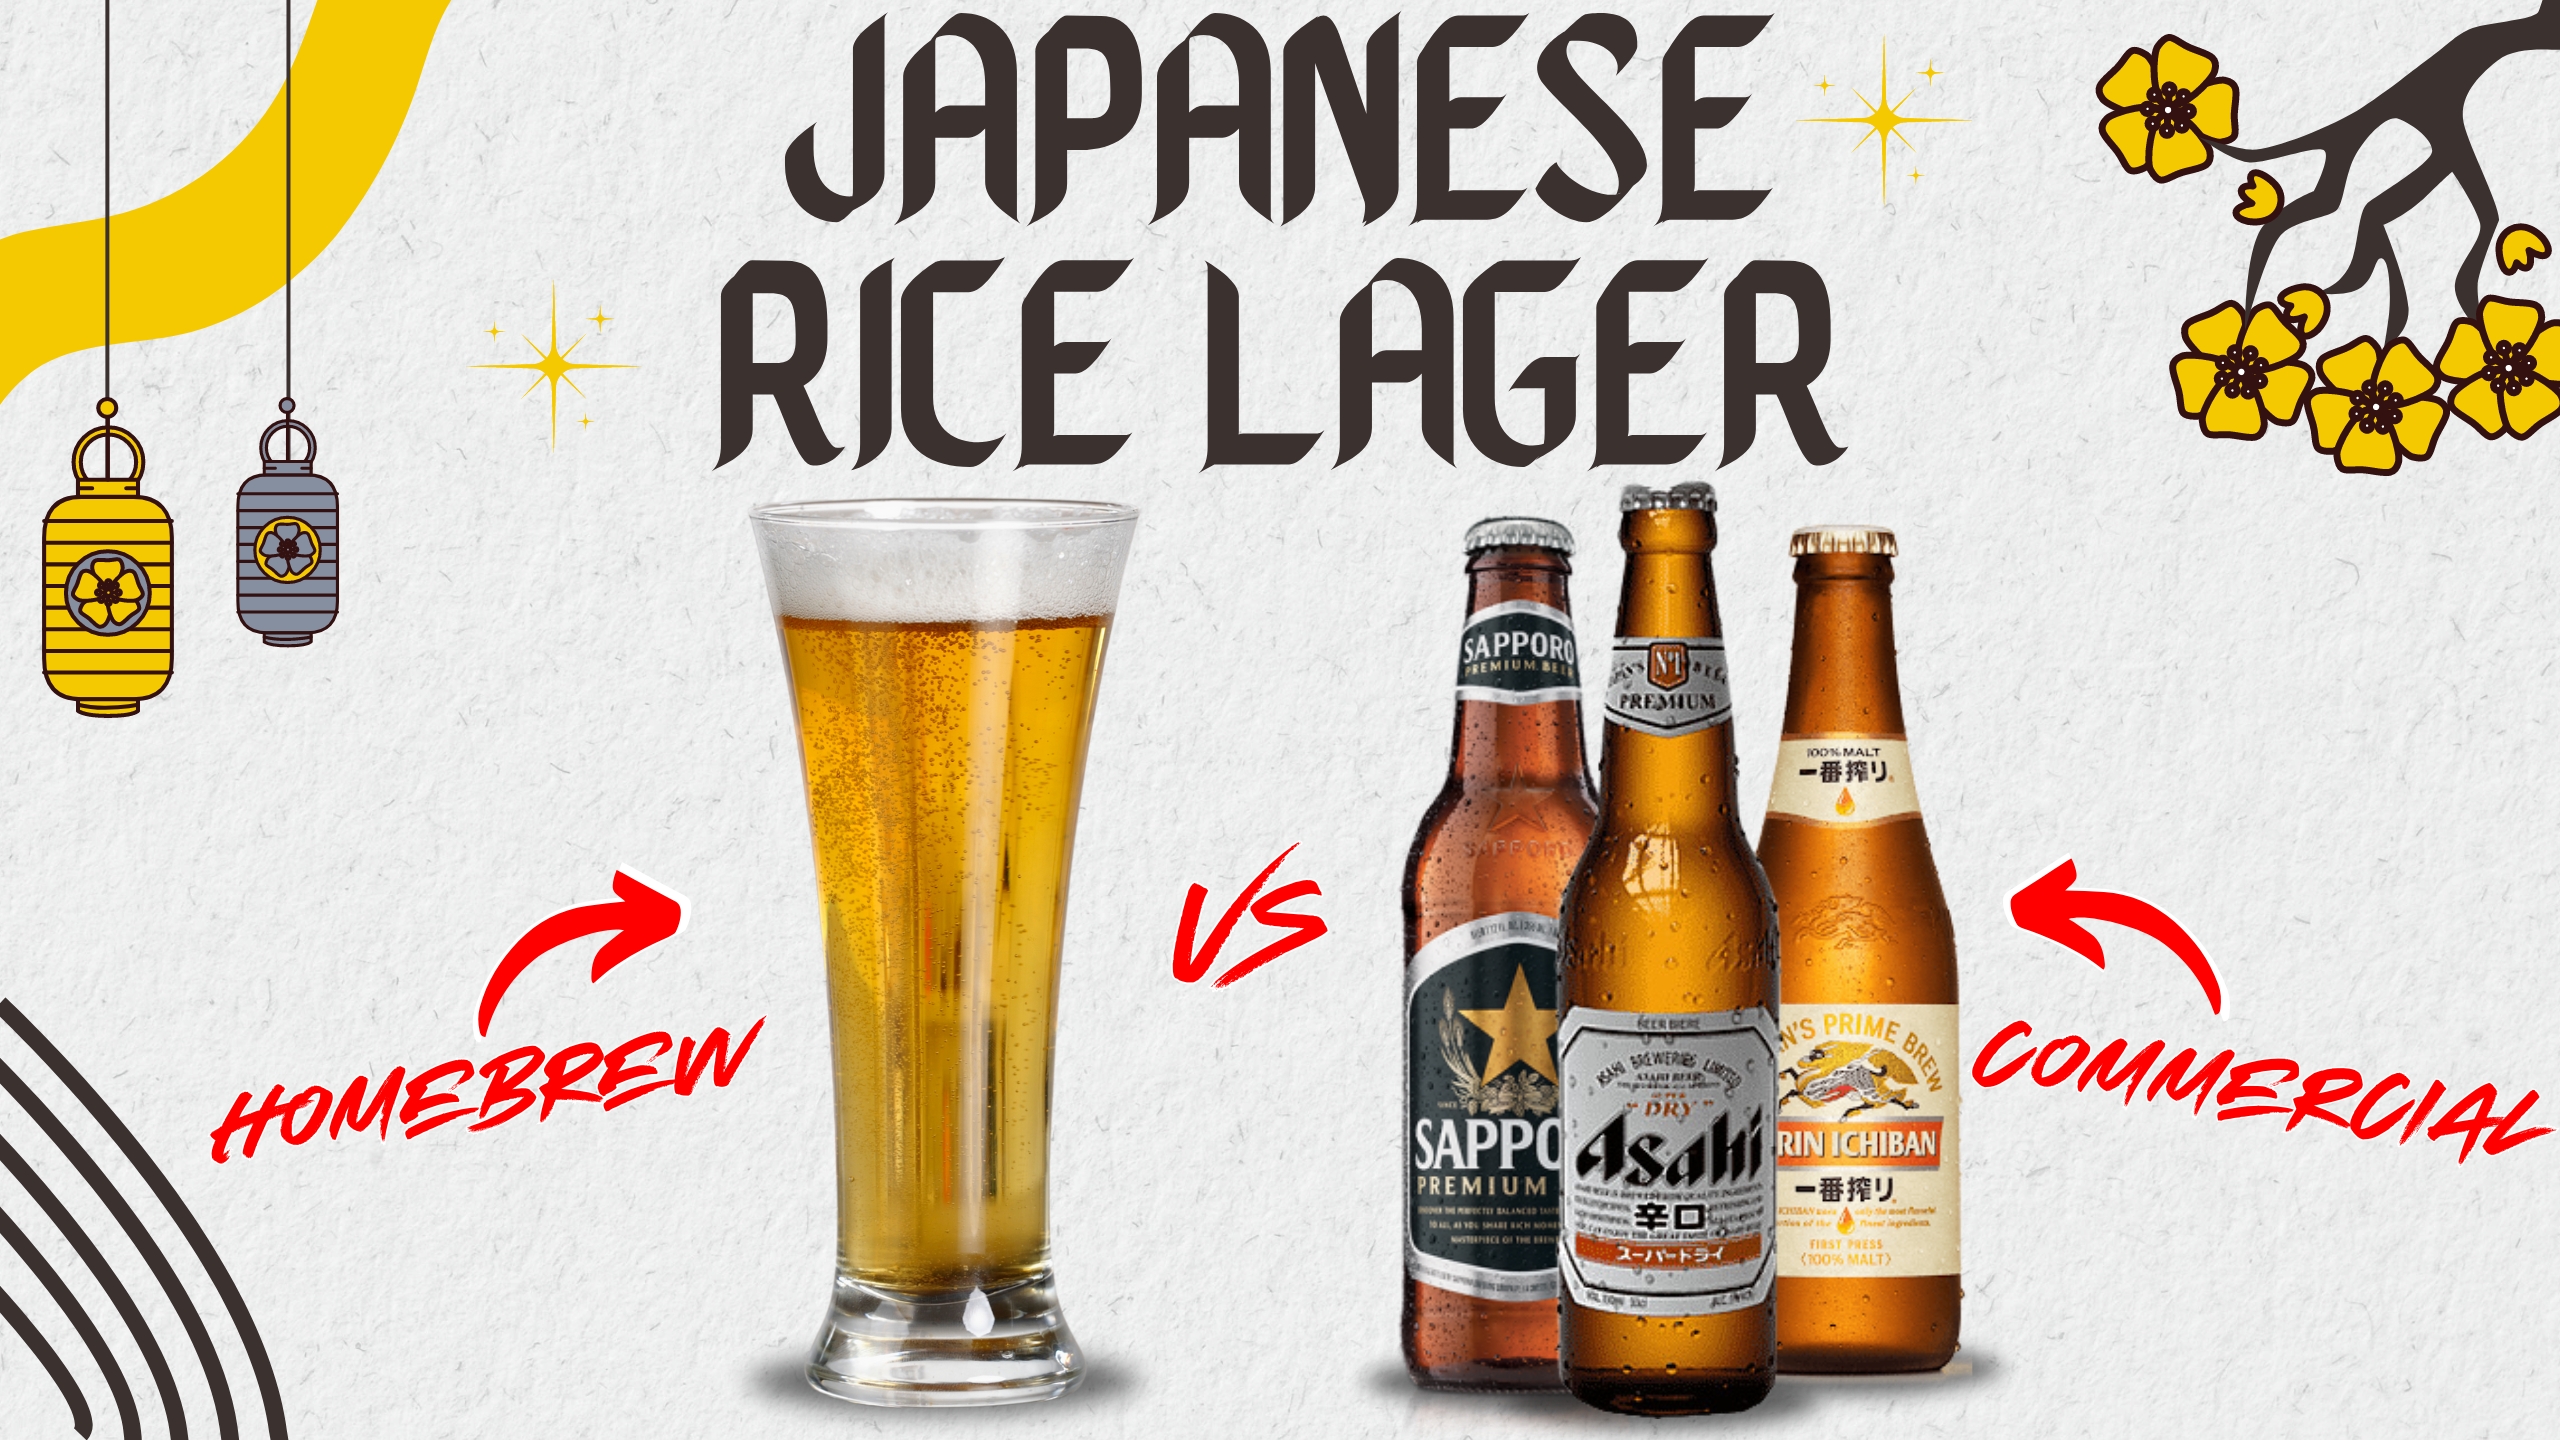
So... What is it?
The Japanese rice lager incorporates rice as a key ingredient alongside the usual barley, giving it a lighter and crisper profile compared to traditional lagers. The style originated in Japan as brewers sought to create a beer that paired well with the country's cuisine, particularly sushi and other delicate flavors. Rice helps to give the style its signature clean, refreshing character and subtle sweet dry finish.
What's ours like?
Coming in at an easy drinking 4.7%, its crisp, fresh, lightly sweet and citrusy and has a beautiful dry finish! The Rice certainly imparts the signature light body and dry finish of the Japanese style and the Motueka hops are perfectly balanced, providing just enough bitterness to keep it drinkable, with subtle citrusy and floral notes that make a near perfect replacement for the signature Japanese Hop, Sorachi Ace. Certainly a beer ill be brewing again and again!
Batch Size & Stats
- 47L (2x 19L & 1 9L corny kegs) / 12.4 gal finished beer
- 51L (13.5 gal) wort
- For a smaller 19L (5 gal) batch size simply half the ingredients of this recipe
- Starting gravity – 1.044
- Final gravity 1.008
- ABV – 4.7%
- IBU - 16
- Colour - 4.7 EBC
- Mash Efficiency - 94%
What ingredients?
Water
With sparging
- 30L (7.9 gal) for a 64°C (147°F) mash (you can use our strike water calculator to find your ideal strike temp)
- 30L (7.9 gal) sparge water at 78°C (172°F) - fermenter topped up with 4L (1 gal) post boil to reduce OG
Without sparging
- 55L (14.5 gal) for a 64°C (147°F) mash (you can use our strike water calculator to find your ideal strike temp)
Malts:
- Pilsner Malt – 5.01 kg (11 lb) - 62%
- Flaked Rice – 2.83 (6.24 lb) - 35%
- Gladiator (dextrin) Malt - 240g (0.53 lb) - 3%
Hops & whirlfloc tablets
Motueka
- 28g (1 oz) 12 IBU's – 60 mins
- 60g (2.1 oz) 5 IBU's – 5 minutes left in the boil
Rice Hulls
- 400g (0.88 lb)
Whirlfloc tablets
- 1.5g (0.052 oz) / 2 tablets – 15 minutes left in the boil
Yeast options & fermentation temperatures
- 23g (0.8 oz) Saflager S-23 – ferment at 14°C (57°F)
- 23g (0.8 oz) Saflager W-34/70 – ferment at 14°C (57°F)
Water Profile
- Ca2+23
- Mg2+ 5
- Na+ 15
- Cl- 31
- SO42- 32
- HCO3- 57
Step by step process
Step 1 – Milling
- Mill grains to medium crush (set mill rollers to a gap of approx. 1.00mm / 0.039 inches)
- Just keep in mind roller gap settings are not universal so as you brew more batches you will find the ideal crush size for your setup
- Alternatively if you don’t have a grain mill you can order your grains crushed from most homebrew stores, both online and in person
Step 2 – Mashing
- Mash for 60 minutes at 64°C (147°F)
- Set your strike water to a few degrees above the target mash temperature, you can use our calculator to determine what your strike temperature should be
- ensure you mix in the grains thoroughly with a mash paddle to prevent dough balls from forming (big spoons, spatulas or whisks will also work)
- its easier to mash the grains and prevent dough balls if you add a little grain at a time, mix, add more grain and repeat until all the grains are mixed
- if you don’t have a mash tun with heating then ensure after you have finished mixing the grains in to insulate your mash tun (thick neoprene or heavy blankets both work well)
Step 3 (optional) – Sparging
- if your setup has the capability to sparge then do so with 30L (7.9 gal) sparge water at 78°C (172°F)
- if you are not sparging and using a BIAB (brew in a bag) method then remove grains from mash tun and twist and squeeze the bag to get as much liquid out of the grains as possible
- as you start sparging (or straining your BIAB bag) begin raising the temperature of your wort to a boil
Step 4 – Boiling
- Once your wort begins to boil start a timer for a 60-minute boil and add your bittering hops, 28g (1 oz) of Motueka
- At 15 minutes left in the boil add 2 whirlfloc tablets
- With 5 minutes left in the boil add your flavour and aroma hops, 60g (2.1 oz) of Motueka
Step 5 – Cooling
- After 1 hour of boiling start cooling wort down to yeast pitching temperature
- once you’ve reached yeast pitching temperature take an original gravity reading of your wort
Step 6 – Yeast Pitching
- It is best to make a yeast starter before beginning your brew day (ideally 1 day before) to ensure your yeast are as active and healthy as possible before pitching, but not completely necessary – you could also just rehydrate yeast 30 minutes before pitching.
- Pitch yeast in wort a degree or two higher than the target fermentation temperature to help yeast take off more aggressively
- To make a yeast starter you can use either:
- DME (dry malt extract) at a ratio of approx. 100g per 1L water (3.5 oz per 33 fluid ounces) for gravity of approx. 1.040
- some unfermented wort kept cold and sanitary from a previous brew day
- 70g of table sugar per 1L water (2.5 oz per 33 fluid ounces) – however, it is best to use malt sugar (wort / DME) whenever possible to reduce the chance of shocking the yeast with a different food source from starter to wort pitching
- To rehydrate yeast
- Add yeast to approx. 10 times as much room temperature water as the weight of the yeast e.g. 10g yeast in 100 ml water (0.35 oz yeast in 3.5 fluid ounces water)
Step 7 – Fermentation
- Allow yeast to ferment over the next week to two weeks
- If you have a temperature controlled system keep the fermenter temperature to the recommended fermentation temperature for each yeast strain (stated in the yeast ingredients section above)
- Monitor the fermentation activity over the first 7 days by the bubbling of the blow off tube / airlock of your fermenter, as the bubbling slows down (roughly around day 7) take a gravity reading. When the gravity reaches around 1.01 raise the temperature of your fermenter by 1-2 degrees for 2-4 days for a diacetyl rest (if you don’t have temperature control don’t worry about this step, its not the end of the world!)
- Its important to note that fermentation times will vary based on your circumstances like, temperature, amount of yeast pitched, healthiness of yeast, gravity of wort, pH etc. so don’t stress be patient and know that these times are just a rough guide
- Once the gravity is the same 2 days in a row move onto cold crashing! (If you can’t / don’t want to cold crash go straight to kegging/bottling your beer!)
Step 8 (optional) – Cold crashing
- begin cold crashing your fermenter (bring the temperature of your fermenter down to as close to 0°C (32°F) as possible, for 2 days to a week depending on how patient you are
- If you don’t have a temp-controlled fermenter, you can cold crash by putting your fermenter in a fridge or temp-controlled chest freezer
- After you have finished cold crashing it's time to keg/bottle your beer! If you are bottling your beer from the fermenter uncarbonated remember to add about 5-7 grams (0.17 - 0.24 oz) of priming sugar to your bottles to carbonate your beer.
.jpg)
So... What is it?
Mulled wine is a warm, spiced beverage typically made from red wine, along with various mulling spices and sometimes raisins. The origins of mulled wine date back to ancient Rome, where it was customary to heat wine and mix it with spices to ward off the cold. This tradition spread throughout Europe, evolving with regional variations. The common ingredients include red wine, cinnamon, cloves, star anise, citrus fruits (such as oranges), and sweeteners like honey or sugar. It's especially popular during the winter months and is a festive staple at Christmas markets in many countries.
What's ours like?
Absolutely delicious! Its sweet, sticky, earthy and has just the right amount of spice! When we say spice, we of course mean cooking spice, think christmasy flavours like cinnamon and honey, blended with an earthy sweet warmth from the cloves & star anise, molassasy richness from the rum, a touch of zesty fresh citrus from the oranges and all marrying together with dark berry character and just a hint of old tobacco from the elderberries. Drink this one cozied up fireside and you'll feel warm and fuzzy like you're sitting by a fireplace in the Swiss alps!
Batch Size & Cook Time
- 4-5 glasses (around 800ml / 27 oz)
- 10-11 standards of alcohol (Australian)
- prep time 5 mins
- cook time 20-30 mins (to taste)
What ingredients?
Spices & Sweets
- 2 oranges (one for cooking, one for garnish)
- 3 cinnamon sticks (2 for cooking 1 for garnish)
- 8-10 cloves (to taste)
- 2 whole star anise
- 1/2 a tablespoon of elderberries (optional)
- 3-4 tablespoons of honey or maple syrup (to taste)
Alcohol
- bottle of red wine (softer less intense wines are best, such as merlot or pinot noir)
- 1/3 to 1/2 of a cup of Rum or Brandy
Step by step process
Step 1 – Spices & sweets
- Measure out each of your spices and set them aside to add to a cooking pot or saucepan
- slice one of the oranges to desired thickness (thinner slices will extract more flavour) however if you'd like less bitterness you can peel the orange first
Step 2 – Heating the wine
- pour out a bottle of red wine into a cookpot or saucepan, generally softer reds are better for mulled wine, such as pinot noirs or merlots. Please not your wine does not need to be expensive! A good price point is something you are happy to cook with, we are going to add a bunch of flavours with our spices so no point spending top dollar on the wine itself!
- Wines with less tannins and robust flavours will produce a sweeter mulled wine that lets the spices shine more rather than the tanic bitterness and astringency of the wine itself.
- Add 1/3 to 1/2 of a cup of either rum or brandy to your pot, this will increase the alcohol content of our spiced drink, giving it more robust character and making it more of a winter warmer for those cold winter nights!
Step 3 Add spices and simmer!
- Time to start simmering! add all your spices and sliced orange to the pot, as well as 3-4 tablespoons of either honey or maple syrup depending on your preference. Start with less and add more to taste!
- allow your brew to reach a simmer NOT A BOIL! alcohol evaporates around 78°C (172°F) so keep the temperature around 70-75°C (158-167°F) max or you will start to loose your booze!
- Now you can let your concoction simmer away from anywhere from 15 to 30 minutes or to taste! The longer you simmer the more spice character and bitterness you will extract, so taste every now and again and stop the simmer when you are happy!
- Once you've reached your desired flavour strain the mulled wine out into heat safe glasses or mugs! But remember to strain all the spices out if you are not drinking it all at once! the longer the wine sits on the spices the more flavour it will pull, so if you leave it overnight it might taste like a tea that has had the bag in for too long the next day!
Step 3 Garnish & Serve!
- Garnish however you'd like! I am a fan of adding a few orange slices, a cinnamon stick and maybe a star anise, but the world is your oyster, your mulled wine is now ready to drink! So play around with this recipe and add or remove spices to taste and make your perfect winter warmer!
.jpg)
So... What is it?
The Red Rye IPA is a daughter of the American West Coast IPA, sitting between 5.5%-7.5% with a similar hop & bitterness profile to a westcoast. However the malt backbone leans deeper into the rich caramel, toffee, and/or dark fruit malt character side of things, similar in some ways to an Irish red ale, and of course a strong earthy spicy note from a hefty addition of Rye malt!
What's ours like?
This is our second crack at a red rye on the channel and we can easily say it is significantly better than our first attempt! The rye is far more balanced, the body thinner (in a good way!) making it far more drinkable, the IBU's and hop character are also far more in balance with the fruitcake, caramel and sticky date flavour of the complex malt bill. Coming in at 6.6% it still carries decent weight both in terms of ABV and overall flavour and character! Definitely a great beer for all seasons, holding more depth than a traditional IPA, but not so heavy as a black!
Batch Size & Stats
- 38L (2 19L corny kegs) / 10 gal finished beer
- 45L (11.9 gal) wort
- For a smaller 19L (5 gal) batch size simply half the ingredients of this recipe
- Starting gravity – 1.073
- Final gravity 1.012
- ABV – 6.6%
- IBU - 66
- Colour - 36 EBC
- Mash Efficiency - 80%
What ingredients?
Water
With sparging
- 40L (10.6 gal) for a 65°C (149°F) mash (you can use our strike water calculator to find your ideal strike temp)
- 25L (6.6 gal) sparge water at 78°C (172°F) - fermenter topped up with 4L (1 gal) post boil to reduce OG
Without sparging
- 55L (14.5 gal) for a 65°C (149°F) mash (you can use our strike water calculator to find your ideal strike temp)
Malts: Total 12.46 kg / 27.5 lb
- Pale ale malt – 7.727 kg (17 lb) - 62%
- Flaked Rye - 1.869 kg (4.12 lb) - 15%
- Red Back - 1.495 kg (3.3 lb) - 12%
- Aurora - 748 g (1.65 lb) 6%
- Supernova – 679g (1.01 lb) - 4%
- Midnight Wheat- 125g (4.4 oz) - 1%
Hops & whirlfloc tablets
Northern Brewer
- 57g (22 IBU) (2 oz) – 60 mins
Citra
- 57g (12 IBU) (2 oz) – 10 mins
- 57g (2 oz) - 0 min flame out
- 57g (2 oz) - dry hop day 7
Rakau
- 57g (10 IBU) (2 oz) – 10 mins
- 57g (2 oz) - 0 min flame out
- 105g (3.5 oz) - dry hop day 7
Lupomax Mosaic
- 57g (10IBU) (2 oz) – 10 mins
- 57g (2 oz) - 0 min flame out
- 100g (3.5 oz) - dry hop day 7
Whirlfloc tablets
- 1.5g (0.052 oz) / 2 tablets – 15 minutes left in the boil
Yeast options & fermentation temperatures
- 23g (0.8 oz) Aus-05– ferment at 18°C / 64.4°F
- 23g (0.8 oz) US-05 – ferment at 18°C / 64.4°F
- 23g (0.8 oz) S-04 – ferment at 18°C / 64.4°F
Water Profile
- Ca2+111
- Mg2+ 18
- Na+ 16
- Cl- 100
- SO42- 200
- HCO3- 57
Step by step process
Step 1 – Milling
- Mill grains to medium crush (set mill rollers to a gap of approx. 1.00mm / 0.039 inches)
- Just keep in mind roller gap settings are not universal so as you brew more batches you will find the ideal crush size for your setup
- Alternatively if you don’t have a grain mill you can order your grains crushed from most homebrew stores, both online and in person
Step 2 – Mashing
- Mash for 60 minutes at 65°C (149°F)
- Set your strike water to a few degrees above the target mash temperature, you can use our calculator to determine what your strike temperature should be
- ensure you mix in the grains thoroughly with a mash paddle to prevent dough balls from forming (big spoons, spatulas or whisks will also work)
- its easier to mash the grains and prevent dough balls if you add a little grain at a time, mix, add more grain and repeat until all the grains are mixed
- if you don’t have a mash tun with heating then ensure after you have finished mixing the grains in to insulate your mash tun (thick neoprene or heavy blankets both work well)
- after 60 minutes of mashing raise the temp to 77°C (170°F) for 10-15 minutes to mash out, and deactivate the enzymes breaking down the sugars
Step 3 (optional) – Sparging
- if your setup has the capability to sparge then do so with 25L (6.6 gal) sparge water at 78°C (172°F)
- if you are not sparging and using a BIAB (brew in a bag) method then remove grains from mash tun and twist and squeeze the bag to get as much liquid out of the grains as possible
- as you start sparging (or straining your BIAB bag) begin raising the temperature of your wort to a boil
Step 4 – Boiling
- once your wort begins to boil start a timer for a 60-minute boil and add your bittering hops, 57g (2 oz) of Northern Brewer
- at 15 minutes left in the boil add 2.5 whirlfloc tablets
- at 10 minutes left in the boil add 57g (2 oz) each of Citra, Lupomax Mosaic and Rakau
- at Flameout / 0 minutes left in the boil add 57g (2oz) of Citra, Lupomax Mosaic and Rakau
Step 5 – Cooling
- After 1 hour of boiling start cooling wort down to yeast pitching temperature
- once you’ve reached yeast pitching temperature take an original gravity reading of your wort
Step 6 – Yeast Pitching
- It is best to make a yeast starter before beginning your brew day (ideally 1 day before) to ensure your yeast are as active and healthy as possible before pitching, but not completely necessary – you could also just rehydrate yeast 30 minutes before pitching.
- Pitch yeast in wort a degree or two higher than the target fermentation temperature to help yeast take off more aggressively
- To make a yeast starter you can use either:
- DME (dry malt extract) at a ratio of approx. 100g per 1L water (3.5 oz per 33 fluid ounces) for gravity of approx. 1.040
- some unfermented wort kept cold and sanitary from a previous brew day
- 70g of table sugar per 1L water (2.5 oz per 33 fluid ounces) – however, it is best to use malt sugar (wort / DME) whenever possible to reduce the chance of shocking the yeast with a different food source from starter to wort pitching
- To rehydrate yeast
- Add yeast to approx. 10 times as much room temperature water as the weight of the yeast e.g. 10g yeast in 100 ml water (0.35 oz yeast in 3.5 fluid ounces water)
Step 7 – Fermentation & Dry Hopping
- Allow yeast to ferment over the next week to two weeks
- If you have a temperature controlled system keep the fermenter temperature to the recommended fermentation temperature for each yeast strain (stated in the yeast ingredients section above)
- Monitor the fermentation activity over the first 7 days by the bubbling of the blow off tube / airlock of your fermenter, as the bubbling slows down (roughly around day 7) take a gravity reading. When the gravity reaches around 1.014 raise the temperature of your fermenter by 1-2 degrees for 2 days for a diacetyl rest (if you don’t have temperature control don’t worry about this step, its not the end of the world!)
- On day 2 of the diacetyl rest its time to Dry Hop, add 113g (3 oz) each of citra and Lupomax Mosaic, and 105g (3.7 oz) of Rakau to the fermenter
- Its important to note that fermentation times will vary based on your circumstances like, temperature, amount of yeast pitched, healthiness of yeast, gravity of wort, pH etc. so don’t stress be patient and know that these times are just a rough guide
- Once the gravity is the same 2 days in a row move onto cold crashing! (If you can’t / don’t want to cold crash go straight to kegging/bottling your beer!)
Step 8 (optional) – Cold crashing
- begin cold crashing your fermenter (bring the temperature of your fermenter down to as close to 0°C (32°F) as possible, for 2 days to a week depending on how patient you are
- If you don’t have a temp-controlled fermenter, you can cold crash by putting your fermenter in a fridge or temp-controlled chest freezer
- After you have finished cold crashing it's time to keg/bottle your beer! If you are bottling your beer from the fermenter uncarbonated remember to add about 5-7 grams (0.17 - 0.24 oz) of priming sugar to your bottles to carbonate your beer.
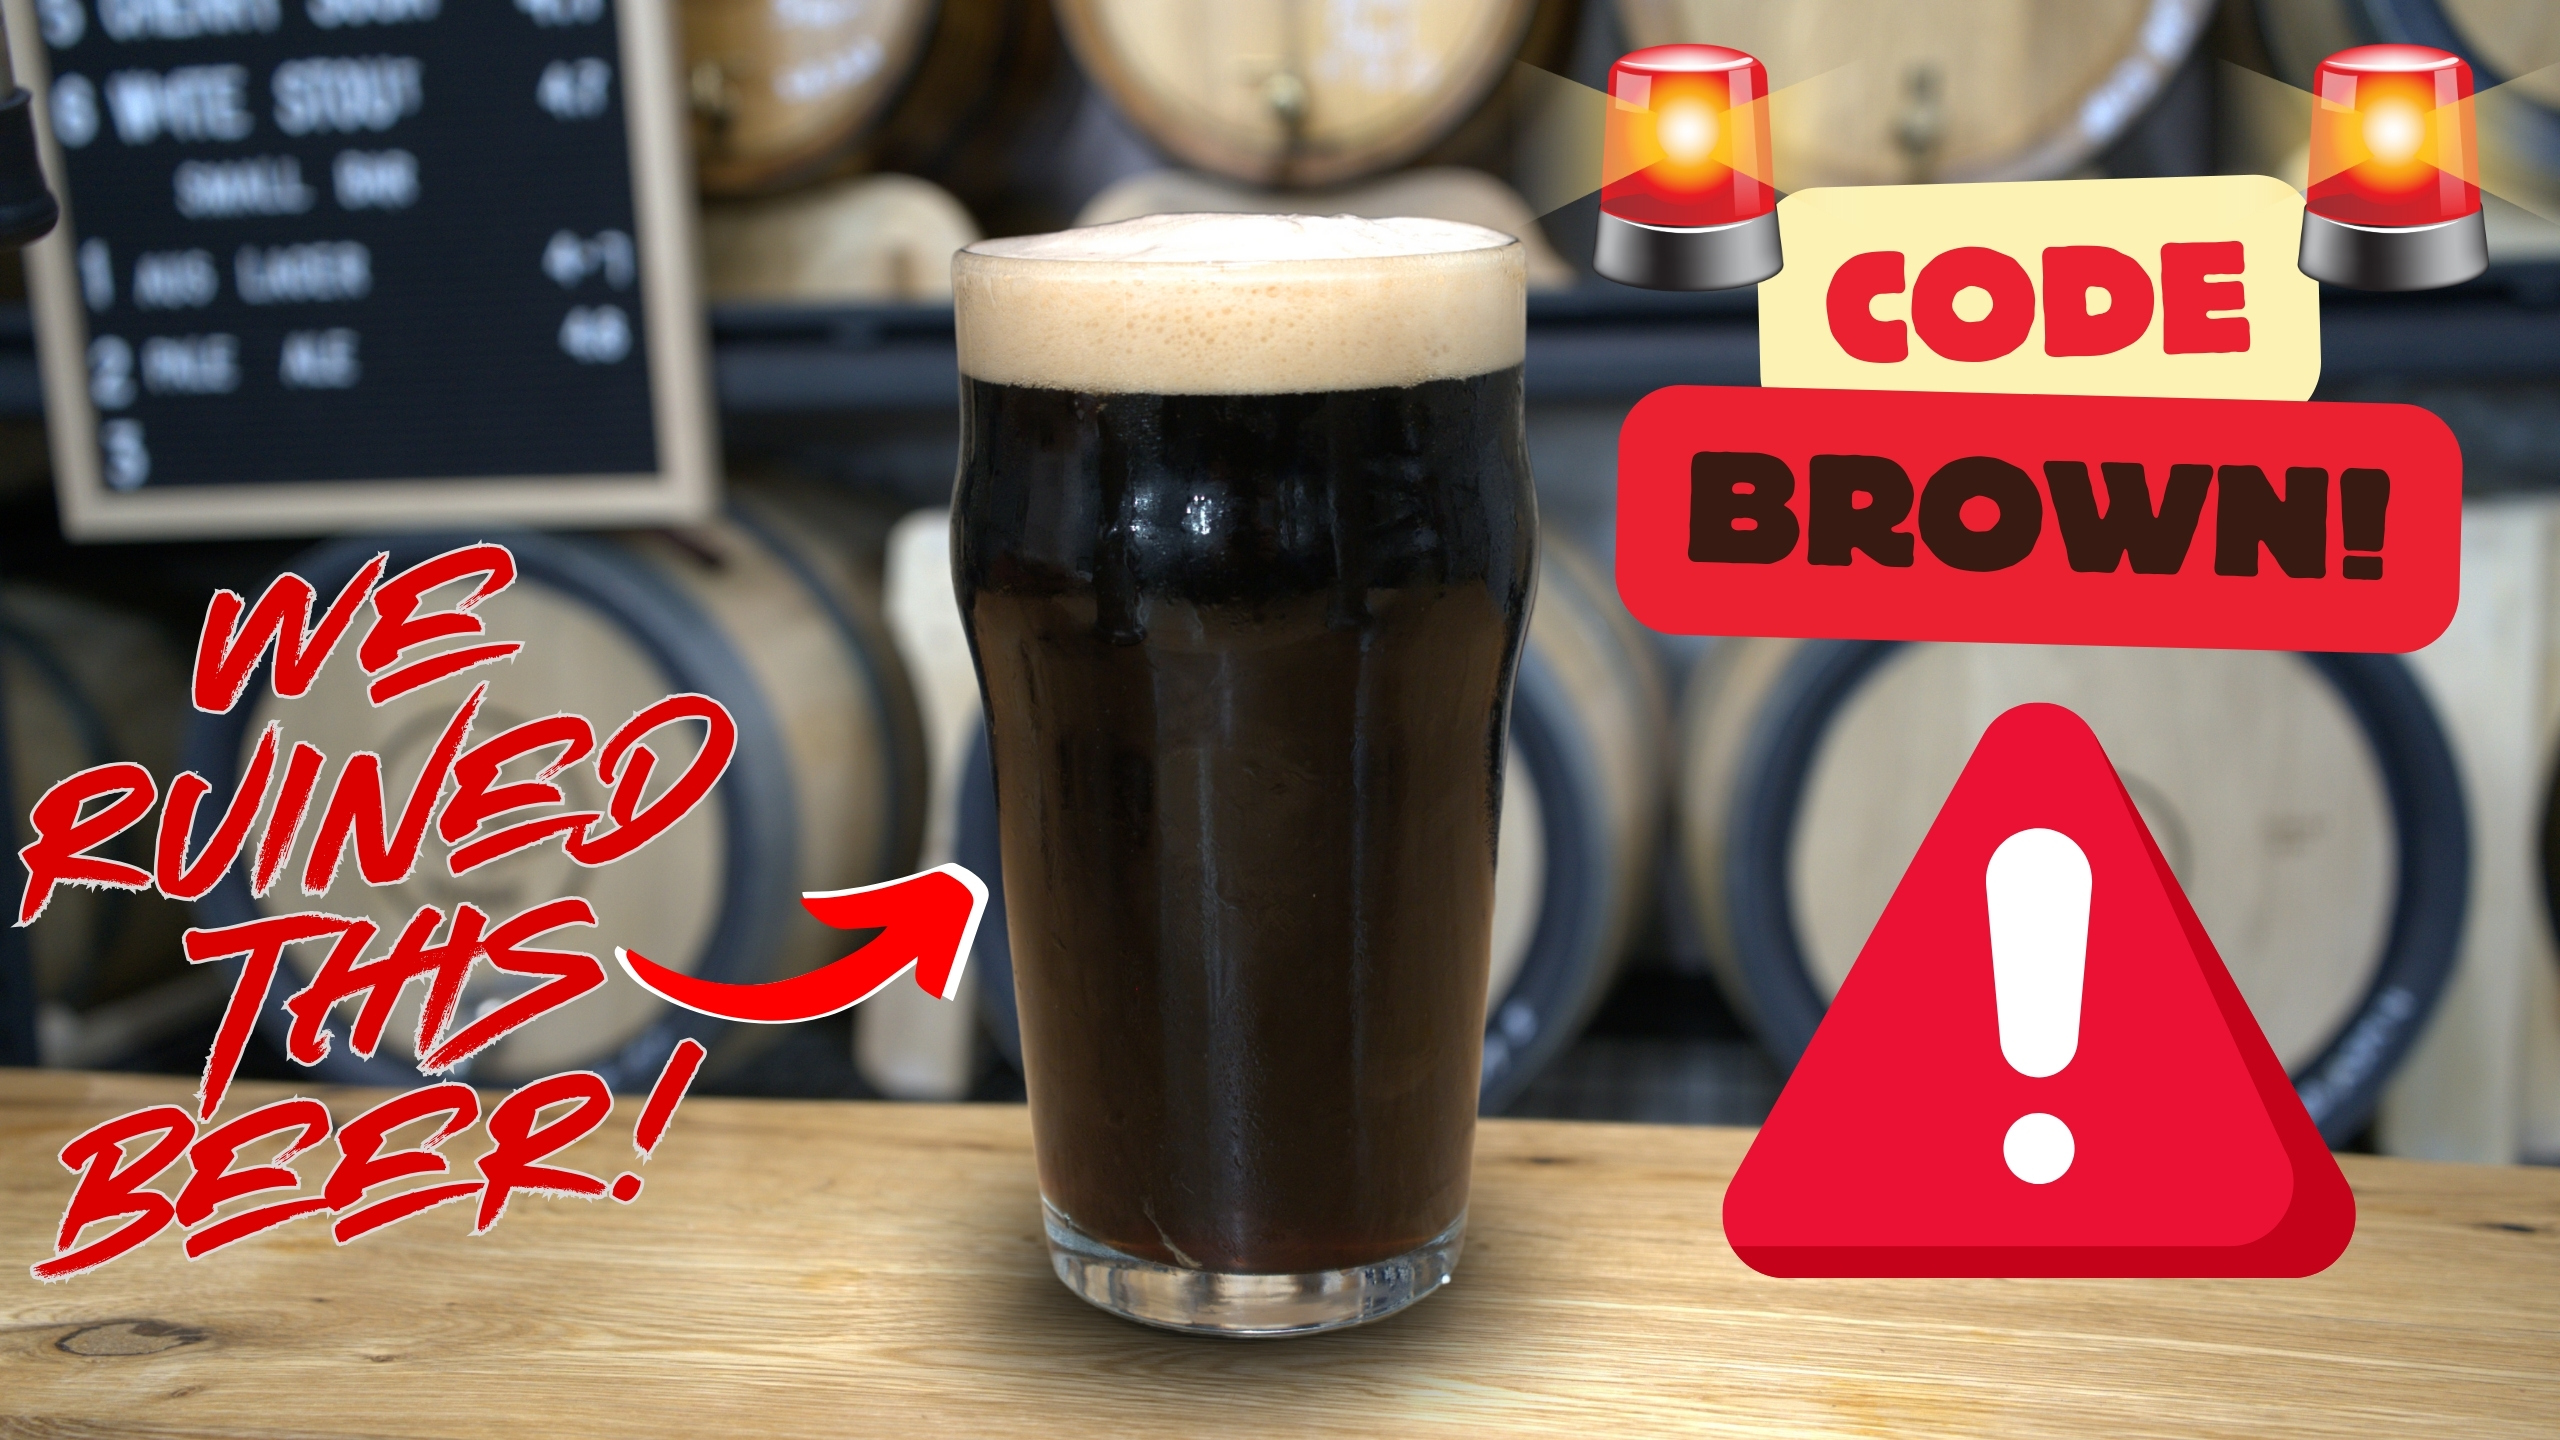
So... What is it?
A brown ale is a dark, malty beer that typically showcases a rich, caramel or toffee-like sweetness, balanced with a moderate bitterness. Originating from England, this ale features a deep amber to brown hue and often carries nutty, toasted bread, or chocolate undertones. With moderate alcohol content, a smooth medium bodied mouthfeel and slightly lower carbonation its an easy drinking malt driven beer for the cooler whether.
What's ours like?
Well there's no way around it... we screwed up! from forgetting to check the mash temp, to stuck sparges to using too much roasted malts in our grain bill, we made a lot of mistakes! BUT, the beer itself is actually very solid, certainly leaning more towards roasted stout territory rather than brown nuttiness, and with a slightly light body it is a very unique beer! imagine a lighter bodied stout with a decent amount of breadiness and nutty character, that's pretty much our code brown ale! Coming in at 6.2% its definitely darker and more boozy than intended, but its made for a great fire side winter sipper!
Batch Size & Stats
- 19L / 5 gal finished beer
- 23L (6 gal) wort
- Starting gravity – 1.057
- Final gravity 1.01
- ABV – 6.2%
- Brewhouse Efficiency 87%
- IBU - 28
What ingredients?
Water
With sparging
- 15L (3.9 gal) strike water approx. 64°C (147°F)
- 15.2L (4 gal) sparge water at 78°C (172°F)
Without sparging
- 27L (7.1 gal) strike water approx. 64°C (147°F)
Malts
Total Grain Bill 5kg (11 4lb)
- Pale malt – 3.026kg (6.67 lb) - 62%
- Crisp Light Munich Malt - 781g (1.72 lb) - 16%
- Gladfield Brown Malt - 683g (1.5 lb) - 14%
- Medium Crystal Malt - 244g (0.54 lb) - 5%
- Dark Chocolate Malt - 146g (5.15 oz) - 3%
Hops & whirlfloc tablets
Northern Brewer
- 14g (0.5 oz) 13 IBU - 60 min
- 28g (1 oz) 9 IBU - 10 min
Fuggles
- 28g (1 oz) 5 IBU - 10 min
Whirlfloc
- 0.75g (0.026 oz) / 1 tablets – 15 minutes left in the boil
Water Profile
- Ca2+81
- Mg2+ 5
- Na+ 15
- Cl- 101
- SO42- 75
- HCO3- 57
Yeast options & fermentation temperatures
- US-05 – ferment at 20°C (68°F) 11.5g (0.2 oz)
- S-04 – ferment at 20°C (68°F) 11.5g (0.2 oz)
Step by step process
Step 1 – Milling
- Mill grains to medium crush (set mill rollers to a gap of approx. 1.00mm / 0.039 inches (credit card width)
- Just keep in mind roller gap settings are not universal so as you brew more batches you will find the ideal crush size for your setup
- Alternatively if you don’t have a grain mill you can order your grains crushed from most homebrew stores, both online and in person
Step 2 – Mashing
Mash for 60 minutes at 66°C (151°F) with 15L (3.9 gal) of strike water
- Set your strike water to a few degrees above the target mash temperature (you can use the calculator in our website for this)
- ensure you mix in the grains thoroughly with a mash paddle to prevent dough balls from forming (big spoons, spatulas or whisks will also work)
- its easier to mash the grains and prevent dough balls if you add a little grain at a time, mix, add more grain and repeat until all the grains are mixed
if you don’t have a mash tun with heating then ensure after you have finished mixing the grains in to insulate your mash tun (thick neoprene or heavy blankets both work well)
Step 3 (optional) – Sparging
- if your setup has the capability to sparge then do so with 15.2L (4 gal) sparge water at 78°C (172°F)
- if you are not sparging and using a BIAB (brew in a bag) method then remove grains from mash tun and twist and squeeze the bag to get as much liquid out of the grains as possible
- as you start sparging (or straining your BIAB bag) begin raising the temperature of your wort to a boil
Step 4 – Boiling
- once your wort begins to boil start a timer for a 60-minute boil and add your bittering hops, 14g (0.5 oz) of Northern Brewer hops
- at 15 minutes left in the boil add 1 whirlfloc tablet (OR granulated whirlfloc 0.7g (0.025 oz)
- at 10 minutes left in the boil add 28g (1 oz) each of fuggles and northern brewer
Step 5 – Whirlpooling / cooling
- After 60 mins of boil turn off your heat and start cooling the wort
- Once you’ve reached yeast pitching temperature take an original gravity reading of your wort
Step 6 – Yeast Pitching
- It is best to make a yeast starter before beginning your brew day (ideally 1 day before) to ensure your yeast are as active and healthy as possible before pitching, but not completely necessary – you could also just rehydrate yeast 30 minutes before pitching.
- Wort Aeration (Optional) if you have a paint mixer give your wort a quick blitz before pitching yeast to help add more dissolved oxygen into the wort to help the yeast have a healthier kick start into fermentation
- Now add your tincture of Vanilla extract! (or you can wait till end of fermentation if you prefer)
- Pitch yeast in wort a degree or two higher than the target fermentation temperature to help yeast take off more aggressively
- To make a yeast starter you can use either:
- DME (dry malt extract) at a ratio of approx. 100g per 1L water (3.5 oz per 33 fluid ounces) for gravity of approx. 1.040
- some unfermented wort kept cold and sanitary from a previous brew day
- 70g of table sugar per 1L water (2.5 oz per 33 fluid ounces) – however, it is best to use malt sugar (wort / DME) whenever possible to reduce the chance of shocking the yeast with a different food source from starter to wort pitching
- To rehydrate yeast
- Add yeast to approx. 10 times as much room temperature water as the weight of the yeast e.g. 10g yeast in 100 ml water (0.35 oz yeast in 3.5 fluid ounces water)
Step 7 – Fermentation
- Allow yeast to ferment over the next two weeks (aprox)
- If you have a temperature-controlled system keep the fermenter temperature to the recommended fermentation temperature for each yeast strain (stated in the yeast ingredients section above)
- It's important to note that fermentation times will vary based on your circumstances like temperature, amount of yeast pitched, the healthiness of yeast, the gravity of the wort, pH, etc. so don’t stress be patient and know that these times are just a rough guide
- If you have temp control then when there are 2 days left of fermentation raise the temperature by 2 degrees for a diacetyl rest (once gravity reaches roughly 1.005) & gravity is the same 3 days in a row move onto cold crashing and adding gelatin! (Dont worry cold crashing & gelatin are both optional steps to help clarify your beer)
Step 8 (optional) – Cold crashing & Gelatin
- begin cold crashing your fermenter (bring the temperature of your fermenter down to as close to 0°C (32°F) as possible, for 2 days to a week depending on how patient you are, and add 1-2 teaspoons of gelatin dissolved in boiling water and allowed to cool a bit to your fermenter
- If you don’t have a temp-controlled fermenter, you can cold crash by putting your fermenter in a fridge or temp-controlled chest freezer
- After you have finished cold crashing it's time to keg/bottle your beer! If you are bottling your beer from the fermenter uncarbonated, remember to add about 5-7 grams (0.17 - 0.24 oz) of priming sugar to your bottles to carbonate your beer.

So... What is it?
A kettle sour is made by inoculated the wort after the mash step with a bacteria like Lactobacillus. It's then left to sour for a few hours to days until the pH reaches the desired level which is halted by immediately boiling the wort and carrying on with the brew-day and pitching yeast as you would with a normal beer!
The Berliner Weisse is a sour wheat beer from (you guessed it) Berlin, Germany! characterized by its slightly sour character and light abv (normally around 3-3.9%) it's a fantastic drop for summer in the beer garden, typically having a very light body, tartness on the tongue, and fresh fruity character. This also makes it a fantastic beer for fruit infusions!
What is ours like?
House Hightower, aka "the greens" are a prominent family in the world House of the Dragon & Game of Thrones, renowned for its wealth, influence, and strategic acumen. Known for their conniving and devious nature, the HighTower's navigate the intricate web of alliances and rivalries, manipulating events from the shadows to secure their power.
So what better way to symbolize house Hightower, than with a Sour! and of course because they are the "Greens" our beer must be too! So here is the Green apple skittles sour! Its tart, acidic and definitely sour, with a surprisingly sweet finish from the hefty addition of the green apple skittles! Its super smashable despite the 5.9% ABV which is definitely on the higher side for a sour, but every sip is packed full of the tart and acidic sweetness of a green apple, making it perfectly aligned with the personalities and personas of house Hightower!
Batch size & ABV
- 19L / 5 gal finished beer
- 23L (6 gal) wort
- Starting gravity – 1.042 (after skittles addition 1.053)
- Final gravity 1.01
- ABV – 5.9%
- Final pH - 3.64
- IBU - 11
- Skittles dissolved to 95%, so we added 693.5g of sugar to 23 litres of beer meaning we increased our gravity by 1.011!
- brewfather link
Ingredients
Water
With sparging
- 15.5L (4 gal) strike water, Mash at 65°C (149°F) for 60 mins, strike temp approx. 69°C (156°F) use our calculator for this
- 15.5L (4 gal) sparge water at 78°C (172°F)
Without sparging
- 30L (7.9 gal) strike water, Mash at 65°C (149°F) for 60 mins, strike temp approx. 66°C (151°F) use our calculator for this
Malts
- Pale ale malt – 1.75 kg (3.86 lb)
- Wheat malt – 1.55kg (3.4 lb)
- Rice Hulls – 150g (5.3 oz)
Fruit Addition
- 1 kg (2.2 lb) Green Apple Skittles (around 1.012 / 7 days)
Hops & whirlfloc tablets
Northern Brewer
- 6g (0.21 oz) - 60 minutes left in the boil
Hallertau Huell Melon
- 15g (0.53 oz) - 15 minutes left in the boil
Whirlfloc Tablets
- 1 tablet – 15 minutes left in the toil OR granulated whirlfloc 0.7g (0.025 oz)
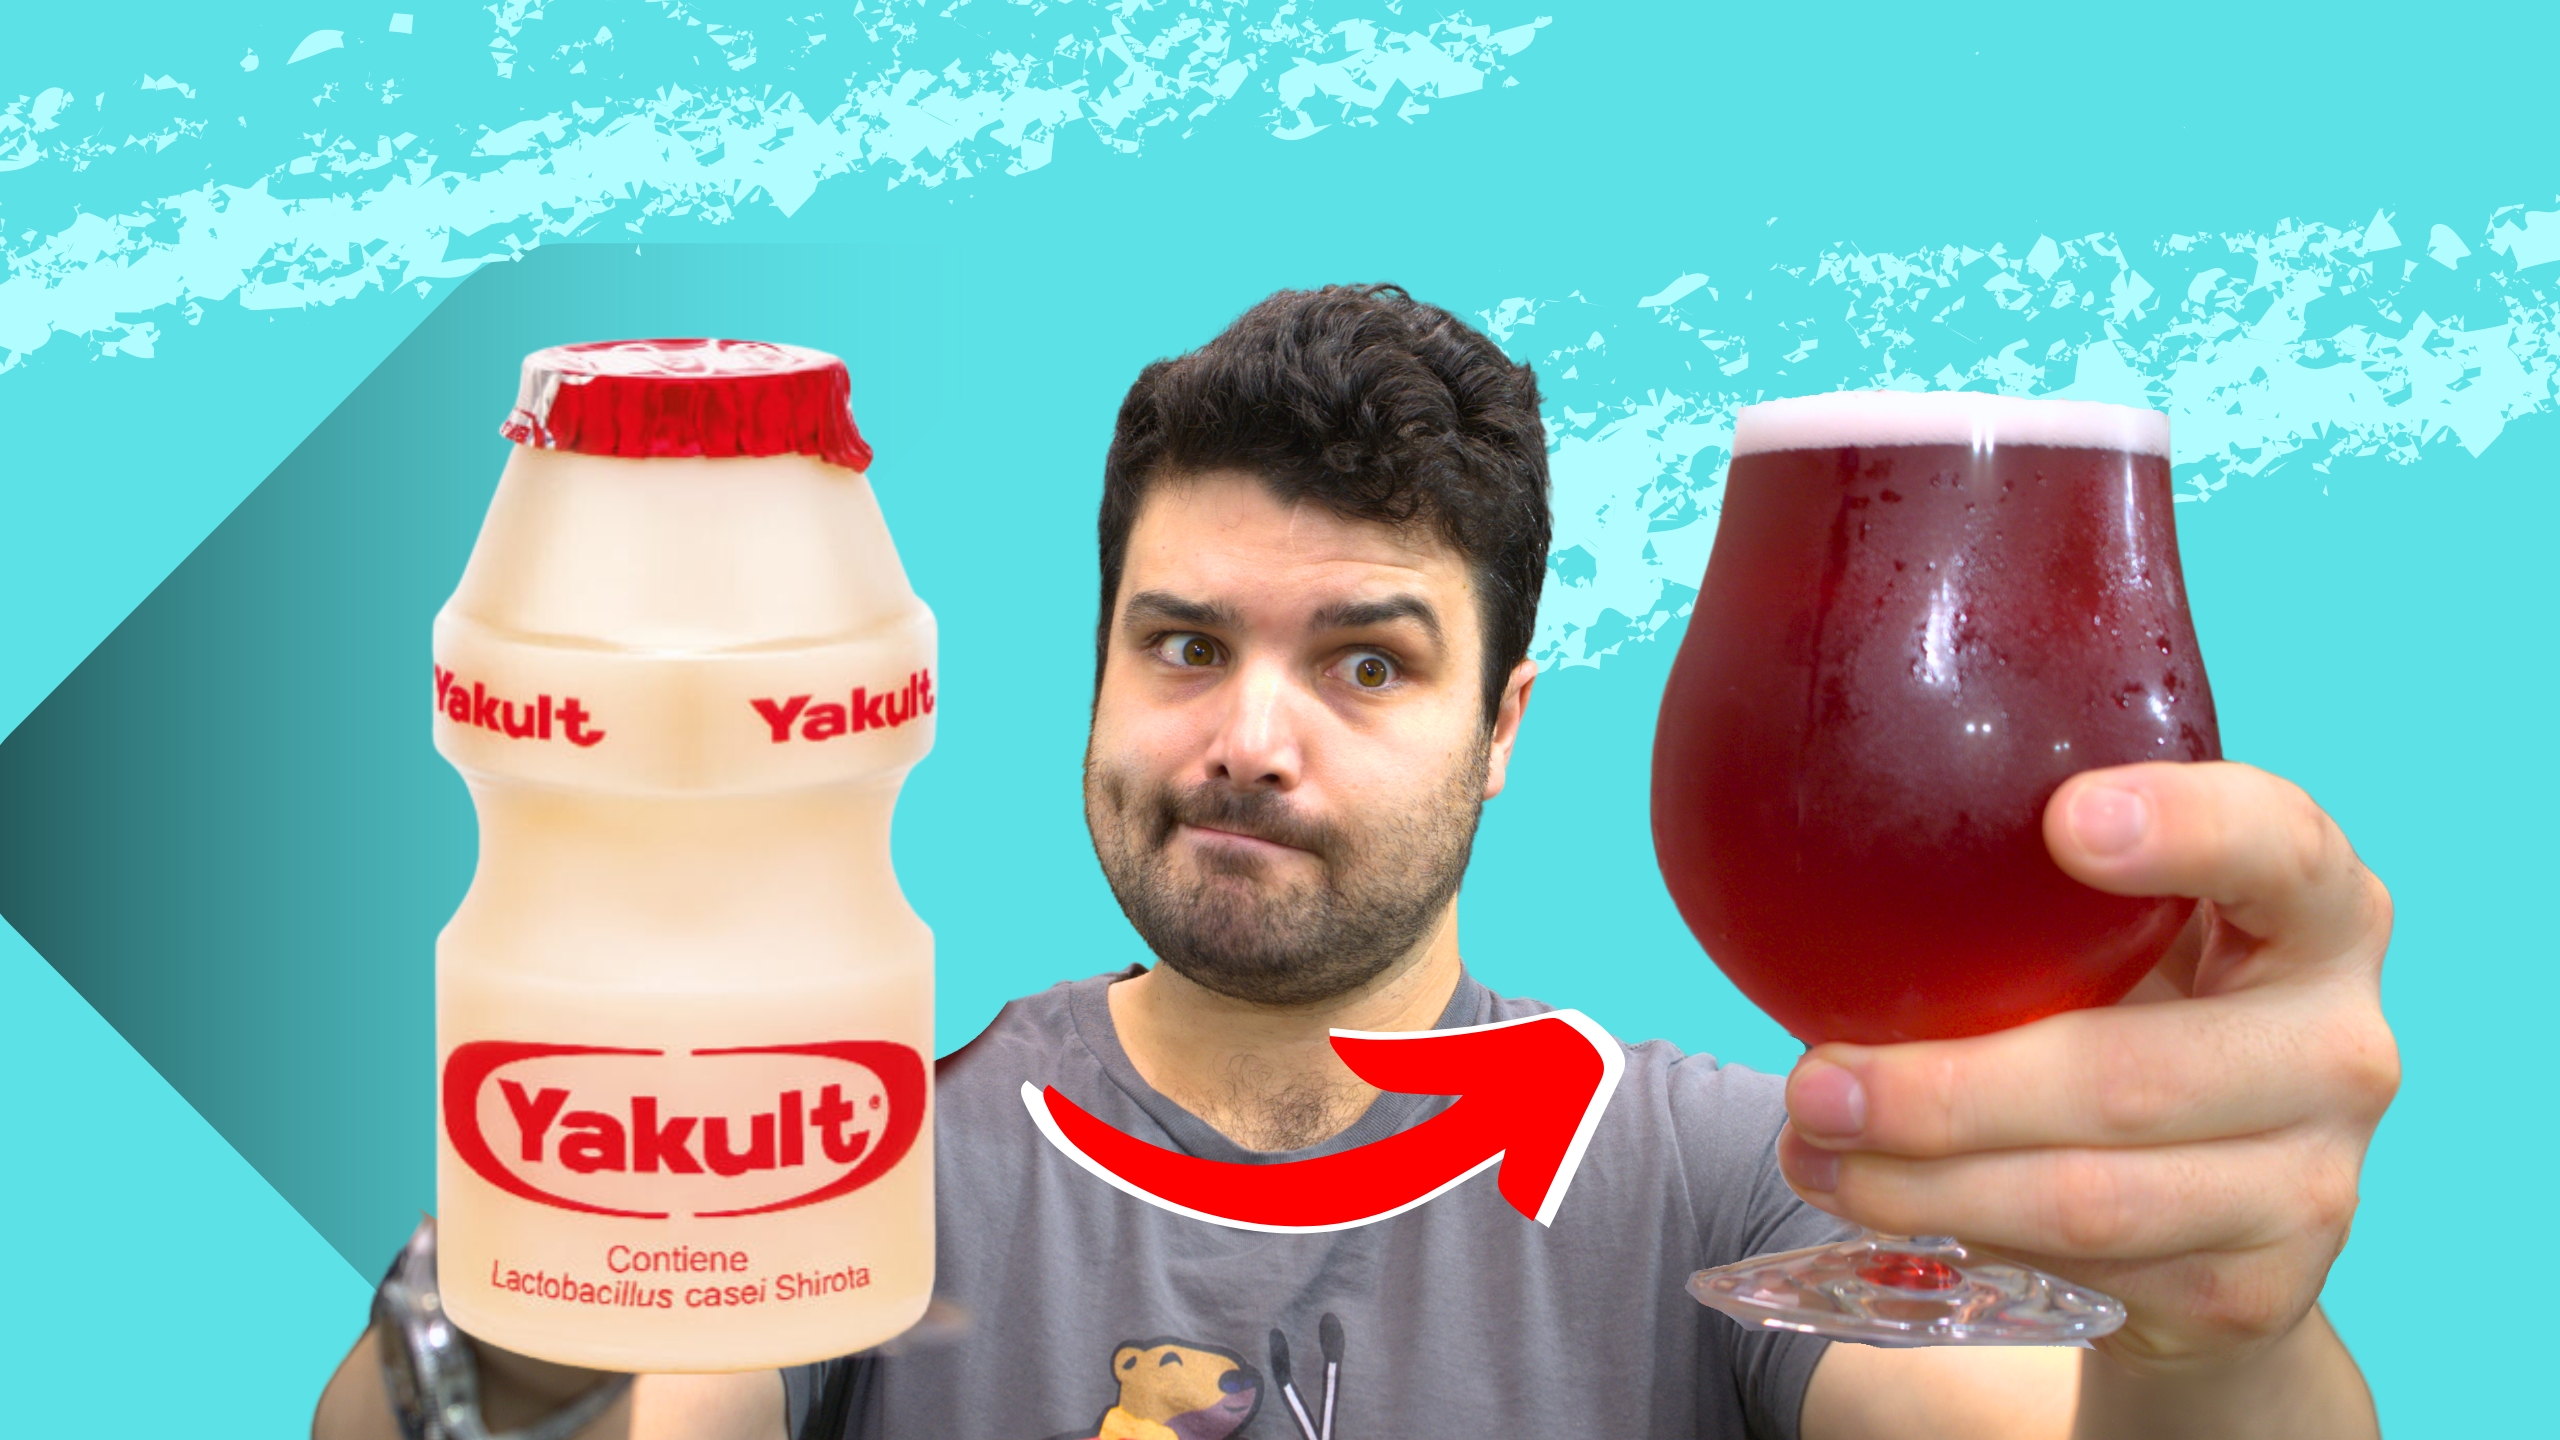
Yeast & Lactobacillus fermentation temperature
- For the kettle souring we pitched 6 bottles of Yakult and allowed it to sour for 30 hours to reach a pH of 3.46
- US-05 – ferment at 20°C (68°F) to 25°C (77°F) 22g (2 packets)
Water Profile
- Ca2+46
- Mg2+ 5
- Na+ 15
- Cl- 55
- SO42- 55
- HCO3- 57
Step by step process
Step 1 – Milling
- Mill grains to medium crush (set mill rollers to a gap of approx. 1.00mm / 0.039 inches)
- Just keep in mind roller gap settings are not universal so as you brew more batches you will find the ideal crush size for your setup
- Alternatively if you don’t have a grain mill you can order your grains crushed from most homebrew stores, both online and in person
Step 2 – Mashing
- Mash for 60 minutes at 65°C (149°F)
- Set your strike water to a few degrees above the target mash temperature, you can use our calculator to determine what your strike temperature should be
- ensure you mix in the grains thoroughly with a mash paddle to prevent dough balls from forming (big spoons, spatulas or whisks will also work)
- its easier to mash the grains and prevent dough balls if you add a little grain at a time, mix, add more grain and repeat until all the grains are mixed
- if you don’t have a mash tun with heating then ensure after you have finished mixing the grains in to insulate your mash tun (thick neoprene or heavy blankets both work well)
Step 3 (optional) – Sparging
- if your setup has the capability to sparge then do so with 15.5L (4 gal) sparge water at 78°C (172°F)
- if you are not sparging and using a BIAB (brew in a bag) method then remove grains from mash tun and twist and squeeze the bag to get as much liquid out of the grains as possible
- as you start sparging (or straining your BIAB bag) begin raising the temperature of your wort to a boil
Step 4 Souring!
- At this point allow your wort to cool down to 30-33°C (86-91.4°F) and then pitch 6 bottles (390mL / 13 oz) of Yakult into the wort, this will pitch around 390 billion cells!
- If you can keep the temp around 30-33°C (86-91.4°F) whilst it sours, and at this point you are at the mercy of the lacto!
- Check the pH using a pH meter every 6-12 hours until it reaches your desired level and then immediately move on to boiling!
- We allowed ours to reach 3.46, but aim for anywhere between 3.3 - 3.6
Step 5 – Boiling
- once your wort begins to boil start a timer for a 60-minute boil and add your bittering hops, 6g (0.21 oz) of Northern Brewer
- at 15 minutes left in the boil add 1 whirlfloc tablet (OR granulated whirlfloc 0.7g (0.025 oz)) and 15g (0.53 oz) of Hallertau Huell Melon
Step 6 – Whirlpooling / cooling
- once wort has been boiling for 60 minutes in total turn off your heat source and begin chilling wort down to yeast pitching temperature
- once you’ve reached yeast pitching temperature take an original gravity reading of your wort
Step 7 – Yeast Pitching
- It is best to make a yeast starter before beginning your brew day (ideally 1 day before) to ensure your yeast are as active and healthy as possible before pitching, but not completely necessary – you could also just rehydrate yeast 30 minutes before pitching.
- Wort Aeration (Optional) if you have a paint mixer give your wort a quick blitz before pitching yeast to help add more dissolved oxygen into the wort to help the yeast have a healthier kick start into fermentation
- Pitch yeast in wort a degree or two higher than the target fermentation temperature to help yeast take off more aggressively
- To make a yeast starter you can use either:
- DME (dry malt extract) at a ratio of approx. 100g per 1L water (3.5 oz per 33 fluid ounces) for gravity of approx. 1.040
- some unfermented wort kept cold and sanitary from a previous brew day
- 70g of table sugar per 1L water (2.5 oz per 33 fluid ounces) – however, it is best to use malt sugar (wort / DME) whenever possible to reduce the chance of shocking the yeast with a different food source from starter to wort pitching
- To rehydrate yeast
- Add yeast to approx. 10 times as much room temperature water as the weight of the yeast e.g. 10g yeast in 100 ml water (0.35 oz yeast in 3.5 fluid ounces water)
Step 8 – Fermentation & Skittles additions!
- Allow yeast to ferment over the next two weeks (aprox)
- If you have a temperature-controlled system keep the fermenter temperature to the recommended fermentation temperature for each yeast strain (stated in the yeast ingredients section above)
- Monitor the fermentation activity over the first 7-10 days by the bubbling of the blow-off tube/airlock of your fermenter, as the bubbling slows down (roughly around day 10-12) take a gravity reading. When the gravity reaches around 1.015 raise the temperature of your fermenter by 1-2 degrees for 2 days for a diacetyl rest (if you don’t have temperature control don’t worry about this step, it's not the end of the world!)
- Time to add FAKE fruit! 1kg (2.2 lb) of green apple skittles to the fermenter
- It's important to note that fermentation times will vary based on your circumstances like temperature, amount of yeast pitched, the healthiness of yeast, the gravity of the wort, pH, etc. so don’t stress be patient and know that these times are just a rough guide
- On day 2 of the diacetyl rest (once gravity reaches roughly 1.008-1.01) & gravity is the same 3 days in a row move onto cold crashing! (If you can’t / don’t want to cold crash go straight to kegging/bottling your beer!)
Step 9 (optional) – Cold crashing
- begin cold crashing your fermenter (bring the temperature of your fermenter down to as close to 0°C (32°F) as possible, for 2 days to a week depending on how patient you are
- If you don’t have a temp-controlled fermenter, you can cold crash by putting your fermenter in a fridge or temp-controlled chest freezer
- After you have finished cold crashing it's time to keg/bottle your beer! If you are bottling your beer from the fermenter uncarbonated remember to add about 5-7grams (0.17 - 0.24 oz) of priming sugar to your bottles to carbonate your beer.
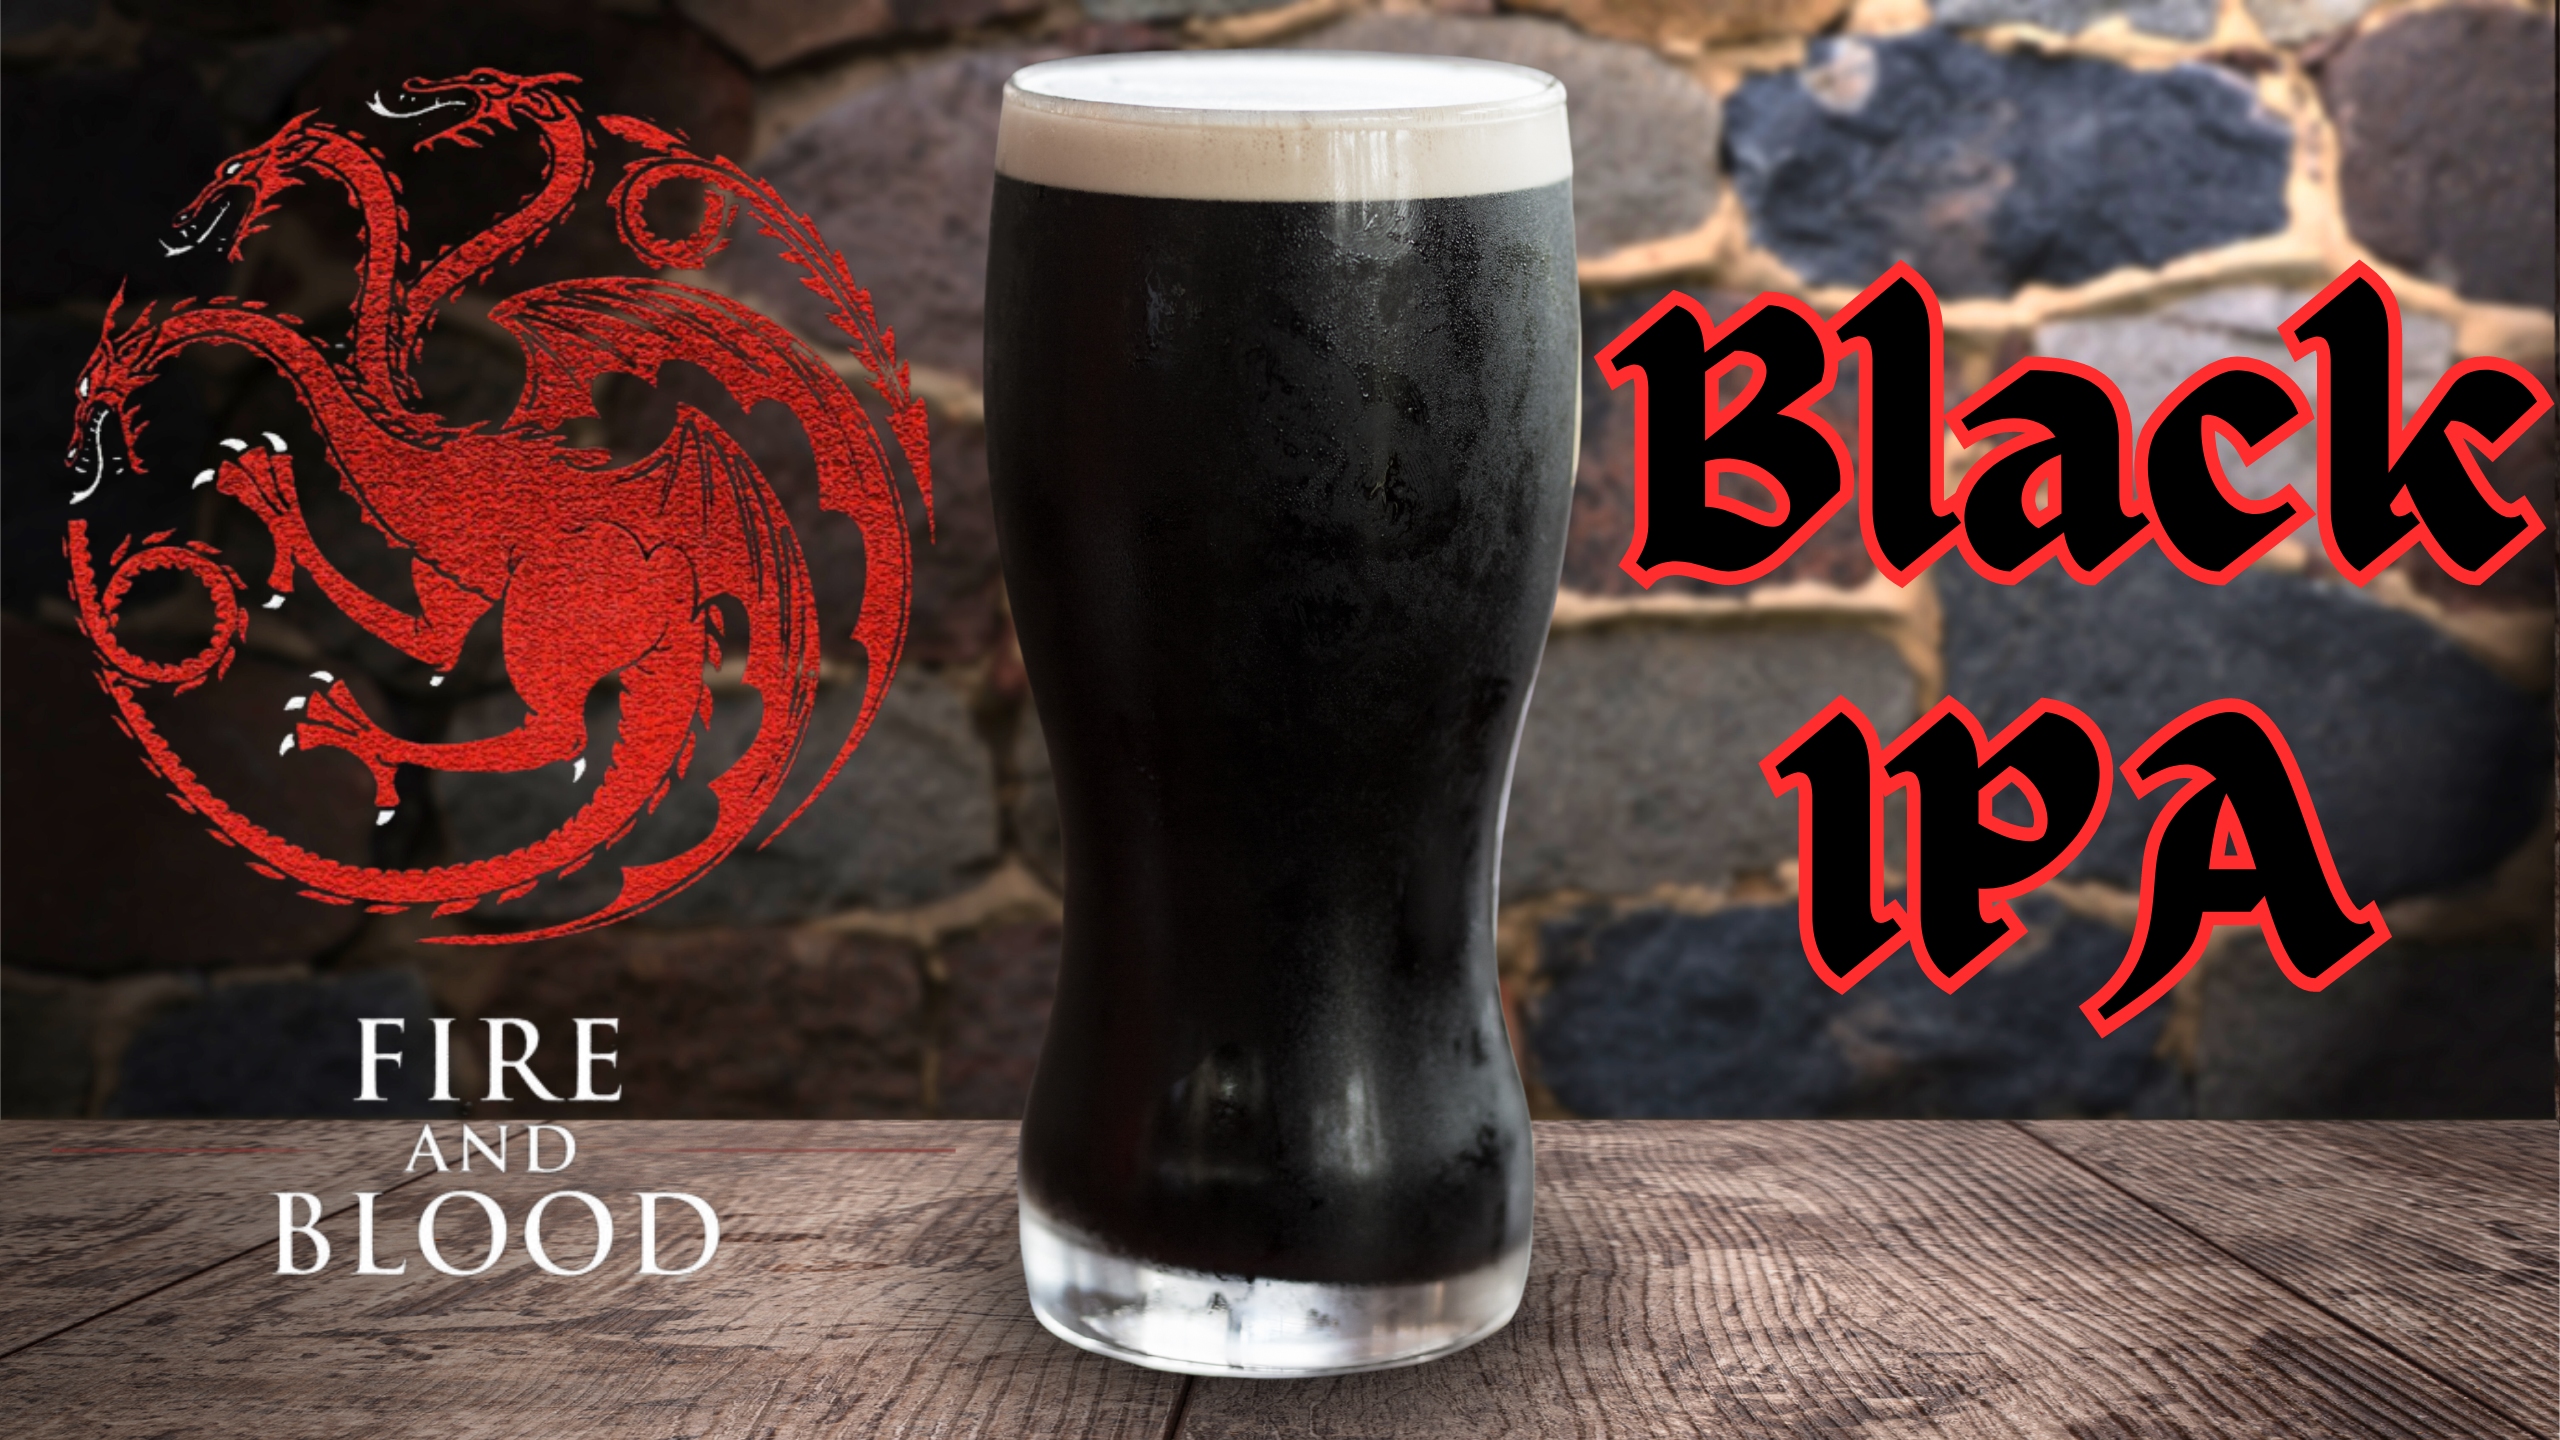
So... What is it?
A Black IPA, or Cascadian Dark Ale, originated in the early 2000s in the Pacific Northwest, combining the roasted malt characteristics of stouts or porters with the hoppy profile of an IPA. Typically having an ABV of 6.0%-8.5% and an IBU range of 50-90, this style offers a balance of dark roasted malt flavors like coffee and chocolate with bold hop notes of pine, resin, and citrus. Its deep brown to black color and medium body create a complex, layered taste experience that appeals to fans of both dark ales and hop-forward beers.
What's ours like?
Big, bold, fierce and intense! These are the qualities of house Targaryen, and these are the qualities we incorporated into this big & bold Black IPA! Coming in at a hefty 7.9% it certainly packs a punch, but it doesn't drink like it! Balanced by a robust malt body and 69 IBU's (not intentional!) the beer comes together perfectly, expressing big punchy citrus, piney, earthy and spicy hop character, followed by a dark chocolate to smoky espresso finish thanks to the addition of the heavily roasted wheat malt. Truly this is the beer that represents house Targaryen in the dance of dragons!
Batch Size & Stats
- 38L (2 19L corny kegs) / 10 gal finished beer
- 47L (12.4 gal) wort
- For a smaller 19L (5 gal) batch size simply half the ingredients of this recipe
- Starting gravity – 1.073
- Final gravity 1.012
- ABV – 8%
- IBU - 76
- Colour - 24 EBC
- Mash Efficiency - 82%
What ingredients?
Water
With sparging
- 40L (10.6 gal) for a 65°C (149°F) mash (you can use our strike water calculator to find your ideal strike temp)
- 22L (5.8 gal) sparge water at 78°C (172°F) - fermenter topped up with 4L (1 gal) post boil to reduce OG
Without sparging
- 55L (14.5 gal) for a 65°C (149°F) mash (you can use our strike water calculator to find your ideal strike temp)
Malts: Total 13.6 kg / 30 lb
- Pale ale malt – 11.63 kg (25.6 lb) - 85.5%
- Briess Midnight Wheat Malt - 883 g (1.95 lb) 6.5%
- Medium Crystal Malt – 679g (1.5 lb) - 5%
- Gladiator Malt (dextrin malt) - 408g (0.9lb) - 3%
Hops & whirlfloc tablets
Chinook
- 57g (2 oz) – 60 minutes left in the boil
- 57g (2 oz) – 10 minutes left in the boil
- 57g (2 oz) - dry hop day 8
Riwaka
- 57g (2 oz) – 10 minutes left in the boil
- 57g (2 oz) - 0 min flame out
- 113g (4 oz) - dry hop day 8
Citra
- 57g (2 oz) – 10 minutes left in the boil
- 57g (2 oz) - 0 min flame out
- 113g (4 oz) - dry hop day 8
Whirlfloc tablets
- 1.5g (0.052 oz) / 2 tablets – 15 minutes left in the boil
Yeast options & fermentation temperatures
- 23g (0.8 oz) Aus-05– ferment at 18°C / 64.4°F
- 23g (0.8 oz) US-05 – ferment at 18°C / 64.4°F
- 23g (0.8 oz) S-04 – ferment at 18°C / 64.4°F
Water Profile
- Ca2+110
- Mg2+ 18
- Na+ 16
- Cl- 100
- SO42- 200
- HCO3- 57
Step by step process
Step 1 – Milling
- Mill grains to medium crush (set mill rollers to a gap of approx. 1.00mm / 0.039 inches)
- Just keep in mind roller gap settings are not universal so as you brew more batches you will find the ideal crush size for your setup
- Alternatively if you don’t have a grain mill you can order your grains crushed from most homebrew stores, both online and in person
Step 2 – Mashing
- Mash for 60 minutes at 65°C (149°F)
- Set your strike water to a few degrees above the target mash temperature, you can use our calculator to determine what your strike temperature should be
- ensure you mix in the grains thoroughly with a mash paddle to prevent dough balls from forming (big spoons, spatulas or whisks will also work)
- its easier to mash the grains and prevent dough balls if you add a little grain at a time, mix, add more grain and repeat until all the grains are mixed
- if you don’t have a mash tun with heating then ensure after you have finished mixing the grains in to insulate your mash tun (thick neoprene or heavy blankets both work well)
- after 60 minutes of mashing raise the temp to 77°C (170°F) for 10-15 minutes to mash out, and deactivate the enzymes breaking down the sugars
Step 3 (optional) – Sparging
- if your setup has the capability to sparge then do so with 22L (5.8 gal) sparge water at 78°C (172°F)
- if you are not sparging and using a BIAB (brew in a bag) method then remove grains from mash tun and twist and squeeze the bag to get as much liquid out of the grains as possible
- as you start sparging (or straining your BIAB bag) begin raising the temperature of your wort to a boil
Step 4 – Boiling
- once your wort begins to boil start a timer for a 60-minute boil and add your bittering hops, 57g (2 oz) of Bravo
- at 15 minutes left in the boil add 2.5 whirlfloc tablets
- at 10 minutes left in the boil add 57g (2 oz) each of Chinook, Citra and Riwaka
- at Flameout / 0 minutes left in the boil add 57g (2oz) of Citra & Riwaka
Step 5 – Cooling
- After 1 hour of boiling start cooling wort down to yeast pitching temperature
- once you’ve reached yeast pitching temperature take an original gravity reading of your wort
Step 6 – Yeast Pitching
- It is best to make a yeast starter before beginning your brew day (ideally 1 day before) to ensure your yeast are as active and healthy as possible before pitching, but not completely necessary – you could also just rehydrate yeast 30 minutes before pitching.
- Pitch yeast in wort a degree or two higher than the target fermentation temperature to help yeast take off more aggressively
- To make a yeast starter you can use either:
- DME (dry malt extract) at a ratio of approx. 100g per 1L water (3.5 oz per 33 fluid ounces) for gravity of approx. 1.040
- some unfermented wort kept cold and sanitary from a previous brew day
- 70g of table sugar per 1L water (2.5 oz per 33 fluid ounces) – however, it is best to use malt sugar (wort / DME) whenever possible to reduce the chance of shocking the yeast with a different food source from starter to wort pitching
- To rehydrate yeast
- Add yeast to approx. 10 times as much room temperature water as the weight of the yeast e.g. 10g yeast in 100 ml water (0.35 oz yeast in 3.5 fluid ounces water)
Step 7 – Fermentation & Dry Hopping
- Allow yeast to ferment over the next week to two weeks
- If you have a temperature controlled system keep the fermenter temperature to the recommended fermentation temperature for each yeast strain (stated in the yeast ingredients section above)
- Monitor the fermentation activity over the first 7 days by the bubbling of the blow off tube / airlock of your fermenter, as the bubbling slows down (roughly around day 7) take a gravity reading. When the gravity reaches around 1.017 raise the temperature of your fermenter by 1-2 degrees for 2 days for a diacetyl rest (if you don’t have temperature control don’t worry about this step, its not the end of the world!)
- On day 2 of the diacetyl rest its time to Dry Hop, add 113g (4 oz) each of citra and simcoe, and 57g (2 oz) of chinook to the fermenter
- Its important to note that fermentation times will vary based on your circumstances like, temperature, amount of yeast pitched, healthiness of yeast, gravity of wort, pH etc. so don’t stress be patient and know that these times are just a rough guide
- Once the gravity is the same 2 days in a row move onto cold crashing! (If you can’t / don’t want to cold crash go straight to kegging/bottling your beer!)
Step 8 (optional) – Cold crashing
- begin cold crashing your fermenter (bring the temperature of your fermenter down to as close to 0°C (32°F) as possible, for 2 days to a week depending on how patient you are
- If you don’t have a temp-controlled fermenter, you can cold crash by putting your fermenter in a fridge or temp-controlled chest freezer
- After you have finished cold crashing it's time to keg/bottle your beer! If you are bottling your beer from the fermenter uncarbonated remember to add about 5-7 grams (0.17 - 0.24 oz) of priming sugar to your bottles to carbonate your beer.

So... What is it?
An old-school West Coast IPA is a bold and assertive beer that pays homage to the origins of the American craft beer movement. Characterized by its golden to amber hue, this IPA boasts a crystal-clear appearance with a generous, foamy white head. The aroma is a vibrant bouquet of pine, resin, and citrus, with grapefruit and orange peel notes taking center stage. On the palate, it delivers a robust bitterness balanced by a sturdy malt backbone, offering hints of caramel and toasted bread. The finish is dry and crisp, leaving a lingering bitterness that invites another sip.
What's ours like?
This one is a booze filled celebration of the old school style of American IPA's! our version coming in at a a very generous 8%, packs a huge hop forward presence of citrus, fruit and a touch of resinous dank pine notes. The body hold up to the bitterness and impressive quantity of a whopping 76 IBU's! On paper this beer is bitter beyond belief... but it definitely doesn't drink like it! It holds a fantastic balance between thick, sweet and chewy mouthfeel, booziness and a hop forward explosion, making this beer deliciously moreish!
Batch Size & Stats
- 38L (2 19L corny kegs) / 10 gal finished beer
- 47L (12.4 gal) wort
- For a smaller 19L (5 gal) batch size simply half the ingredients of this recipe
- Starting gravity – 1.073
- Final gravity 1.012
- ABV – 8%
- IBU - 76
- Colour - 24 EBC
- Mash Efficiency - 82%
Brewfather link
https://share.brewfather.app/9cX1VWrxmbRBAT
What ingredients?
Water
With sparging
- 40L (10.6 gal) for a 65°C (149°F) mash (you can use our strike water calculator to find your ideal strike temp)
- 20L (5.3 gal) sparge water at 78°C (172°F) - fermenter topped up with 4L (1 gal) post boil to reduce OG
Without sparging
- 55L (14.5 gal) for a 65°C (149°F) mash (you can use our strike water calculator to find your ideal strike temp)
Malts: Total 13.6 kg / 30 lb
- Pale ale malt – 12.512 kg (27.58 lb) - 92%
- Medium Crystal Malt – 680g (1.5 lb) - 5%
- Gladiator Malt (dextrin malt) - 408g (0.9lb) - 3%
Hops & whirlfloc tablets
Bravo
- 70g (2.5 oz) - 60 minutes left in the boil
Chinook
- 57g (2 oz) – 10 minutes left in the boil
Simcoe
- 57g (2 oz) – 10 minutes left in the boil
- 57g (2 oz) - dry hop day 7
Citra
- 57g (2 oz) – Flameout / 0 minutes left in the boil
- 57g (2 oz) - dry hop day 7
Whirlfloc tablets
- 1.5g (0.052 oz) / 2 tablets – 15 minutes left in the boil
Yeast options & fermentation temperatures
- 23g (0.8 oz) Aus-05– ferment at 18°C / 64.4°F
- 23g (0.8 oz) US-05 – ferment at 18°C / 64.4°F
- 23g (0.8 oz) S-04 – ferment at 18°C / 64.4°F
Water Profile
- Ca2+111
- Mg2+ 18
- Na+ 16
- Cl- 101
- SO42- 200
- HCO3- 57
Step by step process
Step 1 – Milling
- Mill grains to medium crush (set mill rollers to a gap of approx. 1.00mm / 0.039 inches)
- Just keep in mind roller gap settings are not universal so as you brew more batches you will find the ideal crush size for your setup
- Alternatively if you don’t have a grain mill you can order your grains crushed from most homebrew stores, both online and in person
Step 2 – Mashing
- Mash for 60 minutes at 65°C (149°F)
- Set your strike water to a few degrees above the target mash temperature, you can use our calculator to determine what your strike temperature should be
- ensure you mix in the grains thoroughly with a mash paddle to prevent dough balls from forming (big spoons, spatulas or whisks will also work)
- its easier to mash the grains and prevent dough balls if you add a little grain at a time, mix, add more grain and repeat until all the grains are mixed
- if you don’t have a mash tun with heating then ensure after you have finished mixing the grains in to insulate your mash tun (thick neoprene or heavy blankets both work well)
- after 60 minutes of mashing raise the temp to 77°C (170°F) for 10-15 minutes to mash out, and deactivate the enzymes breaking down the sugars
Step 3 (optional) – Sparging
- if your setup has the capability to sparge then do so with 20L (5.3 gal) sparge water at 78°C (172°F)
- if you are not sparging and using a BIAB (brew in a bag) method then remove grains from mash tun and twist and squeeze the bag to get as much liquid out of the grains as possible
- as you start sparging (or straining your BIAB bag) begin raising the temperature of your wort to a boil
Step 4 – Boiling
- once your wort begins to boil start a timer for a 60-minute boil and add your bittering hops, 70g (2.5 oz) of Bravo
- at 15 minutes left in the boil add 2.5 whirlfloc tablets
- at 10 minutes left in the boil add 57g (2 oz) each of chinook and simcoe
- at Flameout / 0 minutes left in the boil add 57g (2oz) of citra
Step 5 – Cooling
- After 1 hour of boiling start cooling wort down to yeast pitching temperature
- once you’ve reached yeast pitching temperature take an original gravity reading of your wort
Step 6 – Yeast Pitching
- It is best to make a yeast starter before beginning your brew day (ideally 1 day before) to ensure your yeast are as active and healthy as possible before pitching, but not completely necessary – you could also just rehydrate yeast 30 minutes before pitching.
- Pitch yeast in wort a degree or two higher than the target fermentation temperature to help yeast take off more aggressively
- To make a yeast starter you can use either:
- DME (dry malt extract) at a ratio of approx. 100g per 1L water (3.5 oz per 33 fluid ounces) for gravity of approx. 1.040
- some unfermented wort kept cold and sanitary from a previous brew day
- 70g of table sugar per 1L water (2.5 oz per 33 fluid ounces) – however, it is best to use malt sugar (wort / DME) whenever possible to reduce the chance of shocking the yeast with a different food source from starter to wort pitching
- To rehydrate yeast
- Add yeast to approx. 10 times as much room temperature water as the weight of the yeast e.g. 10g yeast in 100 ml water (0.35 oz yeast in 3.5 fluid ounces water)
Step 7 – Fermentation & Dry Hopping
- Allow yeast to ferment over the next week to two weeks
- If you have a temperature controlled system keep the fermenter temperature to the recommended fermentation temperature for each yeast strain (stated in the yeast ingredients section above)
- Monitor the fermentation activity over the first 7 days by the bubbling of the blow off tube / airlock of your fermenter, as the bubbling slows down (roughly around day 7) take a gravity reading. When the gravity reaches around 1.015 raise the temperature of your fermenter by 1-2 degrees for 2 days for a diacetyl rest (if you don’t have temperature control don’t worry about this step, its not the end of the world!)
- On day 2 of the diacetyl rest its time to Dry Hop, add 57g (2 oz) each of citra and simcoe to the fermenter
- Its important to note that fermentation times will vary based on your circumstances like, temperature, amount of yeast pitched, healthiness of yeast, gravity of wort, pH etc. so don’t stress be patient and know that these times are just a rough guide
- Once the gravity is the same 2 days in a row move onto cold crashing! (If you can’t / don’t want to cold crash go straight to kegging/bottling your beer!)
Step 8 (optional) – Cold crashing
- begin cold crashing your fermenter (bring the temperature of your fermenter down to as close to 0°C (32°F) as possible, for 2 days to a week depending on how patient you are
- If you don’t have a temp-controlled fermenter, you can cold crash by putting your fermenter in a fridge or temp-controlled chest freezer
- After you have finished cold crashing it's time to keg/bottle your beer! If you are bottling your beer from the fermenter uncarbonated remember to add about 5-7 grams (0.17 - 0.24 oz) of priming sugar to your bottles to carbonate your beer.
So... What is it?
A kettle sour is made by inoculated the wort after the mash step with a bacteria like Lactobacillus. It's then left to sour for a few hours to days until the pH reaches the desired level which is halted by immediately boiling the wort and carrying on with the brew-day and pitching yeast as you would with a normal beer!
The Berliner Weisse is a sour wheat beer from (you guessed it) Berlin, Germany! characterized by its slightly sour character and light abv (normally around 3-3.9%) it's a fantastic drop for summer in the beer garden, typically having a very light body, tartness on the tongue, and fresh fruity character. This also makes it a fantastic beer for fruit infusions!
What is ours like?
Ours is a "ch-ch-ch-cherry bomb!" and with this being our first kettle sour we stoked with how it turned out! The mouthfeel is a little tart, partly from the souring effect and partly from the cherries, bitterness & hop character very subdued to allow the star's of the show to shine! This Berliner clocked in at 4.7% which is slightly above what the style should be because we didn't account for the cherries sugar! But the cherries come through in spades, with the cherry tartness & subtle residual sweetness pairing beautifully with the sour acidity produced by lactobacillus, producing a gentle sour effect that feels more complex and complete than its philly sour cousin! Making this a super yum beer for sour lovers and the un-initiated alike!
Batch size & ABV
- 19L / 5 gal finished beer
- 20L (6 gal) wort
- Starting gravity – 1.04 (after cherry addition adjusted to 1.046)
- Final gravity 1.01
- ABV – 4.7%
- Final pH - 3.64
- IBU - 11
- we used this calculator to check our ABV after the cherry puree addition
- brewfather link
Ingredients
Water
With sparging
- 15.5L (4 gal) strike water, Mash at 65°C (149°F) for 60 mins, strike temp approx. 69°C (156°F) use our calculator for this
- 15.5L (4 gal) sparge water at 78°C (172°F)
Without sparging
- 30L (7.9 gal) strike water, Mash at 65°C (149°F) for 60 mins, strike temp approx. 66°C (151°F) use our calculator for this
Malts
- Pale ale malt – 1.75 kg (3.86 lb)
- Wheat malt – 1.55kg (3.4 lb)
- Rice Hulls – 150g (5.3 oz)
Fruit Addition
- 3.95 kg (8.7 lb) Puréed Cherries towards end of fermentation (around 1.012 / 7 days)
Hops & whirlfloc tablets
Northern Brewer
- 6g (0.21 oz) - 60 minutes left in the boil
Hallertau Huell Melon
- 15g (0.53 oz) - 15 minutes left in the boil
Whirlfloc Tablets
- 1 tablet – 15 minutes left in the toil OR granulated whirlfloc 0.7g (0.025 oz)
Yeast & Lactobacillus fermentation temperature
- For the kettle souring we pitched 5 bottles of Yakult and allowed it to sour for 28 hours to reach a pH of 3.61
- US-05 – ferment at 20°C (68°F) to 25°C (77°F) 22g (2 packets)
Water Profile
- Ca2+46
- Mg2+ 5
- Na+ 15
- Cl- 55
- SO42- 55
- HCO3- 57
Step by step process
Step 1 – Milling
- Mill grains to medium crush (set mill rollers to a gap of approx. 1.00mm / 0.039 inches)
- Just keep in mind roller gap settings are not universal so as you brew more batches you will find the ideal crush size for your setup
- Alternatively if you don’t have a grain mill you can order your grains crushed from most homebrew stores, both online and in person
Step 2 – Mashing
- Mash for 60 minutes at 65°C (149°F)
- Set your strike water to a few degrees above the target mash temperature, you can use our calculator to determine what your strike temperature should be
- ensure you mix in the grains thoroughly with a mash paddle to prevent dough balls from forming (big spoons, spatulas or whisks will also work)
- its easier to mash the grains and prevent dough balls if you add a little grain at a time, mix, add more grain and repeat until all the grains are mixed
- if you don’t have a mash tun with heating then ensure after you have finished mixing the grains in to insulate your mash tun (thick neoprene or heavy blankets both work well)
Step 3 (optional) – Sparging
- if your setup has the capability to sparge then do so with 15.5L (4 gal) sparge water at 78°C (172°F)
- if you are not sparging and using a BIAB (brew in a bag) method then remove grains from mash tun and twist and squeeze the bag to get as much liquid out of the grains as possible
- as you start sparging (or straining your BIAB bag) begin raising the temperature of your wort to a boil
Step 4 Souring!
- At this point allow your wort to cool down to 30-33°C (86-91.4°F) and then pitch 5 bottles (325mL / 11 oz) of Yakult into the wort, this will pitch around 325 billion cells!
- If you can keep the temp around 30-33°C (86-91.4°F) whilst it sours, and at this point you are at the mercy of the lacto!
- Check the pH using a pH meter every 6-12 hours until it reaches your desired level and then immediately move on to boiling!
- We allowed ours to reach 3.61, but aim for anywhere between 3.3 - 3.6
Step 5 – Boiling
- once your wort begins to boil start a timer for a 60-minute boil and add your bittering hops, 6g (0.21 oz) of Northern Brewer
- at 15 minutes left in the boil add 1 whirlfloc tablet (OR granulated whirlfloc 0.7g (0.025 oz)) and 15g (0.53 oz) of Hallertau Huell Melon
Step 6 – Whirlpooling / cooling
- once wort has been boiling for 60 minutes in total turn off your heat source and begin chilling wort down to yeast pitching temperature
- once you’ve reached yeast pitching temperature take an original gravity reading of your wort
Step 7 – Yeast Pitching
- It is best to make a yeast starter before beginning your brew day (ideally 1 day before) to ensure your yeast are as active and healthy as possible before pitching, but not completely necessary – you could also just rehydrate yeast 30 minutes before pitching.
- Wort Aeration (Optional) if you have a paint mixer give your wort a quick blitz before pitching yeast to help add more dissolved oxygen into the wort to help the yeast have a healthier kick start into fermentation
- Pitch yeast in wort a degree or two higher than the target fermentation temperature to help yeast take off more aggressively
- To make a yeast starter you can use either:
- DME (dry malt extract) at a ratio of approx. 100g per 1L water (3.5 oz per 33 fluid ounces) for gravity of approx. 1.040
- some unfermented wort kept cold and sanitary from a previous brew day
- 70g of table sugar per 1L water (2.5 oz per 33 fluid ounces) – however, it is best to use malt sugar (wort / DME) whenever possible to reduce the chance of shocking the yeast with a different food source from starter to wort pitching
- To rehydrate yeast
- Add yeast to approx. 10 times as much room temperature water as the weight of the yeast e.g. 10g yeast in 100 ml water (0.35 oz yeast in 3.5 fluid ounces water)
Step 8 – Fermentation & Fruit additions!
- Allow yeast to ferment over the next two weeks (aprox)
- If you have a temperature-controlled system keep the fermenter temperature to the recommended fermentation temperature for each yeast strain (stated in the yeast ingredients section above)
- Monitor the fermentation activity over the first 7-10 days by the bubbling of the blow-off tube/airlock of your fermenter, as the bubbling slows down (roughly around day 10-12) take a gravity reading. When the gravity reaches around 1.015 raise the temperature of your fermenter by 1-2 degrees for 2 days for a diacetyl rest (if you don’t have temperature control don’t worry about this step, it's not the end of the world!)
- Time to add fruit! purée 3.95 kg (8.7 lb) of Cherries and throw them all into the fermenter
- we used this calculator to check our ABV after the cherry puree addition
- It's important to note that fermentation times will vary based on your circumstances like temperature, amount of yeast pitched, the healthiness of yeast, the gravity of the wort, pH, etc. so don’t stress be patient and know that these times are just a rough guide
- On day 2 of the diacetyl rest (once gravity reaches roughly 1.008-1.01) & gravity is the same 3 days in a row move onto cold crashing! (If you can’t / don’t want to cold crash go straight to kegging/bottling your beer!)
Step 9 (optional) – Cold crashing
- begin cold crashing your fermenter (bring the temperature of your fermenter down to as close to 0°C (32°F) as possible, for 2 days to a week depending on how patient you are
- If you don’t have a temp-controlled fermenter, you can cold crash by putting your fermenter in a fridge or temp-controlled chest freezer
- After you have finished cold crashing it's time to keg/bottle your beer! If you are bottling your beer from the fermenter uncarbonated remember to add about 5-7grams (0.17 - 0.24 oz) of priming sugar to your bottles to carbonate your beer.

So... What is it?
The Berliner Weisse is a sour wheat beer from (you guessed it) Berlin, Germany! characterized by its slightly sour character and light abv (normally around 3-3.5%) it's a fantastic drop for summer in the beer garden, typically having a very light body, tartness on the tongue, and fresh fruity character. This also makes it a fantastic beer for fruit infusions!
What is ours like?
The mouthfeel is slightly tart, bitterness & hop character very subdued to allow the star's of the show to shine! Its all about the sour acidity and cherry bomb! This Berliner clocked in at a very easy 5% which is slightly above what the style should be because we didnt account for the cherries sugar! But the cherries come through in spades, with the cherry tartness pairing beautifully with the sour acidity produced by the Philly yeast. Its a sour, but only lightly sour, making this a super yum beer for sour lovers and the un-initiated alike!
Batch size & ABV
- 19L / 5 gal finished beer
- 20L (6 gal) wort
- Starting gravity – 1.04 (after cherry addition adjusted to 1.046)
- Final gravity 1.008
- ABV – 5%
- Final pH - 3.91
- IBU - 11
- we used this calculator to check our ABV after the cherry puree addition
- brewfather link
Ingredients
Water
With sparging
- 15.5L (4 gal) strike water, Mash at 65°C (149°F) for 60 mins, strike temp approx. 69°C (156°F) use our calculator for this
- 15.5L (4 gal) sparge water at 78°C (172°F)
Without sparging
- 30L (7.9 gal) strike water, Mash at 65°C (149°F) for 60 mins, strike temp approx. 66°C (151°F) use our calculator for this
Malts
- Pale ale malt – 1.75 kg (3.86 lb)
- Wheat malt – 1.55kg (3.4 lb)
- Rice Hulls – 150g (5.3 oz)
Fruit Addition
- 3.95 kg (8.7 lb) Puréed Cherries towards end of fermentation (around 1.012 / 7 days)
Hops & whirlfloc tablets
Northern Brewer
- 6g (0.21 oz) - 60 minutes left in the boil
Hallertau Huell Melon
- 15g (0.53 oz) - 15 minutes left in the boil
Whirlfloc Tablets
- 1 tablet – 15 minutes left in the toil OR granulated whirlfloc 0.7g (0.025 oz)
Yeast & fermentation temperature
- Wildbrew™ Philly Sour [Lallemand] – ferment at 20°C (68°F) to 25°C (77°F) 22g (2 packets)
Water Profile
- Ca2+46
- Mg2+ 5
- Na+ 15
- Cl- 55
- SO42- 55
- HCO3- 57
Step by step process
Step 1 – Milling
- Mill grains to medium crush (set mill rollers to a gap of approx. 1.00mm / 0.039 inches)
- Just keep in mind roller gap settings are not universal so as you brew more batches you will find the ideal crush size for your setup
- Alternatively if you don’t have a grain mill you can order your grains crushed from most homebrew stores, both online and in person
Step 2 – Mashing
- Mash for 60 minutes at 65°C (149°F)
- Set your strike water to a few degrees above the target mash temperature, you can use our calculator to determine what your strike temperature should be
- ensure you mix in the grains thoroughly with a mash paddle to prevent dough balls from forming (big spoons, spatulas or whisks will also work)
- its easier to mash the grains and prevent dough balls if you add a little grain at a time, mix, add more grain and repeat until all the grains are mixed
- if you don’t have a mash tun with heating then ensure after you have finished mixing the grains in to insulate your mash tun (thick neoprene or heavy blankets both work well)
Step 3 (optional) – Sparging
- if your setup has the capability to sparge then do so with 15.5L (4 gal) sparge water at 78°C (172°F)
- if you are not sparging and using a BIAB (brew in a bag) method then remove grains from mash tun and twist and squeeze the bag to get as much liquid out of the grains as possible
- as you start sparging (or straining your BIAB bag) begin raising the temperature of your wort to a boil
Step 4 – Boiling
- once your wort begins to boil start a timer for a 60-minute boil and add your bittering hops, 6g (0.21 oz) of Northern Brewer
- at 15 minutes left in the boil add 1 whirlfloc tablet (OR granulated whirlfloc 0.7g (0.025 oz)) and 15g (0.53 oz) of Hallertau Huell Melon
Step 5 – Whirlpooling / cooling
- once wort has been boiling for 60 minutes in total turn off your heat source and begin chilling wort down to yeast pitching temperature
- once you’ve reached yeast pitching temperature take an original gravity reading of your wort
Step 6 – Yeast Pitching
- It is best to make a yeast starter before beginning your brew day (ideally 1 day before) to ensure your yeast are as active and healthy as possible before pitching, but not completely necessary – you could also just rehydrate yeast 30 minutes before pitching.
- Wort Aeration (Optional) if you have a paint mixer give your wort a quick blitz before pitching yeast to help add more dissolved oxygen into the wort to help the yeast have a healthier kick start into fermentation
- Pitch yeast in wort a degree or two higher than the target fermentation temperature to help yeast take off more aggressively
- To make a yeast starter you can use either:
- DME (dry malt extract) at a ratio of approx. 100g per 1L water (3.5 oz per 33 fluid ounces) for gravity of approx. 1.040
- some unfermented wort kept cold and sanitary from a previous brew day
- 70g of table sugar per 1L water (2.5 oz per 33 fluid ounces) – however, it is best to use malt sugar (wort / DME) whenever possible to reduce the chance of shocking the yeast with a different food source from starter to wort pitching
- To rehydrate yeast
- Add yeast to approx. 10 times as much room temperature water as the weight of the yeast e.g. 10g yeast in 100 ml water (0.35 oz yeast in 3.5 fluid ounces water)
Step 7 – Fermentation & Fruit additions!
- Allow yeast to ferment over the next two weeks (aprox)
- If you have a temperature-controlled system keep the fermenter temperature to the recommended fermentation temperature for each yeast strain (stated in the yeast ingredients section above)
- Monitor the fermentation activity over the first 7-10 days by the bubbling of the blow-off tube/airlock of your fermenter, as the bubbling slows down (roughly around day 10-12) take a gravity reading. When the gravity reaches around 1.015 raise the temperature of your fermenter by 1-2 degrees for 2 days for a diacetyl rest (if you don’t have temperature control don’t worry about this step, it's not the end of the world!)
- Time to add fruit! purée 3.95 kg (8.7 lb) of Cherries and throw them all into the fermenter
- we used this calculator to check our ABV after the cherry puree addition
- It's important to note that fermentation times will vary based on your circumstances like temperature, amount of yeast pitched, the healthiness of yeast, the gravity of the wort, pH, etc. so don’t stress be patient and know that these times are just a rough guide
- On day 2 of the diacetyl rest (once gravity reaches roughly 1.008-1.01) & gravity is the same 3 days in a row move onto cold crashing! (If you can’t / don’t want to cold crash go straight to kegging/bottling your beer!)
Step 8 (optional) – Cold crashing
- begin cold crashing your fermenter (bring the temperature of your fermenter down to as close to 0°C (32°F) as possible, for 2 days to a week depending on how patient you are
- If you don’t have a temp-controlled fermenter, you can cold crash by putting your fermenter in a fridge or temp-controlled chest freezer
- After you have finished cold crashing it's time to keg/bottle your beer! If you are bottling your beer from the fermenter uncarbonated remember to add about 5-7grams (0.17 - 0.24 oz) of priming sugar to your bottles to carbonate your beer.

So... What is it?
Foster's Lager is an iconic Australian beer known for its refreshing taste and distinctive branding. It's a pale lager that's light and crisp, making it a popular choice for social gatherings, barbecues, and good times with good mates. With a golden hue and a balanced flavor profile, Foster's Lager offers a smooth drinking experience with subtle malt sweetness and a clean finish.
What's ours like?
Ours tastes remarkably similar to the real thing... but better! coming in at 4.7% it is slightly lower in ABV than the original's 4.9%, but it carries through with the same crisp finish, refreshing floral and slightly fruity character, low bitterness and beautiful straw to gold colour. However, it actually has a slightly lighter finish, and lacks the slight artificial chemical aftertaste of the original commercial giant, making this (in our opinion!) a better version than the original symbol of Australian beer culture!
Batch Size & Stats
- 19L / 5 gal finished beer
- 26L (6.8 gal) wort
- Starting gravity – 1.042
- Final gravity 1.006
- ABV – 4.7%
- Brewhouse Efficiency 82%
- IBU - 11
Brewfather link
https://share.brewfather.app/KrXxXnWZ5ERdQr
What ingredients?
Water
With sparging
- 15L (3.9 gal) strike water approx. 64°C (147°F)
- 15.2L (4 gal) sparge water at 78°C (172°F)
Without sparging
- 27L (7.1 gal) strike water approx. 64°C (147°F)
Malts
Total Grain Bill 5kg (11 4lb)
- Joe White Pilsner malt – 3.16kg (7 lb)
- Crisp Light Munich Malt - 160g (5.6 oz)
- Mangrove Jakcs Corn Sugar (Dextrose) - 420g (14.8 oz)
Hops & whirlfloc tablets
Pride of Ringwood
- 10g (0.35 oz) - 60 minutes left in the boil
- 30g (0.53 oz) - Flameout
Whirlfloc
- 0.75g (0.026 oz) / 1 tablets – 15 minutes left in the boil
Water Profile
- Ca2+22
- Mg2+ 5
- Na+ 15
- Cl- 31
- SO42- 30
- HCO3- 57
Yeast options & fermentation temperatures
- SafLager™ S‑23 – ferment at 14°C (57°F) 23g (0.41 oz) / (1 packets) - Fermented under 10 psi pressure (not necessary but a great option)
- Saflager W34-70 – ferment at 14°C (57°F) 23g (0.41 oz) / (1 packets) - Fermented under 10 psi pressure (not necessary but a great option)
Step by step process
Step 1 – Milling
- Mill grains to medium crush (set mill rollers to a gap of approx. 1.00mm / 0.039 inches (credit card width)
- Just keep in mind roller gap settings are not universal so as you brew more batches you will find the ideal crush size for your setup
- Alternatively if you don’t have a grain mill you can order your grains crushed from most homebrew stores, both online and in person
Step 2 – Mashing
Mash for 60 minutes at 64°C (147°F) with 15L (3.9 gal) of strike water
- Set your strike water to a few degrees above the target mash temperature (you can use the calculator in our website for this)
- ensure you mix in the grains thoroughly with a mash paddle to prevent dough balls from forming (big spoons, spatulas or whisks will also work)
- its easier to mash the grains and prevent dough balls if you add a little grain at a time, mix, add more grain and repeat until all the grains are mixed
if you don’t have a mash tun with heating then ensure after you have finished mixing the grains in to insulate your mash tun (thick neoprene or heavy blankets both work well)
Step 3 (optional) – Sparging
- if your setup has the capability to sparge then do so with 15.2L (4 gal) sparge water at 78°C (172°F)
- if you are not sparging and using a BIAB (brew in a bag) method then remove grains from mash tun and twist and squeeze the bag to get as much liquid out of the grains as possible
- as you start sparging (or straining your BIAB bag) begin raising the temperature of your wort to a boil
Step 4 – Boiling
- once your wort begins to boil start a timer for a 60-minute boil and add your bittering hops, 10g (0.35 oz) of Pride of Ringwood
- at 15 minutes left in the boil add 1 whirlfloc tablet (OR granulated whirlfloc 0.7g (0.025 oz)
Step 5 – Whirlpooling / cooling
- After 60 mins of boil turn off your heat and add the flameout hops, 30g (1 oz) of Pride of Ringwood and start cooling wort
- Once you’ve reached yeast pitching temperature take an original gravity reading of your wort
Step 6 – Yeast Pitching
- It is best to make a yeast starter before beginning your brew day (ideally 1 day before) to ensure your yeast are as active and healthy as possible before pitching, but not completely necessary – you could also just rehydrate yeast 30 minutes before pitching.
- Wort Aeration (Optional) if you have a paint mixer give your wort a quick blitz before pitching yeast to help add more dissolved oxygen into the wort to help the yeast have a healthier kick start into fermentation
- Now add your tincture of Vanilla extract! (or you can wait till end of fermentation if you prefer)
- Pitch yeast in wort a degree or two higher than the target fermentation temperature to help yeast take off more aggressively
- To make a yeast starter you can use either:
- DME (dry malt extract) at a ratio of approx. 100g per 1L water (3.5 oz per 33 fluid ounces) for gravity of approx. 1.040
- some unfermented wort kept cold and sanitary from a previous brew day
- 70g of table sugar per 1L water (2.5 oz per 33 fluid ounces) – however, it is best to use malt sugar (wort / DME) whenever possible to reduce the chance of shocking the yeast with a different food source from starter to wort pitching
- To rehydrate yeast
- Add yeast to approx. 10 times as much room temperature water as the weight of the yeast e.g. 10g yeast in 100 ml water (0.35 oz yeast in 3.5 fluid ounces water)
Step 7 – Fermentation
- Allow yeast to ferment over the next two weeks (aprox)
- If you have a temperature-controlled system keep the fermenter temperature to the recommended fermentation temperature for each yeast strain (stated in the yeast ingredients section above)
- It's important to note that fermentation times will vary based on your circumstances like temperature, amount of yeast pitched, the healthiness of yeast, the gravity of the wort, pH, etc. so don’t stress be patient and know that these times are just a rough guide
- If you have temp control then when there are 2 days left of fermentation raise the temperature by 2 degrees for a diacetyl rest (once gravity reaches roughly 1.005) & gravity is the same 3 days in a row move onto cold crashing and adding gelatin! (Dont worry cold crashing & gelatin are both optional steps to help clarify your beer)
Step 8 (optional) – Cold crashing & Gelatin
- begin cold crashing your fermenter (bring the temperature of your fermenter down to as close to 0°C (32°F) as possible, for 2 days to a week depending on how patient you are, and add 1-2 teaspoons of gelatin dissolved in boiling water and allowed to cool a bit to your fermenter
- If you don’t have a temp-controlled fermenter, you can cold crash by putting your fermenter in a fridge or temp-controlled chest freezer
- After you have finished cold crashing it's time to keg/bottle your beer! If you are bottling your beer from the fermenter uncarbonated, remember to add about 5-7 grams (0.17 - 0.24 oz) of priming sugar to your bottles to carbonate your beer.

So... What is it?
The Australian Pale Ale is a vibrant beer that captures the essence of the Land Down Under. Its flavor combines tropical fruit and citrus with a balanced hop bitterness and malt sweetness. The aroma offers hints of mango, passionfruit, and grapefruit, alongside a subtle caramel undertone. This style has its roots in Australia's brewing history and represents our nations diverse hop varieties, love for beer and adventurous spirit!
What's ours like?
Ours is bang on the money with the twist of combing some classic old school Aussie hops with new world varieties! Coming in at a sessionable 4.8% it has a very crisp and light body up front, and is an easy drinking thirst quencher for the hot Australian summer! Ultimately... this one is a beer flavoured beer! its clean, refreshing, and has a light citrus and floral character, and a short sharp finish. If you want an easy drinking easy to brew beer, this is your go to!
Batch Size & Stats
- 38L (2 19L corny kegs) / 10 gal finished beer
- 46L (13.2 gal) wort
- For a smaller 19L (5 gal) batch size simply half the ingredients of this recipe
- Starting gravity – 1.043
- Final gravity 1.007
- ABV – 4.8%
- IBU - 24
- Colour - 16.7 EBC
- Mash Efficiency - 86%
Brewfather link
https://share.brewfather.app/TopKZRwK7tdMXO
What ingredients?
Water
With sparging
- 30L (7.9 gal) for a 65°C (149°F) mash (you can use our strike water calculator to find your ideal strike temp)
- 30L (9.2 gal) sparge water at 78°C (172°F) - fermenter topped up with 4L (1 gal) post boil to reduce OG
Without sparging
- 60L (7.9 gal) for a 65°C (149°F) mash (you can use our strike water calculator to find your ideal strike temp)
Malts:
- Pale ale malt – 7.62 kg (16.8 lb) - 95.5%
- Medium Crystal Malt – 360g (0.79 lb) - 4.5%
Hops & whirlfloc tablets
Pride of Ringwood
- 10g (0.35 oz) - 60 minutes left in the boil
- 60g (2.1 oz) – 3 minutes left in the boil
Galaxy
- 50g (1.76 oz) – 3 minutes left in the boil
Topaz
- 70g (2.47 oz) – 3 minutes left in the boil
Whirlfloc tablets
- 1.5g (0.052 oz) / 2 tablets – 15 minutes left in the boil
Yeast options & fermentation temperatures
- 23g (0.8 oz) Aus-05– ferment at 20°C
- 23g (0.8 oz) US-05 – ferment at 20°C
- 23g (0.8 oz) S-04 – ferment at 19°C
Water Profile
- Ca2+58
- Mg2+ 5
- Na+ 15
- Cl- 56
- SO42- 82
- HCO3- 57
Step by step process
Step 1 – Milling
- Mill grains to medium crush (set mill rollers to a gap of approx. 1.00mm / 0.039 inches)
- Just keep in mind roller gap settings are not universal so as you brew more batches you will find the ideal crush size for your setup
- Alternatively if you don’t have a grain mill you can order your grains crushed from most homebrew stores, both online and in person
Step 2 – Mashing
- Mash for 60 minutes at 65°C (149°F)
- Set your strike water to a few degrees above the target mash temperature, you can use our calculator to determine what your strike temperature should be
- ensure you mix in the grains thoroughly with a mash paddle to prevent dough balls from forming (big spoons, spatulas or whisks will also work)
- its easier to mash the grains and prevent dough balls if you add a little grain at a time, mix, add more grain and repeat until all the grains are mixed
- if you don’t have a mash tun with heating then ensure after you have finished mixing the grains in to insulate your mash tun (thick neoprene or heavy blankets both work well)
Step 3 (optional) – Sparging
- if your setup has the capability to sparge then do so with 34L (9 gal) sparge water at 78°C (172°F)
- if you are not sparging and using a BIAB (brew in a bag) method then remove grains from mash tun and twist and squeeze the bag to get as much liquid out of the grains as possible
- as you start sparging (or straining your BIAB bag) begin raising the temperature of your wort to a boil
Step 4 – Boiling
- once your wort begins to boil start a timer for a 60-minute boil and add your bittering hops, 10g (0.35 oz) of Pride of Ringwood
- at 15 minutes left in the boil add 2.5 whirlfloc tablets
- With 3 minutes left in the boil add your flavour and aroma hops, Pride of Ringwood 60g (2.1 oz), Galaxy 50g (1.76 oz), Topaz 70g (2.47 oz)
Step 5 – Cooling
- After 1 hour of boiling start cooling wort down to yeast pitching temperature
- once you’ve reached yeast pitching temperature take an original gravity reading of your wort
Step 6 – Yeast Pitching
- It is best to make a yeast starter before beginning your brew day (ideally 1 day before) to ensure your yeast are as active and healthy as possible before pitching, but not completely necessary – you could also just rehydrate yeast 30 minutes before pitching.
- Pitch yeast in wort a degree or two higher than the target fermentation temperature to help yeast take off more aggressively
- To make a yeast starter you can use either:
- DME (dry malt extract) at a ratio of approx. 100g per 1L water (3.5 oz per 33 fluid ounces) for gravity of approx. 1.040
- some unfermented wort kept cold and sanitary from a previous brew day
- 70g of table sugar per 1L water (2.5 oz per 33 fluid ounces) – however, it is best to use malt sugar (wort / DME) whenever possible to reduce the chance of shocking the yeast with a different food source from starter to wort pitching
- To rehydrate yeast
- Add yeast to approx. 10 times as much room temperature water as the weight of the yeast e.g. 10g yeast in 100 ml water (0.35 oz yeast in 3.5 fluid ounces water)
Step 7 – Fermentation
- Allow yeast to ferment over the next week to two weeks
- If you have a temperature controlled system keep the fermenter temperature to the recommended fermentation temperature for each yeast strain (stated in the yeast ingredients section above)
- Monitor the fermentation activity over the first 7 days by the bubbling of the blow off tube / airlock of your fermenter, as the bubbling slows down (roughly around day 7) take a gravity reading. When the gravity reaches around 1.01 raise the temperature of your fermenter by 1-2 degrees for 2 days for a diacetyl rest (if you don’t have temperature control don’t worry about this step, its not the end of the world!)
- Its important to note that fermentation times will vary based on your circumstances like, temperature, amount of yeast pitched, healthiness of yeast, gravity of wort, pH etc. so don’t stress be patient and know that these times are just a rough guide
- Once the gravity is the same 2 days in a row move onto cold crashing! (If you can’t / don’t want to cold crash go straight to kegging/bottling your beer!)
Step 8 (optional) – Cold crashing
- begin cold crashing your fermenter (bring the temperature of your fermenter down to as close to 0°C (32°F) as possible, for 2 days to a week depending on how patient you are
- If you don’t have a temp-controlled fermenter, you can cold crash by putting your fermenter in a fridge or temp-controlled chest freezer
- After you have finished cold crashing it's time to keg/bottle your beer! If you are bottling your beer from the fermenter uncarbonated remember to add about 5-7 grams (0.17 - 0.24 oz) of priming sugar to your bottles to carbonate your beer.
So... What is it?
A white stout is a beer that challenges traditional expectations by combining the appearance of a light-colored beer, often resembling a pale ale or even a golden lager, with the flavors typically associated with a stout. Unlike a traditional stout, which is typically dark brown to black in color with roasted malt flavors, a white stout achieves its stout-like characteristics through the use of coffee beans, cocoa nibs and even spiced tinctures in the fermentation step, to maintain a lighter color with full body stouty goodness!
What's our like?
Our White stout takes an already strange style... and makes it even stranger! not only is ours a blonde ale infused with all the roasty goodness of a coffee bean based stout, it is also packed full of spices such as vanilla, sultanas, allspice berries, cinnamon, cacao nib extract and of course, REAL hot cross buns thrown into the mash! To top it all off is a late boil addition of lactose to bring everything together with a creamy sweetness that lingers on the tongue. Coming in at a reasonable 4.7% it is a very sessionable hot cross bun in a glass to keep you warm and cozy all Easter weekend long!
POST BREW ALTERATIONS
- In hindsight we would increase our sultana (raisin) addition from 500g (1.1 lb) to 1kg (2.2 lb) to really boost the Hot cross bun character!
Batch Size & Stats
- 19L / 5 gal finished beer
- 25L (6.6 gal) wort
- Starting gravity – 1.048
- Final gravity 1.013
- ABV – 4.7%
What ingredients?
Water
With sparging
- 20L (5.2 gal) Strike water at 69°C (156.2°F)
- 15L (3.9 gal) Sparge water approx. 78°C (172°F)
Without sparging
- 30L (7.9 gal) strike water approx. 69°C (156.2°F)
Malts
Total Grain Bill 4.91kg (10.8 4lb)
- Pale ale malt – 3.98kg (8.77 lb)
- wheat – 490g (1.08 lb)
- Rolled Oats - 290g (0.64 lb)
- Gladiator malt (dextrin malt)– 150g (0.33 lb)
- Rice Hulls - 250g (0.55 lb)
Adjuncts
- Traditional Hot Cross Buns - 450g (1 lb) in Mash
- Lactose - 220g (0.48 lb) start of boil
- sultanas (raisins) - 500g (1.1 lb) - end of fermentation
- coffee beans - 250g (0.5 lbs) - end of fermentation
Spice Tincture - soak all spices in cacao nib spirit for a week before adding to fermenter at final gravity
- 2 vanilla beans
- 1 cinnamon stick
- 8 all spice berries
- cacao nib spirit 250mL - (to make this toast 500g of cacao nibs at 180°C (356°F) for 5 mins then soak nibs in 700mL of rum or vodka for a week then strain)
Hops & whirlfloc tablets
Northern Brewer
- 20g (0.7 oz) - 60 minutes left in the boil
Spalt Spalter
- 35g (1.23 oz) - 5 minutes left in the boil
Whirlfloc
- 0.75g (0.025 oz) / 1 tablet – 15 minutes left in the boil
Yeast options & fermentation temperatures
- US-05 – ferment at 20°C (68°F) 23g (0.81 oz) / (2 packets)
- AUS-05 – ferment at 20°C (68°F) 23g (0.81 oz) / (2 packets)
- S-04 – ferment at 18°C (64.4°F) 22g (0.81 oz) / (2 packets)
Water Profile
- Ca2+62
- Mg2+ 9
- Na+ 15
- Cl- 98
- SO42- 49
- HCO3- 57
Step by step process
Step 1 – Milling
- Mill grains to medium crush (set mill rollers to a gap of approx. 1.00mm / 0.039 inches (credit card width)
- Just keep in mind roller gap settings are not universal so as you brew more batches you will find the ideal crush size for your setup
- Alternatively if you don’t have a grain mill you can order your grains crushed from most homebrew stores, both online and in person
Step 2 – Mashing
Mash for 60 minutes at 69°C (156.2°F) with 20L (5.2 gal) of strike water (with sparging - 30L (7.9 gal without sparging)
- Set your strike water to a few degrees above the target mash temperature (you can use the calculator in our website for this)
- ensure you mix in the grains thoroughly with a mash paddle to prevent dough balls from forming (big spoons, spatulas or whisks will also work)
- its easier to mash the grains and prevent dough balls if you add a little grain at a time, mix, add more grain and repeat until all the grains are mixed
if you don’t have a mash tun with heating then ensure after you have finished mixing the grains in to insulate your mash tun (thick neoprene or heavy blankets both work well)
Step 3 (optional) – Sparging
- if your setup has the capability to sparge then do so with 15L (3.9 gal) Sparge water approx. 78°C (172°F)
- if you are not sparging and using a BIAB (brew in a bag) method then remove grains from mash tun and twist and squeeze the bag to get as much liquid out of the grains as possible
- as you start sparging (or straining your BIAB bag) begin raising the temperature of your wort to a boil
Step 4 – Boiling
- once your wort begins to boil start a timer for a 60-minute boil and add your bittering hops, 20g (0.7 oz) of Northern Brewer
- at 15 minutes left in the boil add 1 whirlfloc tablet (OR granulated whirlfloc 0.7g (0.025 oz)
- at 5 minutes left in the boil add 35g (1.23 oz) of Spalt Spatler
- after 60 mins of boil turn off your heat source
Step 5 – Whirlpooling / cooling
- after 60 mins of boil turn off your heat source and begin cooling
- once you’ve reached yeast pitching temperature take an original gravity reading of your wort
Step 6 – Yeast Pitching
- It is best to make a yeast starter before beginning your brew day (ideally 1 day before) to ensure your yeast are as active and healthy as possible before pitching, but not completely necessary – you could also just rehydrate yeast 30 minutes before pitching.
- Wort Aeration (Optional) if you have a paint mixer give your wort a quick blitz before pitching yeast to help add more dissolved oxygen into the wort to help the yeast have a healthier kick start into fermentation
- Now add your tincture of Vanilla extract! (or you can wait till end of fermentation if you prefer)
- Pitch yeast in wort a degree or two higher than the target fermentation temperature to help yeast take off more aggressively
- To make a yeast starter you can use either:
- DME (dry malt extract) at a ratio of approx. 100g per 1L water (3.5 oz per 33 fluid ounces) for gravity of approx. 1.040
- some unfermented wort kept cold and sanitary from a previous brew day
- 70g of table sugar per 1L water (2.5 oz per 33 fluid ounces) – however, it is best to use malt sugar (wort / DME) whenever possible to reduce the chance of shocking the yeast with a different food source from starter to wort pitching
- To rehydrate yeast
- Add yeast to approx. 10 times as much room temperature water as the weight of the yeast e.g. 10g yeast in 100 ml water (0.35 oz yeast in 3.5 fluid ounces water)
Step 7 – Fermentation & Fruit and Spice additions!
- Allow yeast to ferment over the next week or two (aprox)
- If you have a temperature-controlled system keep the fermenter temperature to the recommended fermentation temperature for each yeast strain (stated in the yeast ingredients section above)
- After 4 days of fermentation or around 1.015 gravity, we added our sultanas (raisins)
- On day 6 of fermentation we added our 250g (0.5 lb) of Arabica coffee beans and spice tincture and if you have temp control then raise the temperature of fermentation by 2 degrees for a diacetyl rest for the next 2 days
- 2 days after adding the coffee and spice tincture it is time to cold crash (if you can) and bottle / keg!
- It's important to note that fermentation times will vary based on your circumstances like temperature, amount of yeast pitched, the healthiness of yeast, the gravity of the wort, pH, etc. so don’t stress be patient and know that these times are just a rough guide
- If you have temp control then when there are 2 days left of fermentation raise the temperature by 2 degrees for a diacetyl rest (once gravity reaches roughly 1.014) & gravity is the same 3 days in a row move onto cold crashing! (If you can’t / don’t want to cold crash go straight to kegging/bottling your beer!)
Step 8 (optional) – Cold crashing
- begin cold crashing your fermenter (bring the temperature of your fermenter down to as close to 0°C (32°F) as possible, for 2 days to a week depending on how patient you are
- If you don’t have a temp-controlled fermenter, you can cold crash by putting your fermenter in a fridge or temp-controlled chest freezer
- After you have finished cold crashing it's time to keg/bottle your beer! If you are bottling your beer from the fermenter uncarbonated, remember to add about 5-7 grams (0.17 - 0.24 oz) of priming sugar to your bottles to carbonate your beer.
So... What is it?
The Hazy IPA (also called NEIPA) is a super fruity low bitterness style of IPA that typically sits around the 5.5-7.5% ABV mark. This particular recipe makes an 7.9% tropical juice bomb! Huge punchy flavours of mango, pineapple, and fresh orange zest and candy-like sweetness make this a super drinkable boozy juice! And with the hefty amount of wheat and oats added to the grain bill, it has a super silky balanced mouthfeel, accentuating all the hoppy goodness!
Batch Size & ABV
38L (2 19L corny kegs) / 10 gal finished beer
50L (13.2 gal) wort
For a smaller 19L (5 gal) batch size simply half the ingredients of this recipe
Starting gravity – 1.073
Final gravity 1.013
ABV – 7.9%
Ingredients
Water
- With sparging
- 40L (10.6 gal) strike water approx. for a 60 min mash at 68°C (154.4°F) with a 10 min mash out step at the end at 77°C (170°F)
- 30L (7.9 gal) sparge water at 78°C (172°F)
- Without sparging
- 60L (7.9 gal) strike water approx. for a 60 min mash at 68°C (154.4°F) with a 10 min mash out step at the end at 77°C (170°F)
Malts: 14.5kg (32 lb) of fermentable's 15.5kg (34lb) with rice hulls
- Pale ale malt – 10.5kg (23 lb)
- Rolled Oats – 2kg (4.4 lb)
- Wheat malt – 2kg (4.4 lb)
- Rice Hulls (not necessary, just helps with sparging) – 1g (2.2 lb)
Hops & whirlfloc tablets
Northern Brewer
- 20g (0.7 oz) - First Wort Hops
Lupomax El Dorado
- 50g (1.76 oz) – whirlpool for 20 minutes at 75°C (167°F)
- 50g (1.76 oz) - Dry hop at gravity 1.014 (approx. day 5-10 depending on your yeast)
Lupomax Mosaic
- 50g (1.76 oz) – whirlpool for 20 minutes at 75°C (167°F)
- 50g (1.76 oz) - Dry hop at gravity 1.014 (approx. day 5-10 depending on your yeast)
Lupomax Sabro
- 50g (1.76 oz) – whirlpool for 20 minutes at 75°C (167°F)
- 50g (1.76 oz) - Dry hop at gravity 1.014 (approx. day 5-10 depending on your yeast)
Lupomax Amarillo
- 50g (1.76 oz) – whirlpool for 20 minutes at 75°C (167°F)
- 50g (1.76 oz) - Dry hop at gravity 1.014 (approx. day 5-10 depending on your yeast)
Lupomax Citra
- 50g (1.76 oz) – whirlpool for 20 minutes at 75°C (167°F)
- 50g (1.76 oz) - Dry hop at gravity 1.014 (approx. day 5-10 depending on your yeast)
Whirlfloc
- 1.5g granulated whirlfloc / 2 tablets – 15 minutes left in the boil
Yeast options & fermentation temperatures
- 23g (0.8 oz) Lallmand East Coast New England Ale Yeast ferment at 25°C (55°F)
- 23g (0.8 oz) Kveik (we used a Omega yeats Espe Kveik, but any kveik is great!) ferment at 32°C
- 23g (0.8 oz) US-05 – ferment at 20°C
- 23g (0.8 oz) S-04 – ferment at 19°C
Water Profile
Ca2+ 131 Mg2+ 15 Na+ 15 Cl- 199 SO42- 100 HCO3- 57
Brewing Salts & Water Adjustments (this is for my original water profile, so adjust yours to your own profile, you can watch the video under here to learn more!)
14 g — Calcium Chloride (CaCl2) — Mash
3.9 g — Epsom Salt (MgSO4) — Mash
3.9 g — Gypsum (CaSO4) — Mash
4.5 ml — Phosphoric Acid 85% — Mash
10.5 g — Calcium Chloride (CaCl2) — Sparge
2.93 g — Epsom Salt (MgSO4) — Sparge
2.93 g — Gypsum (CaSO4) — Sparge
1.73 ml — Phosphoric Acid 85% — Sparge
Step by step process
Step 1 – Milling
- Mill grains to medium crush (set mill rollers to a gap of approx. 1mm / 0.039 inches) (BUT DONT crush the rice hulls or oats, add them into your grain separately after crushing them)
- Just keep in mind roller gap settings are not universal so as you brew more batches you will find the ideal crush size for your setup
- Alternatively if you don’t have a grain mill you can order your grains crushed from most homebrew stores, both online and in person
Step 2 – Mashing
- Add your brewing salts and mix to ensure they are fully dissolved prior to mashing in grains
- Mash for 60 minutes at 68°C (154.4°F) with 40L (10.6 gal)
- ensure you mix in the grains thoroughly with a mash paddle to prevent dough balls from forming (big spoons, spatulas or whisks will also work)
- its easier to mash the grains and prevent dough balls if you add a little grain at a time, mix, add more grain and repeat until all the grains are mixed
- if you don’t have a mash tun with heating then ensure after you have finished mixing the grains in to insulate your mash tun (thick neoprene or heavy blankets both work well)
- after 60 minutes of mashing raise temperature to 77°C (170°F) for 10 minutes to Mash out
Step 3 (optional) – Sparging
- if your setup has the capability to sparge then do so with 30L (7.9 gal) of sparge water at 78 °C (172°F)
- if you are not sparging and using a BIAB (brew in a bag) method then remove grains from mash tun and twist and squeeze the bag to get as much liquid out of the grains as possible
- as you start sparging (or straining your BIAB bag) begin raising the temperature of your wort to a boil
Step 4 – Boiling
- After removing the grains from your mash tun add your first wort hops (before wort begins to boil)
- once your wort begins to boil start a timer for a 60-minutes
- at 15 minutes left in the boil add 2 whirlfloc tablets
- after 60 minutes of boiling turn of the heat and chill the temperature of the wort down to 75°C (167°F) and begin whirlpooling
- if you don’t have a wort chiller you could rest your boil kettle in an ice bucket
- if your system can’t whirlpool you can also achieve this with a mash paddle and a power drill, if you don’t have this either don’t worry about whirlpooling it’s not completely necessary
Step 5 – Whirlpooling / whirlpool hop additions
- once temperature reaches 75°C (167°F) and you have started whirlpooling add your whirlpool hops, 50g (1.76 oz) each of Lupomax versions of Mosaic, Amarillo, Sabro, citra and El Dorado
- allow hops to whirlpool in the wort for 20 minutes and then begin chilling wort again down to yeast pitching temperature
- once you’ve reached yeast pitching temperature take an original gravity reading of your wort
Step 6 – Yeast Pitching
- It is best to make a yeast starter before beginning your brew day (ideally 1 day before) to ensure your yeast are as active and healthy as possible before pitching, but not completely necessary – you could also just rehydrate yeast 30 minutes before pitching.
- Pitch yeast in wort a degree or two higher than the target fermentation temperature to help yeast take off more aggressively
- To make a yeast starter you can use either:
- DME (dry malt extract) at a ratio of approx. 100g per 1L water (3.5 oz per 33 fluid ounces) for gravity of approx. 1.040
- some unfermented wort kept cold and sanitary from a previous brew day
- 70g of table sugar per 1L water (2.5 oz per 33 fluid ounces) – however, it is best to use malt sugar (wort / DME) whenever possible to reduce the chance of shocking the yeast with a different food source from starter to wort pitching
- To rehydrate yeast
- Add yeast to approx. 10 times as much room temperature water as the weight of the yeast e.g. 10g yeast in 100 ml water (0.35 oz yeast in 3.5 fluid ounces water)
Step 7 – Fermentation, dry hopping and Soft Crashing (optional)
- Allow yeast to ferment over the next 5 days to two weeks
- If you have a temperature-controlled system keep the fermenter temperature to the recommended fermentation temperature for each yeast strain (stated in the yeast ingredients section above)
- Monitor the fermentation activity over the first 7 days by the bubbling of the blow-off tube/airlock of your fermenter, as the bubbling slows down (roughly around day 7) take a gravity reading. When the gravity reaches around 1.014 raise the temperature of your fermenter by 1-2 degrees for 2 days for a diacetyl rest (if you don’t have temperature control don’t worry about this step, it's not the end of the world!)
- It's important to note that fermentation times will vary based on your circumstances like temperature, amount of yeast pitched, the healthiness of yeast, the gravity of the wort, pH, etc. so don’t stress be patient and know that these times are just a rough guide
- On day 2 of the diacetyl rest (once gravity reaches roughly 1.013 – 1.014) "Soft Crash" your beer (optional, if you cant temp control move onto dry hopping), by reducing temperature to 13°C (55.4°F)
- After 1 day of soft crashing add your dry hops, 50g (1.76 oz) each of Lupomax versions of Mosaic, Amarillo, Sabro, citra and El Dorado
- 1 to 2 days after dry hopping move on to cold crashing and dump trub / remove hops and take a final gravity reading
- (If you can’t / don’t want to cold crash go straight to kegging/bottling your beer!)
Step 8 (optional) – Cold crashing
- begin cold crashing your fermenter (bring the temperature of your fermenter down to as close to 0°C (32°F) as possible, for 2 days to a week depending on how patient you are
- If you don’t have a temp-controlled fermenter, you can cold crash by putting your fermenter in a fridge or temp-controlled chest freezer
- After you have finished cold crashing it's time to keg/bottle your beer! If you are bottling your beer from the fermenter uncarbonated remember to add about 5-7 grams (0.17 - 0.24 oz) of priming sugar to your bottles to carbonate your beer.
.png)
So... What is it?
A hazy IPA is a modern style of beer known for its cloudy appearance and juicy, fruity flavors. It's brewed with a combination of hops, grains like oats and wheat, and yeast strains that contribute to its hazy appearance and smooth texture. The result is a refreshing and aromatic beer with a tropical fruit-forward taste, often featuring notes of citrus, mango, and pineapple. Hazy IPAs typically have an alcohol by volume (ABV) ranging from 6% to 7.5% and an International Bitterness Units (IBU) range of 30 to 50, providing a balanced bitterness that complements the fruity hop character.
What's our like?
Crafted by an AI chat GPT model, our hazy IPA is a masterpiece of flavor innovation. Coming in at a boozy 8.4% and bursting with juicy citrus and tropical fruit aromas, it tantalizes the palate with notes of ripe mango, zesty orange, and succulent pineapple. The soft, pillowy mouthfeel from the addition of flaked oats and wheat creates a smooth canvas for the explosion of hoppy goodness. With each sip, you'll experience a harmonious balance of hop bitterness and fruity sweetness, culminating in a lingering finish that leaves you craving another taste. Whether enjoyed on a sunny day or as a delightful indulgence, our AI-crafted hazy IPA offers a refreshing twist on traditional beer styles, inviting you to savor every moment of its flavorful journey
Batch Size & Stats
- 14.5L / 3.8 gal finished beer - (yes we stuffed up our mash efficiency on the day!! im sure you can do better than us)
- 20L (6.3 gal) wort
- Starting gravity – 1.076
- Final gravity 1.012
- ABV – 8.4%
What ingredients?
Water
With sparging
- 20L (5.2 gal) strike water approx. 66°C (15.8°F)
- 8.3L (2.2 gal) sparge water at 78°C (172°F)
Without sparging
- 30L (7.9 gal) strike water approx. 66°C (15.8°F)
Malts
Total Grain Bill 7.5kg (16.5 4lb)
- 5.5 kg (12.1 lbs) Pale Malt
- 1 kg (2.2 lbs) Flaked Oats
- 0.5 kg (1.1 lbs) White Wheat Malt
- 0.5 kg (1.1 lbs) Munich Malt
- Rice Hulls – 400g (1.1 lb)
Hops & whirlfloc tablets
- 30 g (1.1 oz) Citra (12% AA) - First Wort Hop
- 30 g (1.1 oz) Citra (12% AA) - 15 minutes
- 60 g (2.1 oz) Citra (12% AA) - Whirlpool for 20 minutes at 80°C (176°F)
- 60 g (2.1 oz) Mosaic (12% AA) - Whirlpool for 20 minutes at 80°C (176°F)
- Dry Hop #1: 60 g (2.1 oz) Citra + 60 g (2.1 oz) Mosaic - After primary fermentation, for 3-4 days
- Dry Hop #2: 60 g (2.1 oz) Citra + 60 g (2.1 oz) Mosaic - 3 days before bottling/kegging
Whirlfloc
- 1.5g (0.052 oz) / 2 tablets – 15 minutes left in the boil
Water Profile:
- Calcium: 143 ppm
- Magnesium: 20 ppm
- Sodium: 15 ppm
- Sulfate: 150 ppm
- Chloride: 199 ppm
- Bicarbonate: 57
Yeast options & fermentation temperatures
- LalBrew New England™ – ferment at 24°C (75.2°F) 10g (0.35 oz) / (1 packets)
Step by step process
Step 1 – Milling
- Mill grains to medium crush (set mill rollers to a gap of approx. 1.00mm / 0.039 inches (credit card width)
- Just keep in mind roller gap settings are not universal so as you brew more batches you will find the ideal crush size for your setup
- Alternatively if you don’t have a grain mill you can order your grains crushed from most homebrew stores, both online and in person
Step 2 – Mashing
Mash for 60 minutes at 66°C (150.8°F) with 20L (5.2 gal) of strike water
- Set your strike water to a few degrees above the target mash temperature (you can use the calculator in our website for this)
- ensure you mix in the grains thoroughly with a mash paddle to prevent dough balls from forming (big spoons, spatulas or whisks will also work)
- its easier to mash the grains and prevent dough balls if you add a little grain at a time, mix, add more grain and repeat until all the grains are mixed
if you don’t have a mash tun with heating then ensure after you have finished mixing the grains in to insulate your mash tun (thick neoprene or heavy blankets both work well)
Step 3 (optional) – Sparging
- if your setup has the capability to sparge then do so with 8.3L (2.2 gal) sparge water at 78°C (172°F)
- if you are not sparging and using a BIAB (brew in a bag) method then remove grains from mash tun and twist and squeeze the bag to get as much liquid out of the grains as possible
- as you start sparging (or straining your BIAB bag) begin raising the temperature of your wort to a boil
Step 4 – Boiling
- once your wort begins to boil start a timer for a 60-minute boil and add your bittering hops, 30g (1 oz) of Citra
- at 15 minutes left in the boil add 1 whirlfloc tablet (OR granulated whirlfloc 0.7g (0.025 oz)) and 30g (1 oz) of Citra
Step 5 – Whirlpooling / cooling
- after 60 mins of boil turn off your heat source and cool wort down to 80°C (176°F) & add 60g (2.1 oz) each of Citra and Mosaic
- after 20 minutes of hop steeping / whirlpooling cool wort down to yeast pitching temperature & take an original gravity reading of your wort
Step 6 – Yeast Pitching
- It is best to make a yeast starter before beginning your brew day (ideally 1 day before) to ensure your yeast are as active and healthy as possible before pitching, but not completely necessary – you could also just rehydrate yeast 30 minutes before pitching.
- Wort Aeration (Optional) if you have a paint mixer give your wort a quick blitz before pitching yeast to help add more dissolved oxygen into the wort to help the yeast have a healthier kick start into fermentation
- Now add your tincture of Vanilla extract! (or you can wait till end of fermentation if you prefer)
- Pitch yeast in wort a degree or two higher than the target fermentation temperature to help yeast take off more aggressively
- To make a yeast starter you can use either:
- DME (dry malt extract) at a ratio of approx. 100g per 1L water (3.5 oz per 33 fluid ounces) for gravity of approx. 1.040
- some unfermented wort kept cold and sanitary from a previous brew day
- 70g of table sugar per 1L water (2.5 oz per 33 fluid ounces) – however, it is best to use malt sugar (wort / DME) whenever possible to reduce the chance of shocking the yeast with a different food source from starter to wort pitching
- To rehydrate yeast
- Add yeast to approx. 10 times as much room temperature water as the weight of the yeast e.g. 10g yeast in 100 ml water (0.35 oz yeast in 3.5 fluid ounces water)
Step 7 – Fermentation & Dry Hopping
- Allow yeast to ferment over the next week to two weeks (aprox)
- If you have a temperature-controlled system keep the fermenter temperature to the recommended fermentation temperature for each yeast strain (stated in the yeast ingredients section above)
- After 4 days of fermentation or around 1.02 gravity, its time for the first dry hop of 60 g (2.1 oz) each of citra and mosaic. put the hops in a hop bag so that you can remove them after 2 days
- at final gravity (around 1.014) add the final hop edition 60 g (2.1 oz) each of citra and mosaic and leave for 2 more days before kegging/bottling
- If you have temp control then when there are 2 days left of fermentation raise the temperature by 2 degrees for a diacetyl rest (once gravity reaches roughly 1.014) & gravity is the same 3 days in a row move onto cold crashing! (If you can’t / don’t want to cold crash go straight to kegging/bottling your beer!)
Step 8 (optional) – Cold crashing
- begin cold crashing your fermenter (bring the temperature of your fermenter down to as close to 0°C (32°F) as possible, for 2 days to a week depending on how patient you are
- If you don’t have a temp-controlled fermenter, you can cold crash by putting your fermenter in a fridge or temp-controlled chest freezer
- After you have finished cold crashing it's time to keg/bottle your beer! If you are bottling your beer from the fermenter uncarbonated, remember to add about 5-7 grams (0.17 - 0.24 oz) of priming sugar to your bottles to carbonate your beer.
So... What is it?
Imperial Stouts, originating in 18th-century England, are robust beers known for their intense flavors and high alcohol content. Inspired by a desire for a stronger stout, these brews have a deep history tied to the Russian imperial court. With a dark, rich appearance and opulent malt profiles, Imperial Stouts offer a complex taste of chocolate, coffee, dark fruit, and caramel. Boasting an alcohol content surpassing 8% ABV, these ales are revered for their indulgent sipping experience.
What is ours like?
So what better way to get silly for the silly season than with Christmas in a glass! This 10% Imperial Gingerbread Christmas Stout is creamy with a decent heft of body considering its impressive abv! The bitterness definitely sits on the lower side at 32 IBU’s and feels even lower than that due to the high gravity and ABV of the beer (next time I make this id bump the IBU’s up to 50-60). The malt character comes bounding through with bready biscuit, strong espresso, a touch of burnt coffee and sweet caramel toffee notes infused with a touch of sticky date pudding and plums! But the true star of the show is the big ginger note that cuts through the sweetness of the beer, tasting a little more like fresh ginger than gingerbread, but perfectly in balance with the bouquet of spices from the cinnamon, allspice and nutmeg. Don't leave too many of these out for Santa or he may not be able to drive his sleigh!
Batch Size & Stats
- 41.1L / 10.85 gal finished beer
- 47.9L (12.65 gal) wort
- Starting gravity – 1.097 (approx likely a bit higher)
- Final gravity 1.022
- ABV – 10% (incl. Vodka addition and measuring bias)
- IBU - 32
- Mash Efficiency 81%
- Brewhouse Efficiency 73%
What ingredients?
Water
With sparging
- 90 minutes, 60L (15.85 gal) strike water 69°C (156.2°F) mash
- 16L (4.2 gal) sparge water at 78°C (172°F)
Without sparging
- 90 minutes, 70L (18.5 gal) strike water 69°C (156.2°F) mash
Water Chemistry (Salts) - (optional)
Mash water
- Calcium Chloride (CaCl2) - 6.1g (0.22 oz)
- Epsom Salt (MgSO4) - 4.9g (0.1.7 oz)
- Slaked Lime (Ca(OH)2) - 3g (0.1 oz)
Sparge water
- Calcium Chloride (CaCl2) - 1.63g (0.057 oz)
- Epsom Salt (MgSO4) - 1.31g (0.046 oz)
- Slaked Lime (Ca(OH)2) - 0.8g (0.028 oz)
- Phosphoric Acid (85%) – 2.2ml (0.0744 oz)
Malts
Total Grain Bill 20.12kg (44.35 lb) + 1.7kg (3.75 lb) rice hulls
Total Fermentables - 21.12kg (46.6 lb)
- Pale Malt – 10.07kg (22.2 lb) - 50.1%
- Dark Munich - 3.01kg (6.63 lb) - 15%
- Rolled Oats - 1.61kg (3.55 lb) - 8%
- Wheat malt – 1.61kg (3.55 lb) - 8%
- Dark Chocolate malt 1.41kg (3.1 lb) - 7%
- Medium Crystal Malt - 1.41kg (3.1 lb) - 7%
- Roasted Barley - 1kg (2.2 lb) - 5%
- Rice Hulls – 1.7kg (3.75 lb)
Adjuncts
- Extra Dark Belgium Candi Syrup - 1kg (2.2 lb)
Extra Flavouring Additions
For these additions split all ingredients in half, and in 2 separate jars soak the spices to make a tincture, ideally to soak for 5 days before brewday
Use half the tincture after flameout on brewday, use the other half in the fermenter near final gravity (id recommend straining out the spices for the fermenter addition)
- 400 ml Vodka (40% abv)
- Ginger Root (dry and kibbled) - 120g
- All Spice (bought whole then roughly crushed) - 16 berries
- Cinnamon stick (bought whole then roughly crushed) - 2 sticks
- Nutmeg (bought whole then roughly crushed) - 2 tsp
- Vanilla Beans (whole then cut in half and seeds scraped out) - 4 beans
- Cloves (bought whole then roughly crushed) - 4 cloves
Hops & whirlfloc tablets
Northern Brewer
- 52.7g (1.86 oz) - 90 minutes left in the boil
- 50g (1.76 oz) 15 minutes left in the boil
Fuggles
- 50g (1.76 oz) 15 minutes left in the boil
Whirlfloc
- 1.5g (0.052 oz) / 2 tablets – 15 minutes left in the boil
Yeast options & fermentation temperatures
- Lalbrew Nottingham Ale yeast – ferment at 20°C (68°F) 23g (0.81 oz) / (2 packets)
- US-05 – ferment at 20°C (68°F) 23g (0.81 oz) / (2 packets)
- AUS-05 – ferment at 20°C (68°F) 23g (0.81 oz) / (2 packets)
- S-04 – ferment at 18°C (64.4°F) 22g (0.81 oz) / (2 packets)
Step by step process
Step 0 - Prep spices! (pre brew-day step)
For these additions, split all ingredients in half, and lightly crush whole ingredients with a mortar and pestle, and slice the vanilla beans in half and scrape out the insides to help the flavour be released.
Then place all ingredients evenly into 2 separate jars with the vodka to make a tincture, ideally to soak for 5 days before brewday
Use half the tincture after flameout on brewday, use the other half in the fermenter near final gravity (id recommend straining out the spices for the fermenter addition)
Step 1 – Milling
- Mill grains to medium crush (set mill rollers to a gap of approx. 1.00mm / 0.039 inches (credit card width)
- Just keep in mind roller gap settings are not universal so as you brew more batches you will find the ideal crush size for your setup
- Alternatively if you don’t have a grain mill you can order your grains crushed from most homebrew stores, both online and in person
Step 2 – Mashing
- Mash for 90 minutes at 69°C (156.2°F)
- Set your strike water to a few degrees above the target mash temperature
- ensure you mix in the grains thoroughly with a mash paddle to prevent dough balls from forming (big spoons, spatulas or whisks will also work)
- its easier to mash the grains and prevent dough balls if you add a little grain at a time, mix, add more grain, and repeat until all the grains are mixed
- if you don’t have a mash tun with heating then ensure after you have finished mixing the grains in to insulate your mash tun (thick neoprene or heavy blankets both work well)
Step 3 (optional) – Sparging
- if your setup has the capability to sparge then do so with 16L (4.2 gal) sparge water at 78°C (172°F)
- if you are not sparging and using a BIAB (brew in a bag) method then remove grains from mash tun and twist and squeeze the bag to get as much liquid out of the grains as possible
- as you start sparging (or straining your BIAB bag) begin raising the temperature of your wort to a boil
Step 4 – Boiling
- (Optional) - for this beer we wanted to bump up the starting gravity, so we boiled the wort for an extra half hour BEFORE we added our 90min bittering hops when the “real” boil began!
- At the beginning of the boil add your belgian Candi Syrup
- once your wort begins to boil start a timer for a 90-minute boil and add your bittering hops, 52.7g (1.86 oz) of Northern Brewer
- at 15 minutes left in the boil add 2 whirlfloc tablets (OR granulated whirlfloc 1.5g (0.053 oz)) and 50g (1.76 oz) each of Northern Brewer & Fuggles
Step 5 – Whirlpooling / cooling
- once wort has been boiling for 60 minutes in total turn off your heat source and begin chilling wort down to yeast pitching temperature
- Right after flameout strain out the spices from 1 tincture jar and add it to the boil kettle, then add the tincture liquid directly to the fermenter
- once you’ve reached yeast pitching temperature take an original gravity reading of your wort
Step 6 – Yeast Pitching
- It is best to make a yeast starter before beginning your brew day (ideally 1 day before) to ensure your yeast are as active and healthy as possible before pitching, but not completely necessary – you could also just rehydrate yeast 30 minutes before pitching.
- Wort Aeration (Optional) if you have a paint mixer give your wort a quick blitz before pitching yeast to help add more dissolved oxygen into the wort to help the yeast have a healthier kick start into fermentation
- Now add your tincture of Vanilla extract! (or you can wait till end of fermentation if you prefer)
- Pitch yeast in wort a degree or two higher than the target fermentation temperature to help yeast take off more aggressively
- To make a yeast starter you can use either:
- DME (dry malt extract) at a ratio of approx. 100g per 1L water (3.5 oz per 33 fluid ounces) for gravity of approx. 1.040
- some unfermented wort kept cold and sanitary from a previous brew day
- 70g of table sugar per 1L water (2.5 oz per 33 fluid ounces) – however, it is best to use malt sugar (wort / DME) whenever possible to reduce the chance of shocking the yeast with a different food source from starter to wort pitching
- To rehydrate yeast
- Add yeast to approx. 10 times as much room temperature water as the weight of the yeast e.g. 10g yeast in 100 ml water (0.35 oz yeast in 3.5 fluid ounces water)
Step 7 – Fermentation
- Allow yeast to ferment over the next two weeks (approx.)
- If you have a temperature-controlled system keep the fermenter temperature to the recommended fermentation temperature for each yeast strain (stated in the yeast ingredients section above)
- Monitor the fermentation activity over the first 7-10 days by the bubbling of the blow-off tube/airlock of your fermenter, as the bubbling slows down (roughly around day 10-12) take a gravity reading. When the gravity reaches around 1.024 raise the temperature of your fermenter by 1-2 degrees for 2 days for a diacetyl rest (if you don’t have temperature control don’t worry about this step, it's not the end of the world!)
- At this point strain out your last jar of tincture and add the LIQUID only to your fermenter
- On day 2 of the diacetyl rest (once gravity reaches roughly 1.018) & gravity is the same 3 days in a row move onto cold crashing! (If you can’t / don’t want to cold crash go straight to kegging/bottling your beer!)
Step 8 (optional) – Cold crashing
- begin cold crashing your fermenter (bring the temperature of your fermenter down to as close to 0°C (32°F) as possible, for 2 days to a week depending on how patient you are
- If you don’t have a temp-controlled fermenter, you can cold crash by putting your fermenter in a fridge or temp-controlled chest freezer
- After you have finished cold crashing it's time to keg/bottle your beer! If you are bottling your beer from the fermenter uncarbonated, remember to add about 5-7 grams (0.17 - 0.24 oz) of priming sugar to your bottles to carbonate your beer.

So... What is it?
Beer, aside from dogs its definitely mans best friend, but what happens when a man drinks too much of the frothy goodness... Beer belly! So how do we solve this? we could drink less... (yeah right!) or we can reduce the carbs! Thats where this recipe comes in, a classic, crisp style Aussie lager, BUT with only 6 grams of carbs per serve!
The classic Australian Lager is traditionally an amber-hued beer with a balanced malt profile and slightly bitter hop flavour, typically brewed with Pride of Ringwood hops or its descendants. However with the modern craft movement new world styles of Aussie lager are being made with much fruitier and fresher hop profiles, leaning into the citrusy and tropical flavours found in a lot of new world New Zealand pilsners!
What's ours like?
This Low carb Aussie lager comes in at a very sessionable 4.5% and very easy drinking with a golden hue, light malty body and a very crisp finish! The hop profile is well in balance providing enough bitterness to add to the crispness of the finish, without overpowering the palate. The hops and yeast esters provide a light tropical aroma and flavour of citrus, passionfruit and general fruit-salad making this lager an absolute thirst quencher for a man who loves to grab an ice cold beer on a hot day, but doesn't want to grow his belly!
You can use this Link to calculate your final carbs in your beer after Fermentation! (full credit to andrewmaixner over on the homebrewing sub-Reddit!) - Just make a copy of this excel spreadsheet and whack in your numbers!
Batch Size & Stats
- 19L / 5 gal finished beer
- 26L (6.8 gal) wort
- Starting gravity – 1.037
- Final gravity 1.0024
- ABV – 4.54%
What ingredients?
Water
With sparging
- 15L (3.9 gal) strike water approx. 64°C (147°F)
- 21L (5.5 gal) sparge water at 78°C (172°F)
Without sparging
- 30L (7.9 gal) strike water approx. 64°C (147°F)
Malts
Total Grain Bill 5kg (11 4lb)
- Barret Burston Pilsner malt – 4.1kg (9 lb)
ENZYMES!
- Glucoamylase - 10mL (0.34 oz) - Add during mash step
Hops & whirlfloc tablets
Pride of Ringwood
- 5g (0.17 oz) - 60 minutes left in the boil
- 15g (0.53 oz) - 15 minutes left in the boil
Galaxy
- 15g (0.53 oz) - 15 minutes left in the boil
Topaz
- 15g (0.53 oz) - 15 minutes left in the boil
Whirlfloc
- 1.5g (0.052 oz) / 2 tablets – 15 minutes left in the boil
Yeast options & fermentation temperatures
- SafLager™ S‑23 – ferment at 14°C (57°F) 23g (0.41 oz) / (1 packets) - Fermented under 10 psi pressure (not necessary but a great option)
- Saflager W34-70 – ferment at 14°C (57°F) 23g (0.41 oz) / (1 packets) - Fermented under 10 psi pressure (not necessary but a great option)
Step by step process
Step 1 – Milling
- Mill grains to medium crush (set mill rollers to a gap of approx. 1.00mm / 0.039 inches (credit card width)
- Just keep in mind roller gap settings are not universal so as you brew more batches you will find the ideal crush size for your setup
- Alternatively if you don’t have a grain mill you can order your grains crushed from most homebrew stores, both online and in person
Step 2 – Mashing
Mash for 60 minutes at 64°C (147°F) with 15L (3.9 gal) of strike water
- Set your strike water to a few degrees above the target mash temperature (you can use the calculator in our website for this)
- ensure you mix in the grains thoroughly with a mash paddle to prevent dough balls from forming (big spoons, spatulas or whisks will also work)
- its easier to mash the grains and prevent dough balls if you add a little grain at a time, mix, add more grain and repeat until all the grains are mixed
- after you have mashed in your grains, add your enzymes! 10mL (0.34 oz) of glucoamylase
if you don’t have a mash tun with heating then ensure after you have finished mixing the grains in to insulate your mash tun (thick neoprene or heavy blankets both work well)
Step 3 (optional) – Sparging
- if your setup has the capability to sparge then do so with 21L (5.5 gal) sparge water at 78°C (172°F)
- if you are not sparging and using a BIAB (brew in a bag) method then remove grains from mash tun and twist and squeeze the bag to get as much liquid out of the grains as possible
- as you start sparging (or straining your BIAB bag) begin raising the temperature of your wort to a boil
Step 4 – Boiling
- once your wort begins to boil start a timer for a 60-minute boil and add your bittering hops, 5g (0.17 oz) of Pride of Ringwood
- at 15 minutes left in the boil add 1 whirlfloc tablet (OR granulated whirlfloc 0.7g (0.025 oz)
- at 15 minutes left in the boil add 15g (0.53 oz) each of galaxy, Pride of Ringwood and Topaz
Step 5 – Whirlpooling / cooling
- After 60 mins of boil turn off your heat source start cooling
- Once you’ve reached yeast pitching temperature take an original gravity reading of your wort
Step 6 – Yeast Pitching
- It is best to make a yeast starter before beginning your brew day (ideally 1 day before) to ensure your yeast are as active and healthy as possible before pitching, but not completely necessary – you could also just rehydrate yeast 30 minutes before pitching.
- Wort Aeration (Optional) if you have a paint mixer give your wort a quick blitz before pitching yeast to help add more dissolved oxygen into the wort to help the yeast have a healthier kick start into fermentation
- Now add your tincture of Vanilla extract! (or you can wait till end of fermentation if you prefer)
- Pitch yeast in wort a degree or two higher than the target fermentation temperature to help yeast take off more aggressively
- To make a yeast starter you can use either:
- DME (dry malt extract) at a ratio of approx. 100g per 1L water (3.5 oz per 33 fluid ounces) for gravity of approx. 1.040
- some unfermented wort kept cold and sanitary from a previous brew day
- 70g of table sugar per 1L water (2.5 oz per 33 fluid ounces) – however, it is best to use malt sugar (wort / DME) whenever possible to reduce the chance of shocking the yeast with a different food source from starter to wort pitching
- To rehydrate yeast
- Add yeast to approx. 10 times as much room temperature water as the weight of the yeast e.g. 10g yeast in 100 ml water (0.35 oz yeast in 3.5 fluid ounces water)
Step 7 – Fermentation
- Allow yeast to ferment over the next two weeks (aprox)
- If you have a temperature-controlled system keep the fermenter temperature to the recommended fermentation temperature for each yeast strain (stated in the yeast ingredients section above)
- It's important to note that fermentation times will vary based on your circumstances like temperature, amount of yeast pitched, the healthiness of yeast, the gravity of the wort, pH, etc. so don’t stress be patient and know that these times are just a rough guide
- If you have temp control then when there are 2 days left of fermentation raise the temperature by 2 degrees for a diacetyl rest (once gravity reaches roughly 1.005) & gravity is the same 3 days in a row move onto cold crashing and adding gelatin! (Dont worry cold crashing & gelatin are both optional steps to help clarify your beer)
Step 8 (optional) – Cold crashing & Gelatin
- begin cold crashing your fermenter (bring the temperature of your fermenter down to as close to 0°C (32°F) as possible, for 2 days to a week depending on how patient you are, and add 1-2 teaspoons of gelatin dissolved in boiling water and allowed to cool a bit to your fermenter
- If you don’t have a temp-controlled fermenter, you can cold crash by putting your fermenter in a fridge or temp-controlled chest freezer
- After you have finished cold crashing it's time to keg/bottle your beer! If you are bottling your beer from the fermenter uncarbonated, remember to add about 5-7 grams (0.17 - 0.24 oz) of priming sugar to your bottles to carbonate your beer.

So... What is it?
The Berliner Weisse is a sour wheat beer from (you guessed it) Berlin, Germany! characterized by its slightly sour character and light abv (normally around 3-3.5%) it's a fantastic drop for summer in the beer garden, typically having a very light body, tartness on the tongue, and fresh fruity character. This also makes it a fantastic beer for fruit infusions!
What is ours like?
Well for starters... its Imperial baby! So unlike the traditional 3.5% ours comes in at a whopping 8.4% ABV and is absolutely packed full of the tart sweetness of freshly pureed raspberries!
The mouthfeel is slightly tart & dry, the bitterness leaning on the medium side of things (Perhaps a touch high for what we were going for, I'd reccomend reducing the bittering addition) and the hop character is quite subdued to allow the sour notes and raspberry flavour to shine! The colour is a vibrant fruity red thanks to the huge dump of Raspberry puree added during the end of fermentation which also carried through a load of fresh sweetness to round out the palate!
Batch size & ABV
- 35L / 9.2 gal finished beer
- 38L (10 gal) wort
- Starting gravity – 1.074
- Final gravity 1.01
- ABV – 8.4%
Ingredients
Water
With sparging
- 30L (7.9 gal) strike water, Mash at 66°C (151°F) for 60 mins, strike temp approx. 69°C (156°F) use our calculator for this
- 25L (7.9 gal) sparge water at 78°C (172°F)
Without sparging
- 52L (13.7 gal) strike water, Mash at 66°C (151°F) for 60 mins, strike temp approx. 66°C (151°F) use our calculator for this
Malts
- Pale ale malt – 6.6kg (14.5 lb)
- Wheat malt – 5.4kg (11.9 lb)
- Rice Hulls – 1kg (2.2 lb)
- Raspberry Pure - 6.5kg (14.3 lb) - (1kg (2.2 lb) per 7.3l (1.93 gal) wort)
Hops & whirlfloc tablets
- Northern Brewer - 30g (1 oz) - 60 minutes left in the boil
- Hallertau Huell Melon - 40g (1.4 oz) - 15 minutes left in the boil
- Whirlfloc Tablets - 1 tablet – 15 minutes left in the toil OR granulated whirlfloc 1.4g (0.049 oz)
Yeast options & fermentation temperatures
- Wildbrew™ Philly Sour [Lallemand] – ferment at 20°C (68°F) to 25°C (77°F) 22g (2 packets) (0.77 oz)

Step by step process
Step 1 – Milling
- Mill grains to medium crush (set mill rollers to a gap of approx. 1.00mm / 0.039 inches)
- Just keep in mind roller gap settings are not universal so as you brew more batches you will find the ideal crush size for your setup
- Alternatively if you don’t have a grain mill you can order your grains crushed from most homebrew stores, both online and in person
Step 2 – Mashing
- Mash for 60 minutes at 66°C (151°F)
- Set your strike water to a few degrees above the target mash temperature, you can use our calculator to determine what your strike temperature should be
- ensure you mix in the grains thoroughly with a mash paddle to prevent dough balls from forming (big spoons, spatulas or whisks will also work)
- its easier to mash the grains and prevent dough balls if you add a little grain at a time, mix, add more grain and repeat until all the grains are mixed
- if you don’t have a mash tun with heating then ensure after you have finished mixing the grains in to insulate your mash tun (thick neoprene or heavy blankets both work well)
Step 3 (optional) – Sparging
- if your setup has the capability to sparge then do so with 25L (7.9 gal) sparge water at 78°C (172°F)
- if you are not sparging and using a BIAB (brew in a bag) method then remove grains from mash tun and twist and squeeze the bag to get as much liquid out of the grains as possible
- as you start sparging (or straining your BIAB bag) begin raising the temperature of your wort to a boil
Step 4 – Boiling
- once your wort begins to boil start a timer for a 60-minute boil and add your bittering hops, 30g (1 oz) of Northern Brewer
- at 15 minutes left in the boil add 1 whirlfloc tablet (OR granulated whirlfloc 1.4g (0.049 oz)) and 40g (1.4 oz) of Hallertau Huell Melon
Step 5 – Whirlpooling / cooling
- once wort has been boiling for 60 minutes in total turn off your heat source and begin chilling wort down to yeast pitching temperature
- once you’ve reached yeast pitching temperature take an original gravity reading of your wort
Step 6 – Yeast Pitching
- It is best to make a yeast starter before beginning your brew day (ideally 1 day before) to ensure your yeast are as active and healthy as possible before pitching, but not completely necessary – you could also just rehydrate yeast 30 minutes before pitching.
- Wort Aeration (Optional) if you have a paint mixer give your wort a quick blitz before pitching yeast to help add more dissolved oxygen into the wort to help the yeast have a healthier kick start into fermentation
- Pitch yeast in wort a degree or two higher than the target fermentation temperature to help yeast take off more aggressively
- To make a yeast starter you can use either:
- DME (dry malt extract) at a ratio of approx. 100g per 1L water (3.5 oz per 33 fluid ounces) for gravity of approx. 1.040
- some unfermented wort kept cold and sanitary from a previous brew day
- 70g of table sugar per 1L water (2.5 oz per 33 fluid ounces) – however, it is best to use malt sugar (wort / DME) whenever possible to reduce the chance of shocking the yeast with a different food source from starter to wort pitching
- To rehydrate yeast
- Add yeast to approx. 10 times as much room temperature water as the weight of the yeast e.g. 10g yeast in 100 ml water (0.35 oz yeast in 3.5 fluid ounces water)
Step 7 – Fermentation & Fruit additions!
- Allow yeast to ferment over the next two weeks (aprox)
- If you have a temperature-controlled system keep the fermenter temperature to the recommended fermentation temperature for each yeast strain (stated in the yeast ingredients section above)
- Monitor the fermentation activity over the first 7-10 days by the bubbling of the blow-off tube/airlock of your fermenter, as the bubbling slows down (roughly around day 10-12) take a gravity reading. When the gravity reaches around 1.012 raise the temperature of your fermenter by 1-2 degrees for 2 days for a diacetyl rest (if you don’t have temperature control don’t worry about this step, it's not the end of the world!)
- Time to add fruit! purée 6.5kg (14.3 lb) of Raspberries and throw them all into the fermenter (we used frozen raspberries but if you have fresh raspberries even better!)
- It's important to note that fermentation times will vary based on your circumstances like temperature, amount of yeast pitched, the healthiness of yeast, the gravity of the wort, pH, etc. so don’t stress be patient and know that these times are just a rough guide
- On day 2 of the diacetyl rest (once gravity reaches roughly 1.01) & gravity is the same 3 days in a row move onto cold crashing! (If you can’t / don’t want to cold crash go straight to kegging/bottling your beer!)
Step 8 (optional) – Cold crashing
- begin cold crashing your fermenter (bring the temperature of your fermenter down to as close to 0°C (32°F) as possible, for 2 days to a week depending on how patient you are
- If you don’t have a temp-controlled fermenter, you can cold crash by putting your fermenter in a fridge or temp-controlled chest freezer
- After you have finished cold crashing it's time to keg/bottle your beer! If you are bottling your beer from the fermenter uncarbonated remember to add about 5-7grams (0.17 - 0.24 oz) of priming sugar to your bottles to carbonate your beer.

So... What is it?
A fruited beer is brewed with added fruits during the brewing process, giving it unique flavors, aromas, and sometimes colors. It can include various fruits like berries, citrus, or tropical fruits, resulting in a range of tastes from tart to sweet. Fruit beers come in different styles and are a refreshing alternative to traditional beers, especially in warm weather or as a dessert-like treat. The brewing process can vary, with some using fresh fruits and others relying on concentrates, purees, or extracts to achieve desired flavors.
What's our like?
Here is our Fruited beer! Coming in at 5.8% the Pina Colada Pale Ale is a tropical-inspired fruited beer with a hazy golden colour and a captivating aroma of ripe pineapples and creamy coconut. The beer presents a light touch of acidity and gentle notes of citrus & tangy pineapple, but the real star of the show is the big, bold creamy & slightly nutty coconut body! All this is balanced with a light malt sweetness and very creamy body courtesy of the wheat & oat in the grain bill, followed by a mild hop bitterness. If you are looking for a refreshing and exotic beer that transports you to a tropical paradise with every sip then look no further, this is it!

Batch Size & Stats
- 19L / 5 gal finished beer
- 24L (6.3 gal) wort
- Starting gravity – 1.054
- Final gravity 1.01
- ABV – 5.8%
What ingredients?
Water
With sparging
- 15L (3.9 gal) strike water approx. 66°C (15.8°F)
- 17.5L (4.6 gal) sparge water at 78°C (172°F)
Without sparging
- 30L (7.9 gal) strike water approx. 66°C (15.8°F)
Malts
Total Grain Bill 5kg (10.58 4lb)
- Pale ale malt – 4kg (8.38 lb)
- wheat – 1.05kg (2.3 lb)
- Rolled Oats - 1.05kg (2.3 lb)
- Medium Crystal – 400g (0.88 lb)
- Rice Hulls – 400g (1.1 lb)
Adjuncts
- 450g (15.87 oz) of pureed pineapple (end of fermentation)
- 1kg (1.1 lb) oven toasted coconut shavings (180°C (356°F) for 8 minutes) (half in whirlpool, half end of fermentation)
Hops & whirlfloc tablets
Northern Brewer
- 20g (0.53 oz) - 60 minutes left in the boil
Galaxy
- 40g (1.41 oz) - whirlpool/hop steep after boil for 20 mins at 75°C (167°F)
Azacca
- 40g (1.41 oz) - whirlpool/hop steep after boil for 20 mins at 75°C (167°F)
El Dorado
- 40g (1.41 oz) - whirlpool/hop steep after boil for 20 mins at 75°C (167°F)
Amarillio
- 40g (1.41 oz) - whirlpool/hop steep after boil for 20 mins at 75°C (167°F)
Whirlfloc
- 1.5g (0.052 oz) / 2 tablets – 15 minutes left in the boil
Yeast options & fermentation temperatures
- US-05 – ferment at 20°C (68°F) 23g (0.81 oz) / (2 packets)
- AUS-05 – ferment at 20°C (68°F) 23g (0.81 oz) / (2 packets)
- S-04 – ferment at 18°C (64.4°F) 22g (0.81 oz) / (2 packets)
Step by step process
Step 1 – Milling
- Mill grains to medium crush (set mill rollers to a gap of approx. 1.00mm / 0.039 inches (credit card width)
- Just keep in mind roller gap settings are not universal so as you brew more batches you will find the ideal crush size for your setup
- Alternatively if you don’t have a grain mill you can order your grains crushed from most homebrew stores, both online and in person
Step 2 – Mashing
Mash for 60 minutes at 66°C (150.8°F) with 15L (3.9 gal) of strike water
- Set your strike water to a few degrees above the target mash temperature (you can use the calculator in our website for this)
- ensure you mix in the grains thoroughly with a mash paddle to prevent dough balls from forming (big spoons, spatulas or whisks will also work)
- its easier to mash the grains and prevent dough balls if you add a little grain at a time, mix, add more grain and repeat until all the grains are mixed
if you don’t have a mash tun with heating then ensure after you have finished mixing the grains in to insulate your mash tun (thick neoprene or heavy blankets both work well)
Step 3 (optional) – Sparging
- if your setup has the capability to sparge then do so with 17.5L (4.6 gal) sparge water at 78°C (172°F)
- if you are not sparging and using a BIAB (brew in a bag) method then remove grains from mash tun and twist and squeeze the bag to get as much liquid out of the grains as possible
- as you start sparging (or straining your BIAB bag) begin raising the temperature of your wort to a boil
Step 4 – Boiling
- once your wort begins to boil start a timer for a 60-minute boil and add your bittering hops, 20g (0.53 oz) of Northern Brewer
- at 15 minutes left in the boil add 1 whirlfloc tablet (OR granulated whirlfloc 0.7g (0.025 oz))
- at 10 minutes left in the boil add 15g (0.53 oz) each of amarillio and galaxy
Step 5 – Whirlpooling / cooling
- after 60 mins of boil turn off your heat source and cool wort down to 75°C (167°F) & add 40g (1.41 oz) each of El Dorado, Azacca, Amarillio & Galaxy AND 500g (1.1 lb) of oven toasted coconut shavings (180°C (356°F) for 8 minutes)
- after 20 minutes of hop steeping / whirlpooling cool wort down to yeast pitching temperature & take an original gravity reading of your wort
Step 6 – Yeast Pitching
- It is best to make a yeast starter before beginning your brew day (ideally 1 day before) to ensure your yeast are as active and healthy as possible before pitching, but not completely necessary – you could also just rehydrate yeast 30 minutes before pitching.
- Wort Aeration (Optional) if you have a paint mixer give your wort a quick blitz before pitching yeast to help add more dissolved oxygen into the wort to help the yeast have a healthier kick start into fermentation
- Now add your tincture of Vanilla extract! (or you can wait till end of fermentation if you prefer)
- Pitch yeast in wort a degree or two higher than the target fermentation temperature to help yeast take off more aggressively
- To make a yeast starter you can use either:
- DME (dry malt extract) at a ratio of approx. 100g per 1L water (3.5 oz per 33 fluid ounces) for gravity of approx. 1.040
- some unfermented wort kept cold and sanitary from a previous brew day
- 70g of table sugar per 1L water (2.5 oz per 33 fluid ounces) – however, it is best to use malt sugar (wort / DME) whenever possible to reduce the chance of shocking the yeast with a different food source from starter to wort pitching
- To rehydrate yeast
- Add yeast to approx. 10 times as much room temperature water as the weight of the yeast e.g. 10g yeast in 100 ml water (0.35 oz yeast in 3.5 fluid ounces water)
Step 7 – Fermentation & Fruit Additions!
- Allow yeast to ferment over the next two weeks (aprox)
- If you have a temperature-controlled system keep the fermenter temperature to the recommended fermentation temperature for each yeast strain (stated in the yeast ingredients section above)
- After 7-10 days of fermentation or around 1.012 gravity, its time to ADD FRUIT!
- Add 500g (1.1 lb) of oven toasted coconut shavings (180°C (356°F) for 8 minutes) and 450g (15.87 oz) of pureed pineapple (we used tinned crushed pineapple in syrup) into the fermenter and allow to ferment for another 5 days
- It's important to note that fermentation times will vary based on your circumstances like temperature, amount of yeast pitched, the healthiness of yeast, the gravity of the wort, pH, etc. so don’t stress be patient and know that these times are just a rough guide
- If you have temp control then when there are 2 days left of fermentation raise the temperature by 2 degrees for a diacetyl rest (once gravity reaches roughly 1.014) & gravity is the same 3 days in a row move onto cold crashing! (If you can’t / don’t want to cold crash go straight to kegging/bottling your beer!)
Step 8 (optional) – Cold crashing
- begin cold crashing your fermenter (bring the temperature of your fermenter down to as close to 0°C (32°F) as possible, for 2 days to a week depending on how patient you are
- If you don’t have a temp-controlled fermenter, you can cold crash by putting your fermenter in a fridge or temp-controlled chest freezer
- After you have finished cold crashing it's time to keg/bottle your beer! If you are bottling your beer from the fermenter uncarbonated, remember to add about 5-7 grams (0.17 - 0.24 oz) of priming sugar to your bottles to carbonate your beer.
So... What is it?
A fruited beer is brewed with added fruits during the brewing process, giving it unique flavors, aromas, and sometimes colors. It can include various fruits like berries, citrus, or tropical fruits, resulting in a range of tastes from tart to sweet. Fruit beers come in different styles and are a refreshing alternative to traditional beers, especially in warm weather or as a dessert-like treat. The brewing process can vary, with some using fresh fruits and others relying on concentrates, purees, or extracts to achieve desired flavors.
What's our like?
Here is our Fruited beer! Coming in at 5.8% the Piña colada Sour is a tropical-inspired fruited beer with a hazy golden colour but unlike the pale ale version this one is ALL about the pineapple punch! Huge punchy aromas and flavours of ripe pineapples and gentle acidity punch through with a very suble coconut aftertaste. The acidity of the sour yeast leans pushes this beer to be much fresher & more zesty than its pale ale cousin, with the light coconut and creaminess playing a more subdued background role again balanced by subtle bitterness. So If you are looking for a refreshing and exotic beer that leans way more into full robust pineapple juiciness rather than coconut cream then allow this Piña colada sour to take you to a tropical paradise!
Batch Size & Stats
- 19L / 5 gal finished beer
- 24L (6.3 gal) wort
- Starting gravity – 1.054
- Final gravity 1.01
- ABV – 5.8%
What ingredients?
Water
With sparging
- 15L (3.9 gal) strike water approx. 66°C (15.8°F)
- 17.5L (4.6 gal) sparge water at 78°C (172°F)
Without sparging
- 30L (7.9 gal) strike water approx. 66°C (15.8°F)
Malts
Total Grain Bill 5kg (10.58 4lb)
- Pale ale malt – 4kg (8.38 lb)
- wheat – 1.05kg (2.3 lb)
- Rolled Oats - 1.05kg (2.3 lb)
- Medium Crystal – 400g (0.88 lb)
- Rice Hulls – 400g (1.1 lb)
Adjuncts
- 450g (15.87 oz) of pureed pineapple (end of fermentation)
- 1kg (1.1 lb) oven toasted coconut shavings (180°C (356°F) for 8 minutes) (half in whirlpool, half end of fermentation)
Hops & whirlfloc tablets
Northern Brewer
- 20g (0.53 oz) - 60 minutes left in the boil
Galaxy
- 40g (1.41 oz) - whirlpool/hop steep after boil for 20 mins at 75°C (167°F)
Azacca
- 40g (1.41 oz) - whirlpool/hop steep after boil for 20 mins at 75°C (167°F)
El Dorado
- 40g (1.41 oz) - whirlpool/hop steep after boil for 20 mins at 75°C (167°F)
Amarillio
- 40g (1.41 oz) - whirlpool/hop steep after boil for 20 mins at 75°C (167°F)
Whirlfloc
- 1.5g (0.052 oz) / 2 tablets – 15 minutes left in the boil
Yeast options & fermentation temperatures
- WildBrew Philly Sour – ferment at 25°C (77°F) 11g (0.39 oz) / (1 packets)
Step by step process
Step 1 – Milling
- Mill grains to medium crush (set mill rollers to a gap of approx. 1.00mm / 0.039 inches (credit card width)
- Just keep in mind roller gap settings are not universal so as you brew more batches you will find the ideal crush size for your setup
- Alternatively if you don’t have a grain mill you can order your grains crushed from most homebrew stores, both online and in person
Step 2 – Mashing
Mash for 60 minutes at 66°C (150.8°F) with 15L (3.9 gal) of strike water
- Set your strike water to a few degrees above the target mash temperature (you can use the calculator in our website for this)
- ensure you mix in the grains thoroughly with a mash paddle to prevent dough balls from forming (big spoons, spatulas or whisks will also work)
- its easier to mash the grains and prevent dough balls if you add a little grain at a time, mix, add more grain and repeat until all the grains are mixed
if you don’t have a mash tun with heating then ensure after you have finished mixing the grains in to insulate your mash tun (thick neoprene or heavy blankets both work well)
Step 3 (optional) – Sparging
- if your setup has the capability to sparge then do so with 17.5L (4.6 gal) sparge water at 78°C (172°F)
- if you are not sparging and using a BIAB (brew in a bag) method then remove grains from mash tun and twist and squeeze the bag to get as much liquid out of the grains as possible
- as you start sparging (or straining your BIAB bag) begin raising the temperature of your wort to a boil
Step 4 – Boiling
- once your wort begins to boil start a timer for a 60-minute boil and add your bittering hops, 20g (0.53 oz) of Northern Brewer
- at 15 minutes left in the boil add 1 whirlfloc tablet (OR granulated whirlfloc 0.7g (0.025 oz))
- at 10 minutes left in the boil add 15g (0.53 oz) each of amarillio and galaxy
Step 5 – Whirlpooling / cooling
- after 60 mins of boil turn off your heat source and cool wort down to 75°C (167°F) & add 40g (1.41 oz) each of El Dorado, Azacca, Amarillio & Galaxy AND 500g (1.1 lb) of oven toasted coconut shavings (180°C (356°F) for 8 minutes)
- after 20 minutes of hop steeping / whirlpooling cool wort down to yeast pitching temperature & take an original gravity reading of your wort
Step 6 – Yeast Pitching
- It is best to make a yeast starter before beginning your brew day (ideally 1 day before) to ensure your yeast are as active and healthy as possible before pitching, but not completely necessary – you could also just rehydrate yeast 30 minutes before pitching.
- Wort Aeration (Optional) if you have a paint mixer give your wort a quick blitz before pitching yeast to help add more dissolved oxygen into the wort to help the yeast have a healthier kick start into fermentation
- Now add your tincture of Vanilla extract! (or you can wait till end of fermentation if you prefer)
- Pitch yeast in wort a degree or two higher than the target fermentation temperature to help yeast take off more aggressively
- To make a yeast starter you can use either:
- DME (dry malt extract) at a ratio of approx. 100g per 1L water (3.5 oz per 33 fluid ounces) for gravity of approx. 1.040
- some unfermented wort kept cold and sanitary from a previous brew day
- 70g of table sugar per 1L water (2.5 oz per 33 fluid ounces) – however, it is best to use malt sugar (wort / DME) whenever possible to reduce the chance of shocking the yeast with a different food source from starter to wort pitching
- To rehydrate yeast
- Add yeast to approx. 10 times as much room temperature water as the weight of the yeast e.g. 10g yeast in 100 ml water (0.35 oz yeast in 3.5 fluid ounces water)
Step 7 – Fermentation & Fruit Additions!
- Allow yeast to ferment over the next two weeks (aprox)
- If you have a temperature-controlled system keep the fermenter temperature to the recommended fermentation temperature for each yeast strain (stated in the yeast ingredients section above)
- After 7-10 days of fermentation or around 1.012 gravity, its time to ADD FRUIT!
- Add 500g (1.1 lb) of oven toasted coconut shavings (180°C (356°F) for 8 minutes) and 450g (15.87 oz) of pureed pineapple (we used tinned crushed pineapple in syrup) into the fermenter and allow to ferment for another 5 days
- It's important to note that fermentation times will vary based on your circumstances like temperature, amount of yeast pitched, the healthiness of yeast, the gravity of the wort, pH, etc. so don’t stress be patient and know that these times are just a rough guide
- If you have temp control then when there are 2 days left of fermentation raise the temperature by 2 degrees for a diacetyl rest (once gravity reaches roughly 1.014) & gravity is the same 3 days in a row move onto cold crashing! (If you can’t / don’t want to cold crash go straight to kegging/bottling your beer!)
Step 8 (optional) – Cold crashing
- begin cold crashing your fermenter (bring the temperature of your fermenter down to as close to 0°C (32°F) as possible, for 2 days to a week depending on how patient you are
- If you don’t have a temp-controlled fermenter, you can cold crash by putting your fermenter in a fridge or temp-controlled chest freezer
- After you have finished cold crashing it's time to keg/bottle your beer! If you are bottling your beer from the fermenter uncarbonated, remember to add about 5-7 grams (0.17 - 0.24 oz) of priming sugar to your bottles to carbonate your beer.

So... What is it?
XPA beers are known for their lighter color, often golden to light amber, which is achieved by using paler malts. The defining characteristic of XPA is the generous use of hops, typically showcasing a variety of hop flavors and aromas, typically sitting between 4.5-5.5%. This results in a beer that is more hop-forward than a standard Pale Ale but not as intense as an India Pale Ale (IPA).
What's our like?
Well first and foremost, we stuffed up! there was a couple hiccups on the brew-day which resulted in the aroma and whirlpool (flameout hops) steeping for too long at too high a temperature, so end result was an XPA that was just wayyy too bitter! But ignoring that the actual zesty fresh fruit and citrus flavours of the hops came punching through, the colour was a little dark despite the body being very balanced and the abv finished at a relatively sessionable 5.5%, so all in all a great summer beer for when you want a bit more than just a pale ale, but not quite a full IPA!
I would recommend taking note of the adjustments we would make to our recipe before brewing this one like we did in the video! notes below!
POST BREW GRAIN ALTERATIONS
- In hindsight we would swap out the medium crystal with either honey malt or toffee malt for a lighter colour and sweetness
POST BREW HOPS ALTERATIONS
- Instead of adding hops at 10 minutes left, instead add those hops to the flameout hops and only hop steep for 15 mins
OR - add the hops as in the recipe, but before adding the flameout hops drop the temperature of the wort down to 75-80°C (167-176°F) then add the flameout hops for hop steeping
Batch Size & Stats
- 19L / 5 gal finished beer
- 24L (6.3 gal) wort
- Starting gravity – 1.051
- Final gravity 1.009
- ABV – 5.5%
What ingredients?
Water
With sparging
- 15L (3.9 gal) strike water approx. 66°C (15.8°F)
- 20L (5.2 gal) sparge water at 78°C (172°F)
Without sparging
- 30L (7.9 gal) strike water approx. 66°C (15.8°F)
Malts
Total Grain Bill 5kg (11 4lb)
- Pale ale malt – 3.8kg (8.38 lb)
- wheat – 800g (1.76 lb)
- Medium Crystal - 200g (0.44 lb)
- Carapils malt – 200g (0.44 lb)
POST BREW ALTERATION - In hindsight we would swap out the medium crystal with either honey malt or toffee malt for a lighter colour and sweetness
Hops & whirlfloc tablets
Chinook
- 15g (0.53 oz) - 60 minutes left in the boil
Galaxy
- 15g (0.53 oz) - 10 minutes left in the boil
- 20g (0.7 oz) - hop steep at flameout for 20 mins
- 20g (0.7 oz) - dry hop near end of fermentation
Amarillio
- 15g (0.53 oz) - 10 minutes left in the boil
- 20g (0.7 oz) - hop steep at flameout for 20 mins
- 20g (0.7 oz) - dry hop near end of fermentation
Whirlfloc
- 1.5g (0.052 oz) / 2 tablets – 15 minutes left in the boil
Yeast options & fermentation temperatures
- US-05 – ferment at 20°C (68°F) 23g (0.81 oz) / (2 packets)
- AUS-05 – ferment at 20°C (68°F) 23g (0.81 oz) / (2 packets)
- S-04 – ferment at 18°C (64.4°F) 22g (0.81 oz) / (2 packets)
Step by step process
Step 1 – Milling
- Mill grains to medium crush (set mill rollers to a gap of approx. 1.00mm / 0.039 inches (credit card width)
- Just keep in mind roller gap settings are not universal so as you brew more batches you will find the ideal crush size for your setup
- Alternatively if you don’t have a grain mill you can order your grains crushed from most homebrew stores, both online and in person
Step 2 – Mashing
Mash for 60 minutes at 66°C (150.8°F) with 15L (3.9 gal) of strike water
- Set your strike water to a few degrees above the target mash temperature (you can use the calculator in our website for this)
- ensure you mix in the grains thoroughly with a mash paddle to prevent dough balls from forming (big spoons, spatulas or whisks will also work)
- its easier to mash the grains and prevent dough balls if you add a little grain at a time, mix, add more grain and repeat until all the grains are mixed
if you don’t have a mash tun with heating then ensure after you have finished mixing the grains in to insulate your mash tun (thick neoprene or heavy blankets both work well)
Step 3 (optional) – Sparging
- if your setup has the capability to sparge then do so with 20L (5.2 gal) sparge water at 78°C (172°F)
- if you are not sparging and using a BIAB (brew in a bag) method then remove grains from mash tun and twist and squeeze the bag to get as much liquid out of the grains as possible
- as you start sparging (or straining your BIAB bag) begin raising the temperature of your wort to a boil
Step 4 – Boiling
- once your wort begins to boil start a timer for a 60-minute boil and add your bittering hops, 15g (0.53 oz) of Chinook
- at 15 minutes left in the boil add 1 whirlfloc tablet (OR granulated whirlfloc 0.7g (0.025 oz)
- at 10 minutes left in the boil add 15g (0.53 oz) each of amarillio and galaxy
- after 60 mins of boil turn off your heat source and add 20g (0.7 oz) of galaxy & amarillio and allow to steep for 20 minutes
POST BREW ALTERATION - In hind sight we would reccomend making 1 of 2 changes!
- Instead of adding hops at 10 minutes left, instead add those hops to the flameout hops and only hop steep for 15 mins
OR - add the hops as in the recipe, but before adding the flameout hops drop the temperature of the wort down to 75-80°C (167-176°F) then add the flameout hops for hop steeping
Step 5 – Whirlpooling / cooling
- After 20 mins total of hop steeping begin chilling wort down to yeast pitching temperature
- once you’ve reached yeast pitching temperature take an original gravity reading of your wort
Step 6 – Yeast Pitching
- It is best to make a yeast starter before beginning your brew day (ideally 1 day before) to ensure your yeast are as active and healthy as possible before pitching, but not completely necessary – you could also just rehydrate yeast 30 minutes before pitching.
- Wort Aeration (Optional) if you have a paint mixer give your wort a quick blitz before pitching yeast to help add more dissolved oxygen into the wort to help the yeast have a healthier kick start into fermentation
- Now add your tincture of Vanilla extract! (or you can wait till end of fermentation if you prefer)
- Pitch yeast in wort a degree or two higher than the target fermentation temperature to help yeast take off more aggressively
- To make a yeast starter you can use either:
- DME (dry malt extract) at a ratio of approx. 100g per 1L water (3.5 oz per 33 fluid ounces) for gravity of approx. 1.040
- some unfermented wort kept cold and sanitary from a previous brew day
- 70g of table sugar per 1L water (2.5 oz per 33 fluid ounces) – however, it is best to use malt sugar (wort / DME) whenever possible to reduce the chance of shocking the yeast with a different food source from starter to wort pitching
- To rehydrate yeast
- Add yeast to approx. 10 times as much room temperature water as the weight of the yeast e.g. 10g yeast in 100 ml water (0.35 oz yeast in 3.5 fluid ounces water)
Step 7 – Fermentation & Dry Hopping
- Allow yeast to ferment over the next two weeks (aprox)
- If you have a temperature-controlled system keep the fermenter temperature to the recommended fermentation temperature for each yeast strain (stated in the yeast ingredients section above)
- After 7 days of fermentation or around 1.011 gravity, its time to dry hop, add 20g (0.7 oz) each of galaxy and amarillio and allow fermentation to continue for a further 4 days
- It's important to note that fermentation times will vary based on your circumstances like temperature, amount of yeast pitched, the healthiness of yeast, the gravity of the wort, pH, etc. so don’t stress be patient and know that these times are just a rough guide
- If you have temp control then when there are 2 days left of fermentation raise the temperature by 2 degrees for a diacetyl rest (once gravity reaches roughly 1.014) & gravity is the same 3 days in a row move onto cold crashing! (If you can’t / don’t want to cold crash go straight to kegging/bottling your beer!)
Step 8 (optional) – Cold crashing
- begin cold crashing your fermenter (bring the temperature of your fermenter down to as close to 0°C (32°F) as possible, for 2 days to a week depending on how patient you are
- If you don’t have a temp-controlled fermenter, you can cold crash by putting your fermenter in a fridge or temp-controlled chest freezer
- After you have finished cold crashing it's time to keg/bottle your beer! If you are bottling your beer from the fermenter uncarbonated, remember to add about 5-7 grams (0.17 - 0.24 oz) of priming sugar to your bottles to carbonate your beer.
So... What is it?
The Pale Ale is one of the most common and popular beer varieties on the planet! typically a golden sometimes amber coloured ale with low to moderate bitterness, a balanced malt profile and hop forward flavours and aromas. Typically sitting between 4.2%-5.5% ABV its a very drinkable and sessionable style of beer.
What's ours like?
This particular recipe is designed to be a really quick and easy brewday for people who have never brewed before or have only just gotten into home brewing. It allows you to combine all the ease of extract brewing, with an element of all grain, requiring minimal start up costs, equipment and ingredients, but providing you with the ability to really make this recipe your own and make some awesome homebrew pale ale! Coming in at 4.7% it sits in the middle of the ABV scale for the style. On the hops side we use Galaxy for a fresh, tropical, citrusy, passionfruit flavour profile, balanced by a light malt base for easy sessionable drinking.
Batch Size & Stats
- 24L (6.3 gal)
- Starting gravity – 1.040
- Final gravity 1.004
- ABV – 4.7%
What ingredients?
Equipment required
- large cooking pot (anything between 4-20L (1-5 gal) will work)
- hydrometer
- measuring cylinder
- Stellarsan
- mixing spoon
- 2 hop socks or grain bags
- fermenter (a regular food safe sealable bucket will do)
- airlock
- bucket tap (optional but very useful)
- about 24 750ml (25 oz) bottles OR 44 500ml (17 oz) bottles
- PET bottles & resealable flip top bottles are both good options
Water
- 30L (7.9 gal) for a 66°C (151°F) mash (you can use our strike water calculator to find your ideal strike temp)
Malts:
- Pale ale extract Kit – (we used Coopers pale ale, but any pale ale extract will work!)
- Medium Crystal Malt – 200g (7 oz) - 30 mins soak at 70°C (158°F)
- dextrose OR dried malt extract (id recommend DME over dextrose) - 1kg (2.2 lbs)
Hops & whirlfloc tablets
Galaxy
- 40g (1.4 oz) - 20 minutes soak at 70°C (158°F)
- 20g (0.7 oz) - dry hop 2 days before bottling (Optional!)
Yeast options & bottling sugar
- Yeast packet from the extract kit (what we did!) - Ferment at 18°C / room temp (64.4°F)
- 11g US-05 – ferment at 19°C (66°F)
- 11g S-04 – ferment at 18°C (64.4°F)
- some regular table sugar OR carbonation drops for carbonating your finished beer

Step by step process
Before starting!
Wash all your pots, buckets, bottles and anything that will come into contact with your beer with a solution of stellarsan (easy to use and you dont have to rinse) or dishwashing detergent (just make sure you thoroughly rinse off if using detergent), we want yeast to grow not bacteria!
Step 1 – Milling
- Mill grains to medium crush (set mill rollers to a gap of approx. 1.00mm / 0.039 inches)
- Just keep in mind roller gap settings are not universal so as you brew more batches you will find the ideal crush size for your setup
- Alternatively if you don’t have a grain mill you can order your grains crushed from most homebrew stores, both online and in person
Step 2 – Mashing
- pour 200g (7 oz) of crushed Medium Crystal Malt into the hop sock / grain bag
- in a pot measure out a portion of your 22L (5.8 gal) of water - anywhere between 3-10L (0.8-2.6 gal) will work fine (just note its easier to keep more liquid at a stable temperature than less liquid)
- heat up your pot of water to about 70°C (158°F), drop your grain bag into the pot and start your stop watch for 30 minutes
- check the temperature of your pot every now and then and turn the heat back on if needed to keep it around 70°C (158°F) - just make sure when your heat is on the grain bag doesnt sit at the bottom of the pot or it will burn! so keep stirring and stop the bag from touching the bottom of the pot while the heat is on!
Step 4 – Hop Additions
- In your other hop sock / grain bag pour in 20g (0.52 oz) of Galaxy hops
- when your stop watch is at 10 minutes drop your hops into the pot, they will soak in there with the grains for the remaining 20 minutes
- once soaking has gone for 30 minutes total remove both the hops and grains and turn off your heat source
Step 5 – Making the wort
Wort is the sugary syrup made from grain sugars and water which will be fermented into beer! to make your wort for this recipe follow the below
- open your extract kit and scoop/pour out all the syrup into your pot of hot water (remember to take both the grain and hop bags out first!) and stir the mixture until the syrup is fully dissolved
- it helps to pour some hot water in the tin to get some extra syrup out!
Step 6 – Cooling / topping up the water
- now pour both your wort and the remainder of your unused water into your fermenter to bring it up to a total of about 24L (6.3 gal)
- Dont fill your fermenter right to the top! beer foams up when it ferments so make sure you use a fermenter big enough to leave 30% head room! (for this batch a 30L (7.9 gal) fermenter will do)
- now take a gravity reading with your hydrometer by gently dropping it into your wort and giving it a spin, record this number, this is your Original gravity and it is how we will determine the final ABV (alcohol percentage) of your beer!
- just note hydrometers are calibrated to work at 20°C so if your wort was hotter or colder than this when you take the reading use our correction calculator
Step 7 – Yeast Pitching
- check the temperature of your wort in your fermenter, once it has reach about 18-21°C (64-70°F) pour your packet of yeast into the fermenter
- now seal your fermenter and remember to pour a little bit of water into your airlock to make it air tight
Step 8 – Fermentation & dry hopping
- Allow yeast to ferment over the next two weeks (aprox)
- if you would like you can add some more hops into the fermenter around day 7, we added 20g, just open your fermenter, throw your hops straight in and close your fermenter
- after about 7-10 days take a small sample of beer from your fermenter into a measuring cylinder and drop in your hydromter (give it a spin to bubbles dont push it up and ruin the reading)
- record this reading, and take the same measurement the next day, when the reading is the same 3 days in a row fermentation has finished!
Step 9 – Bottling
- It's time to bottle your beer! add about 5-7 grams (0.17 - 0.24 oz) of priming sugar or 1 carbonation drop to your bottles to carbonate your beer if you are using 330-375ml (11 - 12.6 oz) bottles, double this for 750ml (25 oz) bottles
- now allow the residual amounts of yeast to ferment that little sugar addition over the next 2 weeks inside the bottle to carbonate your beer. After that its steady to drink!
So... What is it?
The Chocolate stout is a rich beer that combines the robustness of stout with luscious chocolate. Its roots date back to the 18th century, gaining popularity in England. This decadent brew features a velvety texture, dark color, and a delightful aroma blending roasted malt notes with hints of cocoa and espresso. The flavor offers a harmonious mix of bittersweet chocolate, roasted malts, and subtle caramel undertones, creating a satisfying complexity for beer enthusiasts seeking a luxurious treat.
What's ours like?
Ours is packed full of chocolate like you wouldn't believe! on the nose its all dark choc and fresh baked dark bread. The palate its far less bitter and astringent than what you would usually get in a stout that uses heavily roasted malts and leans more into dark chocolate rather than espresso or cold drip coffee. Coming in at a moderate 5.7% its easy drinking for a dark beer, but if we couldve changed a couple thing with this brewday we would add more chocolate malt, Oats and increase the mash temp to 69°C (156°F) to give a little more body and mouthfeel!
Batch Size & Stats
- 38L (2 19L corny kegs) / 10 gal finished beer
- 49L (13.2 gal) wort
- For a smaller 19L (5 gal) batch size simply half the ingredients of this recipe
- Starting gravity – 1.066
- Final gravity 1.015
- ABV – 5.7% (before rum addition) – 7.2% (after rum addition)
- You can use this website to calculate final ABV after rum addition Vinocalc
What ingredients?
Water
With sparging
- 30L (7.9 gal) strike water for a 67°C (152°F) 60 min mash (you can use our calculator to measure ideal temp for strike)
- 30L (7.9 gal) sparge water at 78°C (172°F)
Without sparging
- 57L (15 gal) strike water for a 67°C (152°F) 60 min mash (you can use our calculator to measure ideal temp for strike)
Post brew edits / potential changes thoughts: perhaps mash at 69°C (156°F) to give more body
Malts:
- Light Munich – 8.625kg (19 lb)
- Big O (oat malt) – 1.575kg (3.47 lb)
- Golden Naked Oats – 840g (1.85 lb)
- Medium Crystal Malt – 480g (1.05 lb)
- Dark Chocolate – 480g (1.05 lb)
Post brew edits / potential changes thoughts: for more body and darker colour
- increase dark chocolate to 624g (1.38 lb)
- add wheat malt 840g (1.85 lb)
Hops & whirlfloc tablets
Northern Brewer
- 20g (0.7 oz) - 60 minutes left in the boil
- 50g (1.76 oz) 15 minutes left in the boil
Fuggles
- 50g (1.76 oz) 15 minutes left in the boil
Whirlfloc tablets
- 1.5g (0.052 oz) / 2 tablets – 15 minutes left in the boil
Adjuncts
Cocoa Nibs (lightly crushed with either mortar & pestle or food processor and toasted at 180°C (356°F) for 5 mins
- 500g (1.1 lb) – 5 minutes left in the boil
- 500g (1.1 lb) – soaked in 700ml of rum for at least a week – “dry hop” fermenter when fermentation is close to finished (e.g. 1.020) around day 7-10
Yeast options & fermentation temperatures
- US-05 – ferment at 20°C (68°F) 23g (0.81 oz) / (2 packets)
- AUS-05 – ferment at 20°C (68°F) 23g (0.81 oz) / (2 packets)
- S-04 – ferment at 18°C (64.4°F) 22g (0.81 oz) / (2 packets)
Step by step process
Step 1 – Milling
- Mill grains to medium crush (set mill rollers to a gap of approx. 1.00mm / 0.039 inches)
- Just keep in mind roller gap settings are not universal so as you brew more batches you will find the ideal crush size for your setup
- Alternatively if you don’t have a grain mill you can order your grains crushed from most homebrew stores, both online and in person
Step 2 – Mashing
- Mash for 60 minutes at 67°C (152°F)
- Set your strike water to a few degrees above the target mash temperature, you can use our calculator to determine what your strike temperature should be
- ensure you mix in the grains thoroughly with a mash paddle to prevent dough balls from forming (big spoons, spatulas or whisks will also work)
- its easier to mash the grains and prevent dough balls if you add a little grain at a time, mix, add more grain and repeat until all the grains are mixed
- if you don’t have a mash tun with heating then ensure after you have finished mixing the grains in to insulate your mash tun (thick neoprene or heavy blankets both work well)
Step 3 (optional) – Sparging
- if your setup has the capability to sparge then do so with 30L (7.9 gal) sparge water at 78°C (172°F)
- if you are not sparging and using a BIAB (brew in a bag) method then remove grains from mash tun and twist and squeeze the bag to get as much liquid out of the grains as possible
- as you start sparging (or straining your BIAB bag) begin raising the temperature of your wort to a boil
Step 4 – Boiling
- once your wort begins to boil start a timer for a 60-minute boil and add your bittering hops, 20g (0.7 oz) of Northern Brewer
- at 15 minutes left in the boil add 2.5 whirlfloc tablets & remaining hops, 50g (1.76 oz) each of Northern Brewer & Fuggles
Step 5 – Whirlpooling / cooling
- once wort has been boiling for 60 minutes in total turn off your heat source and begin chilling wort down to yeast pitching temperature
- once you’ve reached yeast pitching temperature take an original gravity reading of your wort
Step 6 – Yeast Pitching
- It is best to make a yeast starter before beginning your brew day (ideally 1 day before) to ensure your yeast are as active and healthy as possible before pitching, but not completely necessary – you could also just rehydrate yeast 30 minutes before pitching.
- Pitch yeast in wort a degree or two higher than the target fermentation temperature to help yeast take off more aggressively
- To make a yeast starter you can use either:
- DME (dry malt extract) at a ratio of approx. 100g per 1L water (3.5 oz per 33 fluid ounces) for gravity of approx. 1.040
- some unfermented wort kept cold and sanitary from a previous brew day
- 70g of table sugar per 1L water (2.5 oz per 33 fluid ounces) – however, it is best to use malt sugar (wort / DME) whenever possible to reduce the chance of shocking the yeast with a different food source from starter to wort pitching
- To rehydrate yeast
- Add yeast to approx. 10 times as much room temperature water as the weight of the yeast e.g. 10g yeast in 100 ml water (0.35 oz yeast in 3.5 fluid ounces water)
Step 7 – Fermentation
- Allow yeast to ferment over the next week to two weeks
- If you have a temperature-controlled system keep the fermenter temperature to the recommended fermentation temperature for each yeast strain (stated in the yeast ingredients section above)
- Monitor the fermentation activity over the first 7 days by the bubbling of the blow off tube / airlock of your fermenter, as the bubbling slows down (roughly around day 7) take a gravity reading. If its around 1.020 – 1.025 “dry hop” with rum soaked cocoa nibs
- When the gravity reaches around 1.018 raise the temperature of your fermenter by 1-2 degrees for 2 days for a diacetyl rest (if you don’t have temperature control don’t worry about this step, its not the end of the world!)
- Its important to note that fermentation times will vary based on your circumstances like, temperature, amount of yeast pitched, healthiness of yeast, gravity of wort, pH etc. so don’t stress be patient and know that these times are just a rough guide
- Two days after dry hopping take a gravity reading, fermentation should finish at about 1.015, if you haven’t reached this yet wait another day and take another reading, once the gravity is the same 2 days in a row move onto cold crashing! (If you can’t / don’t want to cold crash go straight to kegging/bottling your beer!)
Step 8 (optional) – Cold crashing
- begin cold crashing your fermenter (bring the temperature of your fermenter down to as close to 0°C (32°F) as possible, for 2 days to a week depending on how patient you are
- If you don’t have a temp-controlled fermenter, you can cold crash by putting your fermenter in a fridge or temp-controlled chest freezer
- After you have finished cold crashing it's time to keg/bottle your beer! If you are bottling your beer from the fermenter uncarbonated remember to add about 5-7 grams (0.17 - 0.24 oz) of priming sugar to your bottles to carbonate your beer.