
So... What is it?
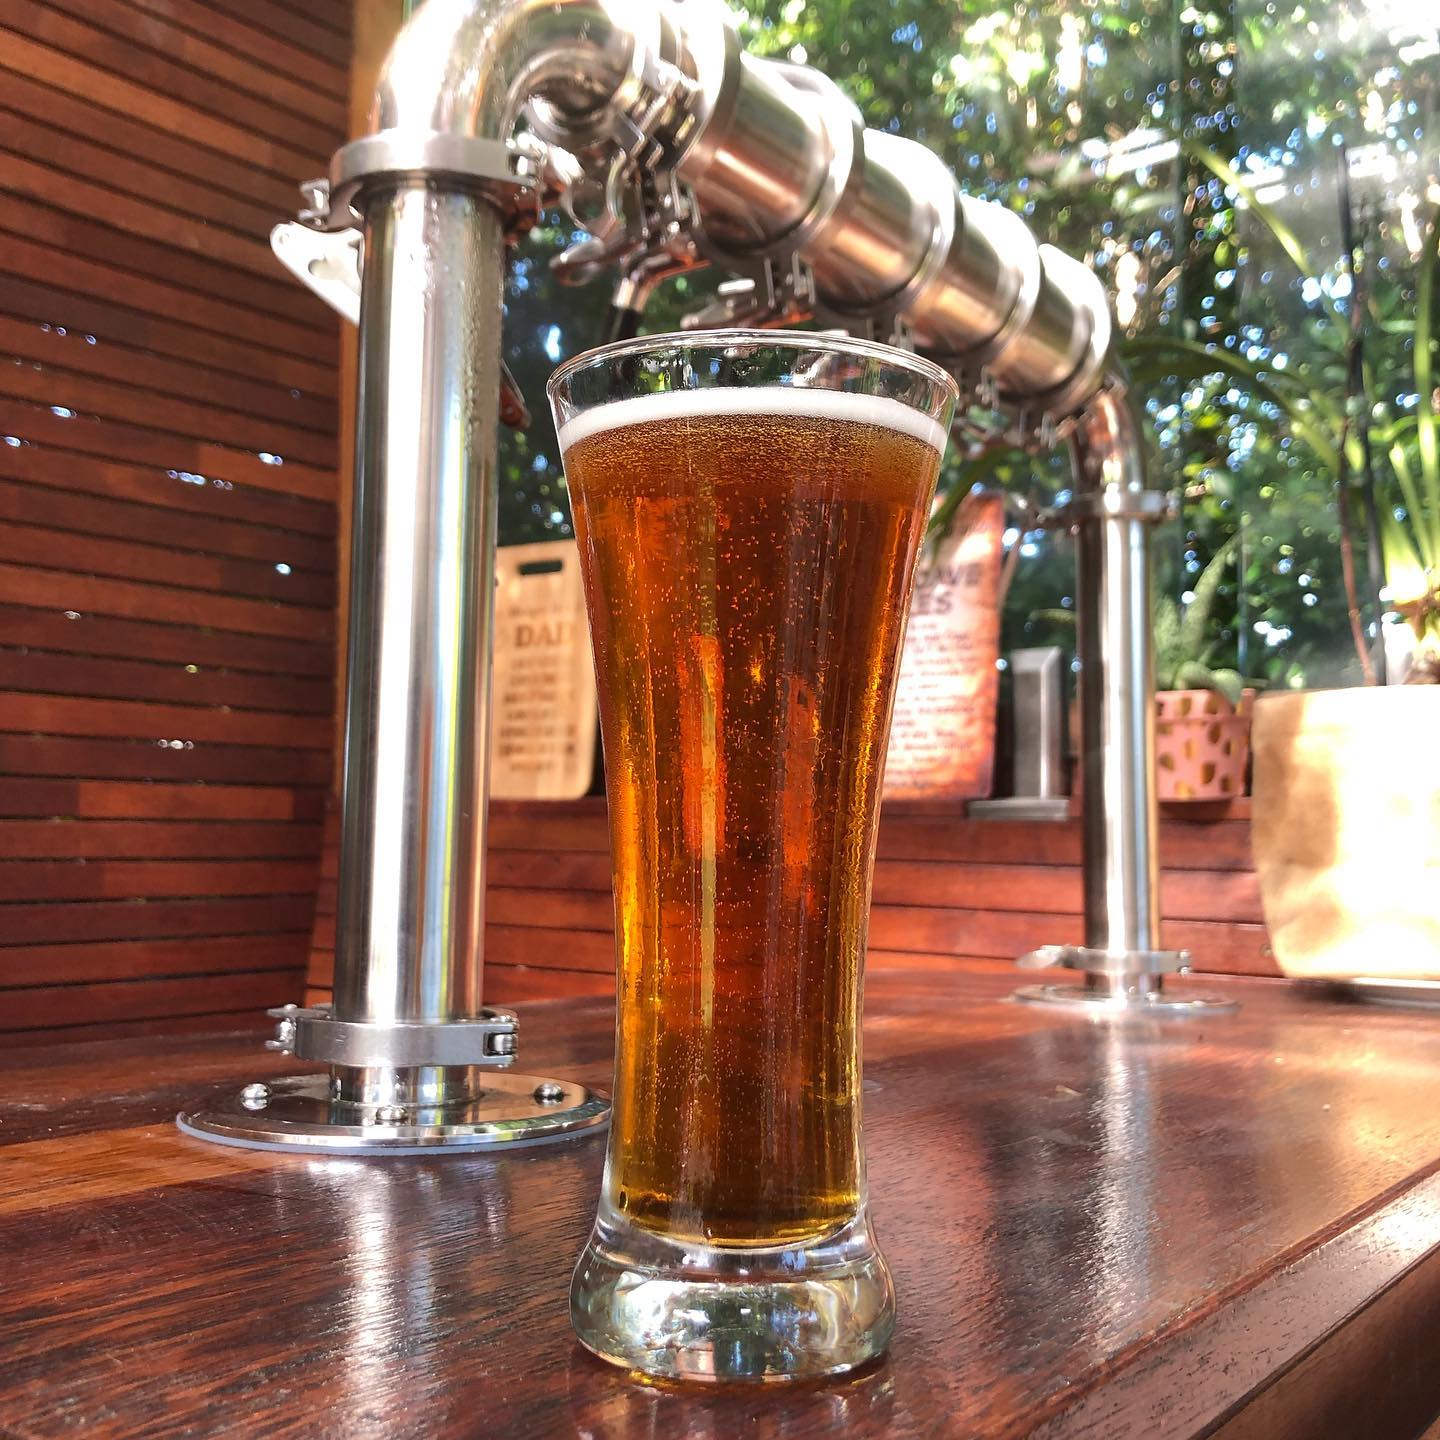
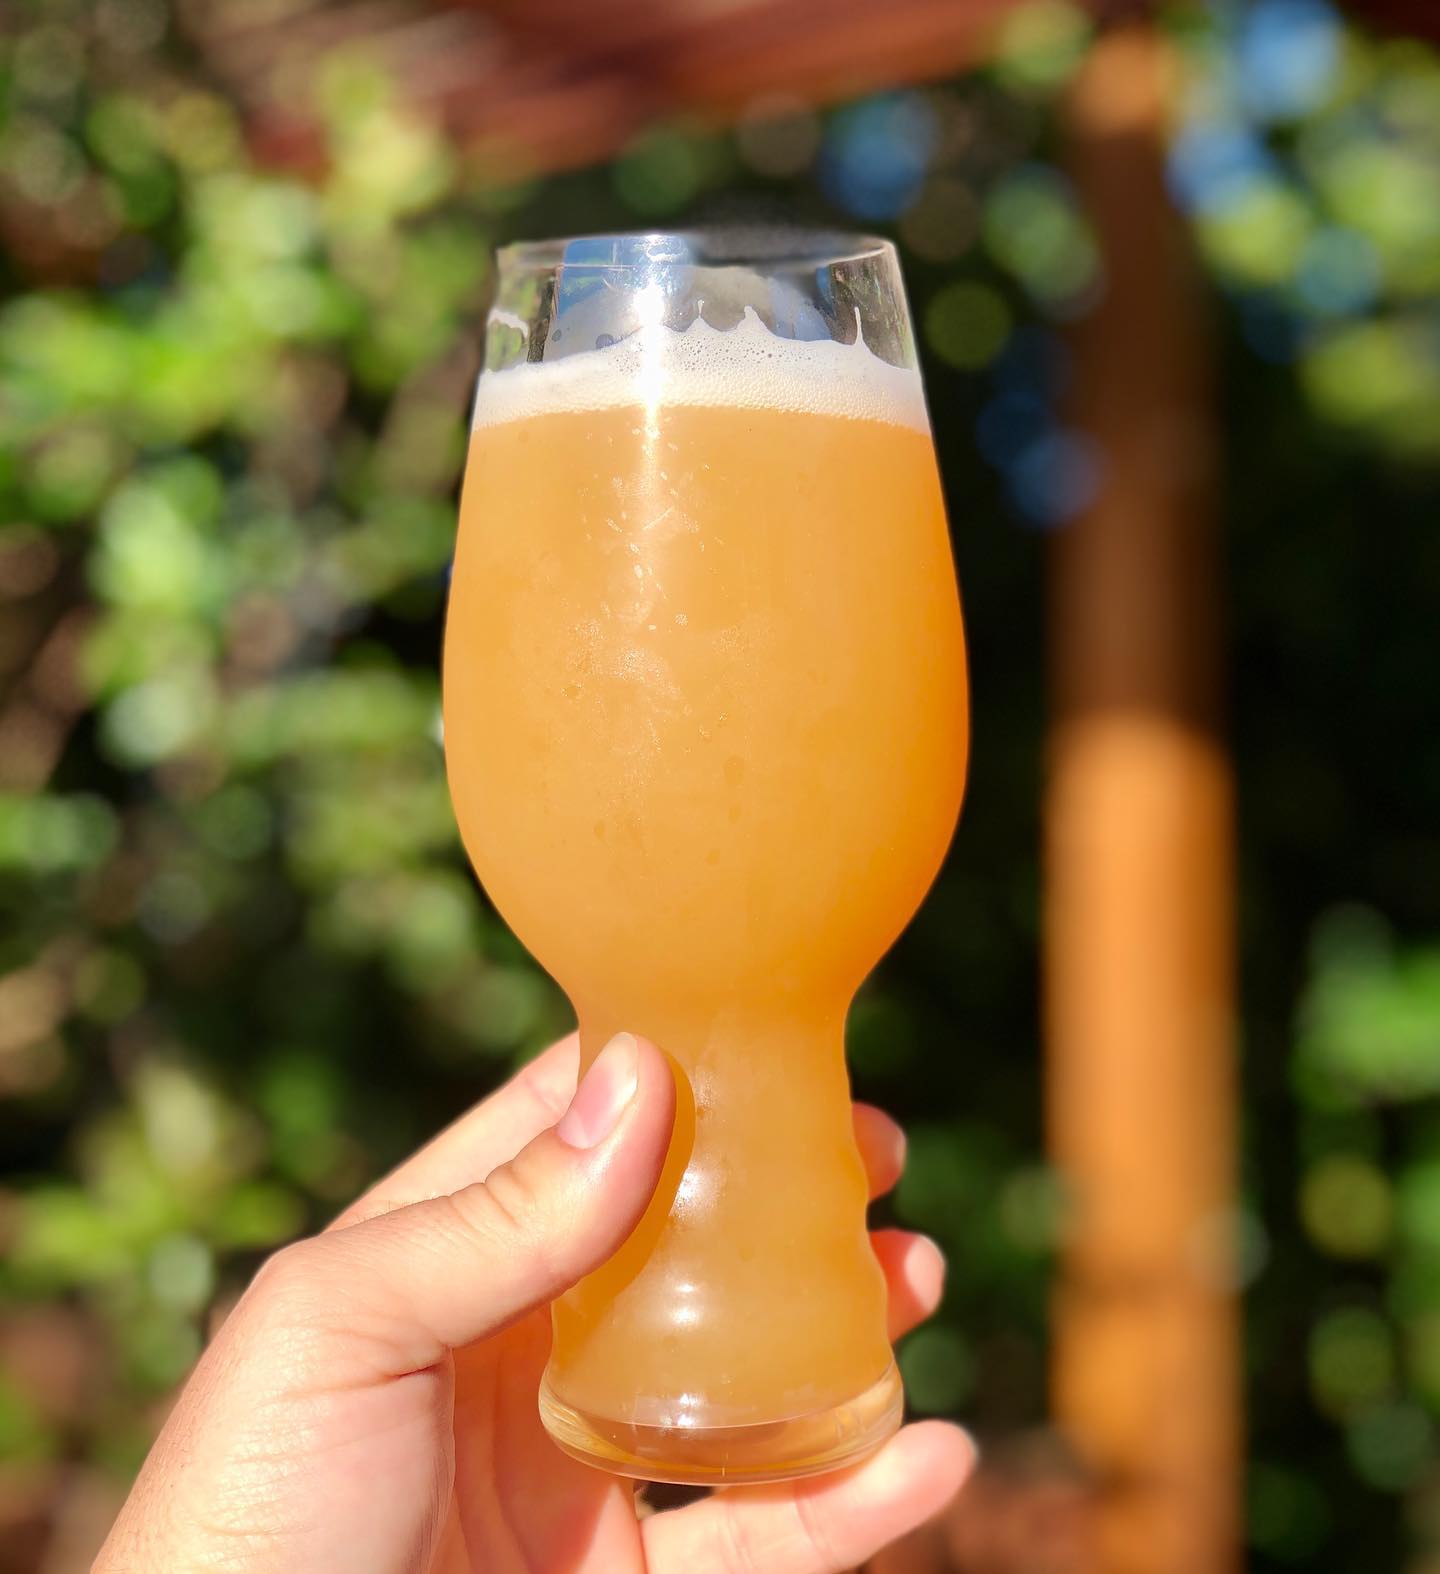
The Australian Pale Ale is a vibrant beer that captures the essence of the Land Down Under. Its flavor combines tropical fruit and citrus with a balanced hop bitterness and malt sweetness. The aroma offers hints of mango, passionfruit, and grapefruit, alongside a subtle caramel undertone. This style has its roots in Australia's brewing history and represents our nations diverse hop varieties, love for beer and adventurous spirit!
What's ours like?
Ours is bang on the money with the twist of some new world hops! coming in at a generous 5.7% and bursting with citrus, passionfruit and tropical aroma it is a cracker thirst quencher after a long day under the Aussie sun! the caramel body adds depth and balance to the hoppy profile without overpowering the whole profile of the beer. Punching through with a refreshing crispness, it truly makes this the land "Where beer does flow and men chunder!" - Down Under, by Men at Work
Batch Size & Stats
- 38L (2 19L corny kegs) / 10 gal finished beer
- 50L (13.2 gal) wort
- For a smaller 19L (5 gal) batch size simply half the ingredients of this recipe
- Starting gravity – 1.054
- Final gravity 1.01
- ABV – 5.7%
What ingredients?
Water
With sparging
- 30L (7.9 gal) for a 66°C (151°F) mash (you can use our strike water calculator to find your ideal strike temp)
- 35L (9.2 gal) sparge water at 78°C (172°F)
Without sparging
- 60L (7.9 gal) for a 66°C (151°F) mash (you can use our strike water calculator to find your ideal strike temp)
Malts:
- Pale ale malt – 9.6kg (21.16 lb)
- Medium Crystal Malt – 400g (14.1 oz)
Hops & whirlfloc tablets
Galaxy
- 8g (0.3 oz) - 60 minutes left in the boil
- 60g (2.1 oz) – whirlpool for 20 minutes at 75°C (167°F)
- 60g (2.1 oz) - Dry hop at gravity 1.013 (approx. day 6-10 depending on your yeast)
El Dorado
- 60g (2.1 oz) – whirlpool for 20 minutes at 75°C (167°F)
- 60g (2.1 oz) - Dry hop at gravity 1.013 (approx. day 6-10 depending on your yeast)
El Dorado
- 60g (2.1 oz) – whirlpool for 20 minutes at 75°C (167°F)
- 60g (2.1 oz) - Dry hop at gravity 1.013 (approx. day 6-10 depending on your yeast)
Whirlfloc tablets
- 1.5g (0.052 oz) / 2 tablets – 15 minutes left in the boil
Yeast options & fermentation temperatures
- 23g (0.8 oz) Aus-05– ferment at 20°C
- 23g (0.8 oz) US-05 – ferment at 20°C
- 23g (0.8 oz) S-04 – ferment at 19°C
Step by step process
Step 1 – Milling
- Mill grains to medium crush (set mill rollers to a gap of approx. 1.00mm / 0.039 inches)
- Just keep in mind roller gap settings are not universal so as you brew more batches you will find the ideal crush size for your setup
- Alternatively if you don’t have a grain mill you can order your grains crushed from most homebrew stores, both online and in person
Step 2 – Mashing
- Mash for 60 minutes at 66°C (151°F)
- Set your strike water to a few degrees above the target mash temperature, you can use our calculator to determine what your strike temperature should be
- ensure you mix in the grains thoroughly with a mash paddle to prevent dough balls from forming (big spoons, spatulas or whisks will also work)
- its easier to mash the grains and prevent dough balls if you add a little grain at a time, mix, add more grain and repeat until all the grains are mixed
- if you don’t have a mash tun with heating then ensure after you have finished mixing the grains in to insulate your mash tun (thick neoprene or heavy blankets both work well)
Step 3 (optional) – Sparging
- if your setup has the capability to sparge then do so with 35L (9.2 gal) sparge water at 78°C (172°F)
- if you are not sparging and using a BIAB (brew in a bag) method then remove grains from mash tun and twist and squeeze the bag to get as much liquid out of the grains as possible
- as you start sparging (or straining your BIAB bag) begin raising the temperature of your wort to a boil
Step 4 – Boiling
- once your wort begins to boil start a timer for a 60-minute boil and add your bittering hops, 8g (0.3 oz) of Galaxy
- at 15 minutes left in the boil add 2.5 whirlfloc tablets
- after 60 minutes of boiling turn of the heat and chill the temperature of the wort down to 75°C (167°F) and begin whirlpooling
- if you don’t have a wort chiller you could rest your boil kettle in an ice bucket
- if your system can’t whirlpool you can also achieve this with a mash paddle and a power drill, if you don’t have this either don’t worry about whirlpooling it’s not completely necessary
Step 5 – Whirlpooling & whirlpool hops / cooling
- once temperature reaches 75°C (167°F) and you have started whirlpooling add your whirlpool hops, 60g (2.1 oz) each of Galaxy, El Dorado and Azacca
- allow hops to whirlpool in the wort for 20 minutes and then begin chilling wort again down to yeast pitching temperature
- once you’ve reached yeast pitching temperature take an original gravity reading of your wort
Step 6 – Yeast Pitching
- It is best to make a yeast starter before beginning your brew day (ideally 1 day before) to ensure your yeast are as active and healthy as possible before pitching, but not completely necessary – you could also just rehydrate yeast 30 minutes before pitching.
- Pitch yeast in wort a degree or two higher than the target fermentation temperature to help yeast take off more aggressively
- To make a yeast starter you can use either:
- DME (dry malt extract) at a ratio of approx. 100g per 1L water (3.5 oz per 33 fluid ounces) for gravity of approx. 1.040
- some unfermented wort kept cold and sanitary from a previous brew day
- 70g of table sugar per 1L water (2.5 oz per 33 fluid ounces) – however, it is best to use malt sugar (wort / DME) whenever possible to reduce the chance of shocking the yeast with a different food source from starter to wort pitching
- To rehydrate yeast
- Add yeast to approx. 10 times as much room temperature water as the weight of the yeast e.g. 10g yeast in 100 ml water (0.35 oz yeast in 3.5 fluid ounces water)
Step 7 – Fermentation & dry hopping
- Allow yeast to ferment over the next week to two weeks
- If you have a temperature controlled system keep the fermenter temperature to the recommended fermentation temperature for each yeast strain (stated in the yeast ingredients section above)
- Monitor the fermentation activity over the first 7 days by the bubbling of the blow off tube / airlock of your fermenter, as the bubbling slows down (roughly around day 7) take a gravity reading. When the gravity reaches around 1.014 raise the temperature of your fermenter by 1-2 degrees for 2 days for a diacetyl rest (if you don’t have temperature control don’t worry about this step, its not the end of the world!)
- Its important to note that fermentation times will vary based on your circumstances like, temperature, amount of yeast pitched, healthiness of yeast, gravity of wort, pH etc. so don’t stress be patient and know that these times are just a rough guide
- On day 2 of the diacetly rest (once gravity reaches roughly 1.012 – 1.014) add 60g (2.1 oz) each of Galaxy, El Dorado and Azacca to your fermenter
- One day after dry hopping take a gravity reading, fermentation should finish at about 1.010, if you havnt reached this yet wait another day and take another reading, once the gravity is the same 2 days in a row move onto cold crashing! (If you can’t / don’t want to cold crash go straight to kegging/bottling your beer!)
Step 8 (optional) – Cold crashing
- begin cold crashing your fermenter (bring the temperature of your fermenter down to as close to 0°C (32°F) as possible, for 2 days to a week depending on how patient you are
- If you don’t have a temp-controlled fermenter, you can cold crash by putting your fermenter in a fridge or temp-controlled chest freezer
- After you have finished cold crashing it's time to keg/bottle your beer! If you are bottling your beer from the fermenter uncarbonated remember to add about 5-7 grams (0.17 - 0.24 oz) of priming sugar to your bottles to carbonate your beer.


So... What is it?
The HotD Red IPA (Red India Pale Ale) is a daughter of the American West Coast IPA, sitting between 5.5%-7.5% with a similar hop & bitterness profile to a westcoast. However the malt backbone leans deeper into the rich caramel, toffee, and/or dark fruit malt character side of things, similar in some ways to an Irish red ale.
What's our like?
This particular recipe makes a 6.5% IPA with a creamy mouthfeel, red hues and citrus & blueberry-like hop flavour. However, the biggest flavour by far is the spicy earthiness of the ryle malt and almost chewy flavours of rich fruitcake and caramel like flavours from the malt base.
Batch Size & Stats
- 38L (2 19L corny kegs) / 10 gal finished beer
- 49L (13.2 gal) wort
- For a smaller 19L (5 gal) batch size simply half the ingredients of this recipe
- Starting gravity – 1.072
- Final gravity 1.022
- ABV – 6.5%
What ingredients?
Water
With sparging
- 30L (7.9 gal) 67°C (152°F) mash (you can use our strike temp calculator to find your ideal start temp)
- 30L (7.9 gal) sparge water at 78°C (172°F)
Without sparging
- 55L (14.5 gal) 67°C (152°F) mash (you can use our strike temp calculator to find your ideal start temp)
Malts
Total Grain Bill 12kg (15.4lb)
- Pale ale malt – 7.2kg (15.8 lb)
- rye – 1.8kg (3.9 lb)
- Aurora (Gladfield) – 1kg (2.2 lb)
- Red Back (Gladfield) – 1kg (2.2 lb)
- Supernova (Gladfield) – 1kg (2.2 lb)
- Rice Hulls (not essential but helpful for sparging) - 500g (1.1 lb)
Hops & whirlfloc tablets
Galaxy
- 15g (0.52 oz) - 60 minutes left in the boil
- 70g (2.47 oz) - 5 minutes left in the boil
- 70g (2.47 oz) - Dry hop at gravity 1.023 (approx. day 6-10 depending on your yeast)
Topaz
- 70g (2.47 oz) - 5 minutes left in the boil
- 70g (2.47 oz) - Dry hop at gravity 1.023 (approx. day 6-10 depending on your yeast)
Riwaka
- 70g (2.47 oz) - 5 minutes left in the boil
- 70g (2.47 oz) - Dry hop at gravity 1.023 (approx. day 6-10 depending on your yeast)
Whirlfloc
- 1.5g granulated or 2 tablets – 15 minutes left in the boil
Yeast options & fermentation temperatures
- US-05 – ferment at 20°C (68°F) 23g (0.81 oz) / (2 packets)
- AUS-05 – ferment at 20°C (68°F) 23g (0.81 oz) / (2 packets)
- S-04 – ferment at 18°C (64.4°F) 22g (0.81 oz) / (2 packets)
- Kveik - ferment at 32°C (89°F) 22g (0.81 oz) / (2 packets)

Step by step process
Step 1 – Milling
- Mill grains to medium crush (set mill rollers to a gap of approx. 1.00mm / 0.039 inches (credit card width)
- Just keep in mind roller gap settings are not universal so as you brew more batches you will find the ideal crush size for your setup
- Alternatively if you don’t have a grain mill you can order your grains crushed from most homebrew stores, both online and in person
Step 2 – Mashing
- Mash for 60 minutes at 67°C (152°F)
- Set your strike water to a few degrees above the target mash temperature (you can use the calculator in our website for this)
- ensure you mix in the grains thoroughly with a mash paddle to prevent dough balls from forming (big spoons, spatulas or whisks will also work)
- its easier to mash the grains and prevent dough balls if you add a little grain at a time, mix, add more grain and repeat until all the grains are mixed
if you don’t have a mash tun with heating then ensure after you have finished mixing the grains in to insulate your mash tun (thick neoprene or heavy blankets both work well)
Step 3 (optional) – Sparging
- if your setup has the capability to sparge then do so with 30L (7.9 gal) sparge water at 78°C (172°F)
- if you are not sparging and using a BIAB (brew in a bag) method then remove grains from mash tun and twist and squeeze the bag to get as much liquid out of the grains as possible
- as you start sparging (or straining your BIAB bag) begin raising the temperature of your wort to a boil
Step 4 – Boiling
- once your wort begins to boil start a timer for a 60-minute boil and add your bittering hops, 10g (0.35 oz) of Galaxy
- at 15 minutes left in the boil add 2 whirlfloc tablets
- at 5 minutes left in the boil add 70g (2.47 oz) each of Galaxy, Topaz and Riwaka
Step 5 – Whirlpooling / cooling
- once wort has been boiling for 60 minutes in total turn off your heat source and begin chilling wort down to yeast pitching temperature
- once you’ve reached yeast pitching temperature take an original gravity reading of your wort
Step 6 – Yeast Pitching
- It is best to make a yeast starter before beginning your brew day (ideally 1 day before) to ensure your yeast are as active and healthy as possible before pitching, but not completely necessary – you could also just rehydrate yeast 30 minutes before pitching.
- Wort Aeration (Optional) if you have a paint mixer give your wort a quick blitz before pitching yeast to help add more dissolved oxygen into the wort to help the yeast have a healthier kick start into fermentation
- Now add your tincture of Vanilla extract! (or you can wait till end of fermentation if you prefer)
- Pitch yeast in wort a degree or two higher than the target fermentation temperature to help yeast take off more aggressively
To make a yeast starter you can use either:
- DME (dry malt extract) at a ratio of approx. 100g per 1L water (3.5 oz per 33 fluid ounces) for gravity of approx. 1.040
- some unfermented wort kept cold and sanitary from a previous brew day
- 70g of table sugar per 1L water (2.5 oz per 33 fluid ounces) – however, it is best to use malt sugar (wort / DME) whenever possible to reduce the chance of shocking the yeast with a different food source from starter to wort pitching
To rehydrate yeast
- Add yeast to approx. 10 times as much room temperature water as the weight of the yeast e.g. 10g yeast in 100 ml water (0.35 oz yeast in 3.5 fluid ounces water)
Step 7 – Fermentation & dry hopping
- Allow yeast to ferment over the next week to two weeks
- If you have a temperature-controlled system keep the fermenter temperature to the recommended fermentation temperature for each yeast strain (stated in the yeast ingredients section above)
- Monitor the fermentation activity over the first 7 days by the bubbling of the blow-off tube/airlock of your fermenter, as the bubbling slows down (roughly around day 7) take a gravity reading. When the gravity reaches around 1.023 raise the temperature of your fermenter by 1-2 degrees for 2 days for a diacetyl rest (if you don’t have temperature control don’t worry about this step, it's not the end of the world!)
- It's important to note that fermentation times will vary based on your circumstances like temperature, amount of yeast pitched, the healthiness of yeast, the gravity of the wort, pH, etc. so don’t stress be patient and know that these times are just a rough guide
- On day 2 of the diacetyl rest (once gravity reaches roughly 1.022) add 70g (2.47 oz) each of Galaxy, Topaz and Riwaka
- One day after dry hopping take a gravity reading, fermentation should finish at about 1.022, if you haven't reached this yet wait another day and take another reading, once the gravity is the same 2 days in a row move onto cold crashing! (If you can’t / don’t want to cold crash go straight to kegging/bottling your beer!)
Step 8 (optional) – Cold crashing
- begin cold crashing your fermenter (bring the temperature of your fermenter down to as close to 0°C (32°F) as possible, for 2 days to a week depending on how patient you are
- If you don’t have a temp-controlled fermenter, you can cold crash by putting your fermenter in a fridge or temp-controlled chest freezer
- After you have finished cold crashing it's time to keg/bottle your beer! If you are bottling your beer from the fermenter uncarbonated, remember to add about 5-7 grams (0.17 - 0.24 oz) of priming sugar to your bottles to carbonate your beer.

So... What is it?
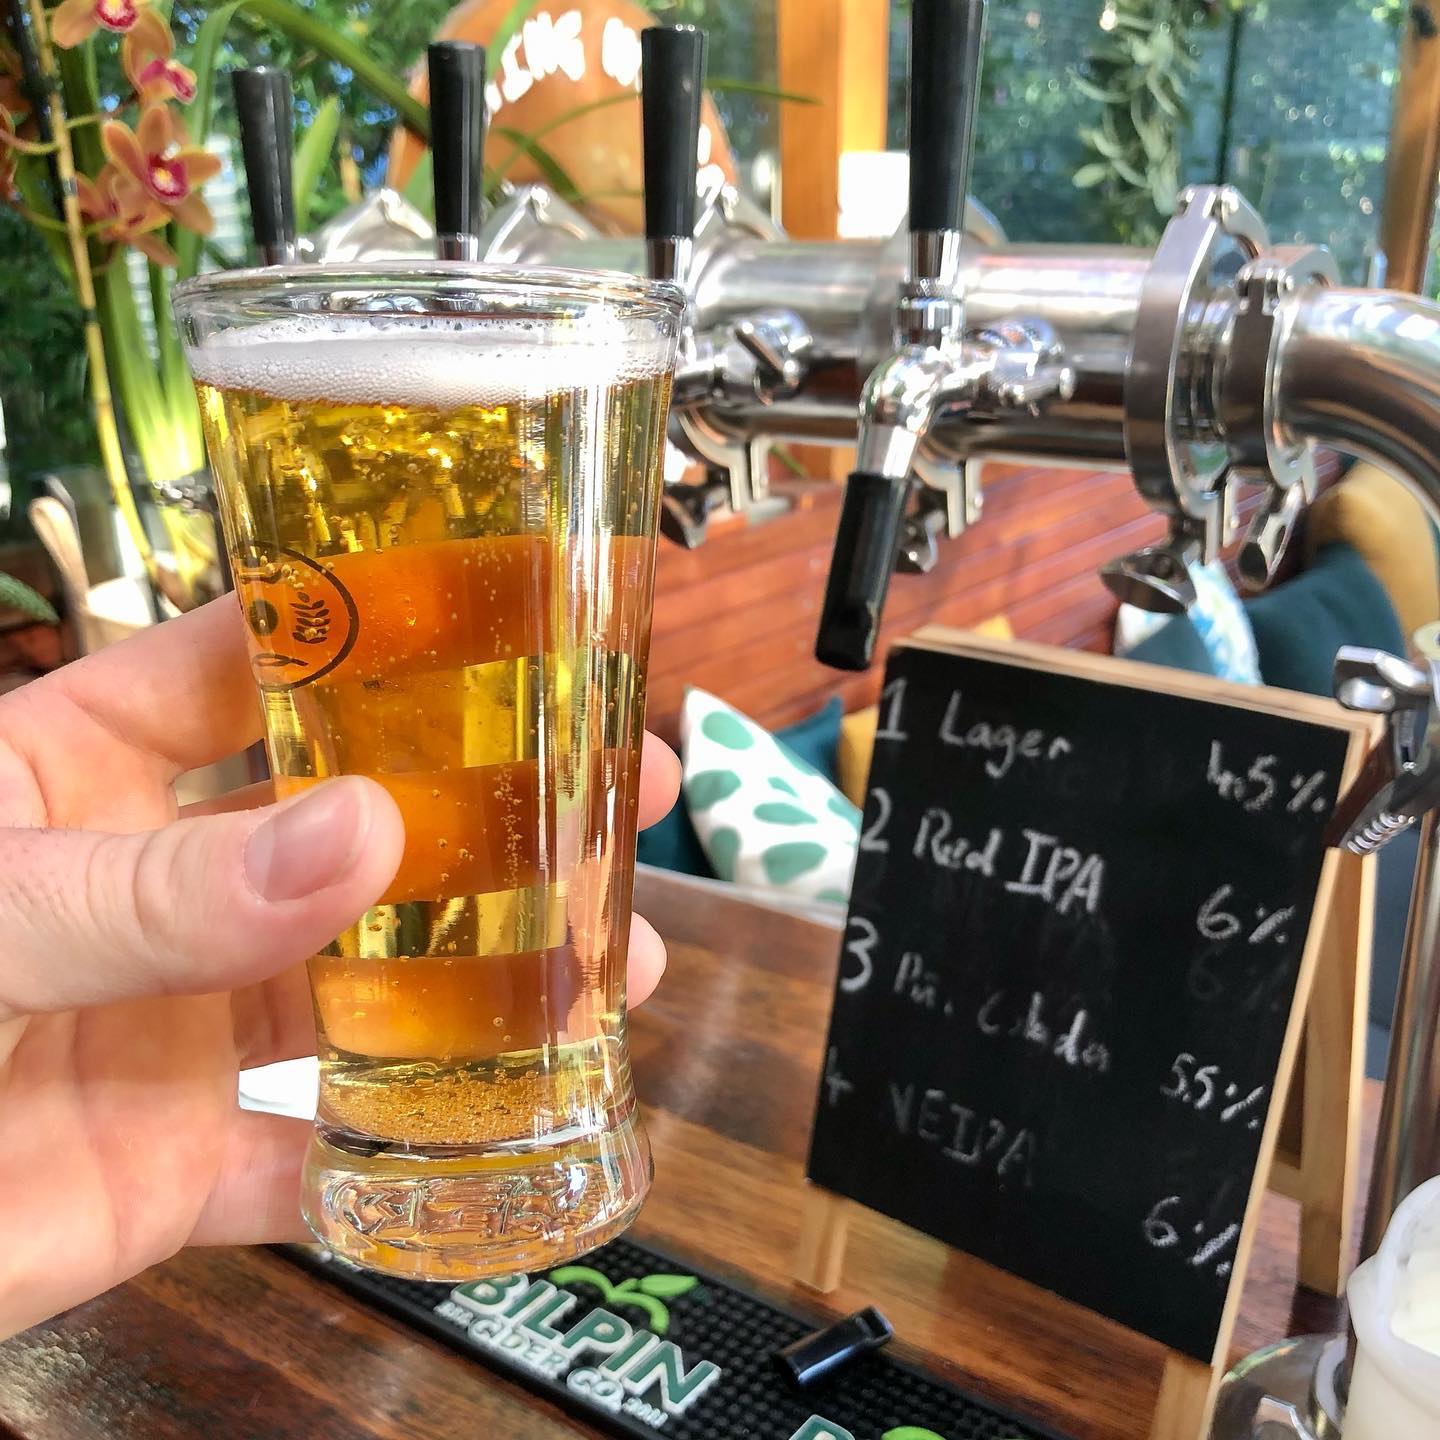
The Australian Lager is traditionally an amber-hued lager with a balanced malt profile and slightly bitter hop flavour, typically brewed with Pride of Ringwood hops or its descendants. However with the modern craft movement new world styles of Aussie lager are being made with much fruitier and fresher hop profiles, leaning into the citrusy and tropical flavours found in a lot of new world New Zealand pilsners!
What's ours like?
This Aussie lager is no different, coming in at a moderate 4.8% and leaning into the new world styles of hops it is a lightly malty crisp bodied lager with medium bitterness and a hop profile of citrus, passionfruit and “fruit salad” like flavour & aroma, making it a perfect “lawn mower” session beer for a hot day when you want to enjoy a full flavoured lager with a moderate abv!
Batch Size & Stats
- 44LL (2 19L corny kegs & 6L for a half keg) / 11.6 gal finished beer
- 53L (14 gal) wort
- For a smaller 19L (5 gal) batch size simply half the ingredients of this recipe
- Starting gravity – 1.046
- Final gravity 1.009
- ABV – 4.85%
What ingredients?
Water
With sparging
- 30L (7.9 gal) for a 66°C (151°F) mash (you can use our strike water calculator to find your ideal strike temp)
- 35L (9.2 gal) sparge water at 78°C (172°F)
Without sparging
- 60L (7.9 gal) for a 66°C (151°F) mash (you can use our strike water calculator to find your ideal strike temp)
Malts:
- Australian Pilsner – 9.5kg (20.9 lb) (if you cant get Aussie pils any pils malt will do)
Hops & whirlfloc tablets
Galaxy
- 10g (0.35 oz) - 60 minutes left in the boil
- 60g (2.1 oz) - 5 minutes left in the boil
Topaz
- 60g (2.1 oz) - 5 minutes left in the boil
Whirlfloc tablets
- 1.5g (0.052 oz) / 2 tablets – 15 minutes left in the boil
Yeast options & fermentation temperatures
- 23g SafLager S-23 – ferment at 15°C (59 °F) OR [under 12psi pressure 19°C / 66.2 °F]
- 23g SafLager W-34/70 – ferment at 14°C (57.2 °F) OR [under 12psi pressure 19°C / 66.2 °F]
Step by step process
Step 1 – Milling
- Mill grains to medium crush (set mill rollers to a gap of approx. 1.00mm / 0.039 inches)
- Just keep in mind roller gap settings are not universal so as you brew more batches you will find the ideal crush size for your setup
- Alternatively if you don’t have a grain mill you can order your grains crushed from most homebrew stores, both online and in person
Step 2 – Mashing
- Mash for 60 minutes at 66°C (151°F)
- Set your strike water to a few degrees above the target mash temperature, you can use our calculator to determine what your strike temperature should be
- ensure you mix in the grains thoroughly with a mash paddle to prevent dough balls from forming (big spoons, spatulas or whisks will also work)
- its easier to mash the grains and prevent dough balls if you add a little grain at a time, mix, add more grain and repeat until all the grains are mixed
- if you don’t have a mash tun with heating then ensure after you have finished mixing the grains in to insulate your mash tun (thick neoprene or heavy blankets both work well)
Step 3 (optional) – Sparging
- if your setup has the capability to sparge then do so with 35L (9.2 gal) sparge water at 78°C (172°F)
- if you are not sparging and using a BIAB (brew in a bag) method then remove grains from mash tun and twist and squeeze the bag to get as much liquid out of the grains as possible
- as you start sparging (or straining your BIAB bag) begin raising the temperature of your wort to a boil
Step 4 – Boiling
- once your wort begins to boil start a timer for a 60-minute boil and add your bittering hops, 10g (0.35 oz) of Galaxy
- at 5 minutes left in the boil add 2 whirlfloc tablets and 60g (2.1 oz) each of Galaxy and Topaz
Step 5 – Whirlpooling / cooling
- once wort has been boiling for 60 minutes in total turn off your heat source and begin chilling wort down to yeast pitching temperature
- once you’ve reached yeast pitching temperature take an original gravity reading of your wort
Step 6 – Yeast Pitching
- It is best to make a yeast starter before beginning your brew day (ideally 1 day before) to ensure your yeast are as active and healthy as possible before pitching, but not completely necessary – you could also just rehydrate yeast 30 minutes before pitching.
- Pitch yeast in wort a degree or two higher than the target fermentation temperature to help yeast take off more aggressively
- To make a yeast starter you can use either:
- DME (dry malt extract) at a ratio of approx. 100g per 1L water (3.5 oz per 33 fluid ounces) for gravity of approx. 1.040
- some unfermented wort kept cold and sanitary from a previous brew day
- 70g of table sugar per 1L water (2.5 oz per 33 fluid ounces) – however, it is best to use malt sugar (wort / DME) whenever possible to reduce the chance of shocking the yeast with a different food source from starter to wort pitching
- To rehydrate yeast
- Add yeast to approx. 10 times as much room temperature water as the weight of the yeast e.g. 10g yeast in 100 ml water (0.35 oz yeast in 3.5 fluid ounces water)
Step 7 – Fermentation & dry hopping
- Allow yeast to ferment over the next two weeks (aprox)
- If you have a temperature-controlled system keep the fermenter temperature to the recommended fermentation temperature for each yeast strain (stated in the yeast ingredients section above)
- Monitor the fermentation activity over the first 10-12 days by the bubbling of the blow-off tube/airlock of your fermenter, as the bubbling slows down (roughly around day 10-12) take a gravity reading. When the gravity reaches around 1.010 raise the temperature of your fermenter by 1-2 degrees for 2 days for a diacetyl rest (if you don’t have temperature control don’t worry about this step, it's not the end of the world!)
- It's important to note that fermentation times will vary based on your circumstances like temperature, amount of yeast pitched, the healthiness of yeast, the gravity of the wort, pH, etc. so don’t stress be patient and know that these times are just a rough guide
- On day 2 of the diacetyl rest (once gravity reaches roughly 1.008) & gravity is the same 3 days in a row move onto cold crashing! (If you can’t / don’t want to cold crash go straight to kegging/bottling your beer!)
Step 8 (optional) – Cold crashing
- begin cold crashing your fermenter (bring the temperature of your fermenter down to as close to 0°C (32°F) as possible, for 2 days to a week depending on how patient you are
- If you don’t have a temp-controlled fermenter, you can cold crash by putting your fermenter in a fridge or temp-controlled chest freezer
- After you have finished cold crashing it's time to keg/bottle your beer! If you are bottling your beer from the fermenter uncarbonated remember to add about 5-7 grams (0.17 - 0.24 oz) of priming sugar to your bottles to carbonate your beer.
So... What is it?
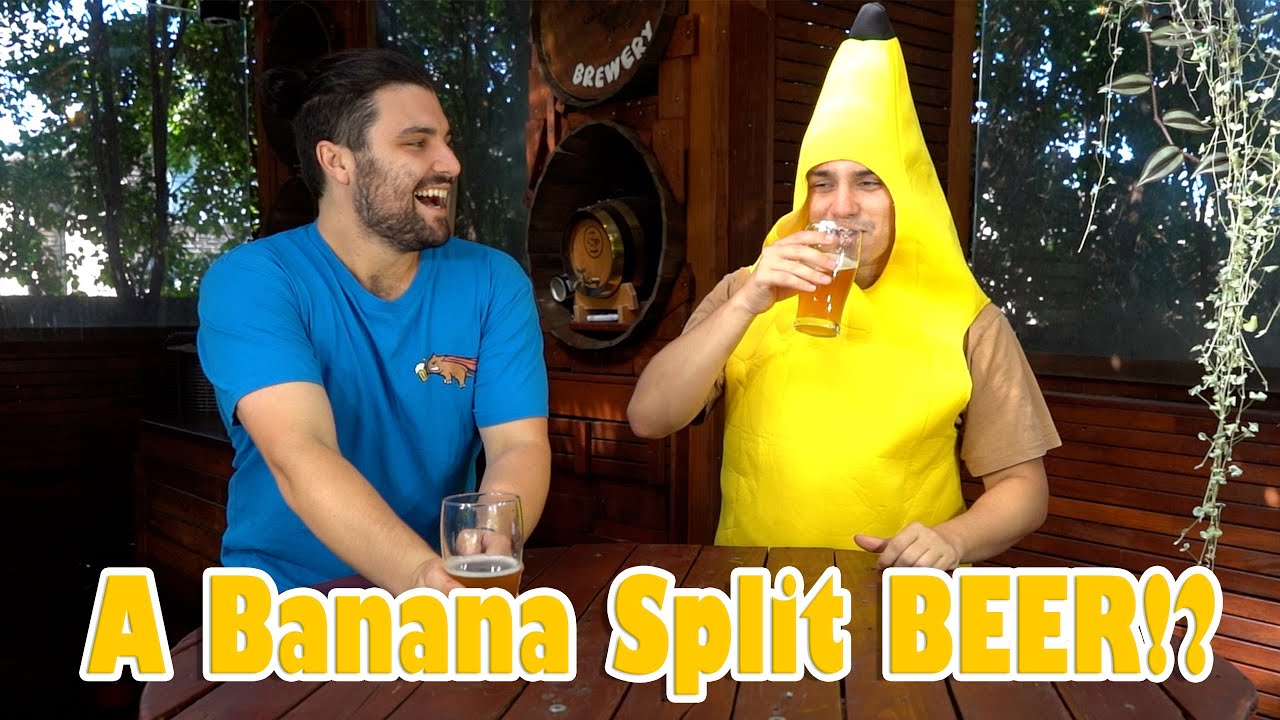
Milkshake beers are a weird and wonderful new addition to the beer world, the most famous version being a milkshake IPA (smoothie IPA). Milkshake beers ramp up fruit additions, unfermentable sugars (such as lactose), and adjuncts such as vanilla. This gives the beer a sweet, creamy, and silky quality similar to what you find in a classic milkshake!
What is ours like?
For our first milkshake beer on the channel, we decided to take a beery twist on a desert classic, the banana split!
The mouthfeel is silky and smooth, the bitterness very mild and subdued with a healthy hop character for a wheat beer, leaning towards tropical and fruity flavours such as mango, pineapple, nectarines, and peaches! The vanilla and lactose add the silky sweet character to the beer and finally the bananas! there's a decent banana addition to the mash of this beer but surprisingly it didn't comes through as powerfully as we expected, instead making its debut more in the lingering bananery aftertaste, so I would recommend taking notice of our post-brew notes in the ingredients section and ramping up the banana additions for this one! even so, there is definitely a banana vibe lingering in this beer and a big punch of peach and nectarine-like lingering sweetness!
Batch size & ABV
- 19L / 5 gal finished beer
- 25L (6.6 gal) wort
- Starting gravity – 1.053
- Final gravity 1.016
- ABV – 4.85%
Ingredients
Water
With sparging
- 15L (3.9 gal) strike water, Mash at 66°C (151°F) for 60 mins, strike temp approx. 69°C (156°F) use our calculator for this
- 20L (5.2 gal) sparge water at 78°C (172°F)
Without sparging
- 30L (7.9 gal) strike water, Mash at 66°C (151°F) for 60 mins, strike temp approx. 66°C (151°F) use our calculator for this
Malts
- Pale ale malt – 2.75kg (6 lb)
- Wheat malt – 2.75kg (6 lb)
- Rice Hulls – 500g (1.1 lb)
Fruit & Adjuncts
Lactose - 250g (0.55 lb)
3 kg banana in mash (banana flesh weight without skins) - Post brew adjustments I’d recommend tripling or even quadrupling this quantity! and adding towards the end of the boil instead of in the mash, just be carful not to scorch the banana (use a false bottom!) (In Hind sight we reccomend adding the banana towards end of fermentation instead of the mash)
- 1kg (2.2 lb) fresh
- 1kg (2.2 lb) oven baked 15-25 min at 160 °C / 320 °F until the skin is totally black and some of the bananas are splitting
- 1kg (2.2 lb) pan-fried on medium to high heat with butter and some brown sugar until caramelized
Hops & whirlfloc tablets
Northern Brewer
- 5g (0.17 oz) - 60 minutes left in the boil
Lotus
- 25g (0.88 oz) - 5 minutes left in the boil
Astra
- 25g (0.88 oz) - 5 minutes left in the boil
Whirlfloc Tablets
- 1 tablet – 15 minutes left in the toil OR granulated whirlfloc 0.7g (0.025 oz)
Yeast options & fermentation temperatures
- SafAle™ K-97 – ferment between 18-26°C (68°F to 78.8°F) 22g (0.78 oz) / (2 packets)
Step by step process
Step 1 – Milling
peel and weigh out 3kg of banana flesh then split into 3 batches,
- leave 1kg (2.2 lb) fresh
- oven bake 1kg (2.2 lb) for 15-25 min at 160 °C / 320 °F until the skin is totally black and some of the bananas are splitting
- pan fry 1kg (2.2 lb) on medium to high heat with butter and some brown sugar until caramelized
- Mill grains to medium crush (set mill rollers to a gap of approx. 1.00mm / 0.039 inches)
- Just keep in mind roller gap settings are not universal so as you brew more batches you will find the ideal crush size for your setup
- Alternatively if you don’t have a grain mill you can order your grains crushed from most homebrew stores, both online and in person
Step 2 – Mashing
- Mash for 60 minutes at 66°C (151°F)
- Set your strike water to a few degrees above the target mash temperature, you can use our calculator to determine what your strike temperature should be
- ensure you mix in the grains thoroughly with a mash paddle to prevent dough balls from forming (big spoons, spatulas or whisks will also work)
- its easier to mash the grains and prevent dough balls if you add a little grain at a time, mix, add more grain and repeat until all the grains are mixed
- if you don’t have a mash tun with heating then ensure after you have finished mixing the grains in to insulate your mash tun (thick neoprene or heavy blankets both work well)
Step 3 (optional) – Sparging
- if your setup has the capability to sparge then do so with 20L (5.2 gal) sparge water at 78°C (172°F)
- if you are not sparging and using a BIAB (brew in a bag) method then remove grains from mash tun and twist and squeeze the bag to get as much liquid out of the grains as possible
- as you start sparging (or straining your BIAB bag) begin raising the temperature of your wort to a boil
Step 4 – Boiling
- once your wort begins to boil start a timer for a 60-minute boil and add your bittering hops, 5g (0.17 oz) of Northern Brewer
- at 15 minutes left in the boil add 1 whirlfloc tablet (OR granulated whirlfloc 0.7g (0.025 oz))
- at 5 minutes left in the boil add 25g each (0.88 oz) of Lotus, Astra and Azacca
Step 5 – Whirlpooling / cooling
- once wort has been boiling for 60 minutes in total turn off your heat source and begin chilling wort down to yeast pitching temperature
- once you’ve reached yeast pitching temperature take an original gravity reading of your wort
Step 6 – Yeast Pitching
- It is best to make a yeast starter before beginning your brew day (ideally 1 day before) to ensure your yeast are as active and healthy as possible before pitching, but not completely necessary – you could also just rehydrate yeast 30 minutes before pitching.
- Wort Aeration (Optional) if you have a paint mixer give your wort a quick blitz before pitching yeast to help add more dissolved oxygen into the wort to help the yeast have a healthier kick start into fermentation
- Pitch yeast in wort a degree or two higher than the target fermentation temperature to help yeast take off more aggressively
- To make a yeast starter you can use either:
- DME (dry malt extract) at a ratio of approx. 100g per 1L water (3.5 oz per 33 fluid ounces) for gravity of approx. 1.040
- some unfermented wort kept cold and sanitary from a previous brew day
- 70g of table sugar per 1L water (2.5 oz per 33 fluid ounces) – however, it is best to use malt sugar (wort / DME) whenever possible to reduce the chance of shocking the yeast with a different food source from starter to wort pitching
- To rehydrate yeast
- Add yeast to approx. 10 times as much room temperature water as the weight of the yeast e.g. 10g yeast in 100 ml water (0.35 oz yeast in 3.5 fluid ounces water)
Step 7 – Fermentation & Fruit additions!
- Allow yeast to ferment over the next two weeks (aprox)
- If you have a temperature-controlled system keep the fermenter temperature to the recommended fermentation temperature for each yeast strain (stated in the yeast ingredients section above)
- Monitor the fermentation activity over the first 7-10 days by the bubbling of the blow-off tube/airlock of your fermenter, as the bubbling slows down (roughly around day 10-12) take a gravity reading. When the gravity reaches around 1.020 raise the temperature of your fermenter by 1-2 degrees for 2 days for a diacetyl rest (if you don’t have temperature control don’t worry about this step, it's not the end of the world!)
- On day 2 of the diacetyl rest (once gravity reaches roughly 1.016) & gravity is the same 3 days in a row move onto cold crashing! (If you can’t / don’t want to cold crash go straight to kegging/bottling your beer!)
Step 8 (optional) – Cold crashing
- begin cold crashing your fermenter (bring the temperature of your fermenter down to as close to 0°C (32°F) as possible, for 2 days to a week depending on how patient you are
- If you don’t have a temp-controlled fermenter, you can cold crash by putting your fermenter in a fridge or temp-controlled chest freezer
- After you have finished cold crashing it's time to keg/bottle your beer! If you are bottling your beer from the fermenter uncarbonated remember to add about 5-7grams (0.17 - 0.24 oz) of priming sugar to your bottles to carbonate your beer.
So... What is it?
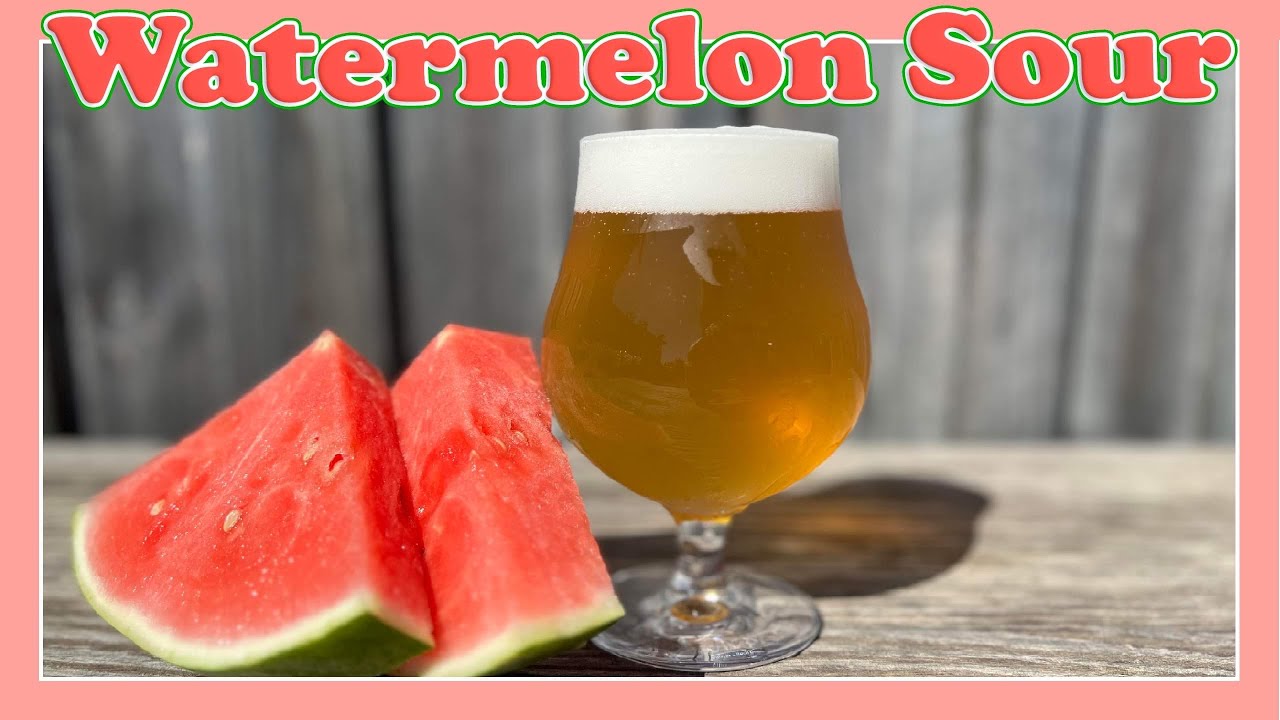
The Berliner Weisse is a sour wheat beer from (you guessed it) Berlin, Germany! characterized by its slightly sour character and light abv (normally around 3-3.5%) it's a fantastic drop for summer in the beer garden, typically having a very light body, tartness on the tongue, and fresh fruity character. This also makes it a fantastic beer for fruit infusions!
What is ours like?
For our second crack at a sour we decided to get our watermelon sugar high on!
The mouthfeel is slightly tart, the bitterness soft & gentle, and hop character slightly fruity but all in moderation to allow the sour character and watermelon flavour to shine! Our Berliner clocked in at a moderate ABV of 3.8% and surprisingly didn't adopt the red hue of pineapple flesh but stayed a straw-like golden colour. Finally the water melon! Coming through with a suppressed presence, it doesn't hold the same weight of flavour as the raspberry sour, but instead tastes more like a traditional Berliner with a watermelon flavour closer to the rind of the fruit rather than the meaty flesh. However, in my opinion the lack of fruit forward sweetness makes it a much more sessional beer than its raspberry cousin, drink up and enjoy!
Batch size & ABV
- 25L / 5 gal finished beer
- 30L (6 gal) wort
- Starting gravity – 1.037
- Final gravity 1.008
- ABV – 3.8%
Ingredients
Water
With sparging
- 15L (3.9 gal) strike water, Mash at 66°C (151°F) for 60 mins, strike temp approx. 69°C (156°F) use our calculator for this
- 20L (5.2 gal) sparge water at 78°C (172°F)
Without sparging
- 30L (7.9 gal) strike water, Mash at 66°C (151°F) for 60 mins, strike temp approx. 66°C (151°F) use our calculator for this
Malts
- Pale ale malt – 2.25kg (5 lb)
- Wheat malt – 2.5kg (4.4 lb)
- Rice Hulls – 250g (0.5 lb)
Fruit Addition
- 3.65 kg (8 lb) Fresh Watermelonpurée towards end of fermentation (around 1.009 / 7 days)
Hops & whirlfloc tablets
Northern Brewer
- 8g (0.28 oz) - 60 minutes left in the boil
Hallertau Huell Melon
- 15g (0.53 oz) - 15 minutes left in the boil
Whirlfloc Tablets
- 1 tablet – 15 minutes left in the toil OR granulated whirlfloc 0.7g (0.025 oz)
Yeast options & fermentation temperatures
- Wildbrew™ Philly Sour [Lallemand] – ferment at 20°C (68°F) to 25°C (77°F) 22g (2 packets)
Step by step process
Step 1 – Milling
- Mill grains to medium crush (set mill rollers to a gap of approx. 1.00mm / 0.039 inches)
- Just keep in mind roller gap settings are not universal so as you brew more batches you will find the ideal crush size for your setup
- Alternatively if you don’t have a grain mill you can order your grains crushed from most homebrew stores, both online and in person
Step 2 – Mashing
- Mash for 60 minutes at 66°C (151°F)
- Set your strike water to a few degrees above the target mash temperature, you can use our calculator to determine what your strike temperature should be
- ensure you mix in the grains thoroughly with a mash paddle to prevent dough balls from forming (big spoons, spatulas or whisks will also work)
- its easier to mash the grains and prevent dough balls if you add a little grain at a time, mix, add more grain and repeat until all the grains are mixed
- if you don’t have a mash tun with heating then ensure after you have finished mixing the grains in to insulate your mash tun (thick neoprene or heavy blankets both work well)
Step 3 (optional) – Sparging
- if your setup has the capability to sparge then do so with 20L (5.2 gal) sparge water at 78°C (172°F)
- if you are not sparging and using a BIAB (brew in a bag) method then remove grains from mash tun and twist and squeeze the bag to get as much liquid out of the grains as possible
- as you start sparging (or straining your BIAB bag) begin raising the temperature of your wort to a boil
Step 4 – Boiling
- once your wort begins to boil start a timer for a 60-minute boil and add your bittering hops, 15g (0.53 oz) of Northern Brewer
- at 15 minutes left in the boil add 1 whirlfloc tablet (OR granulated whirlfloc 0.7g (0.025 oz)) and 15g (0.53 oz) of Hallertau Huell Melon
Step 5 – Whirlpooling / cooling
- once wort has been boiling for 60 minutes in total turn off your heat source and begin chilling wort down to yeast pitching temperature
- once you’ve reached yeast pitching temperature take an original gravity reading of your wort
Step 6 – Yeast Pitching
- It is best to make a yeast starter before beginning your brew day (ideally 1 day before) to ensure your yeast are as active and healthy as possible before pitching, but not completely necessary – you could also just rehydrate yeast 30 minutes before pitching.
- Wort Aeration (Optional) if you have a paint mixer give your wort a quick blitz before pitching yeast to help add more dissolved oxygen into the wort to help the yeast have a healthier kick start into fermentation
- Pitch yeast in wort a degree or two higher than the target fermentation temperature to help yeast take off more aggressively
- To make a yeast starter you can use either:
- DME (dry malt extract) at a ratio of approx. 100g per 1L water (3.5 oz per 33 fluid ounces) for gravity of approx. 1.040
- some unfermented wort kept cold and sanitary from a previous brew day
- 70g of table sugar per 1L water (2.5 oz per 33 fluid ounces) – however, it is best to use malt sugar (wort / DME) whenever possible to reduce the chance of shocking the yeast with a different food source from starter to wort pitching
- To rehydrate yeast
- Add yeast to approx. 10 times as much room temperature water as the weight of the yeast e.g. 10g yeast in 100 ml water (0.35 oz yeast in 3.5 fluid ounces water)
Step 7 – Fermentation & Fruit additions!
- Allow yeast to ferment over the next two weeks (aprox)
- If you have a temperature-controlled system keep the fermenter temperature to the recommended fermentation temperature for each yeast strain (stated in the yeast ingredients section above)
- Monitor the fermentation activity over the first 7-10 days by the bubbling of the blow-off tube/airlock of your fermenter, as the bubbling slows down (roughly around day 10-12) take a gravity reading. When the gravity reaches around 1.015 raise the temperature of your fermenter by 1-2 degrees for 2 days for a diacetyl rest (if you don’t have temperature control don’t worry about this step, it's not the end of the world!)
- Time to add fruit! purée 3.65kg (8 lb) of Watermelon and throw them all into the fermenter
- It's important to note that fermentation times will vary based on your circumstances like temperature, amount of yeast pitched, the healthiness of yeast, the gravity of the wort, pH, etc. so don’t stress be patient and know that these times are just a rough guide
- On day 2 of the diacetyl rest (once gravity reaches roughly 1.011) & gravity is the same 3 days in a row move onto cold crashing! (If you can’t / don’t want to cold crash go straight to kegging/bottling your beer!)
Step 8 (optional) – Cold crashing
- begin cold crashing your fermenter (bring the temperature of your fermenter down to as close to 0°C (32°F) as possible, for 2 days to a week depending on how patient you are
- If you don’t have a temp-controlled fermenter, you can cold crash by putting your fermenter in a fridge or temp-controlled chest freezer
- After you have finished cold crashing it's time to keg/bottle your beer! If you are bottling your beer from the fermenter uncarbonated remember to add about 5-7grams (0.17 - 0.24 oz) of priming sugar to your bottles to carbonate your beer.
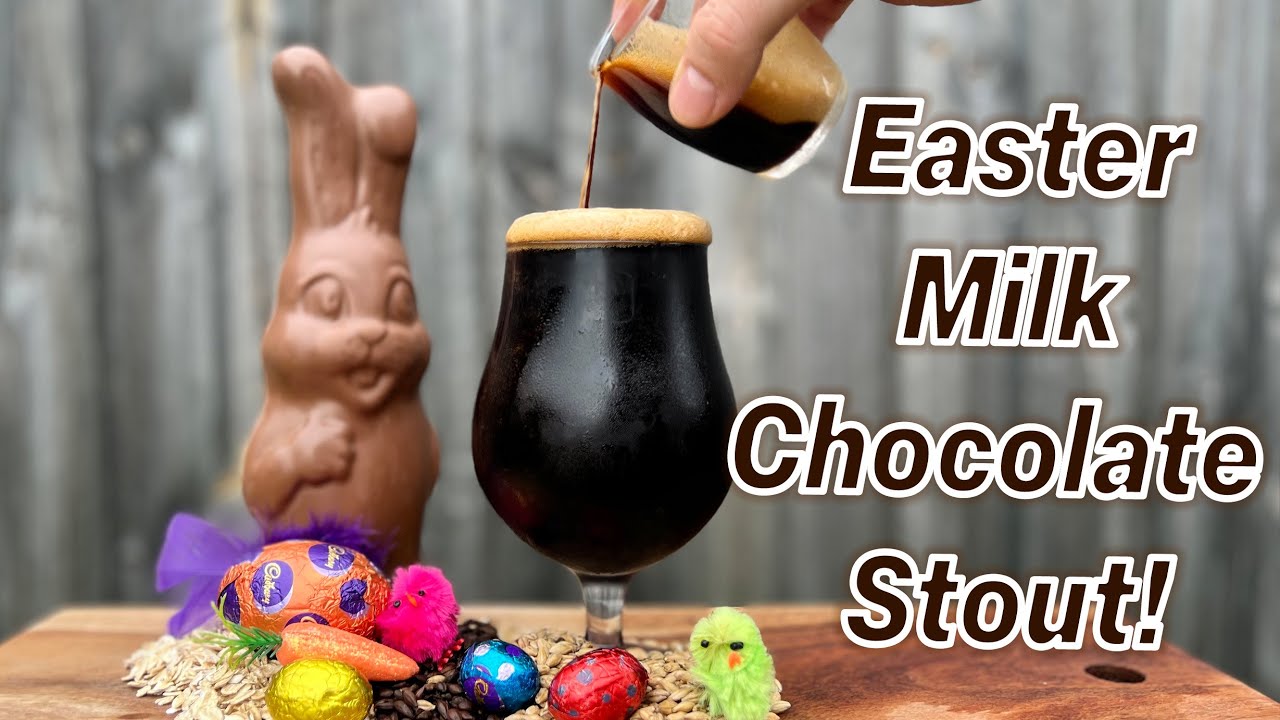
So... What is it?
The Milk Chocolate Stout is a dark, creamy and rich full-bodied black beer, overflowing with roasted espresso and dark chocolate-like flavours. The sweet silky body is owed not just to the wheat and oats often used in the grain bill, but also lactose which is added to provide unfermentable milk-based sugars. Typically these beers range from 4-6% ABV with a few leaning into the boozy above 7% side of the spectrum, and have a high final gravity, which is why they remain so thick, creamy, and luxurious!
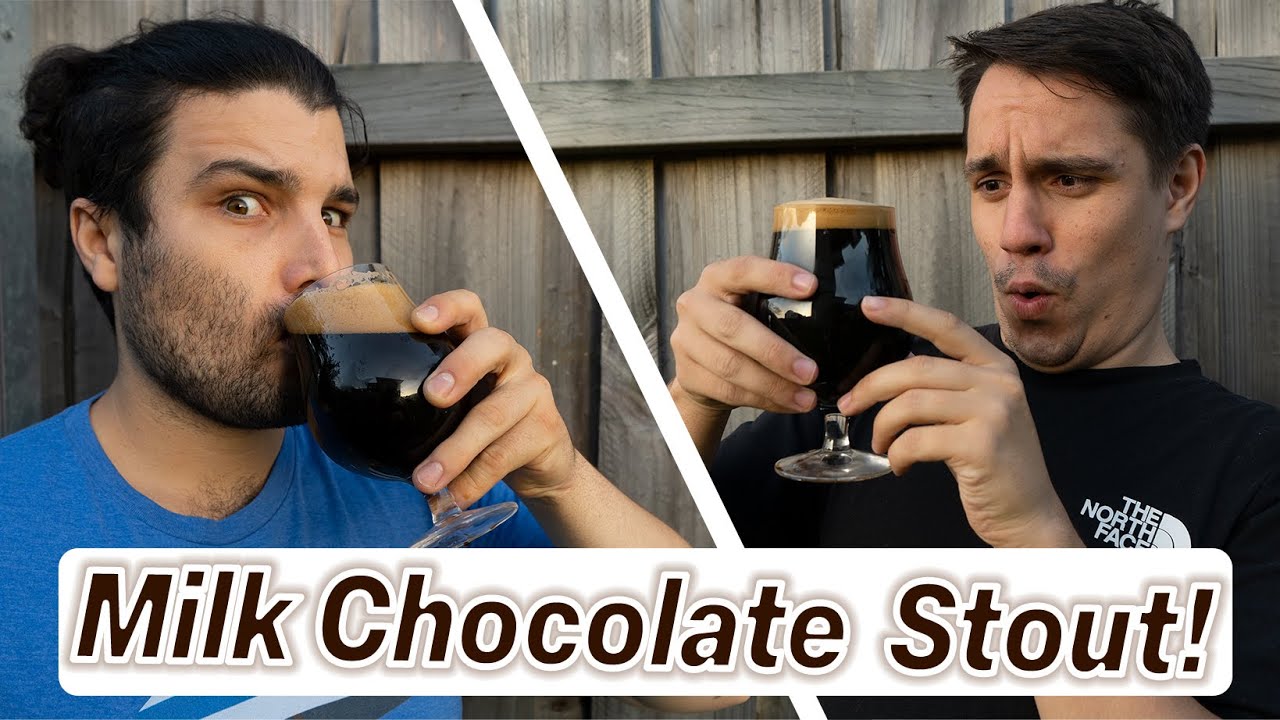
What's our like?
Our Easter-themed version of the big black stout comes in at a hefty 7.2% so sip slowly, don't chug! The mouthfeel is creamy, silky, and luxuriously thick, the bitterness very subdued, and thanks to the huge additions of REAL milk chocolate, cacao nibs, lactose, and vanilla extract this stout exudes massive flavours and aromas of rich dark chocolate, freshly baked pastries, and just enough sweet malty character to keep it all in balance! So enjoy this bad boy in the depths of winter and feel snug as a bug in a rug as the rich boozy choccy milk stout warms you from the inside out!
Batch Size & Stats
- 42L / 11 gal finished beer
- 48L (12.6 gal) wort
- Starting gravity – 1.077
- Final gravity 1.024
- ABV – 7%
What ingredients?
Water
With sparging
- 90 minutes, 30L (7.9 gal) strike water 69°C (156.2°F) mash
- 34L (9 gal) sparge water at 78°C (172°F)
Without sparging
- 90 minutes, 65L (17.2 gal) strike water 69°C (156.2°F) mash
Malts
Total Grain Bill 12kg (15.4lb)
- Light Munich – 7.2kg (15.9 lb) - 60%
- Wheat malt – 1.3kg (2.8 lb) - 10.8%
- Rolled Oats - 1.2kg (2.6 lb) - 10%
- Eclipse Midnight Wheat - 1kg (2.2 lb) - 8.5%
- Medium Crystal Malt - 720g (1.58 lb) - 6%
- Dark Chocolate Malt - 580g (1.27 lb) - 5%
- Rice Hulls – 1kg (2.2 lb)
Adjuncts (A LOT!)
- 2.2kg (4.8 lb) of milk chocolate (added last 10 mins of boil)
- 250g (0.55 lb) Lactose (added last 15 mins of boil)
- 500g (1.1 lb) cacao nibs oven-toasted at 180°C (356°F) for 7 minutes and added to last 10 mins of boil
- 500g (1.1 lb) cacao nibs oven-toasted at 180°C (356°F) for 7 minutes and soaked in 700ml of vodka for a week then added to the fermenter at the end of fermentation
- 60ml (2 oz) Vanilla extract - added to the fermenter at the end of fermentation
Hops & whirlfloc tablets
Northern Brewer
15g (0.52 oz) - 60 minutes left in the boil
- 50g (1.76 oz) 15 minutes left in the boil
Fuggles
- 50g (1.76 oz) 15 minutes left in the boil
Whirlfloc
- 1.5g granulated or 2 tablets – 15 minutes left in the boil
Yeast options & fermentation temperatures
- US-05 – ferment at 20°C (68°F) 23g (0.81 oz) / (2 packets)
- AUS-05 – ferment at 20°C (68°F) 23g (0.81 oz) / (2 packets)
- S-04 – ferment at 18°C (64.4°F) 22g (0.81 oz) / (2 packets)
Step by step process
Step 1 – Milling
- Mill grains to medium crush (set mill rollers to a gap of approx. 1.00mm / 0.039 inches (credit card width)
- Just keep in mind roller gap settings are not universal so as you brew more batches you will find the ideal crush size for your setup
- Alternatively if you don’t have a grain mill you can order your grains crushed from most homebrew stores, both online and in person
Step 2 – Mashing
Mash for 90 minutes at 69°C (156.2°F)
- Set your strike water to a few degrees above the target mash temperature (you can use the calculator in our website for this)
- ensure you mix in the grains thoroughly with a mash paddle to prevent dough balls from forming (big spoons, spatulas or whisks will also work)
- its easier to mash the grains and prevent dough balls if you add a little grain at a time, mix, add more grain and repeat until all the grains are mixed
if you don’t have a mash tun with heating then ensure after you have finished mixing the grains in to insulate your mash tun (thick neoprene or heavy blankets both work well)
Step 3 (optional) – Sparging
- if your setup has the capability to sparge then do so with 35L (9.2 gal) sparge water at 78°C (172°F)
- if you are not sparging and using a BIAB (brew in a bag) method then remove grains from mash tun and twist and squeeze the bag to get as much liquid out of the grains as possible
- as you start sparging (or straining your BIAB bag) begin raising the temperature of your wort to a boil
Step 4 – Boiling
- once your wort begins to boil start a timer for a 60-minute boil and add your bittering hops, 15g (0.52 oz) of Northern Brewer
- at 15 minutes left in the boil add 2 whirlfloc tablets (OR granulated whirlfloc 1.5g (0.053 oz)), 250g (0.55 lb) Lactose and 50g (1.76 oz) each of Northern Brewer & Fuggles
- at 10 minutes left in the boil add 2.2kg (4.8 lb) of milk chocolate and 500g (1.1 lb) of oven-toasted cacao nibs
Step 5 – Whirlpooling / cooling
- once wort has been boiling for 60 minutes in total turn off your heat source and begin chilling wort down to yeast pitching temperature
- once you’ve reached yeast pitching temperature take an original gravity reading of your wort
Step 6 – Yeast Pitching
- It is best to make a yeast starter before beginning your brew day (ideally 1 day before) to ensure your yeast are as active and healthy as possible before pitching, but not completely necessary – you could also just rehydrate yeast 30 minutes before pitching.
- Wort Aeration (Optional) if you have a paint mixer give your wort a quick blitz before pitching yeast to help add more dissolved oxygen into the wort to help the yeast have a healthier kick start into fermentation
- Now add your tincture of Vanilla extract! (or you can wait till end of fermentation if you prefer)
- Pitch yeast in wort a degree or two higher than the target fermentation temperature to help yeast take off more aggressively
To make a yeast starter you can use either:
- DME (dry malt extract) at a ratio of approx. 100g per 1L water (3.5 oz per 33 fluid ounces) for gravity of approx. 1.040
- some unfermented wort kept cold and sanitary from a previous brew day
- 70g of table sugar per 1L water (2.5 oz per 33 fluid ounces) – however, it is best to use malt sugar (wort / DME) whenever possible to reduce the chance of shocking the yeast with a different food source from starter to wort pitching
To rehydrate yeast
- Add yeast to approx. 10 times as much room temperature water as the weight of the yeast e.g. 10g yeast in 100 ml water (0.35 oz yeast in 3.5 fluid ounces water)
Step 7 – Fermentation
- Allow yeast to ferment over the next two weeks (approx.)
- If you have a temperature-controlled system keep the fermenter temperature to the recommended fermentation temperature for each yeast strain (stated in the yeast ingredients section above)
- Monitor the fermentation activity over the first 7-10 days by the bubbling of the blow-off tube/airlock of your fermenter, as the bubbling slows down (roughly around day 10-12) take a gravity reading. When the gravity reaches around 1.026 raise the temperature of your fermenter by 1-2 degrees for 2 days for a diacetyl rest (if you don’t have temperature control don’t worry about this step, it's not the end of the world!)
- At the same time as starting diacetyl rest you can now add the 60ml (2 oz) of Vanilla extract and strain and add the cacao-infused vodka to the fermenter
- On day 2 of the diacetyl rest (once gravity reaches roughly 1.024) & gravity is the same 3 days in a row move onto cold crashing! (If you can’t / don’t want to cold crash go straight to kegging/bottling your beer!)
Step 8 (optional) – Cold crashing
- begin cold crashing your fermenter (bring the temperature of your fermenter down to as close to 0°C (32°F) as possible, for 2 days to a week depending on how patient you are
- If you don’t have a temp-controlled fermenter, you can cold crash by putting your fermenter in a fridge or temp-controlled chest freezer
- After you have finished cold crashing it's time to keg/bottle your beer! If you are bottling your beer from the fermenter uncarbonated, remember to add about 5-7 grams (0.17 - 0.24 oz) of priming sugar to your bottles to carbonate your beer.
So... What is it?
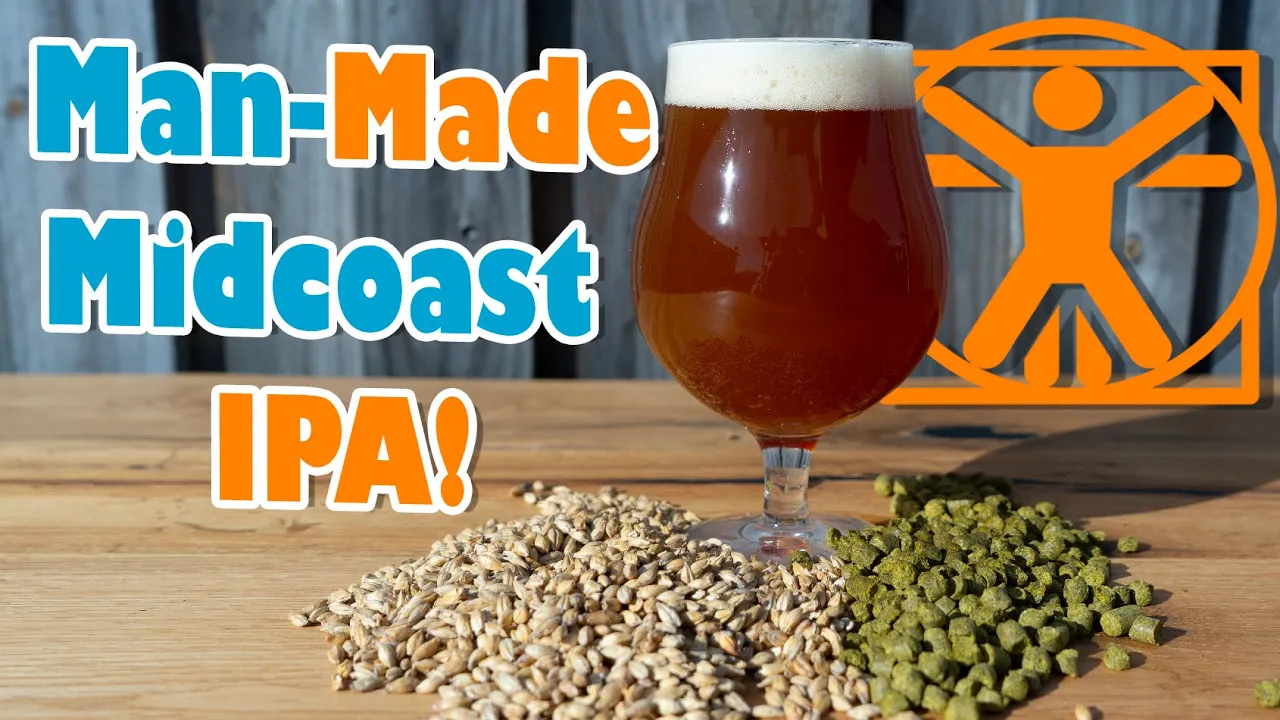
The India Pale Ale (IPA) is a hop-forward beer style with higher alcohol content (typically average 7-7.5%). It originated in the 18th century during British colonization of India, when brewers added extra hops and increased alcohol to preserve beer for long journeys. George Hodgson's "October beer" gained popularity in India, leading to the term "India Pale Ale." Now the IPA has evolved, and is largely responsible for the boom of the new era of craft beer, with breweries the world over experimenting and creating various sub-styles of amazing and unique IPA’s!
What's our like?
So what the heck is a “Mid-Coast” IPA? Well to be honest… it's not really a thing! but it's our tongue and cheek joke at an IPA that sits somewhere in the worlds between a West Coast and an East Coast style. For our “Mid-Coast” the grain bill leans towards a west Coast style, whereas the hop schedule leans more towards an East coast style, almost NEIPA-esque, with low bitterness but big bold citrus, berries and tropical juice hop character! Clocking in at 7.2% it sits in the average ballpark for the IPA style and the crystal backbone makes it a very balanced and smashable IPA!
Batch Size & Stats
- 38L (2 19L corny kegs) / 10 gal finished beer
- 48L (12.7 gal) wort
- For a smaller 19L (5 gal) batch size simply half the ingredients of this recipe
- Starting gravity – 1.067
- Final gravity 1.012
- ABV – 7.2%
What ingredients?
Water
With sparging
- 30L (7.9 gal) strike water approx. mash temp of 66°C (151°F) for 60 mins
- 35L (9.2 gal) sparge water at 78°C (172°F)
Without sparging
- 60L (15.8 gal) strike water approx. mash temp of 66°C (151°F) for 60 mins
-
Malts
Total Grain Bill 7kg (15.4lb)
- Pale Ale – 11.2kg (24.7 lb)
- Medium Crystal – 800g (1.76 lb)
- (I would recommend adding some carapils / cara foam for better body, maybe swap out 500g (1.1lb) from the pale ale malt)
Hops & whirlfloc tablets
Galaxy
- 10g (0.35 oz) - 60 minutes left in the boil
- 10g (0.35 oz) - 10 minutes left in the boil
- 10g (0.35 oz) - 5 minutes left in the boil
- 60g (2.1 oz) - 20 minutes whirlpool after boil at 75 °C (167°F)
Lotus
- 10g (0.35 oz) - 10 minutes left in the boil
- 10g (0.35 oz) - 5 minutes left in the boil
- 60g (2.1 oz) - 20 minutes whirlpool after boil at 75 °C (167°F)
Lupomax Sabro
- 10g (0.35 oz) - 10 minutes left in the boil
- 10g (0.35 oz) - 5 minutes left in the boil
- 60g (2.1 oz) - 20 minutes whirlpool after boil at 75 °C (167°F)
- 100g (3.53 oz) - Dry hop near end of fermentation (around day 7 & 1.013 gravity)
Lupomax Mosaic
- 100g (3.53 oz) - Dry hop near end of fermentation (around day 7 & 1.013 gravity)
Whirlfloc
- 1.5g granulated or 2 tablets – 15 minutes left in the boil
Yeast options & fermentation temperatures
- LalBrew Verdant IPA – ferment at 20°C (68°F) to 25°C (77°F) 22g (0.77 oz) / (2 packet)
- lallemand west coast ale – ferment at 20°C (68°F) to 25°C (77°F) 22g (2 packet)
- US-05 – ferment at 20°C (68°F) 23g (0.81 oz) / (2 packets)
- AUS-05 – ferment at 20°C (68°F) 23g (0.81 oz) / (2 packets)
- S-04 – ferment at 18°C (64.4°F) 22g (0.81 oz) / (2 packets)
Step by step process
Step 1 – Milling
- Mill grains to medium crush (set mill rollers to a gap of approx. 1.00mm / 0.039 inches (credit card width)
- Just keep in mind roller gap settings are not universal so as you brew more batches you will find the ideal crush size for your setup
- Alternatively if you don’t have a grain mill you can order your grains crushed from most homebrew stores, both online and in person
Step 2 – Mashing
Mash for 60 minutes at 66°C (151°F)
- Set your strike water to a few degrees above the target mash temperature (you can use the calculator in our website for this)
- ensure you mix in the grains thoroughly with a mash paddle to prevent dough balls from forming (big spoons, spatulas or whisks will also work)
- its easier to mash the grains and prevent dough balls if you add a little grain at a time, mix, add more grain and repeat until all the grains are mixed
if you don’t have a mash tun with heating then ensure after you have finished mixing the grains in to insulate your mash tun (thick neoprene or heavy blankets both work well)
Step 3 (optional) – Sparging
- if your setup has the capability to sparge then do so with 35L (9.2 gal) sparge water at 78°C (172°F)
- if you are not sparging and using a BIAB (brew in a bag) method then remove grains from mash tun and twist and squeeze the bag to get as much liquid out of the grains as possible
- as you start sparging (or straining your BIAB bag) begin raising the temperature of your wort to a boil
Step 4 – Boiling
- once your wort begins to boil start a timer for a 60-minute boil and add your bittering hops, 10g (0.35 oz) of Galaxy
- at 15 minutes left in the boil add 2 whirlfloc tablets / 1.5g of granulated whirlfloc
- at 10 minutes left in the boil add 10g (0.35 oz) of Galaxy, Lupomax Sabro & Lotus
- at 5 minutes left in the boil add 10g (0.35 oz) of Galaxy, Lupomax Sabro & Lotus
- once wort has been boiling for 60 minutes in total bring the temperature of the wort down to 75 °C (167°F) and add 60g (2.1 oz) each of galaxy, lotus, & lupomax sabro and hold temperature here for 20 minutes
Step 5 – Whirlpooling / cooling
- after your 20 minute hop steep / whirlpool off your heat source and begin chilling wort down to yeast pitching temperature
- once you’ve reached yeast pitching temperature take an original gravity reading of your wort
Step 6 – Yeast Pitching
- It is best to make a yeast starter before beginning your brew day (ideally 1 day before) to ensure your yeast are as active and healthy as possible before pitching, but not completely necessary – you could also just rehydrate yeast 30 minutes before pitching.
- Wort Aeration (Optional) if you have a paint mixer give your wort a quick blitz before pitching yeast to help add more dissolved oxygen into the wort to help the yeast have a healthier kick start into fermentation
- Now add your tincture of Vanilla extract! (or you can wait till end of fermentation if you prefer)
- Pitch yeast in wort a degree or two higher than the target fermentation temperature to help yeast take off more aggressively
- To make a yeast starter you can use either:
- DME (dry malt extract) at a ratio of approx. 100g per 1L water (3.5 oz per 33 fluid ounces) for gravity of approx. 1.040
- some unfermented wort kept cold and sanitary from a previous brew day
- 70g of table sugar per 1L water (2.5 oz per 33 fluid ounces) – however, it is best to use malt sugar (wort / DME) whenever possible to reduce the chance of shocking the yeast with a different food source from starter to wort pitching
- To rehydrate yeast
- Add yeast to approx. 10 times as much room temperature water as the weight of the yeast e.g. 10g yeast in 100 ml water (0.35 oz yeast in 3.5 fluid ounces water)
Step 7 – Fermentation & Dry Hopping
- Allow yeast to ferment over the next two weeks (aprox)
- If you have a temperature-controlled system keep the fermenter temperature to the recommended fermentation temperature for each yeast strain (stated in the yeast ingredients section above)
- Monitor the fermentation activity over the first 5-7 days by the bubbling of the blow-off tube/airlock of your fermenter, as the bubbling slows down (roughly around day 5-7) take a gravity reading. When the gravity reaches around 1.015 raise the temperature of your fermenter by 1-2 degrees for 2 days for a diacetyl rest (if you don’t have temperature control don’t worry about this step, it's not the end of the world!)
- whilst you start your diacetyl rest add your dry hops, 100g (3.53 oz) each of lupomax mosaic & lupomax sabro!
- It's important to note that fermentation times will vary based on your circumstances like temperature, amount of yeast pitched, the healthiness of yeast, the gravity of the wort, pH, etc. so don’t stress be patient and know that these times are just a rough guide
- On day 2 of the diacetyl rest (once gravity reaches roughly 1.012) & gravity is the same 2 days in a row move onto cold crashing! (If you can’t / don’t want to cold crash go straight to kegging/bottling your beer!)
Step 8 (optional) – Cold crashing
- begin cold crashing your fermenter (bring the temperature of your fermenter down to as close to 0°C (32°F) as possible, for 2 days to a week depending on how patient you are
- If you don’t have a temp-controlled fermenter, you can cold crash by putting your fermenter in a fridge or temp-controlled chest freezer
- After you have finished cold crashing it's time to keg/bottle your beer! If you are bottling your beer from the fermenter uncarbonated, remember to add about 5-7 grams (0.17 - 0.24 oz) of priming sugar to your bottles to carbonate your beer.

So... What is it?
The India Pale Ale (IPA) is a hop-forward beer style with higher alcohol content (typically average 7-7.5%). It originated in the 18th century during British colonization of India, when brewers added extra hops and increased alcohol to preserve beer for long journeys. George Hodgson's "October beer" gained popularity in India, leading to the term "India Pale Ale." Now the IPA has evolved, and is largely responsible for the boom of the new era of craft beer, with breweries the world over experimenting and creating various sub-styles of amazing and unique IPA’s!
What's our like?
So how do you take such a popular and notorious style of beer to the next level? you get open AI (artificial intelligence) from Chat GPT to write you a recipe and brew it to the letter!
This may be a beer made by a machine, but it punches with the classic flavour of an old school west coast IPA, and this AI IPA has balls! coming in at a boozy 8.1% The mouthfeel is full and well rounded with a decent weight of bitterness balancing the malty backbone. The hops come punching through with citrus, a touch of pine and finishing with a resinous weight of hop oil.
Batch Size & Stats
- 19L / 5 gal finished beer
- 24L (6.3 gal) wort
- Starting gravity – 1.076
- Final gravity 1.014
- ABV – 8.1%
What ingredients?
Water
With sparging
- 23L (6 gal) strike water approx. 67°C (152.6°F)
- 9.3L (2.4 gal) sparge water at 78°C (172°F)
Without sparging
- 30L (7.9 gal) strike water approx. 67°C (152.6°F)
Malts
Total Grain Bill 7kg (15.4lb)
- Pale ale malt – 5.5kg (12.1 lb)
- Light Munich malt – 500g (1.1 lb)
- Carapils malt – 500g (1.1 lb)
- medium crystal malt – 500g (1.1 lb)
Hops & whirlfloc tablets
Chinook
- 50g (1.7 oz) - 60 minutes left in the boil
Citra
- 50g (1.7 oz) - flame out boil then allow to steep for 15 mins
- 50g (1.7 oz) - dry hop day 7
Simcoe
- 50g (1.7 oz) - after Citra’s been steeping for 10 mins add citra and steep for 5 more mins
- 50g (1.7 oz) - dry hop day 7
Whirlfloc
- 1.5g (0.052 oz) / 2 tablets – 15 minutes left in the boil
Yeast options & fermentation temperatures
- lallemand west coast ale – ferment at 20°C (68°F) to 25°C (77°F) 11g (1 packet)
- US-05 – ferment at 20°C (68°F) 23g (0.81 oz) / (2 packets)
- AUS-05 – ferment at 20°C (68°F) 23g (0.81 oz) / (2 packets)
- S-04 – ferment at 18°C (64.4°F) 22g (0.81 oz) / (2 packets)
Step by step process
Step 1 – Milling
- Mill grains to medium crush (set mill rollers to a gap of approx. 1.00mm / 0.039 inches (credit card width)
- Just keep in mind roller gap settings are not universal so as you brew more batches you will find the ideal crush size for your setup
- Alternatively if you don’t have a grain mill you can order your grains crushed from most homebrew stores, both online and in person
Step 2 – Mashing
Mash for 60 minutes at 67°C (152.6°F) with 23L (6 gal) of strike water
- Set your strike water to a few degrees above the target mash temperature (you can use the calculator in our website for this)
- ensure you mix in the grains thoroughly with a mash paddle to prevent dough balls from forming (big spoons, spatulas or whisks will also work)
- its easier to mash the grains and prevent dough balls if you add a little grain at a time, mix, add more grain and repeat until all the grains are mixed
if you don’t have a mash tun with heating then ensure after you have finished mixing the grains in to insulate your mash tun (thick neoprene or heavy blankets both work well)
Step 3 (optional) – Sparging
- if your setup has the capability to sparge then do so with 9.3L (2.4 gal) sparge water at 78°C (172°F)
- if you are not sparging and using a BIAB (brew in a bag) method then remove grains from mash tun and twist and squeeze the bag to get as much liquid out of the grains as possible
- as you start sparging (or straining your BIAB bag) begin raising the temperature of your wort to a boil
Step 4 – Boiling
- once your wort begins to boil start a timer for a 60-minute boil and add your bittering hops, 50g (1.76 oz) of Chinook
- at 15 minutes left in the boil add 1 whirlfloc tablet (OR granulated whirlfloc 0.7g (0.025 oz)
- after 60 mins of boil turn off your heat source and add 50g (1.7 oz) of Citra and allow to steep for a total of 15 minutes
- after citra has been steeping for 10 minutes add 50g (1.7 oz) of simcoe and allow all to steep for a further 5 minutes. then move on to cooling
Step 5 – Whirlpooling / cooling
- After 15 mins total of hop steeping begin chilling wort down to yeast pitching temperature
- once you’ve reached yeast pitching temperature take an original gravity reading of your wort
Step 6 – Yeast Pitching
- It is best to make a yeast starter before beginning your brew day (ideally 1 day before) to ensure your yeast are as active and healthy as possible before pitching, but not completely necessary – you could also just rehydrate yeast 30 minutes before pitching.
- Wort Aeration (Optional) if you have a paint mixer give your wort a quick blitz before pitching yeast to help add more dissolved oxygen into the wort to help the yeast have a healthier kick start into fermentation
- Now add your tincture of Vanilla extract! (or you can wait till end of fermentation if you prefer)
- Pitch yeast in wort a degree or two higher than the target fermentation temperature to help yeast take off more aggressively
- To make a yeast starter you can use either:
- DME (dry malt extract) at a ratio of approx. 100g per 1L water (3.5 oz per 33 fluid ounces) for gravity of approx. 1.040
- some unfermented wort kept cold and sanitary from a previous brew day
- 70g of table sugar per 1L water (2.5 oz per 33 fluid ounces) – however, it is best to use malt sugar (wort / DME) whenever possible to reduce the chance of shocking the yeast with a different food source from starter to wort pitching
- To rehydrate yeast
- Add yeast to approx. 10 times as much room temperature water as the weight of the yeast e.g. 10g yeast in 100 ml water (0.35 oz yeast in 3.5 fluid ounces water)
Step 7 – Fermentation & Dry Hopping
- Allow yeast to ferment over the next two weeks (aprox)
- If you have a temperature-controlled system keep the fermenter temperature to the recommended fermentation temperature for each yeast strain (stated in the yeast ingredients section above)
- After 7 days of fermentation its time to dry hop, add 50g (1.7 oz) each of simcoe and Citra and allow fermentation to continue for a further 5-7 days
- It's important to note that fermentation times will vary based on your circumstances like temperature, amount of yeast pitched, the healthiness of yeast, the gravity of the wort, pH, etc. so don’t stress be patient and know that these times are just a rough guide
- If you have temp control then when there are 2 days left of fermentation raise the temperature by 2 degrees for a diacetyl rest (once gravity reaches roughly 1.014) & gravity is the same 3 days in a row move onto cold crashing! (If you can’t / don’t want to cold crash go straight to kegging/bottling your beer!)
Step 8 (optional) – Cold crashing
- begin cold crashing your fermenter (bring the temperature of your fermenter down to as close to 0°C (32°F) as possible, for 2 days to a week depending on how patient you are
- If you don’t have a temp-controlled fermenter, you can cold crash by putting your fermenter in a fridge or temp-controlled chest freezer
- After you have finished cold crashing it's time to keg/bottle your beer! If you are bottling your beer from the fermenter uncarbonated, remember to add about 5-7 grams (0.17 - 0.24 oz) of priming sugar to your bottles to carbonate your beer.
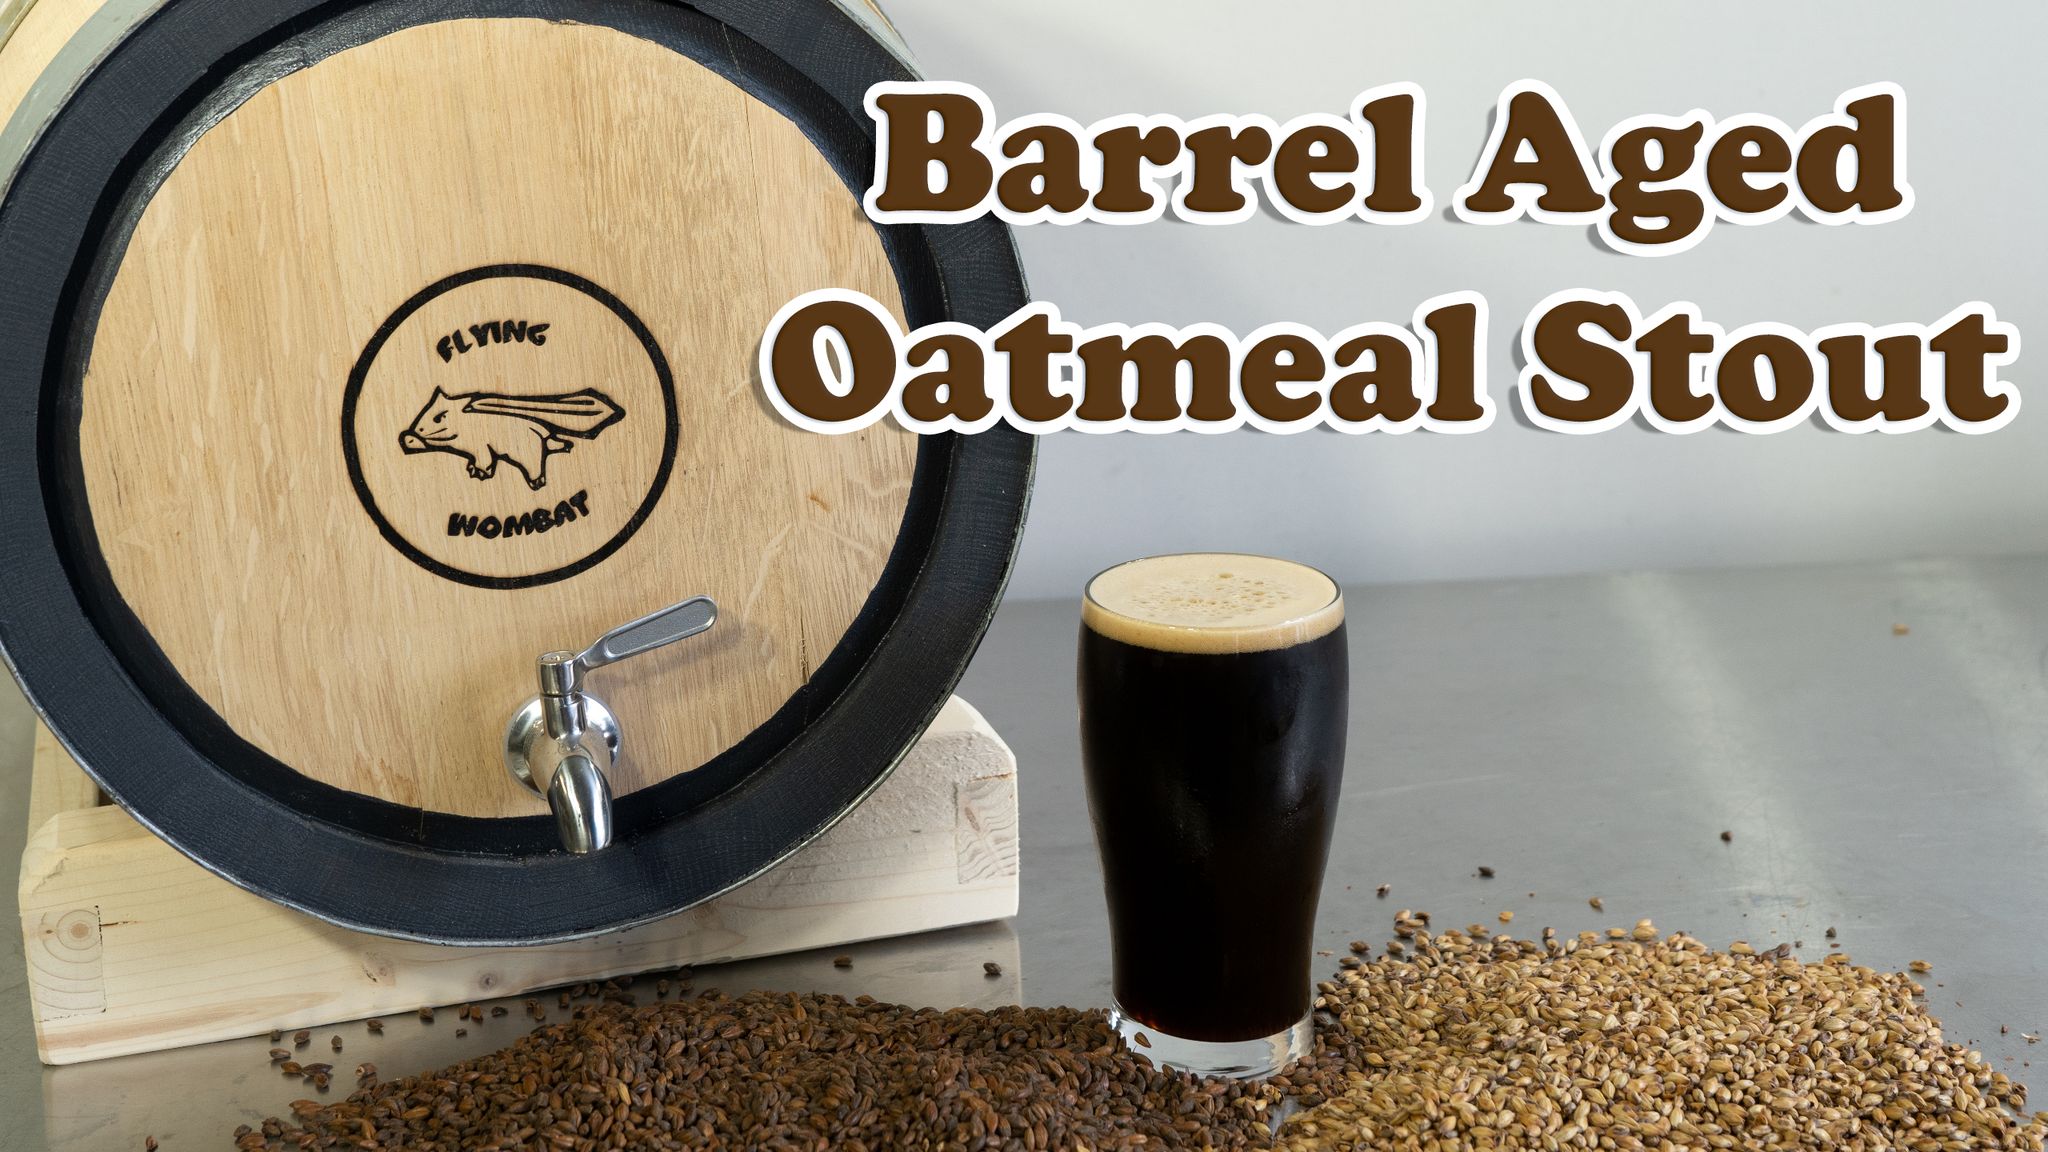
So... What is it?
The Oatmeal Stout is a cousin of the classic Stout, the one major difference being a little obvious, oats! This gives the resulting beer more malty sweetness and a luxurious silky mouthfeel! Now add a barrel to the mix and Bam! you get a Barrel-aged oatmeal stout! Aging the beer for a period of time in a barrel allows the natural tannins and organic compounds in the oak to add additional layers of complexity to the Stout that you can't get in any other way, introducing layers of Vanilla, caramel, spiciness, and even Coconut!
What is ours like?
Here is our attempt at a winter classic! The mouthfeel is creamy, silky, and luxurious, the bitterness mild and in balance, as is the hops profile. The star of the show is the slightly sweet malty nutty character, with delicious flavours of freshly baked bread and espresso coffee-like flavours! Coming in at 6.3% its definitely not low abv but not the 10% target we had in mind! Finally, half this batch was thrown into a 20L Oak barrel that once held irish whiskey, contibuting further flavours of vanilla & oaky sweetness!
Batch Size & Stats
- 35L / 9.5 gal finished beer
- 51L (13.47 gal) wort
- Starting gravity – 1.066
- Final gravity 1.018
- ABV – 6.3%
What ingredients?
Water
With sparging
- 90 minutes, 30L (7.9 gal) Mash water 69°C (156.2°F) - use our calculator to determine strike water
- 42L (11 gal) sparge water at 78°C (172°F)
Without sparging
- 90 minutes, 65L (17.2 gal) strike water 69°C (156.2°F) mash - use our calculator to determine strike water
Malts
Total Grain Bill 14.2kg (31.3 lb) + 1kg (2.2 lb) rice hulls
- Light Munich – 5.74kg (12.65 lb) - (40.4%)
- Dark Munich - 1.96kg (4.32 lb) - (13.8%)
- Wheat malt – 1.94kg (4.27 lb) - (13.7%)
- Rolled Oats - 1.7kg (3.74 lb) - (12%)
- Dark Chocolate malt 980g (2.16 lb) + 200g (7 Oz) end of mash for colour - (8.3%)
- Medium Crystal Malt - 840g (1.85 lb) - (5.9%)
- Rice Hulls – 1kg (2.2 lb)
Adjuncts
Vanilla extract - 3 small vanilla beans, sliced down the middle & soaked in a small cup of bourbon
Hops & whirlfloc tablets
Northern Brewer
- 20g (0.7 oz) - 60 minutes left in the boil
- 50g (1.76 oz) 15 minutes left in the boil
Fuggles
- 50g (1.76 oz) 15 minutes left in the boil
Whirlfloc
- 1.5g (0.052 oz) / 2 tablets – 15 minutes left in the boil
Yeast options & fermentation temperatures
- US-05 – ferment at 20°C (68°F) 23g (0.81 oz) / (2 packets)
- AUS-05 – ferment at 20°C (68°F) 23g (0.81 oz) / (2 packets)
- S-04 – ferment at 18°C (64.4°F) 22g (0.81 oz) / (2 packets)
Step by step process
Step 1 – Milling
- Mill grains to medium crush (set mill rollers to a gap of approx. 1.00mm / 0.039 inches (credit card width)
- Just keep in mind roller gap settings are not universal so as you brew more batches you will find the ideal crush size for your setup
- Alternatively if you don’t have a grain mill you can order your grains crushed from most homebrew stores, both online and in person
Step 2 – Mashing
- Mash for 90 minutes at 69°C (156.2°F)
- Set your strike water to a few degrees above the target mash temperature
- ensure you mix in the grains thoroughly with a mash paddle to prevent dough balls from forming (big spoons, spatulas or whisks will also work)
- its easier to mash the grains and prevent dough balls if you add a little grain at a time, mix, add more grain, and repeat until all the grains are mixed
- if you don’t have a mash tun with heating then ensure after you have finished mixing the grains in to insulate your mash tun (thick neoprene or heavy blankets both work well)
Step 3 (optional) – Sparging
- if your setup has the capability to sparge then do so with 42L (11 gal) sparge water at 78°C (172°F)
- if you are not sparging and using a BIAB (brew in a bag) method then remove grains from mash tun and twist and squeeze the bag to get as much liquid out of the grains as possible
- as you start sparging (or straining your BIAB bag) begin raising the temperature of your wort to a boil
Step 4 – Boiling
- (Optional) - for this beer we wanted to bump up the starting gravity after our very efficient mash! so we boiled the wort for an extra hour BEFORE we added our 60min bittering hops when the “real” boil began!
- once your wort begins to boil start a timer for a 60-minute boil and add your bittering hops, 20g (0.7 oz) of Northern Brewer
- at 15 minutes left in the boil add 2 whirlfloc tablets (OR granulated whirlfloc 1.5g (0.053 oz)) and 50g (1.76 oz) each of Northern Brewer & Fuggles
Step 5 – Whirlpooling / cooling
- once wort has been boiling for 60 minutes in total turn off your heat source and begin chilling wort down to yeast pitching temperature
- once you’ve reached yeast pitching temperature take an original gravity reading of your wort
Step 6 – Yeast Pitching
- It is best to make a yeast starter before beginning your brew day (ideally 1 day before) to ensure your yeast are as active and healthy as possible before pitching, but not completely necessary – you could also just rehydrate yeast 30 minutes before pitching.
- Wort Aeration (Optional) if you have a paint mixer give your wort a quick blitz before pitching yeast to help add more dissolved oxygen into the wort to help the yeast have a healthier kick start into fermentation
- Now add your tincture of Vanilla extract! (or you can wait till end of fermentation if you prefer)
- Pitch yeast in wort a degree or two higher than the target fermentation temperature to help yeast take off more aggressively
- To make a yeast starter you can use either:
- DME (dry malt extract) at a ratio of approx. 100g per 1L water (3.5 oz per 33 fluid ounces) for gravity of approx. 1.040
- some unfermented wort kept cold and sanitary from a previous brew day
- 70g of table sugar per 1L water (2.5 oz per 33 fluid ounces) – however, it is best to use malt sugar (wort / DME) whenever possible to reduce the chance of shocking the yeast with a different food source from starter to wort pitching
- To rehydrate yeast
- Add yeast to approx. 10 times as much room temperature water as the weight of the yeast e.g. 10g yeast in 100 ml water (0.35 oz yeast in 3.5 fluid ounces water)
Step 7 – Fermentation
- Allow yeast to ferment over the next two weeks (approx.)
- If you have a temperature-controlled system keep the fermenter temperature to the recommended fermentation temperature for each yeast strain (stated in the yeast ingredients section above)
- Monitor the fermentation activity over the first 7-10 days by the bubbling of the blow-off tube/airlock of your fermenter, as the bubbling slows down (roughly around day 10-12) take a gravity reading. When the gravity reaches around 1.020 raise the temperature of your fermenter by 1-2 degrees for 2 days for a diacetyl rest (if you don’t have temperature control don’t worry about this step, it's not the end of the world!)
- On day 2 of the diacetyl rest (once gravity reaches roughly 1.018) & gravity is the same 3 days in a row move onto cold crashing! (If you can’t / don’t want to cold crash go straight to kegging/bottling your beer!)
Step 8 (optional) – Cold crashing
- begin cold crashing your fermenter (bring the temperature of your fermenter down to as close to 0°C (32°F) as possible, for 2 days to a week depending on how patient you are
- If you don’t have a temp-controlled fermenter, you can cold crash by putting your fermenter in a fridge or temp-controlled chest freezer
- After you have finished cold crashing it's time to keg/bottle your beer! If you are bottling your beer from the fermenter uncarbonated, remember to add about 5-7 grams (0.17 - 0.24 oz) of priming sugar to your bottles to carbonate your beer.
So... What is it?
The New England India Pale Ale (NEIPA) is a super fruity low bitterness style of IPA that typically sits around the 5.5-7.5% ABV mark. This particular recipe makes a 6.5% tropical juice bomb of a beer, with big flavors and aromas of mango, peaches, guava, orange, pineapple, and a touch of watermelon, lychee, and candy-like sweetness! If you haven't brewed a NEIPA before or just wanted to know what ingredients go into brewing a NEIPA, this is the guide for you!
Batch Size & ABV
38L (2 19L corny kegs) / 10 gal finished beer
50L (13.2 gal) wort
For a smaller 19L (5 gal) batch size simply half the ingredients of this recipe
Starting gravity – 1.063
Final gravity 1.013
ABV – 6.5%
Ingredients
Water
- With sparging
- 30L (7.9 gal) strike water approx. 75°C (167°F) use this calculator to determine your strike water starting temp for a 69°C (156°F) mash https://chasethecraft.com/calculators
- 30L (7.9 gal) sparge water at 78°C (172°F)
- Without sparging
- 60L (7.9 gal) strike water approx. 74°C (165°F) use this calculator to determine your strike water starting temp for a 69°C (156°F) mash https://chasethecraft.com/calculators
Malts:
- Pale ale malt – 7.7kg (17 lb)
- Wheat Malt – 1.65kg (3.6 lb)
- Rolled Oat – 1.1kg (2.4 lb)
- Crisp Cara Gold (light caramalt) – 550g (1.2 lb)
- Rice Hulls (not necessary, just helps with sparging) – 550g (1.2 lb)
Hops & whirlfloc tablets
Galaxy
- 10g (0.35 oz) - 60 minutes left in the boil
Lupomax El Dorado
- 40g (1.4 oz) – whirlpool for 20 minutes at 75°C (167°F)
- 65g (2.3 oz) - Dry hop at gravity 1.017 (approx. day 6-10 depending on your yeast)
Lupomax Mosaic
- 40g (1.4 oz) – whirlpool for 20 minutes at 75°C (167°F)
- 65g (2.3 oz) - Dry hop at gravity 1.017 (approx. day 6-10 depending on your yeast)
Lupomax Sabro
- 40g (1.4 oz) – whirlpool for 20 minutes at 75°C (167°F)
- 65g (2.3 oz) - Dry hop at gravity 1.017 (approx. day 6-10 depending on your yeast)
Lupomax Amarillio
- 40g (1.4 oz) – whirlpool for 20 minutes at 75°C (167°F)
- 65g (2.3 oz) - Dry hop at gravity 1.017 (approx. day 6-10 depending on your yeast)
- Whirlfloc tablets
- 2 tablets – 15 minutes left in the boil
Yeast options & fermentation temperatures
- 23g (0.8 oz) Kveik (we used a Omega yeats Espe Kveik, but any kveik is great!) ferment at 32°C
- 23g (0.8 oz) US-05 – ferment at 20°C
- 23g (0.8 oz) S-04 – ferment at 19°C
Step by step process
Step 1 – Milling
- Mill grains to medium crush (set mill rollers to a gap of approx. 1mm / 0.039 inches)
- Just keep in mind roller gap settings are not universal so as you brew more batches you will find the ideal crush size for your setup
- Alternatively if you don’t have a grain mill you can order your grains crushed from most homebrew stores, both online and in person
Step 2 – Mashing
- Mash for 60 minutes at 69°C (156°F)
- Set your strike water to a few degrees above the target mash temperature, you can use this calculator to determine what your strike temperature should be https://chasethecraft.com/calculators
- ensure you mix in the grains thoroughly with a mash paddle to prevent dough balls from forming (big spoons, spatulas or whisks will also work)
- its easier to mash the grains and prevent dough balls if you add a little grain at a time, mix, add more grain and repeat until all the grains are mixed
- if you don’t have a mash tun with heating then ensure after you have finished mixing the grains in to insulate your mash tun (thick neoprene or heavy blankets both work well)
Step 3 (optional) – Sparging
- if your setup has the capability to sparge then do so with 30L (7.9 gal) of sparge water at 78 °C (172°F)
- if you are not sparging and using a BIAB (brew in a bag) method then remove grains from mash tun and twist and squeeze the bag to get as much liquid out of the grains as possible
- as you start sparging (or straining your BIAB bag) begin raising the temperature of your wort to a boil
Step 4 – Boiling
- once your wort begins to boil start a timer for a 60-minute boil and add your bittering hops, 10g (0.35 oz) of Galaxy
- at 15 minutes left in the boil add 2 whirlfloc tablets
- after 60 minutes of boiling turn of the heat and chill the temperature of the wort down to 75°C (167°F) and begin whirlpooling
- if you don’t have a wort chiller you could rest your boil kettle in an ice bucket
- if your system can’t whirlpool you can also achieve this with a mash paddle and a power drill, if you don’t have this either don’t worry about whirlpooling it’s not completely necessary
Step 5 – Whirlpooling / whirlpool hop additions
- once temperature reaches 75°C (167°F) and you have started whirlpooling add your whirlpool hops, 40g (1.4 oz) each of Lupomax versions of Mosaic, Amarillo, Sabro and El Dorado
- allow hops to whirlpool in the wort for 20 minutes and then begin chilling wort again down to yeast pitching temperature
- once you’ve reached yeast pitching temperature take an original gravity reading of your wort
Step 6 – Yeast Pitching
- It is best to make a yeast starter before beginning your brew day (ideally 1 day before) to ensure your yeast are as active and healthy as possible before pitching, but not completely necessary – you could also just rehydrate yeast 30 minutes before pitching.
- Pitch yeast in wort a degree or two higher than the target fermentation temperature to help yeast take off more aggressively
- To make a yeast starter you can use either:
- DME (dry malt extract) at a ratio of approx. 100g per 1L water (3.5 oz per 33 fluid ounces) for gravity of approx. 1.040
- some unfermented wort kept cold and sanitary from a previous brew day
- 70g of table sugar per 1L water (2.5 oz per 33 fluid ounces) – however, it is best to use malt sugar (wort / DME) whenever possible to reduce the chance of shocking the yeast with a different food source from starter to wort pitching
- To rehydrate yeast
- Add yeast to approx. 10 times as much room temperature water as the weight of the yeast e.g. 10g yeast in 100 ml water (0.35 oz yeast in 3.5 fluid ounces water)
Step 7 – Fermentation & dry hopping
- Allow yeast to ferment over the next week to two weeks
- If you have a temperature-controlled system keep the fermenter temperature to the recommended fermentation temperature for each yeast strain (stated in the yeast ingredients section above)
- Monitor the fermentation activity over the first 7 days by the bubbling of the blow-off tube/airlock of your fermenter, as the bubbling slows down (roughly around day 7) take a gravity reading. When the gravity reaches around 1.014 raise the temperature of your fermenter by 1-2 degrees for 2 days for a diacetyl rest (if you don’t have temperature control don’t worry about this step, it's not the end of the world!)
- It's important to note that fermentation times will vary based on your circumstances like temperature, amount of yeast pitched, the healthiness of yeast, the gravity of the wort, pH, etc. so don’t stress be patient and know that these times are just a rough guide
- On day 2 of the diacetyl rest (once gravity reaches roughly 1.015 – 1.017) add 65g (2.3 oz) each of Lupomax versions of Mosaic, Amarillo, Sabro, and El Dorado
- One day after dry hopping take a gravity reading, fermentation should finish at about 1.013, if you haven't reached this yet wait another day and take another reading, once the gravity is the same 2 days in a row move onto cold crashing! (If you can’t / don’t want to cold crash go straight to kegging/bottling your beer!)
Step 8 (optional) – Cold crashing
- begin cold crashing your fermenter (bring the temperature of your fermenter down to as close to 0°C (32°F) as possible, for 2 days to a week depending on how patient you are
- If you don’t have a temp-controlled fermenter, you can cold crash by putting your fermenter in a fridge or temp-controlled chest freezer
- After you have finished cold crashing it's time to keg/bottle your beer! If you are bottling your beer from the fermenter uncarbonated remember to add about 5-7 grams (0.17 - 0.24 oz) of priming sugar to your bottles to carbonate your beer.
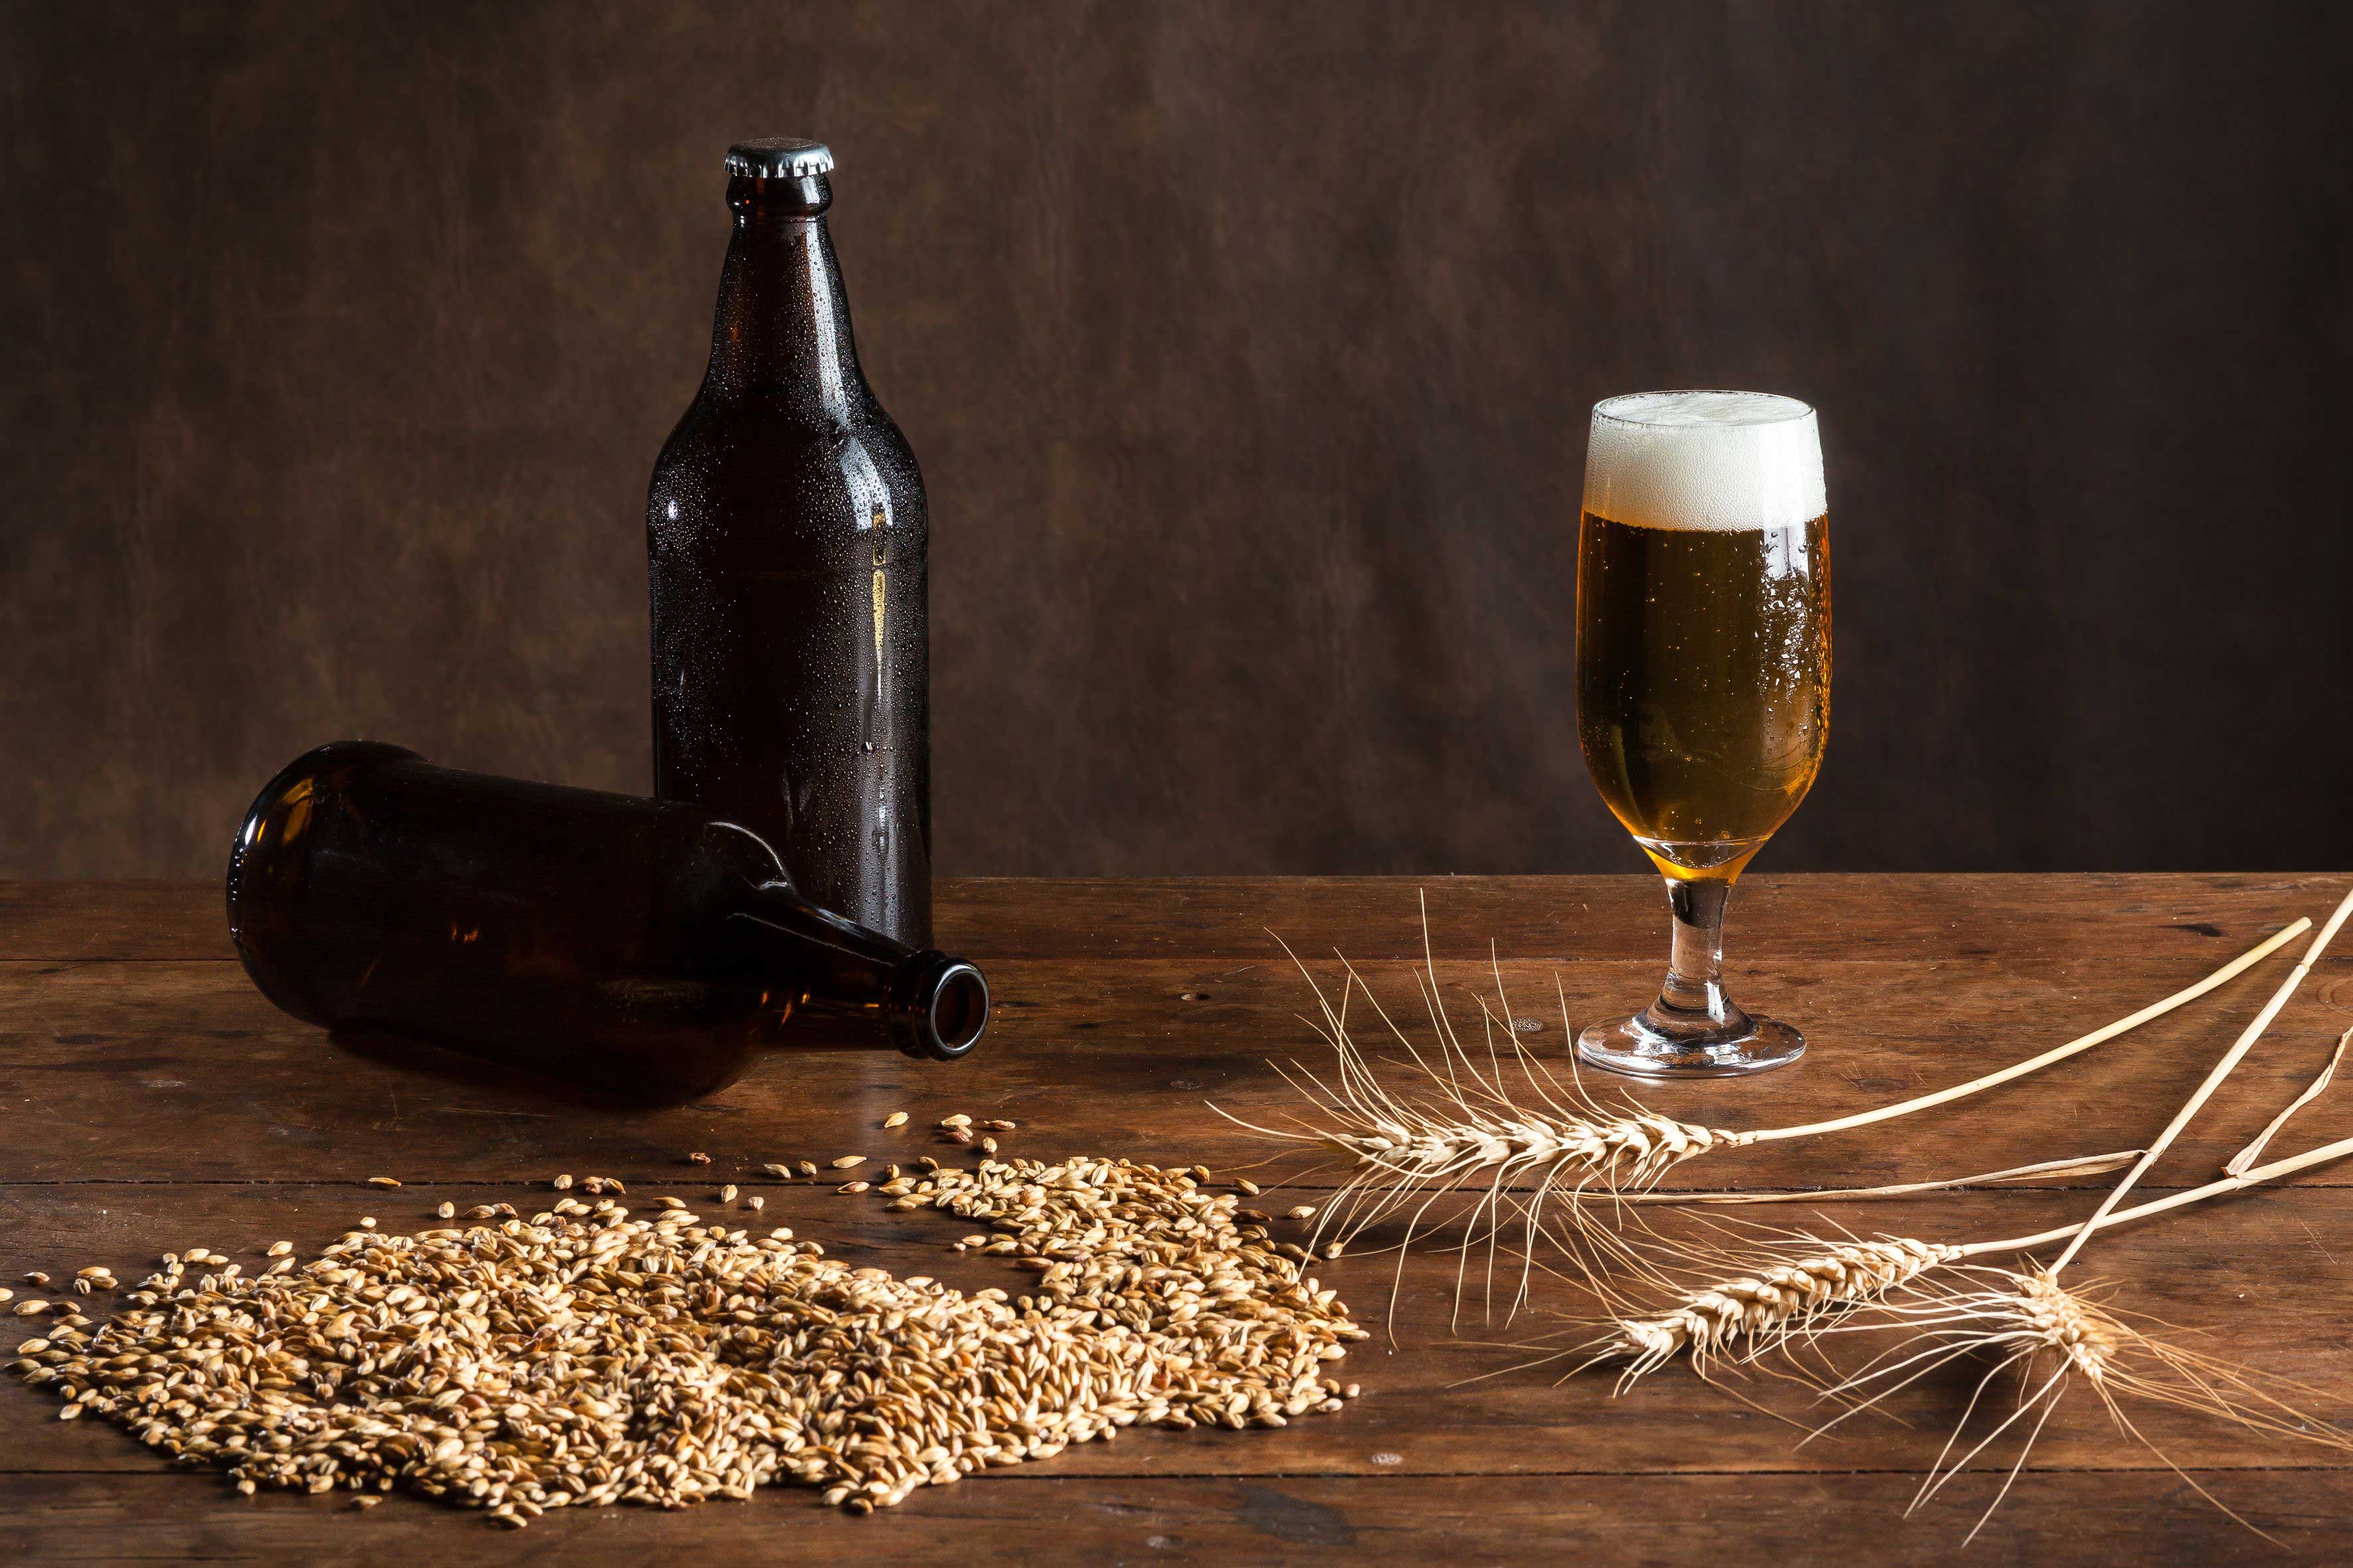
So... What is it?
The Helles Lager (primarily produced in Bavaria - southern Germany) is much maltier and breadier than a classic style pilsner, and “helles” translates to “brightness” and “light” describing the golden-hued colour of the lager. It typically sits between 4.5% to 5.5% in abv and is made as a refreshing and crisp style summer beer with a balanced malty bready base and fresh zesty hoppiness.
This particular recipe takes on the fundamentals of the style with a slight wombat twist! Coming in at 5.5% it sits at the higher ABV end of the style. As far as hops go a traditional Helles would use older noble hop varieties, however, we used some fresher fruitier new world hops balanced by the woody earthiness of UK fuggles for a more summery style zest (and also its all we had available at the time!). All in all making a fresh, malty german style lager with a bit of a twist.
Batch Size & Stats
- 38L (2 19L corny kegs) / 10 gal finished beer
- 50L (13.2 gal) wort
- For a smaller 19L (5 gal) batch size simply half the ingredients of this recipe
- Starting gravity – 1.052
- Final gravity 1.010
What ingredients?
Water
With sparging
- 30L (7.9 gal) Mash temp 66°C (151°F) 1 hour. Strike water approx. 71°C (160°F) use our calculator to determine your strike water temp
- 35L (9.2 gal) sparge water at 78°C (172°F)
Without sparging
- 60L (7.9 gal) Mash temp 66°C (151°F) 1 hour. Strike water approx. 72°C (161.6°F) use our calculator to determine your strike water temp
Malts:
- Pilsner – 8.7kg (19.4 lb)
- Light Munich – 1.2kg (2.64 lb)
- Aurora – 100g (3.5 oz)
Hops & whirlfloc tablets
Fuggles
- 15g (0.52 oz) - 60 minutes left in the boil
- 60g (2.1 oz) - 15 minutes left in the boil
Huell Melon
- 60g (2.1 oz) - 15 minutes left in the boil
Whirlfloc tablets
- 1.5g (0.052 oz) / 2 tablets – 15 minutes left in the boil
Yeast options & fermentation temperatures
- 23g SafLager S-23 – ferment at 15°C
- 23g SafLager W-34/70 – ferment at 14°C

Step by step process
Step 1 – Milling
- Mill grains to medium crush (set mill rollers to a gap of approx. 1.05mm / 0.041 inches)
- Just keep in mind roller gap settings are not universal so as you brew more batches you will find the ideal crush size for your setup
- Alternatively if you don’t have a grain mill you can order your grains crushed from most homebrew stores, both online and in person
Step 2 – Mashing
- Mash for 60 minutes at 66°C (151°F)
- Set your strike water to a few degrees above the target mash temperature, you can use our calculator to determine what your strike temperature should be
- ensure you mix in the grains thoroughly with a mash paddle to prevent dough balls from forming (big spoons, spatulas or whisks will also work)
- its easier to mash the grains and prevent dough balls if you add a little grain at a time, mix, add more grain and repeat until all the grains are mixed
- if you don’t have a mash tun with heating then ensure after you have finished mixing the grains in to insulate your mash tun (thick neoprene or heavy blankets both work well)
Step 3 (optional) – Sparging
- if your setup has the capability to sparge then do so with 35L (9.2 gal) sparge water at 78°C (172°F)
- if you are not sparging and using a BIAB (brew in a bag) method then remove grains from mash tun and twist and squeeze the bag to get as much liquid out of the grains as possible
- as you start sparging (or straining your BIAB bag) begin raising the temperature of your wort to a boil
Step 4 – Boiling
- once your wort begins to boil start a timer for a 60-minute boil and add your bittering hops, 15g (0.52 oz) of Fuggles
- at 15 minutes left in the boil add 2 whirlfloc tablets and 60g (2.1 oz) each of Fuggles and Huell Melon
Step 5 – Whirlpooling / cooling
- once wort has been boiling for 60 minutes in total turn off your heat source and begin chilling wort down to yeast pitching temperature
- once you’ve reached yeast pitching temperature take an original gravity reading of your wort
Step 6 – Yeast Pitching
- It is best to make a yeast starter before beginning your brew day (ideally 1 day before) to ensure your yeast are as active and healthy as possible before pitching, but not completely necessary – you could also just rehydrate yeast 30 minutes before pitching.
- Pitch yeast in wort a degree or two higher than the target fermentation temperature to help yeast take off more aggressively
- To make a yeast starter you can use either:
- DME (dry malt extract) at a ratio of approx. 100g per 1L water (3.5 oz per 33 fluid ounces) for gravity of approx. 1.040
- some unfermented wort kept cold and sanitary from a previous brew day
- 70g of table sugar per 1L water (2.5 oz per 33 fluid ounces) – however, it is best to use malt sugar (wort / DME) whenever possible to reduce the chance of shocking the yeast with a different food source from starter to wort pitching
- To rehydrate yeast
- Add yeast to approx. 10 times as much room temperature water as the weight of the yeast e.g. 10g yeast in 100 ml water (0.35 oz yeast in 3.5 fluid ounces water)
Step 7 – Fermentation & dry hopping
- Allow yeast to ferment over the next two weeks (aprox)
- If you have a temperature-controlled system keep the fermenter temperature to the recommended fermentation temperature for each yeast strain (stated in the yeast ingredients section above)
- Monitor the fermentation activity over the first 10-12 days by the bubbling of the blow-off tube/airlock of your fermenter, as the bubbling slows down (roughly around day 10-12) take a gravity reading. When the gravity reaches around 1.010 raise the temperature of your fermenter by 1-2 degrees for 2 days for a diacetyl rest (if you don’t have temperature control don’t worry about this step, it's not the end of the world!)
- It's important to note that fermentation times will vary based on your circumstances like temperature, amount of yeast pitched, the healthiness of yeast, the gravity of the wort, pH, etc. so don’t stress be patient and know that these times are just a rough guide
- On day 2 of the diacetyl rest (once gravity reaches roughly 1.008) & gravity is the same 2 days in a row move onto cold crashing! (If you can’t / don’t want to cold crash go straight to kegging/bottling your beer!)
Step 8 (optional) – Cold crashing
- begin cold crashing your fermenter (bring the temperature of your fermenter down to as close to 0°C (32°F) as possible, for 2 days to a week depending on how patient you are
- If you don’t have a temp-controlled fermenter, you can cold crash by putting your fermenter in a fridge or temp-controlled chest freezer
- After you have finished cold crashing it's time to keg/bottle your beer! If you are bottling your beer from the fermenter uncarbonated remember to add about 5-7 grams (0.17 - 0.24 oz) of priming sugar to your bottles to carbonate your beer.
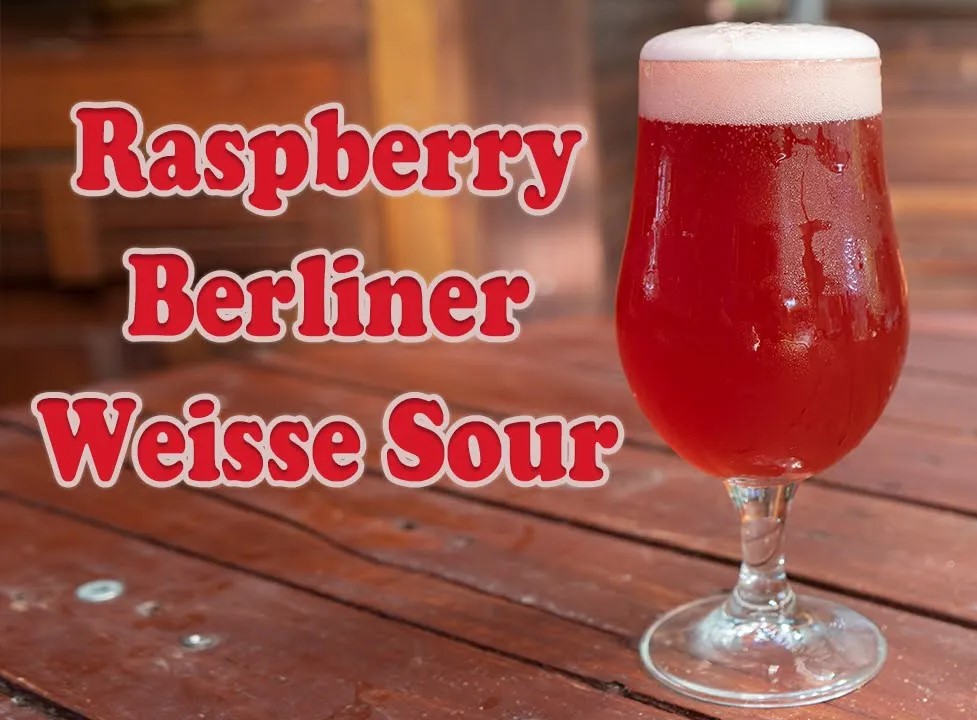
So... What is it?
The Berliner Weisse is a sour wheat beer from (you guessed it) Berlin, Germany! characterized by its slightly sour character and light abv (normally around 3-3.5%) it's a fantastic drop for summer in the beer garden, typically having a very light body, tartness on the tongue, and fresh fruity character. This also makes it a fantastic beer for fruit infusions!
What is ours like?
Seeing as this is our first crack at a sour we figured there was no better place to start than with a Berliner! We are stoked to say our turned out brilliantly!
The mouthfeel is slightly tart, the bitterness very mild and hop character slightly fruity but all very subdued to allow the sour character and raspberry flavour to shine! Our Berliner clocked in pretty high on the ABV at 5.5% (but hey who's ever complained about a bit more booze!) and has a fantastic red colour thanks to the huge dump of Raspberry puree added during the end of fermentation, which also produced a brilliant fruity sweetness, complementing the sour acidity perfectly.
Batch size & ABV
- 19L / 5 gal finished beer
- 23L (6 gal) wort
- Starting gravity – 1.053
- Final gravity 1.011
- ABV – 5.5%
Ingredients
Water
With sparging
- 15L (3.9 gal) strike water, Mash at 66°C (151°F) for 60 mins, strike temp approx. 69°C (156°F) use our calculator for this
- 20L (5.2 gal) sparge water at 78°C (172°F)
Without sparging
- 30L (7.9 gal) strike water, Mash at 66°C (151°F) for 60 mins, strike temp approx. 66°C (151°F) use our calculator for this
Malts
- Pale ale malt – 3kg (6.6 lb)
- Wheat malt – 2.5kg (5.5 lb)
- Rice Hulls – 500g (1.1 lb)
Hops & whirlfloc tablets
- Northern Brewer
- 15g (0.53 oz) - 60 minutes left in the boil
- Hallertau Huell Melon
- 15g (0.53 oz) - 15 minutes left in the boil
- Whirlfloc Tablets
- 1 tablet – 15 minutes left in the toil OR granulated whirlfloc 0.7g (0.025 oz)
Yeast options & fermentation temperatures
- Wildbrew™ Philly Sour [Lallemand] – ferment at 20°C (68°F) to 25°C (77°F) 22g (2 packets)
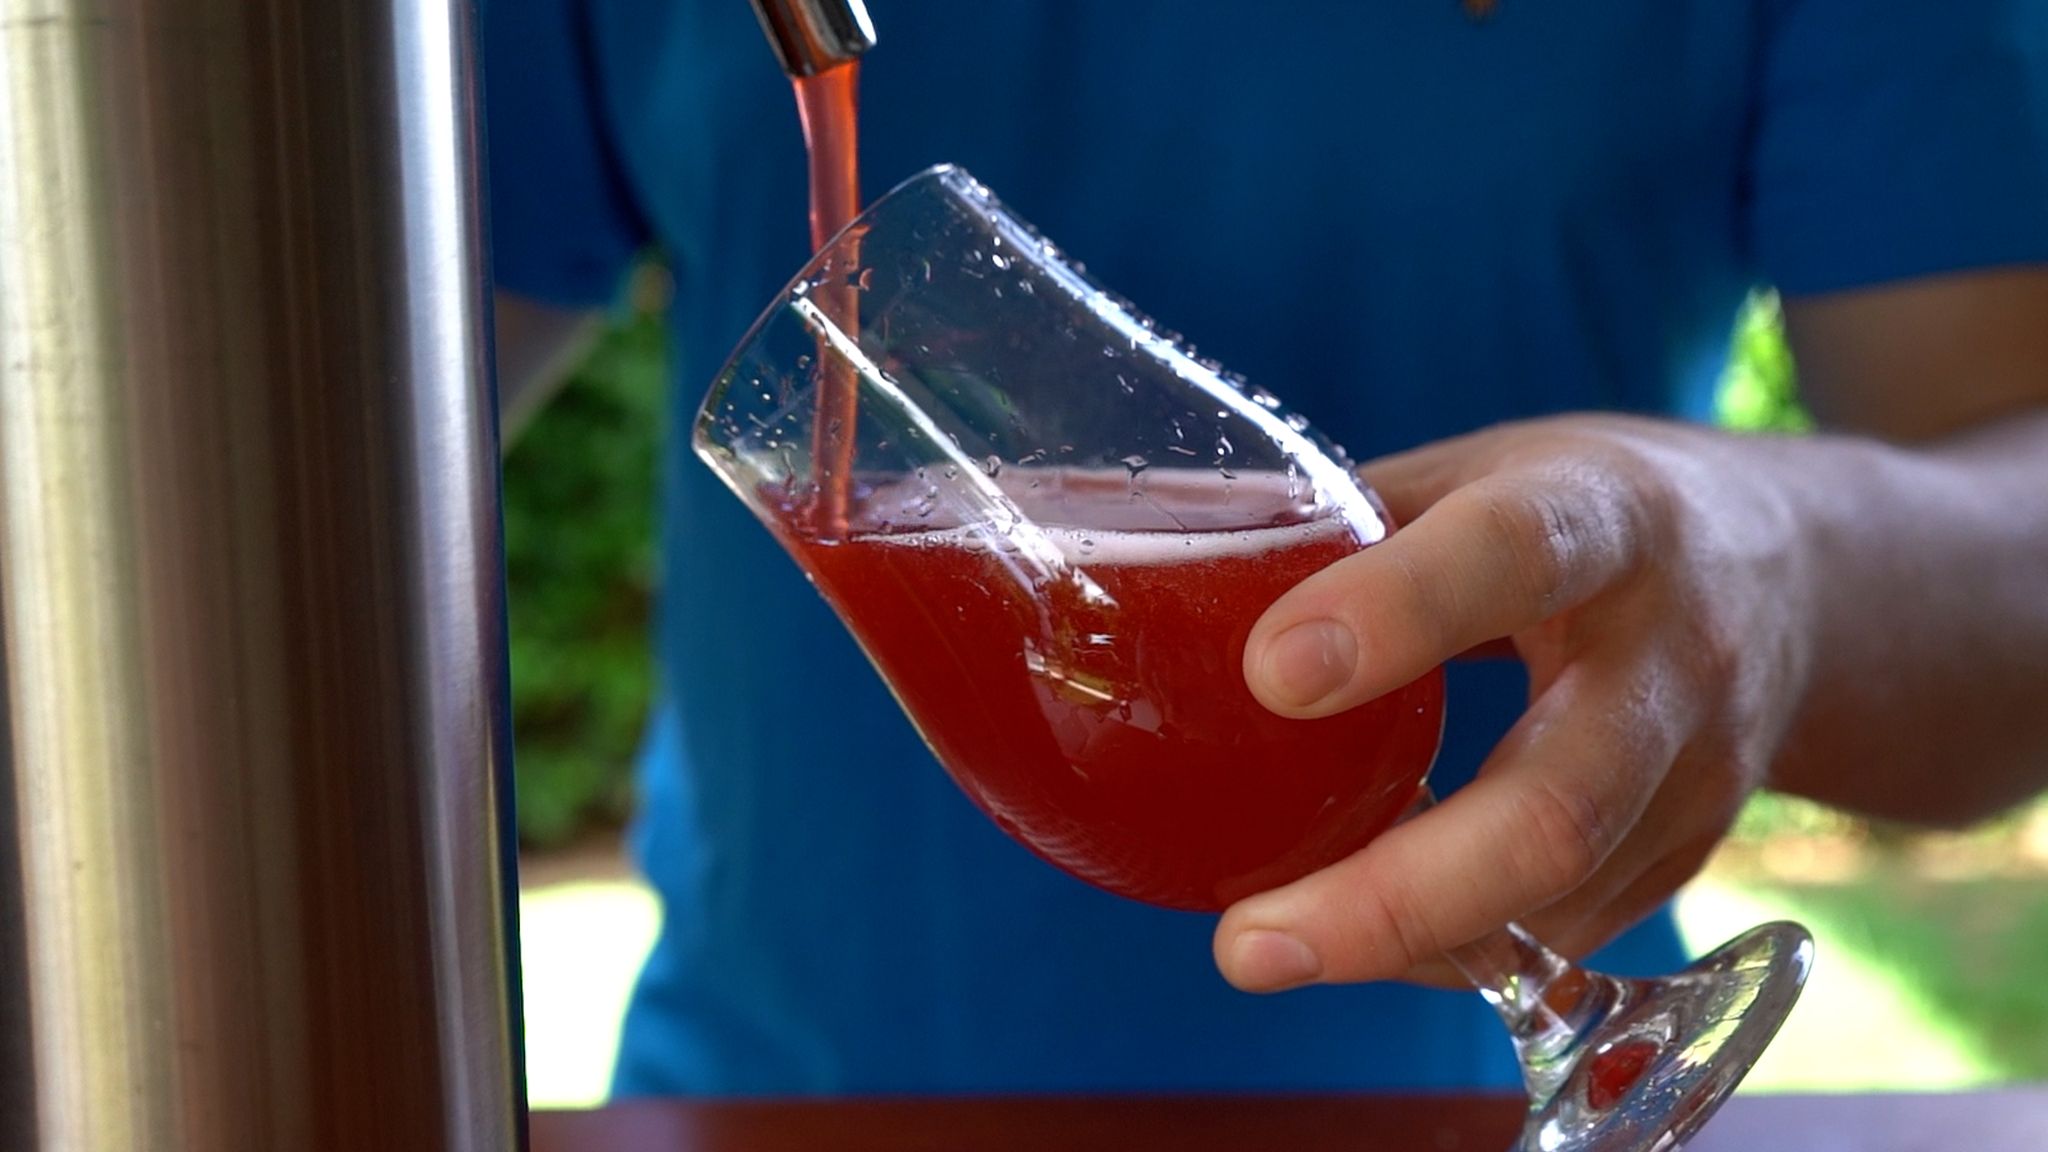
Step by step process
Step 1 – Milling
- Mill grains to medium crush (set mill rollers to a gap of approx. 1.00mm / 0.039 inches)
- Just keep in mind roller gap settings are not universal so as you brew more batches you will find the ideal crush size for your setup
- Alternatively if you don’t have a grain mill you can order your grains crushed from most homebrew stores, both online and in person
Step 2 – Mashing
- Mash for 60 minutes at 66°C (151°F)
- Set your strike water to a few degrees above the target mash temperature, you can use our calculator to determine what your strike temperature should be
- ensure you mix in the grains thoroughly with a mash paddle to prevent dough balls from forming (big spoons, spatulas or whisks will also work)
- its easier to mash the grains and prevent dough balls if you add a little grain at a time, mix, add more grain and repeat until all the grains are mixed
- if you don’t have a mash tun with heating then ensure after you have finished mixing the grains in to insulate your mash tun (thick neoprene or heavy blankets both work well)
Step 3 (optional) – Sparging
- if your setup has the capability to sparge then do so with 20L (5.2 gal) sparge water at 78°C (172°F)
- if you are not sparging and using a BIAB (brew in a bag) method then remove grains from mash tun and twist and squeeze the bag to get as much liquid out of the grains as possible
- as you start sparging (or straining your BIAB bag) begin raising the temperature of your wort to a boil
Step 4 – Boiling
- once your wort begins to boil start a timer for a 60-minute boil and add your bittering hops, 15g (0.53 oz) of Northern Brewer
- at 15 minutes left in the boil add 1 whirlfloc tablet (OR granulated whirlfloc 0.7g (0.025 oz)) and 15g (0.53 oz) of Hallertau Huell Melon
Step 5 – Whirlpooling / cooling
- once wort has been boiling for 60 minutes in total turn off your heat source and begin chilling wort down to yeast pitching temperature
- once you’ve reached yeast pitching temperature take an original gravity reading of your wort
Step 6 – Yeast Pitching
- It is best to make a yeast starter before beginning your brew day (ideally 1 day before) to ensure your yeast are as active and healthy as possible before pitching, but not completely necessary – you could also just rehydrate yeast 30 minutes before pitching.
- Wort Aeration (Optional) if you have a paint mixer give your wort a quick blitz before pitching yeast to help add more dissolved oxygen into the wort to help the yeast have a healthier kick start into fermentation
- Pitch yeast in wort a degree or two higher than the target fermentation temperature to help yeast take off more aggressively
- To make a yeast starter you can use either:
- DME (dry malt extract) at a ratio of approx. 100g per 1L water (3.5 oz per 33 fluid ounces) for gravity of approx. 1.040
- some unfermented wort kept cold and sanitary from a previous brew day
- 70g of table sugar per 1L water (2.5 oz per 33 fluid ounces) – however, it is best to use malt sugar (wort / DME) whenever possible to reduce the chance of shocking the yeast with a different food source from starter to wort pitching
- To rehydrate yeast
- Add yeast to approx. 10 times as much room temperature water as the weight of the yeast e.g. 10g yeast in 100 ml water (0.35 oz yeast in 3.5 fluid ounces water)
Step 7 – Fermentation & Fruit additions!
- Allow yeast to ferment over the next two weeks (aprox)
- If you have a temperature-controlled system keep the fermenter temperature to the recommended fermentation temperature for each yeast strain (stated in the yeast ingredients section above)
- Monitor the fermentation activity over the first 7-10 days by the bubbling of the blow-off tube/airlock of your fermenter, as the bubbling slows down (roughly around day 10-12) take a gravity reading. When the gravity reaches around 1.015 raise the temperature of your fermenter by 1-2 degrees for 2 days for a diacetyl rest (if you don’t have temperature control don’t worry about this step, it's not the end of the world!)
- Time to add fruit! purée 3kg (6.6 lb) of Raspberries and throw them all into the fermenter (we used frozen raspberries but if you have fresh raspberries even better!)
- It's important to note that fermentation times will vary based on your circumstances like temperature, amount of yeast pitched, the healthiness of yeast, the gravity of the wort, pH, etc. so don’t stress be patient and know that these times are just a rough guide
- On day 2 of the diacetyl rest (once gravity reaches roughly 1.011) & gravity is the same 3 days in a row move onto cold crashing! (If you can’t / don’t want to cold crash go straight to kegging/bottling your beer!)
Step 8 (optional) – Cold crashing
- begin cold crashing your fermenter (bring the temperature of your fermenter down to as close to 0°C (32°F) as possible, for 2 days to a week depending on how patient you are
- If you don’t have a temp-controlled fermenter, you can cold crash by putting your fermenter in a fridge or temp-controlled chest freezer
- After you have finished cold crashing it's time to keg/bottle your beer! If you are bottling your beer from the fermenter uncarbonated remember to add about 5-7grams (0.17 - 0.24 oz) of priming sugar to your bottles to carbonate your beer.