.png)
Historically Accurate 1800's Double Decoction Vienna Lager!
A traditional 19th-century Vienna Lager brewed using a true double decoction mash. Built entirely on Vienna malt, this beer delivers rich toasted bread character, firm bitterness from Tettnang hops, and a clean, dry finish shaped by classic lager fermentation. Inspired by early Austrian brewing methods, this recipe focuses on depth, balance, and authenticity.
Stats
- Style: Vienna Lager
- ABV: 4.6%
- OG: 1.044 (measured 1.047)
- FG: 1.009
- IBU: 22 (Tinseth)
- Colour: 10 EBC (SRM ~5)
- Carbonation: 2.4 vols CO₂
- Batch Size: 45 L (11.9 gal)
- Boil Time: 60 min
- Brewhouse Efficiency: 80%
- System: BrewZilla / RoboBrew 65 L
Ingredients
Grain Bill (8 kg / 17.6 lb total)
- 8 kg (17.6 lb) Gladfield Vienna Malt (8.2 EBC) — 100%
Hops – Tettnang (250 g / 8.8 oz total)
- 79 g (2.8 oz) @ 60 min
- 56 g (2 oz) @ 30 min
- 87 g (3.1 oz) @ 10 min
- 28 g (1 oz) @ 5 min
Yeast
- 2 packs White Labs WLP802 Czech Budejovice Lager
Water Profile (Historic Vienna Profile)
- Ca 35 ppm
- Mg 16 ppm
- Na 17 ppm
- Cl 31 ppm
- SO₄ 66 ppm
- HCO₃ 112 ppm
- SO₄/Cl ratio: 2.2
- Mash pH: 5.56
- Sparge pH: 5.4
Mash Additions
- 0.31 g Baking Soda
- 4.4 g Epsom Salt
- 1.1 g Gypsum
- 3 ml Phosphoric Acid (85%)
- 1.2 g Slaked Lime
Sparge Additions
- 0.19 g Baking Soda
- 2.75 g Epsom Salt
- 0.69 g Gypsum
- 2.83 ml Phosphoric Acid (85%)
- 0.75 g Slaked Lime
Boil
- 1.67 g Whirlfloc @ 15 mins
Mash Schedule — Traditional Double Decoction
- 64 °C (147 °F) — 15 min beta rest
- Pull decoction, boil 15 min
- Return to 64 °C — 15 min
- Raise to 70 °C (158 °F) — 15 min alpha rest
- Second decoction boil — 15 min
- Return to 70 °C — 15 min
- Mash out at 77 °C (171 °F) — 15 min
Mash water: 40 L (10.6 gal)
Sparge water: 25 L (6.6 gal)
Fermentation Schedule
- Primary: 10 °C (50 °F) for 14 days
- Secondary: 12 °C (54 °F) for 3 days
- Cold crash: 1 °C (34 °F) for 3 days
- Carbonation: 2.4 vols CO₂
Step-by-Step Brewing Method
1. Mash In
Mash 8 kg (17.6 lb) Vienna malt in 40 L (10.6 gal) of water at 64 °C (147 °F). Rest for 15 minutes.
2. First Decoction
Pull a thick portion of the mash, bring to a boil, and boil for 15 minutes. Return to main mash to maintain 64 °C for another 15 minutes.
3. Alpha Rest
Raise mash to 70 °C (158 °F) and hold for 15 minutes.
4. Second Decoction
Pull a second thick decoction, boil 15 minutes, then return to mash and hold at 70 °C for another 15 minutes.
5. Mash Out & Sparge
Raise to 77 °C (171 °F) for 15 minutes. Sparge with 25 L (6.6 gal) at 77 °C to collect approximately 55–56 L (14.5 gal) pre-boil wort.
6. Boil – 60 Minutes
Add Tettnang hops according to schedule. Add Whirlfloc with 15 minutes remaining.
7. Chill & Transfer
Chill wort to 10 °C (50 °F) and transfer to fermenter. Pitch WLP802 yeast.
8. Fermentation & Lagering
Ferment at 10 °C for 14 days, raise to 12 °C for 3 days, then cold crash to 1 °C for 3 days. Lager cold for several additional weeks for full historical authenticity.
Brew Notes
- Brew Date: 5 Dec 2025
- Fermentation Start: 5 Dec 2025
- Bottling Date: 25 Dec 2025
- Pre-Boil Gravity: 1.040
- OG: 1.047
- FG: 1.009

.png)
Succulent Chinese Beer! (48 L / 12.7 gal)
What is the charge!? Drinking a BEER? A Succulent CHINESE Beer!? In honour of democracy manifest we have brewed up a delicious, succulent Chinese Beer! This refreshing 4.5 % lager is clean, dry, a touch sweet and perfectly balanced with Saaz hops. Its the perfect palate cleanser with a Succulent Chinese Meal!
Stats
- Style: Chinese Lager
- ABV: 4.6 %
- OG: 1.043 (measured 1.041)
- FG: 1.008 (measured 1.007)
- IBU: 20 (Tinseth)
- Colour: 9 EBC (SRM ~4.5)
- Carbonation: 2.8 vols CO₂
- Batch Size: 48 L (12.7 gal)
- Boil Time: 60 min
- Efficiency: 82 % brewhouse, 85 % mash
- System: BrewZilla / RoboBrew 65 L
- Brewfather_Batch51_20251113
Brewfather Link
Ingredients
Malt Bill (8.48 kg / 18.7 lb total)
- 5.342 kg (11.78 lb) Pilsner Malt (Craft Export, 3.2 EBC) — 63 %
- 2.544 kg (5.61 lb) Long Grain Chinese Rice (2 EBC) — 30 % (boil 30 min to gelatinise)
- 339 g (0.75 lb) Medium Crystal Malt (100 EBC) — 4 %
- 254 g (0.56 lb) Gladiator Malt (8.2 EBC) — 3 %
- 200 g (0.44 lb) Rice Hulls (for lautering)
- Brewfather_Batch51_20251113
Hops (Saaz – 174 g / 6.14 oz total)
- 57 g (2 oz) @ 60 min — 9 IBU
- 57 g (2 oz) @ 30 min — 7 IBU
- 60 g (2.1 oz) @ 15 min — 4 IBU
Yeast
- 34 g (1.2 oz) Fermentis SafLager West European Lager Yeast
Water Profile (Adjusted)
- Base Profile: Myk Light Lager
- Ca 22 ppm • Mg 5 ppm • Na 15 ppm • Cl 31 ppm • SO₄ 30 ppm • HCO₃ 57 ppm
- SO₄/Cl ratio: 1.0 • Mash pH: 5.35 • Sparge pH: 5.3
Additions (per batch):
- Mash: 1.3 g Gypsum (CaSO₄), 6.6 mL Phosphoric Acid (85%)
- Sparge: 1.3 g Gypsum, 1.77 mL Phosphoric Acid
- Boil (15 min): 1.67 g Whirlfloc
- Brewfather_Batch51_20251113
Mash Schedule
- Single infusion at 64 °C (147 °F) for 60 min
- Mash out at 76 °C (169 °F)
- Sparge with 20 L (5.3 gal) @ 77 °C (170 °F)
Fermentation Schedule
- Primary: 15 °C (59 °F) × 14 days
- Cold Crash: 1–2 °C (34–36 °F) × 3 days
- Carbonation: 2.8 vols CO₂
- Conditioning: Lager cold for 3–5 weeks for clarity and smoothness
- Brewfather_Batch51_20251113
Step-by-Step Method
1. Rice Prep
Boil 2.54 kg (5.6 lb) long-grain rice in water for 30 minutes until fully gelatinised. Set aside to add during mash-in.
2. Mash In
Add all grains plus prepared rice to 40 L (10.6 gal) water at 64 °C (147 °F). Hold for 60 minutes for a highly fermentable wort.
3. Mash Out & Sparge
Raise mash to 76 °C (169 °F) for 10 minutes, then sparge with 20 L (5.3 gal) at 77 °C (170 °F) to collect roughly 58–60 L (15.3 gal) pre-boil volume.
4. Boil – 60 Minutes
- Add 57 g (2 oz) Saaz at 60 min
- Add 57 g (2 oz) Saaz at 30 min
- Add 60 g (2.1 oz) Saaz and 1.67 g (0.06 oz) Whirlfloc at 15 min
Boil hard and clean for 60 minutes.
5. Chill & Transfer
Cool wort to 15 °C (59 °F) and transfer to fermenter.
6. Fermentation
Pitch 34 g (1.2 oz) SafLager West European yeast. Ferment at 15 °C (59 °F) for 14 days.
7. Cold Crash & Package
Cold crash at 1–2 °C (34–36 °F) for 3 days. Bottle or keg, carbonating to 2.8 vols CO₂. Lager for several weeks for best clarity and flavour.
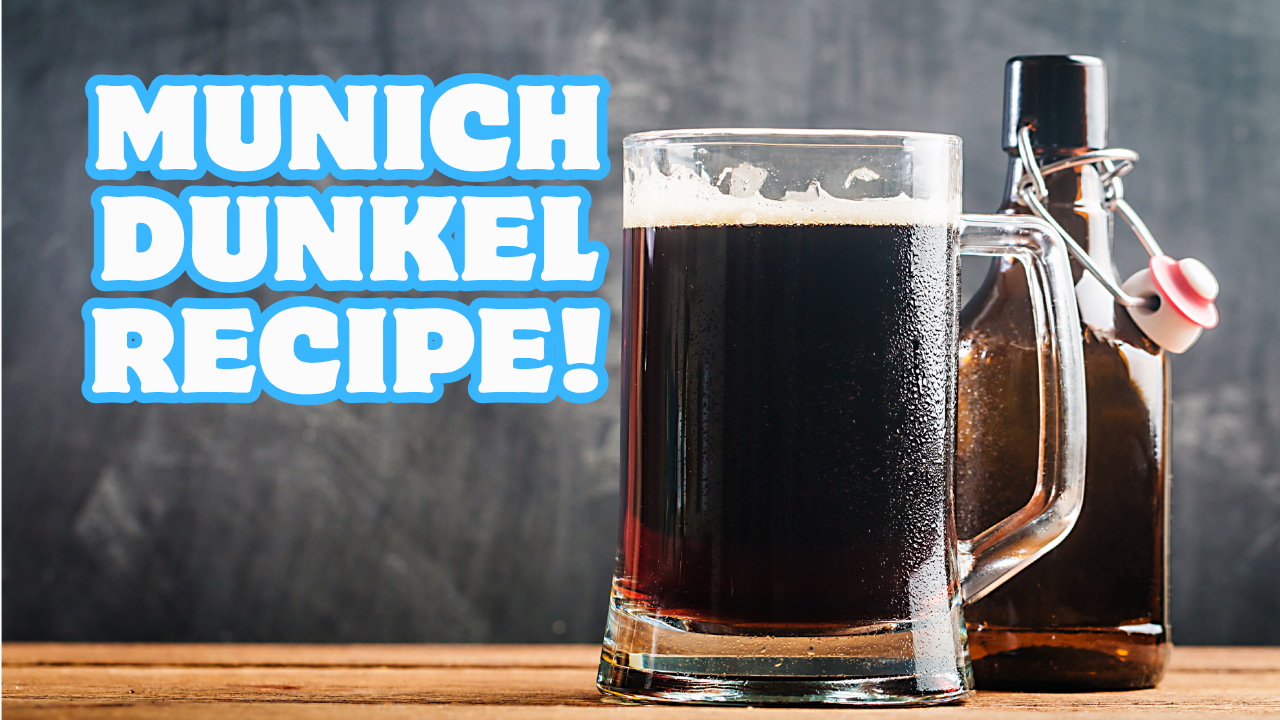
Munich Dunkel (48 L)
This is a Munich Dunkel, Germany’s iconic dark lager. Expect layers of toffee, bread crust, and chocolate, balanced by Tettnang hops and a clean lager finish. This is a true showcase of Munich’s dark-lager tradition, pouring a deep chestnut with a tan head and an aroma of toasted malt, biscuit, and caramel. Smooth, balanced, and endlessly drinkable — perfect for cool evenings or pairing with hearty food.
Stats
- Style: Munich Dunkel
- ABV: 5%
- IBU: 19 (Tinseth)
- Colour: 42 EBC (SRM ~21)
- Original Gravity (design): 1.046
- Final Gravity (design): 1.008
- Measured Pre-Boil Gravity: 1.048
- Measured Final Gravity: 1.012
- Batch Size: 48 L
- Boil Time: 60 min
- Brewhouse Efficiency: 83%
- System: BrewZilla / RoboBrew 65 L
- Brewfather_Batch48_20251004
Ingredients
Malt & Adjuncts (8.86 kg total)
- 3.544 kg Light Munich Malt (22 EBC) — 40%
- 2.658 kg Dark Munich Malt (44 EBC) — 30%
- 1.949 kg Floor-Malted Bohemian Pilsner — 22%
- 443 g Gladfield Shepherd’s Delight (320 EBC) — 5%
- 266 g Carafa Special II (1100 EBC) — 3%
- Brewfather_Batch48_20251004
Hops (Tettnang)
- 57 g @ 60 min
- 57 g @ 30 min
- 87 g @ 15 min
(Total ~19 IBU) - Brewfather_Batch48_20251004
Yeast
- Fermentis SafLager West European Lager (lager pitch rate)
- Brewfather_Batch48_20251004
Water Profile & Additions
Target Profile (ppm): Ca 55, Mg 5, Na 33, Cl 79, SO₄ 45, HCO₃ 104
SO₄/Cl ratio: 0.6 • Mash pH target: ~5.27 • Sparge pH: ~5.4
Additions (per batch):
- Mash: 2 g Baking Soda (NaHCO₃), 3 g Calcium Chloride (CaCl₂), 2 g Gypsum (CaSO₄)
- Sparge: 2.2 g Baking Soda, 3.3 g Calcium Chloride, 2.2 g Gypsum, 3.49 ml Phosphoric Acid (85%)
- Boil (15 min): 1.6 g Whirlfloc
Water Volumes: Mash 30 L, Sparge 33 L - Brewfather_Batch48_20251004
Mash Schedule
- 64 °C – 30 min (Beta rest: fermentability, clean profile)
- 70 °C – 30 min (Alpha rest: body & malt depth)
- 77 °C – 15 min (Mash out)
- Sparge with 33 L @ 77 °C to reach ~58–59 L pre-boil
- Brewfather_Batch48_20251004
🍻 Fermentation Schedule
- Primary: 14 °C × 14 days
- Rise/Secondary: 16 °C × 2 days (cleanup)
- Cold Crash: 1.5 °C × 2 days
- Carbonation: 2.7 vols CO₂
- Lagering: 4–6 weeks cold for polish
- Brewfather_Batch48_20251004
Brew Notes
- Brewed: 10 Sep 2025 • Bottled: 28 Sep 2025
- First trub dump removed 1.5 L
- Gravity around 1.015 at day 7
- Brewfather_Batch48_20251004
Step-by-Step Method (Brew Day to Glass)
1) Water Prep
- Treat mash and sparge water with the listed salts and phosphoric acid to hit Ca 55 | Cl 79 | SO₄ 45 | HCO₃ 104 ppm and mash pH ≈ 5.27. Heat 30 L strike water to mash-in temp.
- Brewfather_Batch48_20251004
2) Mash In
- Dough in at 64 °C and hold 30 min (beta rest).
- Raise to 70 °C, hold 30 min (alpha rest).
- Raise to 77 °C, hold 15 min (mash out).
- Brewfather_Batch48_20251004
3) Lauter & Sparge
- Vorlauf until clear, then lauter.
- Sparge with 33 L @ 77 °C to collect ~58–59 L pre-boil. Aim pre-boil gravity ≈ 1.041–1.048 (you measured 1.048).
- Brewfather_Batch48_20251004
4) Boil – 60 Minutes
- 60 min: Tettnang 57 g
- 30 min: Tettnang 57 g
- 15 min: Tettnang 87 g + 1.6 g Whirlfloc
- Chill immediately at flameout.
- Brewfather_Batch48_20251004
5) Chill & Transfer
- Chill to 14 °C, transfer to fermenter, and oxygenate well.
6) Fermentation
- Pitch SafLager West European Lager at 14 °C, hold 14 days.
- Raise to 16 °C for 2 days to finish and clean up.
- Cold crash to 1.5 °C for 2 days.
- Brewfather_Batch48_20251004
7) Package & Lager
- Carbonate to 2.7 vols CO₂ (bottle or keg).
- Lager cold 4–6 weeks for a smooth, polished beer. Serve cool, not ice-cold, to showcase malt.
.png)
Czech Pilsner – 4.7% ABV
A crisp, golden classic brewed with 100% floor-malted Bohemian Pilsner malt and an all-Saaz hop schedule. This Czech Premium Pale Lager is soft, bready, and perfectly balanced — lightly floral, delicately bitter, and ultra-refreshing. Fermented cold with traditional Budejovice lager yeast and conditioned long and cold, this one's as close to the Czech motherland as you’ll get without hopping on a plane.
Specs
- Style: Czech Premium Pale Lager
- Batch Size: 45 L (11.9 gal)
- OG: 1.045
- FG: 1.009
- ABV: 4.7%
- IBU: 31 (Tinseth)
- Colour: 7 EBC (3.5 SRM)
- BU/GU: 0.68
- Carbonation: 2.7 CO₂-vol
Grain Bill (8.8 kg / 19.4 lbs)
- 8.8 kg (19.4 lbs) Floor-Malted Bohemian Pilsner Malt – 100%
Water & Mash
- Mash Water: 35 L (9.25 gal)
- Sparge Water: 25 L (6.6 gal)
- Total Water: 60 L (15.85 gal)
Water Profile:
Ca 23 | Mg 5 | Na 15 | Cl 31 | SO₄ 32 | HCO₃ 57
- Mash pH: 5.58
- Sparge pH: 5.4
Water Adjustments:
- Mash: 1.5 g Gypsum, 3 ml Phosphoric Acid
- Sparge: 1.5 g Gypsum, 1.73 ml Phosphoric Acid
Mash Schedule (Double Decoction – Czech Lager Profile)
- 64°C (147°F) – 15 min Beta Rest
- Pull Decoction #1 – Boil for 15 min
- Return decoction, hold at 64°C – 15 min
- 70°C (158°F) – 15 min Alpha Rest
- Pull Decoction #2 – Boil for 15 min
- Return decoction, hold at 70°C – 15 min
- 77°C (171°F) – 15 min Mash Out
Hop Schedule (182 g / 6.4 oz total)
- 90 min – 28 g (1 oz) Saaz – 8 IBU
- 30 min – 70 g (2.47 oz) Saaz – 14 IBU
- 15 min – 56 g (1.98 oz) Saaz – 7 IBU
- 5 min – 28 g (1 oz) Saaz – 1 IBU
Other Additions
- 15 min Boil – 1.67 g Whirlfloc
Yeast
- 1 pack White Labs WLP802 Czech Budejovice Lager - made with a yeast starter 1 day before brewing
Fermentation Schedule:
- 10°C (50°F) – 14 days Primary
- 12°C (54°F) – 3 days Secondary
- 1°C (34°F) – 7 days Cold Crash
Brew Day Notes
- Brewed on BrewZilla 65L system
- Boiled at 3000W for 90 minutes
- Brewhouse Efficiency: 80%
Step-by-Step Brew Day Process
1. Heat Water & Adjust
- Heat 35 L (9.25 gal) of water for the mash.
- Add 1.5 g Gypsum and 3 ml Phosphoric Acid.
- Target mash pH: 5.58
2. Mash In & Decoction #1
- Add 8.8 kg Bohemian Pilsner malt.
- Hold at 64°C (147°F) for 15 minutes (Beta rest).
- Pull thick decoction (~30–40% of mash), bring to 100°C (212°F), boil 15 min.
- Return decoction to main mash, stir, rest at 64°C again for 15 minutes.
3. Decoction #2
- Raise to 70°C (158°F) – hold for 15 minutes (Alpha rest).
- Pull second decoction (~25–30%), boil 15 minutes.
- Return to mash, hold at 70°C for 15 minutes.
- Raise to 77°C (171°F) for 15-minute mash out.
4. Sparge & Collect Wort
- Sparge with 25 L (6.6 gal) water, adjusted with:
- 1.5 g Gypsum
- 1.73 ml Phosphoric Acid
- Collect pre-boil volume of ~58.7 L (15.5 gal)
5. Boil – 90 Minutes
- Start a 90-minute vigorous boil.
- Hop Additions:
- 90 min: 28 g Saaz
- 30 min: 70 g Saaz
- 15 min: 56 g Saaz
- 5 min: 28 g Saaz
- 15 min: Add 1.67 g Whirlfloc
6. Chill & Transfer
- Chill to 10°C (50°F).
- Transfer to fermenter. Top up to 46.5 L (if needed).
- Aerate well.
7. Pitch Yeast
- Pitch 1 pack of WLP802 Czech Lager yeast
- No starter required if yeast is fresh and healthy
8. Fermentation & Lagering
- 14 days at 10°C (50°F)
- 3 days at 12°C (54°F) for cleanup
- 3 days at 1°C (34°F) cold crash
- Optional: Lager for 4+ weeks at 1–2°C (34–36°F) for clarity and refinement
9. Package
- Target 2.7 vol CO₂
- For bottling: use ~8.2 g/L (1.1 oz/gal) priming sugar
- Condition cold and serve crisp!
.jpg)
So... What is it?
This new world pilsner takes all the best aspects of old school European lagers, but adds a fantastic Kiwi twist! Hopped up on a variety of punchy new world NZ hops, it makes the resulting beer a beautiful golden straw coloured spectacle of tropical fruits, like passionfruit, lime zest, mango and generic fruit salad! Ours comes in at 5.4% and still has a subtle maltiness and decent bitterness to make this not just refreshing, but complex and layered with NZ beery goodness!
Batch Size & Stats
- 38L (2 19L corny kegs) / 10 gal finished beer
- 47L (12.4 gal) wort
- For a smaller 19L (5 gal) batch size simply half the ingredients of this recipe
- Starting gravity – 1.051
- Final gravity 1.001
- ABV – 5.4%
- IBU - 30
- Colour - 7.1 EBC
- Mash Efficiency - 83%
What ingredients?
Water
With sparging
- 30L (7.9 gal) Mash temp 65°C (149°F) 1 hour. use our calculator to determine your strike water temp
- 30L (7.9 gal) sparge water at 78°C (172°F)
Without sparging
- 60L (15.8 gal) Mash temp 65°C (149°F) 1 hour. use our calculator to determine your strike water temp
Malts: 9kg (19.8 lb)
- Gladfield Pilsner Malt – 8kg (17.6 lb) - 88.9%
- Gladfield Malt Gladfield Vienna Malt – 1kg (2.2 lb) - 11.1%
Hops & whirlfloc tablets
Motueka
- 28g (1 oz) - 11IBU's - 60 minutes left in the boil
- 70g (2.5 oz) - 6 IBU's) - 5 minutes left in the boil
Nelson Sauvin
- 70g (2.5 oz) - 10 IBU's) - 5 minutes left in the boil
Riwaka
- 70g (2.5 oz) - 4 IBU's) - 5 minutes left in the boil
Whirlfloc tablets
- 1.5g (0.052 oz) / 2 tablets – 15 minutes left in the boil
Yeast options & fermentation temperatures
- 23g SafLager S-23 – ferment at 14°C (57 F)
- 23g SafLager W-34/70 – ferment at 14°C (57 F)
Water Profile
- Ca2+24
- Mg2+ 5
- Na+ 15
- Cl- 31
- SO42- 36
- HCO3- 57
Step by step process
Step 1 – Milling
- Mill grains to medium crush (set mill rollers to a gap of approx. 1.05mm / 0.041 inches)
- Just keep in mind roller gap settings are not universal so as you brew more batches you will find the ideal crush size for your setup
- Alternatively if you don’t have a grain mill you can order your grains crushed from most homebrew stores, both online and in person
Step 2 – Mashing
- Mash for 60 minutes at 65°C (149°F)
- Set your strike water to a few degrees above the target mash temperature, you can use our calculator to determine what your strike temperature should be
- ensure you mix in the grains thoroughly with a mash paddle to prevent dough balls from forming (big spoons, spatulas or whisks will also work)
- its easier to mash the grains and prevent dough balls if you add a little grain at a time, mix, add more grain and repeat until all the grains are mixed
- if you don’t have a mash tun with heating then ensure after you have finished mixing the grains in to insulate your mash tun (thick neoprene or heavy blankets both work well)
Step 3 (optional) – Sparging
- if your setup has the capability to sparge then do so with 30L (7.9 gal) sparge water at 78°C (172°F)
- if you are not sparging and using a BIAB (brew in a bag) method then remove grains from mash tun and twist and squeeze the bag to get as much liquid out of the grains as possible
- as you start sparging (or straining your BIAB bag) begin raising the temperature of your wort to a boil
Step 4 – Boiling
- once your wort begins to boil start a timer for a 60-minute boil and add your bittering hops, 28g (1 oz) of Motueka
- at 15 minutes left in the boil add 2 whirlfloc tablets
- With 5 minutes left in the boil add 70g (2.5 oz) each of Motueka, Riwaka, and Nelson Sauvin
Step 5 – Whirlpooling / cooling
- once wort has been boiling for 60 minutes in total turn off your heat source and begin chilling wort down to yeast pitching temperature
- once you’ve reached yeast pitching temperature take an original gravity reading of your wort
Step 6 – Yeast Pitching
- It is best to make a yeast starter before beginning your brew day (ideally 1 day before) to ensure your yeast are as active and healthy as possible before pitching, but not completely necessary – you could also just rehydrate yeast 30 minutes before pitching.
- Pitch yeast in wort a degree or two higher than the target fermentation temperature to help yeast take off more aggressively
- To make a yeast starter you can use either:
- DME (dry malt extract) at a ratio of approx. 100g per 1L water (3.5 oz per 33 fluid ounces) for gravity of approx. 1.040
- some unfermented wort kept cold and sanitary from a previous brew day
- 70g of table sugar per 1L water (2.5 oz per 33 fluid ounces) – however, it is best to use malt sugar (wort / DME) whenever possible to reduce the chance of shocking the yeast with a different food source from starter to wort pitching
- To rehydrate yeast
- Add yeast to approx. 10 times as much room temperature water as the weight of the yeast e.g. 10g yeast in 100 ml water (0.35 oz yeast in 3.5 fluid ounces water)
Step 7 – Fermentation & dry hopping
- Allow yeast to ferment over the next two weeks (aprox)
- If you have a temperature-controlled system keep the fermenter temperature to the recommended fermentation temperature for each yeast strain (stated in the yeast ingredients section above)
- Monitor the fermentation activity over the first 10-12 days by the bubbling of the blow-off tube/airlock of your fermenter, as the bubbling slows down (roughly around day 10-12) take a gravity reading. When the gravity reaches around 1.010 raise the temperature of your fermenter by 1-2 degrees for 2-3 days for a diacetyl rest (if you don’t have temperature control don’t worry about this step, it's not the end of the world!)
- It's important to note that fermentation times will vary based on your circumstances like temperature, amount of yeast pitched, the healthiness of yeast, the gravity of the wort, pH, etc. so don’t stress be patient and know that these times are just a rough guide
- On day 2 of the diacetyl rest (once gravity reaches roughly 1.009) & gravity is the same 2 days in a row move onto cold crashing! (If you can’t / don’t want to cold crash go straight to kegging/bottling your beer!)
Step 8 (optional) – Cold crashing
- begin cold crashing your fermenter (bring the temperature of your fermenter down to as close to 0°C (32°F) as possible, for 2 days to a week depending on how patient you are
- If you don’t have a temp-controlled fermenter, you can cold crash by putting your fermenter in a fridge or temp-controlled chest freezer
- After you have finished cold crashing it's time to keg/bottle your beer! If you are bottling your beer from the fermenter uncarbonated remember to add about 5-7 grams (0.17 - 0.24 oz) of priming sugar to your bottles to carbonate your beer.
.jpg)
So... What is it?
The Oktoberfest Märzen is a traditional German beer made using a decoction mashing process, which involves boiling a portion of the mash and returning it to the main mash to increase the temperature in stages. This technique was historically used in Bavaria to achieve certain mash steps & help extract more flavor and fermentable sugars from the malt. Märzen, meaning "March" in German, was brewed in late winter and stored in cool caves for consumption during Oktoberfest. The decoction process enhances the malt complexity and depth of flavor, giving the beer its rich amber colour, moderate bitterness and signature rich, slightly sweet finish!
What's ours like?
Wow this brewday was a fail! But this beer was worth the pain! Showcasing an awesome amber to orange colour, decent mouthfeel and rich malty character and complex sweetness, we can call this beer an Oktoberfest success! The decoction mash has paid huge dividends despite the pain, creating a very complex sweetness, with flavors of candied prunes, deep caramel and rich delicious honey! Coming in at 6.3% its on the boozier side for a fest beer, but we absolutely love it and know you will too!
Batch Size & Stats
- 19L / 5 gal finished beer
- 22L (6.8 gal) wort
- Starting gravity – 1.064
- Final gravity 1.015
- ABV – 6.4%
- Brewhouse Efficiency 84%
- EBC - 28
- IBU - 23
What ingredients?
Water
With sparging
- 16L (4.2 gal) strike water
Protein rest: 113F (55 C) — 10 min
Decoction Step - scoop out 1/3 of the mash and heat to 65C (149 F) for 15 mins, then heat up to boil for 15 mins and add back to main mash
Beta rest: 147F (64 C) — 30 min
Alpha rest: 158F (70 C) — 30 min
Mash Out — 170F - 77 °C — 10 min
- 14L (3.7 gal) sparge water at 78°C (172°F)
Without sparging
- 27L (7.1 gal) strike water approx. 64°C (147°F)
Protein rest: 113F (55 C) — 10 min
Decoction Step - scoop out 1/3 of the mash and heat to 65C (149 F) for 15 mins, then heat up to boil for 15 mins and add back to main mash
Beta rest: 147F (64 C) — 30 min
Alpha rest: 158F (70 C) — 30 min
Mash Out — 170F - 77 °C — 10 min
Malts
Total Grain Bill 6.2kg (13.67 4lb)
- Joe White Pilsner malt – 2.883kg (6.35 lb) - 46.5%
- Light Munich - 2.48kg (5.47 lb) - 40%
- Dark Munich - 620g (1.37 lb) - 10%
- Medium Crystal - 217g (0.48 lb) - 3.5%
Hops & whirlfloc tablets
Hallertauer Mittelfrueh (3% Alpha Acid)
- 28g (1 oz) 8 IBU - 60 mins
- 70g (2.5 oz) 10 IBU - 15 mins
Whirlfloc
- 0.75g (0.026 oz) / 1 tablets – 15 minutes left in the boil
Water Profile
- Ca2+21
- Mg2+ 5
- Na+ 15
- Cl- 31
- SO42- 27
- HCO3- 57
Yeast options & fermentation temperatures
- 70 ml — White Labs WLP820 Octoberfest/Marzen Lager - Ferment at 14°C (57°F)
- SafLager™ S‑23 – ferment at 14°C (57°F) 23g (0.41 oz) / (1 packets) - Fermented under 10 psi pressure (not necessary but a great option)
- Saflager W34-70 – ferment at 14°C (57°F) 23g (0.41 oz) / (1 packets) - Fermented under 10 psi pressure (not necessary but a great option)
Step by step process
Step 1 – Milling
- Mill grains to medium crush (set mill rollers to a gap of approx. 1.00mm / 0.039 inches (credit card width)
- Just keep in mind roller gap settings are not universal so as you brew more batches you will find the ideal crush size for your setup
- Alternatively if you don’t have a grain mill you can order your grains crushed from most homebrew stores, both online and in person
Step 2 – Mashing
Mash in with 16L (4.2 gal) for 95 minutes with the following step mash order (not whilst you pull out 1/3 of the mash for decoction keep the main mash going along with the set mash schedule simultaneously)
- Protein rest: 113F (55 C) — 10 min
- Decoction Step - scoop out 1/3 of the mash and heat to 65C (149 F) for 15 mins, then heat up to boil for 15 mins and add back to main mash
- Beta rest: 147F (64 C) — 30 min
- Alpha rest: 158F (70 C) — 30 min
- Mash Out — 170F - 77 °C — 10 min
- Set your strike water to a few degrees above the target mash temperature (you can use the calculator in our website for this)
- ensure you mix in the grains thoroughly with a mash paddle to prevent dough balls from forming (big spoons, spatulas or whisks will also work)
Step 3 (optional) – Sparging
- if your setup has the capability to sparge then do so with 14L (3.7 gal) sparge water at 78°C (172°F)
- if you are not sparging and using a BIAB (brew in a bag) method then remove grains from mash tun and twist and squeeze the bag to get as much liquid out of the grains as possible
- as you start sparging (or straining your BIAB bag) begin raising the temperature of your wort to a boil
Step 4 – Boiling
- once your wort begins to boil start a timer for a 90-minute boil
- After 30 mins of boiling (with 60 mins left remaining) add your bittering hops, 28g (1 oz) of Hallertauer Mittelfrueh
- at 15 minutes left in the boil add 70g (2.5 oz) of Hallertauer Mittelfrueh and 1 whirlfloc tablet (OR granulated whirlfloc 0.7g (0.025 oz))
Step 5 – Whirlpooling / cooling
- After 90 mins of boiling turn off your heat source and start cooling wort down
- Once you’ve reached yeast pitching temperature take an original gravity reading of your wort
Step 6 – Yeast Pitching
- It is best to make a yeast starter before beginning your brew day (ideally 1 day before, UNLESS you are using liquid yeast! in which case ignore the below steps!) to ensure your yeast are as active and healthy as possible before pitching, but not completely necessary – you could also just rehydrate yeast 30 minutes before pitching.
- Wort Aeration (Optional) if you have a paint mixer give your wort a quick blitz before pitching yeast to help add more dissolved oxygen into the wort to help the yeast have a healthier kick start into fermentation
- Now add your tincture of Vanilla extract! (or you can wait till end of fermentation if you prefer)
- Pitch yeast in wort a degree or two higher than the target fermentation temperature to help yeast take off more aggressively
- To make a yeast starter you can use either:
- DME (dry malt extract) at a ratio of approx. 100g per 1L water (3.5 oz per 33 fluid ounces) for gravity of approx. 1.040
- some unfermented wort kept cold and sanitary from a previous brew day
- 70g of table sugar per 1L water (2.5 oz per 33 fluid ounces) – however, it is best to use malt sugar (wort / DME) whenever possible to reduce the chance of shocking the yeast with a different food source from starter to wort pitching
- To rehydrate yeast
- Add yeast to approx. 10 times as much room temperature water as the weight of the yeast e.g. 10g yeast in 100 ml water (0.35 oz yeast in 3.5 fluid ounces water)
Step 7 – Fermentation
- Allow yeast to ferment over the next two weeks (aprox)
- If you have a temperature-controlled system keep the fermenter temperature to the recommended fermentation temperature for each yeast strain (stated in the yeast ingredients section above)
- It's important to note that fermentation times will vary based on your circumstances like temperature, amount of yeast pitched, the healthiness of yeast, the gravity of the wort, pH, etc. so don’t stress be patient and know that these times are just a rough guide
- If you have temp control then when there are 2 days left of fermentation raise the temperature by 2 degrees for a diacetyl rest (once gravity reaches roughly 1.01) & gravity is the same 3 days in a row move onto cold crashing and adding gelatin! (Dont worry cold crashing & gelatin are both optional steps to help clarify your beer)
Step 8 (optional) – Cold crashing & Gelatin
- begin cold crashing your fermenter (bring the temperature of your fermenter down to as close to 0°C (32°F) as possible, for 2 days to a week depending on how patient you are, and add 1-2 teaspoons of gelatin dissolved in boiling water and allowed to cool a bit to your fermenter
- If you don’t have a temp-controlled fermenter, you can cold crash by putting your fermenter in a fridge or temp-controlled chest freezer
- After you have finished cold crashing it's time to keg/bottle your beer! If you are bottling your beer from the fermenter uncarbonated, remember to add about 5-7 grams (0.17 - 0.24 oz) of priming sugar to your bottles to carbonate your beer.

So... What is it?
The Helles Lager (primarily produced in Bavaria - southern Germany) is much maltier and breadier than a classic style pilsner, and “Helles” translates to “brightness” and “light” describing the golden-hued colour of the lager. It typically sits between 4.5% to 5.5% in abv and is made as a refreshing and crisp style summer beer with a balanced malty bready base and fresh zesty hoppiness.
What's ours like?
Coming in at 5.4% with a beautiful golden hugh and frothy head it makes a cracker Fest bier for the Oktoberfest season! By using a combo of noble hop varieties with modern German variants its holds a floral and fruity aroma! But the star of the show is the complex malty character, giving layers of fresh baked sourdough, pretzels, nuttiness and a subtle honey finish to round it out and make it so bloody delicious!
Batch Size & Stats
- 38L (2 19L corny kegs) / 10 gal finished beer
- 48L (12.6 gal) wort
- For a smaller 19L (5 gal) batch size simply half the ingredients of this recipe
- Starting gravity – 1.052
- Final gravity 1.009
- ABV – 5.4%
- IBU - 21
- Colour - 9.7 EBC
- Mash Efficiency - 88%
What ingredients?
Water
With sparging
- 30L (7.9 gal) Mash temp 65°C (149°F) 1 hour. Strike water approx. 71°C (160°F) use our calculator to determine your strike water temp
- 32.5L (8.6 gal) sparge water at 78°C (172°F)
Without sparging
- 60L (7.9 gal) Mash temp 65°C (149°F) 1 hour. Strike water approx. 72°C (161.6°F) use our calculator to determine your strike water temp
Malts: 9.18kg (20.2 lb)
- Pilsner – 7.711kg (17.1 lb) - 84%
- Light Munich – 1.377kg (3 lb) - 15%
- Supernova (or other melanoidin malt) – 92g (3.2 oz) - 1%
Hops & whirlfloc tablets
Spalt Spatler
- 28g (1 oz) - 60 minutes left in the boil
- 50g (1.76 oz) - 15 minutes left in the boil
Huell Melon
- 50g (1.76 oz) - 15 minutes left in the boil
Whirlfloc tablets
- 1.5g (0.052 oz) / 2 tablets – 15 minutes left in the boil
Yeast options & fermentation temperatures
- 23g SafLager S-23 – ferment at 14°C (57 F)
- 23g SafLager W-34/70 – ferment at 14°C (57 F)
Water Profile
- Ca2+23
- Mg2+ 5
- Na+ 15
- Cl- 31
- SO42- 32
- HCO3- 57
Step by step process
Step 1 – Milling
- Mill grains to medium crush (set mill rollers to a gap of approx. 1.05mm / 0.041 inches)
- Just keep in mind roller gap settings are not universal so as you brew more batches you will find the ideal crush size for your setup
- Alternatively if you don’t have a grain mill you can order your grains crushed from most homebrew stores, both online and in person
Step 2 – Mashing
- Mash for 60 minutes at 65°C (149°F)
- Set your strike water to a few degrees above the target mash temperature, you can use our calculator to determine what your strike temperature should be
- ensure you mix in the grains thoroughly with a mash paddle to prevent dough balls from forming (big spoons, spatulas or whisks will also work)
- its easier to mash the grains and prevent dough balls if you add a little grain at a time, mix, add more grain and repeat until all the grains are mixed
- if you don’t have a mash tun with heating then ensure after you have finished mixing the grains in to insulate your mash tun (thick neoprene or heavy blankets both work well)
Step 3 (optional) – Sparging
- if your setup has the capability to sparge then do so with 35L (9.2 gal) sparge water at 78°C (172°F)
- if you are not sparging and using a BIAB (brew in a bag) method then remove grains from mash tun and twist and squeeze the bag to get as much liquid out of the grains as possible
- as you start sparging (or straining your BIAB bag) begin raising the temperature of your wort to a boil
Step 4 – Boiling
- once your wort begins to boil start a timer for a 60-minute boil and add your bittering hops, 28g (1 oz) of Spalt Spalter
- at 15 minutes left in the boil add 2 whirlfloc tablets and 50g (1.76 oz) each of Spalt Spalter and Huell Melon
Step 5 – Whirlpooling / cooling
- once wort has been boiling for 60 minutes in total turn off your heat source and begin chilling wort down to yeast pitching temperature
- once you’ve reached yeast pitching temperature take an original gravity reading of your wort
Step 6 – Yeast Pitching
- It is best to make a yeast starter before beginning your brew day (ideally 1 day before) to ensure your yeast are as active and healthy as possible before pitching, but not completely necessary – you could also just rehydrate yeast 30 minutes before pitching.
- Pitch yeast in wort a degree or two higher than the target fermentation temperature to help yeast take off more aggressively
- To make a yeast starter you can use either:
- DME (dry malt extract) at a ratio of approx. 100g per 1L water (3.5 oz per 33 fluid ounces) for gravity of approx. 1.040
- some unfermented wort kept cold and sanitary from a previous brew day
- 70g of table sugar per 1L water (2.5 oz per 33 fluid ounces) – however, it is best to use malt sugar (wort / DME) whenever possible to reduce the chance of shocking the yeast with a different food source from starter to wort pitching
- To rehydrate yeast
- Add yeast to approx. 10 times as much room temperature water as the weight of the yeast e.g. 10g yeast in 100 ml water (0.35 oz yeast in 3.5 fluid ounces water)
Step 7 – Fermentation & dry hopping
- Allow yeast to ferment over the next two weeks (aprox)
- If you have a temperature-controlled system keep the fermenter temperature to the recommended fermentation temperature for each yeast strain (stated in the yeast ingredients section above)
- Monitor the fermentation activity over the first 10-12 days by the bubbling of the blow-off tube/airlock of your fermenter, as the bubbling slows down (roughly around day 10-12) take a gravity reading. When the gravity reaches around 1.010 raise the temperature of your fermenter by 1-2 degrees for 2-3 days for a diacetyl rest (if you don’t have temperature control don’t worry about this step, it's not the end of the world!)
- It's important to note that fermentation times will vary based on your circumstances like temperature, amount of yeast pitched, the healthiness of yeast, the gravity of the wort, pH, etc. so don’t stress be patient and know that these times are just a rough guide
- On day 2 of the diacetyl rest (once gravity reaches roughly 1.009) & gravity is the same 2 days in a row move onto cold crashing! (If you can’t / don’t want to cold crash go straight to kegging/bottling your beer!)
Step 8 (optional) – Cold crashing
- begin cold crashing your fermenter (bring the temperature of your fermenter down to as close to 0°C (32°F) as possible, for 2 days to a week depending on how patient you are
- If you don’t have a temp-controlled fermenter, you can cold crash by putting your fermenter in a fridge or temp-controlled chest freezer
- After you have finished cold crashing it's time to keg/bottle your beer! If you are bottling your beer from the fermenter uncarbonated remember to add about 5-7 grams (0.17 - 0.24 oz) of priming sugar to your bottles to carbonate your beer.
.jpg)
So... What is it?
Mexican lager is a light, crisp, easy drinking beer influenced by European brewing traditions brought over to Central America. Characterized by a golden straw colour, clean mild taste, subtle malt & corn based sweetness, minimal bitterness and relatively light ABV (4-5% normally) it is a fantastic summer beer and palate cleanser!
What's ours like?
Ours is spot on the profile! Showing a beautiful golden straw colour, light body and sweet malt and corn finish its a brilliant summer beer to have beach side! The bitterness is certainly in check, showing only enough IBU's to keep everything in balance without overpowering the rest of the beer. It's clean, easy drinking and perfect for warmer weather and lazy afternoons in the sun!
Batch Size & Stats
- 19L / 5 gal finished beer
- 22L (6.8 gal) wort
- Starting gravity – 1.044
- Final gravity 1.009
- ABV – 4.9%
- Brewhouse Efficiency 88%
- EBC - 4.7
- IBU - 12
What ingredients?
Water
With sparging
- 15L (3.9 gal) strike water approx. 64°C (147°F)
- 15.2L (4 gal) sparge water at 78°C (172°F)
Without sparging
- 27L (7.1 gal) strike water approx. 64°C (147°F)
Malts
Total Grain Bill 5kg (11 4lb)
- Joe White Pilsner malt – 3.14kg (7 lb)
- Flaked Corn (Maize) - 790g (1.74 lb)
Hops & whirlfloc tablets
Spalt Spatler (4.2% Alpha Acid)
- 19g (0.67 oz) 10 IBU - 60 mins
- 30g (1 oz) 2 IBU - 5 mins
Whirlfloc
- 0.75g (0.026 oz) / 1 tablets – 15 minutes left in the boil
Water Profile
- Ca2+22
- Mg2+ 5
- Na+ 15
- Cl- 31
- SO42- 30
- HCO3- 57
Yeast options & fermentation temperatures
- SafLager™ S‑23 – ferment at 14°C (57°F) 23g (0.41 oz) / (1 packets) - Fermented under 10 psi pressure (not necessary but a great option)
- Saflager W34-70 – ferment at 14°C (57°F) 23g (0.41 oz) / (1 packets) - Fermented under 10 psi pressure (not necessary but a great option)
Step by step process
Step 1 – Milling
- Mill grains to medium crush (set mill rollers to a gap of approx. 1.00mm / 0.039 inches (credit card width)
- Just keep in mind roller gap settings are not universal so as you brew more batches you will find the ideal crush size for your setup
- Alternatively if you don’t have a grain mill you can order your grains crushed from most homebrew stores, both online and in person
Step 2 – Mashing
Mash for 60 minutes at 64°C (147°F) with 15L (3.9 gal) of strike water
- Set your strike water to a few degrees above the target mash temperature (you can use the calculator in our website for this)
- ensure you mix in the grains thoroughly with a mash paddle to prevent dough balls from forming (big spoons, spatulas or whisks will also work)
- its easier to mash the grains and prevent dough balls if you add a little grain at a time, mix, add more grain and repeat until all the grains are mixed
if you don’t have a mash tun with heating then ensure after you have finished mixing the grains in to insulate your mash tun (thick neoprene or heavy blankets both work well)
Step 3 (optional) – Sparging
- if your setup has the capability to sparge then do so with 15.2L (4 gal) sparge water at 78°C (172°F)
- if you are not sparging and using a BIAB (brew in a bag) method then remove grains from mash tun and twist and squeeze the bag to get as much liquid out of the grains as possible
- as you start sparging (or straining your BIAB bag) begin raising the temperature of your wort to a boil
Step 4 – Boiling
- once your wort begins to boil start a timer for a 60-minute boil and add your bittering hops, 19g (0.67 oz) of Spalt Spatler
- at 15 minutes left in the boil add 1 whirlfloc tablet (OR granulated whirlfloc 0.7g (0.025 oz)\
- At 5 mins left in the boil add the flameout hops, 30g (1 oz) of Spalt Spatler and start cooling wort
Step 5 – Whirlpooling / cooling
- After 60 mins of boiling turn off your heat source and start cooling wort down
- Once you’ve reached yeast pitching temperature take an original gravity reading of your wort
Step 6 – Yeast Pitching
- It is best to make a yeast starter before beginning your brew day (ideally 1 day before) to ensure your yeast are as active and healthy as possible before pitching, but not completely necessary – you could also just rehydrate yeast 30 minutes before pitching.
- Wort Aeration (Optional) if you have a paint mixer give your wort a quick blitz before pitching yeast to help add more dissolved oxygen into the wort to help the yeast have a healthier kick start into fermentation
- Now add your tincture of Vanilla extract! (or you can wait till end of fermentation if you prefer)
- Pitch yeast in wort a degree or two higher than the target fermentation temperature to help yeast take off more aggressively
- To make a yeast starter you can use either:
- DME (dry malt extract) at a ratio of approx. 100g per 1L water (3.5 oz per 33 fluid ounces) for gravity of approx. 1.040
- some unfermented wort kept cold and sanitary from a previous brew day
- 70g of table sugar per 1L water (2.5 oz per 33 fluid ounces) – however, it is best to use malt sugar (wort / DME) whenever possible to reduce the chance of shocking the yeast with a different food source from starter to wort pitching
- To rehydrate yeast
- Add yeast to approx. 10 times as much room temperature water as the weight of the yeast e.g. 10g yeast in 100 ml water (0.35 oz yeast in 3.5 fluid ounces water)
Step 7 – Fermentation
- Allow yeast to ferment over the next two weeks (aprox)
- If you have a temperature-controlled system keep the fermenter temperature to the recommended fermentation temperature for each yeast strain (stated in the yeast ingredients section above)
- It's important to note that fermentation times will vary based on your circumstances like temperature, amount of yeast pitched, the healthiness of yeast, the gravity of the wort, pH, etc. so don’t stress be patient and know that these times are just a rough guide
- If you have temp control then when there are 2 days left of fermentation raise the temperature by 2 degrees for a diacetyl rest (once gravity reaches roughly 1.01) & gravity is the same 3 days in a row move onto cold crashing and adding gelatin! (Dont worry cold crashing & gelatin are both optional steps to help clarify your beer)
Step 8 (optional) – Cold crashing & Gelatin
- begin cold crashing your fermenter (bring the temperature of your fermenter down to as close to 0°C (32°F) as possible, for 2 days to a week depending on how patient you are, and add 1-2 teaspoons of gelatin dissolved in boiling water and allowed to cool a bit to your fermenter
- If you don’t have a temp-controlled fermenter, you can cold crash by putting your fermenter in a fridge or temp-controlled chest freezer
- After you have finished cold crashing it's time to keg/bottle your beer! If you are bottling your beer from the fermenter uncarbonated, remember to add about 5-7 grams (0.17 - 0.24 oz) of priming sugar to your bottles to carbonate your beer.
So... What is it?
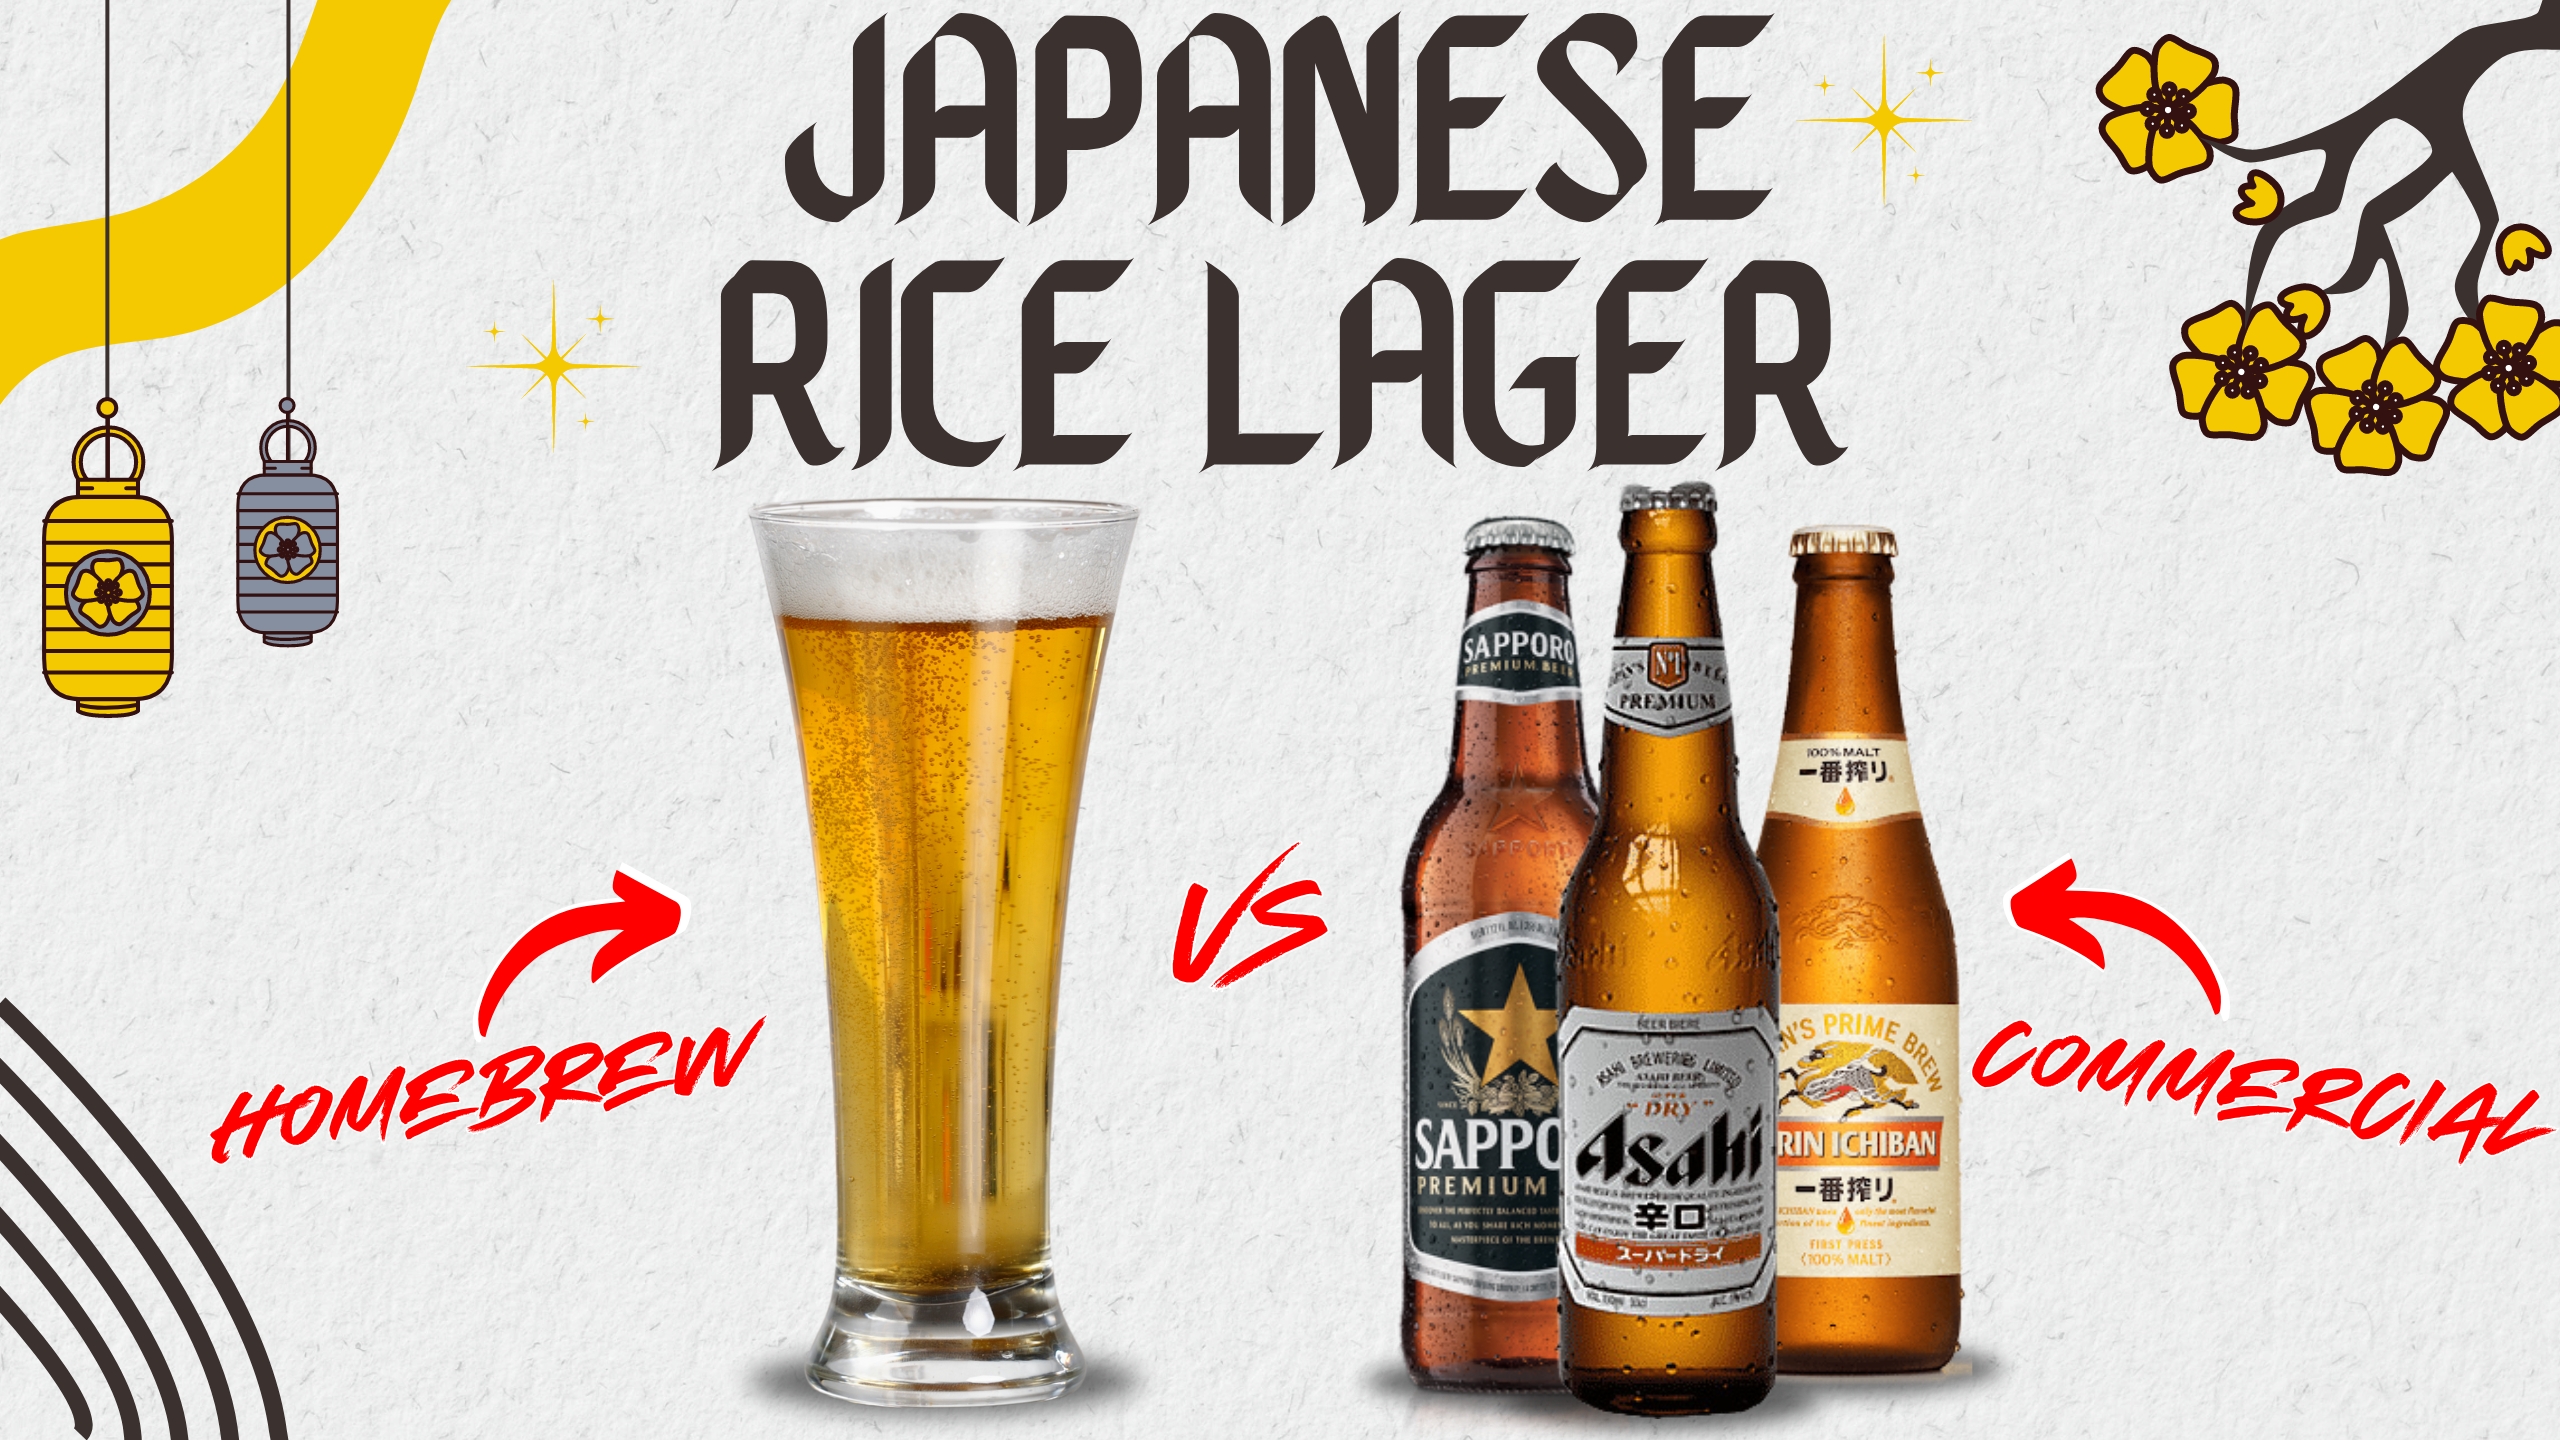
The Japanese rice lager incorporates rice as a key ingredient alongside the usual barley, giving it a lighter and crisper profile compared to traditional lagers. The style originated in Japan as brewers sought to create a beer that paired well with the country's cuisine, particularly sushi and other delicate flavors. Rice helps to give the style its signature clean, refreshing character and subtle sweet dry finish.
What's ours like?
Coming in at an easy drinking 4.7%, its crisp, fresh, lightly sweet and citrusy and has a beautiful dry finish! The Rice certainly imparts the signature light body and dry finish of the Japanese style and the Motueka hops are perfectly balanced, providing just enough bitterness to keep it drinkable, with subtle citrusy and floral notes that make a near perfect replacement for the signature Japanese Hop, Sorachi Ace. Certainly a beer ill be brewing again and again!
Batch Size & Stats
- 47L (2x 19L & 1 9L corny kegs) / 12.4 gal finished beer
- 51L (13.5 gal) wort
- For a smaller 19L (5 gal) batch size simply half the ingredients of this recipe
- Starting gravity – 1.044
- Final gravity 1.008
- ABV – 4.7%
- IBU - 16
- Colour - 4.7 EBC
- Mash Efficiency - 94%
What ingredients?
Water
With sparging
- 30L (7.9 gal) for a 64°C (147°F) mash (you can use our strike water calculator to find your ideal strike temp)
- 30L (7.9 gal) sparge water at 78°C (172°F) - fermenter topped up with 4L (1 gal) post boil to reduce OG
Without sparging
- 55L (14.5 gal) for a 64°C (147°F) mash (you can use our strike water calculator to find your ideal strike temp)
Malts:
- Pilsner Malt – 5.01 kg (11 lb) - 62%
- Flaked Rice – 2.83 (6.24 lb) - 35%
- Gladiator (dextrin) Malt - 240g (0.53 lb) - 3%
Hops & whirlfloc tablets
Motueka
- 28g (1 oz) 12 IBU's – 60 mins
- 60g (2.1 oz) 5 IBU's – 5 minutes left in the boil
Rice Hulls
- 400g (0.88 lb)
Whirlfloc tablets
- 1.5g (0.052 oz) / 2 tablets – 15 minutes left in the boil
Yeast options & fermentation temperatures
- 23g (0.8 oz) Saflager S-23 – ferment at 14°C (57°F)
- 23g (0.8 oz) Saflager W-34/70 – ferment at 14°C (57°F)
Water Profile
- Ca2+23
- Mg2+ 5
- Na+ 15
- Cl- 31
- SO42- 32
- HCO3- 57
Step by step process
Step 1 – Milling
- Mill grains to medium crush (set mill rollers to a gap of approx. 1.00mm / 0.039 inches)
- Just keep in mind roller gap settings are not universal so as you brew more batches you will find the ideal crush size for your setup
- Alternatively if you don’t have a grain mill you can order your grains crushed from most homebrew stores, both online and in person
Step 2 – Mashing
- Mash for 60 minutes at 64°C (147°F)
- Set your strike water to a few degrees above the target mash temperature, you can use our calculator to determine what your strike temperature should be
- ensure you mix in the grains thoroughly with a mash paddle to prevent dough balls from forming (big spoons, spatulas or whisks will also work)
- its easier to mash the grains and prevent dough balls if you add a little grain at a time, mix, add more grain and repeat until all the grains are mixed
- if you don’t have a mash tun with heating then ensure after you have finished mixing the grains in to insulate your mash tun (thick neoprene or heavy blankets both work well)
Step 3 (optional) – Sparging
- if your setup has the capability to sparge then do so with 30L (7.9 gal) sparge water at 78°C (172°F)
- if you are not sparging and using a BIAB (brew in a bag) method then remove grains from mash tun and twist and squeeze the bag to get as much liquid out of the grains as possible
- as you start sparging (or straining your BIAB bag) begin raising the temperature of your wort to a boil
Step 4 – Boiling
- Once your wort begins to boil start a timer for a 60-minute boil and add your bittering hops, 28g (1 oz) of Motueka
- At 15 minutes left in the boil add 2 whirlfloc tablets
- With 5 minutes left in the boil add your flavour and aroma hops, 60g (2.1 oz) of Motueka
Step 5 – Cooling
- After 1 hour of boiling start cooling wort down to yeast pitching temperature
- once you’ve reached yeast pitching temperature take an original gravity reading of your wort
Step 6 – Yeast Pitching
- It is best to make a yeast starter before beginning your brew day (ideally 1 day before) to ensure your yeast are as active and healthy as possible before pitching, but not completely necessary – you could also just rehydrate yeast 30 minutes before pitching.
- Pitch yeast in wort a degree or two higher than the target fermentation temperature to help yeast take off more aggressively
- To make a yeast starter you can use either:
- DME (dry malt extract) at a ratio of approx. 100g per 1L water (3.5 oz per 33 fluid ounces) for gravity of approx. 1.040
- some unfermented wort kept cold and sanitary from a previous brew day
- 70g of table sugar per 1L water (2.5 oz per 33 fluid ounces) – however, it is best to use malt sugar (wort / DME) whenever possible to reduce the chance of shocking the yeast with a different food source from starter to wort pitching
- To rehydrate yeast
- Add yeast to approx. 10 times as much room temperature water as the weight of the yeast e.g. 10g yeast in 100 ml water (0.35 oz yeast in 3.5 fluid ounces water)
Step 7 – Fermentation
- Allow yeast to ferment over the next week to two weeks
- If you have a temperature controlled system keep the fermenter temperature to the recommended fermentation temperature for each yeast strain (stated in the yeast ingredients section above)
- Monitor the fermentation activity over the first 7 days by the bubbling of the blow off tube / airlock of your fermenter, as the bubbling slows down (roughly around day 7) take a gravity reading. When the gravity reaches around 1.01 raise the temperature of your fermenter by 1-2 degrees for 2-4 days for a diacetyl rest (if you don’t have temperature control don’t worry about this step, its not the end of the world!)
- Its important to note that fermentation times will vary based on your circumstances like, temperature, amount of yeast pitched, healthiness of yeast, gravity of wort, pH etc. so don’t stress be patient and know that these times are just a rough guide
- Once the gravity is the same 2 days in a row move onto cold crashing! (If you can’t / don’t want to cold crash go straight to kegging/bottling your beer!)
Step 8 (optional) – Cold crashing
- begin cold crashing your fermenter (bring the temperature of your fermenter down to as close to 0°C (32°F) as possible, for 2 days to a week depending on how patient you are
- If you don’t have a temp-controlled fermenter, you can cold crash by putting your fermenter in a fridge or temp-controlled chest freezer
- After you have finished cold crashing it's time to keg/bottle your beer! If you are bottling your beer from the fermenter uncarbonated remember to add about 5-7 grams (0.17 - 0.24 oz) of priming sugar to your bottles to carbonate your beer.

So... What is it?
Foster's Lager is an iconic Australian beer known for its refreshing taste and distinctive branding. It's a pale lager that's light and crisp, making it a popular choice for social gatherings, barbecues, and good times with good mates. With a golden hue and a balanced flavor profile, Foster's Lager offers a smooth drinking experience with subtle malt sweetness and a clean finish.
What's ours like?
Ours tastes remarkably similar to the real thing... but better! coming in at 4.7% it is slightly lower in ABV than the original's 4.9%, but it carries through with the same crisp finish, refreshing floral and slightly fruity character, low bitterness and beautiful straw to gold colour. However, it actually has a slightly lighter finish, and lacks the slight artificial chemical aftertaste of the original commercial giant, making this (in our opinion!) a better version than the original symbol of Australian beer culture!
Batch Size & Stats
- 19L / 5 gal finished beer
- 26L (6.8 gal) wort
- Starting gravity – 1.042
- Final gravity 1.006
- ABV – 4.7%
- Brewhouse Efficiency 82%
- IBU - 11
Brewfather link
https://share.brewfather.app/KrXxXnWZ5ERdQr
What ingredients?
Water
With sparging
- 15L (3.9 gal) strike water approx. 64°C (147°F)
- 15.2L (4 gal) sparge water at 78°C (172°F)
Without sparging
- 27L (7.1 gal) strike water approx. 64°C (147°F)
Malts
Total Grain Bill 5kg (11 4lb)
- Joe White Pilsner malt – 3.16kg (7 lb)
- Crisp Light Munich Malt - 160g (5.6 oz)
- Mangrove Jakcs Corn Sugar (Dextrose) - 420g (14.8 oz)
Hops & whirlfloc tablets
Pride of Ringwood
- 10g (0.35 oz) - 60 minutes left in the boil
- 30g (0.53 oz) - Flameout
Whirlfloc
- 0.75g (0.026 oz) / 1 tablets – 15 minutes left in the boil
Water Profile
- Ca2+22
- Mg2+ 5
- Na+ 15
- Cl- 31
- SO42- 30
- HCO3- 57
Yeast options & fermentation temperatures
- SafLager™ S‑23 – ferment at 14°C (57°F) 23g (0.41 oz) / (1 packets) - Fermented under 10 psi pressure (not necessary but a great option)
- Saflager W34-70 – ferment at 14°C (57°F) 23g (0.41 oz) / (1 packets) - Fermented under 10 psi pressure (not necessary but a great option)
Step by step process
Step 1 – Milling
- Mill grains to medium crush (set mill rollers to a gap of approx. 1.00mm / 0.039 inches (credit card width)
- Just keep in mind roller gap settings are not universal so as you brew more batches you will find the ideal crush size for your setup
- Alternatively if you don’t have a grain mill you can order your grains crushed from most homebrew stores, both online and in person
Step 2 – Mashing
Mash for 60 minutes at 64°C (147°F) with 15L (3.9 gal) of strike water
- Set your strike water to a few degrees above the target mash temperature (you can use the calculator in our website for this)
- ensure you mix in the grains thoroughly with a mash paddle to prevent dough balls from forming (big spoons, spatulas or whisks will also work)
- its easier to mash the grains and prevent dough balls if you add a little grain at a time, mix, add more grain and repeat until all the grains are mixed
if you don’t have a mash tun with heating then ensure after you have finished mixing the grains in to insulate your mash tun (thick neoprene or heavy blankets both work well)
Step 3 (optional) – Sparging
- if your setup has the capability to sparge then do so with 15.2L (4 gal) sparge water at 78°C (172°F)
- if you are not sparging and using a BIAB (brew in a bag) method then remove grains from mash tun and twist and squeeze the bag to get as much liquid out of the grains as possible
- as you start sparging (or straining your BIAB bag) begin raising the temperature of your wort to a boil
Step 4 – Boiling
- once your wort begins to boil start a timer for a 60-minute boil and add your bittering hops, 10g (0.35 oz) of Pride of Ringwood
- at 15 minutes left in the boil add 1 whirlfloc tablet (OR granulated whirlfloc 0.7g (0.025 oz)
Step 5 – Whirlpooling / cooling
- After 60 mins of boil turn off your heat and add the flameout hops, 30g (1 oz) of Pride of Ringwood and start cooling wort
- Once you’ve reached yeast pitching temperature take an original gravity reading of your wort
Step 6 – Yeast Pitching
- It is best to make a yeast starter before beginning your brew day (ideally 1 day before) to ensure your yeast are as active and healthy as possible before pitching, but not completely necessary – you could also just rehydrate yeast 30 minutes before pitching.
- Wort Aeration (Optional) if you have a paint mixer give your wort a quick blitz before pitching yeast to help add more dissolved oxygen into the wort to help the yeast have a healthier kick start into fermentation
- Now add your tincture of Vanilla extract! (or you can wait till end of fermentation if you prefer)
- Pitch yeast in wort a degree or two higher than the target fermentation temperature to help yeast take off more aggressively
- To make a yeast starter you can use either:
- DME (dry malt extract) at a ratio of approx. 100g per 1L water (3.5 oz per 33 fluid ounces) for gravity of approx. 1.040
- some unfermented wort kept cold and sanitary from a previous brew day
- 70g of table sugar per 1L water (2.5 oz per 33 fluid ounces) – however, it is best to use malt sugar (wort / DME) whenever possible to reduce the chance of shocking the yeast with a different food source from starter to wort pitching
- To rehydrate yeast
- Add yeast to approx. 10 times as much room temperature water as the weight of the yeast e.g. 10g yeast in 100 ml water (0.35 oz yeast in 3.5 fluid ounces water)
Step 7 – Fermentation
- Allow yeast to ferment over the next two weeks (aprox)
- If you have a temperature-controlled system keep the fermenter temperature to the recommended fermentation temperature for each yeast strain (stated in the yeast ingredients section above)
- It's important to note that fermentation times will vary based on your circumstances like temperature, amount of yeast pitched, the healthiness of yeast, the gravity of the wort, pH, etc. so don’t stress be patient and know that these times are just a rough guide
- If you have temp control then when there are 2 days left of fermentation raise the temperature by 2 degrees for a diacetyl rest (once gravity reaches roughly 1.005) & gravity is the same 3 days in a row move onto cold crashing and adding gelatin! (Dont worry cold crashing & gelatin are both optional steps to help clarify your beer)
Step 8 (optional) – Cold crashing & Gelatin
- begin cold crashing your fermenter (bring the temperature of your fermenter down to as close to 0°C (32°F) as possible, for 2 days to a week depending on how patient you are, and add 1-2 teaspoons of gelatin dissolved in boiling water and allowed to cool a bit to your fermenter
- If you don’t have a temp-controlled fermenter, you can cold crash by putting your fermenter in a fridge or temp-controlled chest freezer
- After you have finished cold crashing it's time to keg/bottle your beer! If you are bottling your beer from the fermenter uncarbonated, remember to add about 5-7 grams (0.17 - 0.24 oz) of priming sugar to your bottles to carbonate your beer.

So... What is it?
Beer, aside from dogs its definitely mans best friend, but what happens when a man drinks too much of the frothy goodness... Beer belly! So how do we solve this? we could drink less... (yeah right!) or we can reduce the carbs! Thats where this recipe comes in, a classic, crisp style Aussie lager, BUT with only 6 grams of carbs per serve!
The classic Australian Lager is traditionally an amber-hued beer with a balanced malt profile and slightly bitter hop flavour, typically brewed with Pride of Ringwood hops or its descendants. However with the modern craft movement new world styles of Aussie lager are being made with much fruitier and fresher hop profiles, leaning into the citrusy and tropical flavours found in a lot of new world New Zealand pilsners!
What's ours like?
This Low carb Aussie lager comes in at a very sessionable 4.5% and very easy drinking with a golden hue, light malty body and a very crisp finish! The hop profile is well in balance providing enough bitterness to add to the crispness of the finish, without overpowering the palate. The hops and yeast esters provide a light tropical aroma and flavour of citrus, passionfruit and general fruit-salad making this lager an absolute thirst quencher for a man who loves to grab an ice cold beer on a hot day, but doesn't want to grow his belly!
You can use this Link to calculate your final carbs in your beer after Fermentation! (full credit to andrewmaixner over on the homebrewing sub-Reddit!) - Just make a copy of this excel spreadsheet and whack in your numbers!
Batch Size & Stats
- 19L / 5 gal finished beer
- 26L (6.8 gal) wort
- Starting gravity – 1.037
- Final gravity 1.0024
- ABV – 4.54%
What ingredients?
Water
With sparging
- 15L (3.9 gal) strike water approx. 64°C (147°F)
- 21L (5.5 gal) sparge water at 78°C (172°F)
Without sparging
- 30L (7.9 gal) strike water approx. 64°C (147°F)
Malts
Total Grain Bill 5kg (11 4lb)
- Barret Burston Pilsner malt – 4.1kg (9 lb)
ENZYMES!
- Glucoamylase - 10mL (0.34 oz) - Add during mash step
Hops & whirlfloc tablets
Pride of Ringwood
- 5g (0.17 oz) - 60 minutes left in the boil
- 15g (0.53 oz) - 15 minutes left in the boil
Galaxy
- 15g (0.53 oz) - 15 minutes left in the boil
Topaz
- 15g (0.53 oz) - 15 minutes left in the boil
Whirlfloc
- 1.5g (0.052 oz) / 2 tablets – 15 minutes left in the boil
Yeast options & fermentation temperatures
- SafLager™ S‑23 – ferment at 14°C (57°F) 23g (0.41 oz) / (1 packets) - Fermented under 10 psi pressure (not necessary but a great option)
- Saflager W34-70 – ferment at 14°C (57°F) 23g (0.41 oz) / (1 packets) - Fermented under 10 psi pressure (not necessary but a great option)
Step by step process
Step 1 – Milling
- Mill grains to medium crush (set mill rollers to a gap of approx. 1.00mm / 0.039 inches (credit card width)
- Just keep in mind roller gap settings are not universal so as you brew more batches you will find the ideal crush size for your setup
- Alternatively if you don’t have a grain mill you can order your grains crushed from most homebrew stores, both online and in person
Step 2 – Mashing
Mash for 60 minutes at 64°C (147°F) with 15L (3.9 gal) of strike water
- Set your strike water to a few degrees above the target mash temperature (you can use the calculator in our website for this)
- ensure you mix in the grains thoroughly with a mash paddle to prevent dough balls from forming (big spoons, spatulas or whisks will also work)
- its easier to mash the grains and prevent dough balls if you add a little grain at a time, mix, add more grain and repeat until all the grains are mixed
- after you have mashed in your grains, add your enzymes! 10mL (0.34 oz) of glucoamylase
if you don’t have a mash tun with heating then ensure after you have finished mixing the grains in to insulate your mash tun (thick neoprene or heavy blankets both work well)
Step 3 (optional) – Sparging
- if your setup has the capability to sparge then do so with 21L (5.5 gal) sparge water at 78°C (172°F)
- if you are not sparging and using a BIAB (brew in a bag) method then remove grains from mash tun and twist and squeeze the bag to get as much liquid out of the grains as possible
- as you start sparging (or straining your BIAB bag) begin raising the temperature of your wort to a boil
Step 4 – Boiling
- once your wort begins to boil start a timer for a 60-minute boil and add your bittering hops, 5g (0.17 oz) of Pride of Ringwood
- at 15 minutes left in the boil add 1 whirlfloc tablet (OR granulated whirlfloc 0.7g (0.025 oz)
- at 15 minutes left in the boil add 15g (0.53 oz) each of galaxy, Pride of Ringwood and Topaz
Step 5 – Whirlpooling / cooling
- After 60 mins of boil turn off your heat source start cooling
- Once you’ve reached yeast pitching temperature take an original gravity reading of your wort
Step 6 – Yeast Pitching
- It is best to make a yeast starter before beginning your brew day (ideally 1 day before) to ensure your yeast are as active and healthy as possible before pitching, but not completely necessary – you could also just rehydrate yeast 30 minutes before pitching.
- Wort Aeration (Optional) if you have a paint mixer give your wort a quick blitz before pitching yeast to help add more dissolved oxygen into the wort to help the yeast have a healthier kick start into fermentation
- Now add your tincture of Vanilla extract! (or you can wait till end of fermentation if you prefer)
- Pitch yeast in wort a degree or two higher than the target fermentation temperature to help yeast take off more aggressively
- To make a yeast starter you can use either:
- DME (dry malt extract) at a ratio of approx. 100g per 1L water (3.5 oz per 33 fluid ounces) for gravity of approx. 1.040
- some unfermented wort kept cold and sanitary from a previous brew day
- 70g of table sugar per 1L water (2.5 oz per 33 fluid ounces) – however, it is best to use malt sugar (wort / DME) whenever possible to reduce the chance of shocking the yeast with a different food source from starter to wort pitching
- To rehydrate yeast
- Add yeast to approx. 10 times as much room temperature water as the weight of the yeast e.g. 10g yeast in 100 ml water (0.35 oz yeast in 3.5 fluid ounces water)
Step 7 – Fermentation
- Allow yeast to ferment over the next two weeks (aprox)
- If you have a temperature-controlled system keep the fermenter temperature to the recommended fermentation temperature for each yeast strain (stated in the yeast ingredients section above)
- It's important to note that fermentation times will vary based on your circumstances like temperature, amount of yeast pitched, the healthiness of yeast, the gravity of the wort, pH, etc. so don’t stress be patient and know that these times are just a rough guide
- If you have temp control then when there are 2 days left of fermentation raise the temperature by 2 degrees for a diacetyl rest (once gravity reaches roughly 1.005) & gravity is the same 3 days in a row move onto cold crashing and adding gelatin! (Dont worry cold crashing & gelatin are both optional steps to help clarify your beer)
Step 8 (optional) – Cold crashing & Gelatin
- begin cold crashing your fermenter (bring the temperature of your fermenter down to as close to 0°C (32°F) as possible, for 2 days to a week depending on how patient you are, and add 1-2 teaspoons of gelatin dissolved in boiling water and allowed to cool a bit to your fermenter
- If you don’t have a temp-controlled fermenter, you can cold crash by putting your fermenter in a fridge or temp-controlled chest freezer
- After you have finished cold crashing it's time to keg/bottle your beer! If you are bottling your beer from the fermenter uncarbonated, remember to add about 5-7 grams (0.17 - 0.24 oz) of priming sugar to your bottles to carbonate your beer.

So... What is it?
The Australian Lager is traditionally an amber-hued lager with a balanced malt profile and slightly bitter hop flavour, typically brewed with Pride of Ringwood hops or its descendants. However with the modern craft movement new world styles of Aussie lager are being made with much fruitier and fresher hop profiles, leaning into the citrusy and tropical flavours found in a lot of new world New Zealand pilsners!
What's ours like?
This Aussie lager is no different, coming in at a moderate 4.8% and leaning into the new world styles of hops it is a lightly malty crisp bodied lager with medium bitterness and a hop profile of citrus, passionfruit and “fruit salad” like flavour & aroma, making it a perfect “lawn mower” session beer for a hot day when you want to enjoy a full flavoured lager with a moderate abv!
Batch Size & Stats
- 44LL (2 19L corny kegs & 6L for a half keg) / 11.6 gal finished beer
- 53L (14 gal) wort
- For a smaller 19L (5 gal) batch size simply half the ingredients of this recipe
- Starting gravity – 1.046
- Final gravity 1.009
- ABV – 4.85%
What ingredients?
Water
With sparging
- 30L (7.9 gal) for a 66°C (151°F) mash (you can use our strike water calculator to find your ideal strike temp)
- 35L (9.2 gal) sparge water at 78°C (172°F)
Without sparging
- 60L (7.9 gal) for a 66°C (151°F) mash (you can use our strike water calculator to find your ideal strike temp)
Malts:
- Australian Pilsner – 9.5kg (20.9 lb) (if you cant get Aussie pils any pils malt will do)
Hops & whirlfloc tablets
Galaxy
- 10g (0.35 oz) - 60 minutes left in the boil
- 60g (2.1 oz) - 5 minutes left in the boil
Topaz
- 60g (2.1 oz) - 5 minutes left in the boil
Whirlfloc tablets
- 1.5g (0.052 oz) / 2 tablets – 15 minutes left in the boil
Yeast options & fermentation temperatures
- 23g SafLager S-23 – ferment at 15°C (59 °F) OR [under 12psi pressure 19°C / 66.2 °F]
- 23g SafLager W-34/70 – ferment at 14°C (57.2 °F) OR [under 12psi pressure 19°C / 66.2 °F]
Step by step process
Step 1 – Milling
- Mill grains to medium crush (set mill rollers to a gap of approx. 1.00mm / 0.039 inches)
- Just keep in mind roller gap settings are not universal so as you brew more batches you will find the ideal crush size for your setup
- Alternatively if you don’t have a grain mill you can order your grains crushed from most homebrew stores, both online and in person
Step 2 – Mashing
- Mash for 60 minutes at 66°C (151°F)
- Set your strike water to a few degrees above the target mash temperature, you can use our calculator to determine what your strike temperature should be
- ensure you mix in the grains thoroughly with a mash paddle to prevent dough balls from forming (big spoons, spatulas or whisks will also work)
- its easier to mash the grains and prevent dough balls if you add a little grain at a time, mix, add more grain and repeat until all the grains are mixed
- if you don’t have a mash tun with heating then ensure after you have finished mixing the grains in to insulate your mash tun (thick neoprene or heavy blankets both work well)
Step 3 (optional) – Sparging
- if your setup has the capability to sparge then do so with 35L (9.2 gal) sparge water at 78°C (172°F)
- if you are not sparging and using a BIAB (brew in a bag) method then remove grains from mash tun and twist and squeeze the bag to get as much liquid out of the grains as possible
- as you start sparging (or straining your BIAB bag) begin raising the temperature of your wort to a boil
Step 4 – Boiling
- once your wort begins to boil start a timer for a 60-minute boil and add your bittering hops, 10g (0.35 oz) of Galaxy
- at 5 minutes left in the boil add 2 whirlfloc tablets and 60g (2.1 oz) each of Galaxy and Topaz
Step 5 – Whirlpooling / cooling
- once wort has been boiling for 60 minutes in total turn off your heat source and begin chilling wort down to yeast pitching temperature
- once you’ve reached yeast pitching temperature take an original gravity reading of your wort
Step 6 – Yeast Pitching
- It is best to make a yeast starter before beginning your brew day (ideally 1 day before) to ensure your yeast are as active and healthy as possible before pitching, but not completely necessary – you could also just rehydrate yeast 30 minutes before pitching.
- Pitch yeast in wort a degree or two higher than the target fermentation temperature to help yeast take off more aggressively
- To make a yeast starter you can use either:
- DME (dry malt extract) at a ratio of approx. 100g per 1L water (3.5 oz per 33 fluid ounces) for gravity of approx. 1.040
- some unfermented wort kept cold and sanitary from a previous brew day
- 70g of table sugar per 1L water (2.5 oz per 33 fluid ounces) – however, it is best to use malt sugar (wort / DME) whenever possible to reduce the chance of shocking the yeast with a different food source from starter to wort pitching
- To rehydrate yeast
- Add yeast to approx. 10 times as much room temperature water as the weight of the yeast e.g. 10g yeast in 100 ml water (0.35 oz yeast in 3.5 fluid ounces water)
Step 7 – Fermentation & dry hopping
- Allow yeast to ferment over the next two weeks (aprox)
- If you have a temperature-controlled system keep the fermenter temperature to the recommended fermentation temperature for each yeast strain (stated in the yeast ingredients section above)
- Monitor the fermentation activity over the first 10-12 days by the bubbling of the blow-off tube/airlock of your fermenter, as the bubbling slows down (roughly around day 10-12) take a gravity reading. When the gravity reaches around 1.010 raise the temperature of your fermenter by 1-2 degrees for 2 days for a diacetyl rest (if you don’t have temperature control don’t worry about this step, it's not the end of the world!)
- It's important to note that fermentation times will vary based on your circumstances like temperature, amount of yeast pitched, the healthiness of yeast, the gravity of the wort, pH, etc. so don’t stress be patient and know that these times are just a rough guide
- On day 2 of the diacetyl rest (once gravity reaches roughly 1.008) & gravity is the same 3 days in a row move onto cold crashing! (If you can’t / don’t want to cold crash go straight to kegging/bottling your beer!)
Step 8 (optional) – Cold crashing
- begin cold crashing your fermenter (bring the temperature of your fermenter down to as close to 0°C (32°F) as possible, for 2 days to a week depending on how patient you are
- If you don’t have a temp-controlled fermenter, you can cold crash by putting your fermenter in a fridge or temp-controlled chest freezer
- After you have finished cold crashing it's time to keg/bottle your beer! If you are bottling your beer from the fermenter uncarbonated remember to add about 5-7 grams (0.17 - 0.24 oz) of priming sugar to your bottles to carbonate your beer.
So... What is it?
The Helles Lager (primarily produced in Bavaria - southern Germany) is much maltier and breadier than a classic style pilsner, and “helles” translates to “brightness” and “light” describing the golden-hued colour of the lager. It typically sits between 4.5% to 5.5% in abv and is made as a refreshing and crisp style summer beer with a balanced malty bready base and fresh zesty hoppiness.
This particular recipe takes on the fundamentals of the style with a slight wombat twist! Coming in at 5.5% it sits at the higher ABV end of the style. As far as hops go a traditional Helles would use older noble hop varieties, however, we used some fresher fruitier new world hops balanced by the woody earthiness of UK fuggles for a more summery style zest (and also its all we had available at the time!). All in all making a fresh, malty german style lager with a bit of a twist.
Batch Size & Stats
- 38L (2 19L corny kegs) / 10 gal finished beer
- 50L (13.2 gal) wort
- For a smaller 19L (5 gal) batch size simply half the ingredients of this recipe
- Starting gravity – 1.052
- Final gravity 1.010
What ingredients?
Water
With sparging
- 30L (7.9 gal) Mash temp 66°C (151°F) 1 hour. Strike water approx. 71°C (160°F) use our calculator to determine your strike water temp
- 35L (9.2 gal) sparge water at 78°C (172°F)
Without sparging
- 60L (7.9 gal) Mash temp 66°C (151°F) 1 hour. Strike water approx. 72°C (161.6°F) use our calculator to determine your strike water temp
Malts:
- Pilsner – 8.7kg (19.4 lb)
- Light Munich – 1.2kg (2.64 lb)
- Aurora – 100g (3.5 oz)
Hops & whirlfloc tablets
Fuggles
- 15g (0.52 oz) - 60 minutes left in the boil
- 60g (2.1 oz) - 15 minutes left in the boil
Huell Melon
- 60g (2.1 oz) - 15 minutes left in the boil
Whirlfloc tablets
- 1.5g (0.052 oz) / 2 tablets – 15 minutes left in the boil
Yeast options & fermentation temperatures
- 23g SafLager S-23 – ferment at 15°C
- 23g SafLager W-34/70 – ferment at 14°C

Step by step process
Step 1 – Milling
- Mill grains to medium crush (set mill rollers to a gap of approx. 1.05mm / 0.041 inches)
- Just keep in mind roller gap settings are not universal so as you brew more batches you will find the ideal crush size for your setup
- Alternatively if you don’t have a grain mill you can order your grains crushed from most homebrew stores, both online and in person
Step 2 – Mashing
- Mash for 60 minutes at 66°C (151°F)
- Set your strike water to a few degrees above the target mash temperature, you can use our calculator to determine what your strike temperature should be
- ensure you mix in the grains thoroughly with a mash paddle to prevent dough balls from forming (big spoons, spatulas or whisks will also work)
- its easier to mash the grains and prevent dough balls if you add a little grain at a time, mix, add more grain and repeat until all the grains are mixed
- if you don’t have a mash tun with heating then ensure after you have finished mixing the grains in to insulate your mash tun (thick neoprene or heavy blankets both work well)
Step 3 (optional) – Sparging
- if your setup has the capability to sparge then do so with 35L (9.2 gal) sparge water at 78°C (172°F)
- if you are not sparging and using a BIAB (brew in a bag) method then remove grains from mash tun and twist and squeeze the bag to get as much liquid out of the grains as possible
- as you start sparging (or straining your BIAB bag) begin raising the temperature of your wort to a boil
Step 4 – Boiling
- once your wort begins to boil start a timer for a 60-minute boil and add your bittering hops, 15g (0.52 oz) of Fuggles
- at 15 minutes left in the boil add 2 whirlfloc tablets and 60g (2.1 oz) each of Fuggles and Huell Melon
Step 5 – Whirlpooling / cooling
- once wort has been boiling for 60 minutes in total turn off your heat source and begin chilling wort down to yeast pitching temperature
- once you’ve reached yeast pitching temperature take an original gravity reading of your wort
Step 6 – Yeast Pitching
- It is best to make a yeast starter before beginning your brew day (ideally 1 day before) to ensure your yeast are as active and healthy as possible before pitching, but not completely necessary – you could also just rehydrate yeast 30 minutes before pitching.
- Pitch yeast in wort a degree or two higher than the target fermentation temperature to help yeast take off more aggressively
- To make a yeast starter you can use either:
- DME (dry malt extract) at a ratio of approx. 100g per 1L water (3.5 oz per 33 fluid ounces) for gravity of approx. 1.040
- some unfermented wort kept cold and sanitary from a previous brew day
- 70g of table sugar per 1L water (2.5 oz per 33 fluid ounces) – however, it is best to use malt sugar (wort / DME) whenever possible to reduce the chance of shocking the yeast with a different food source from starter to wort pitching
- To rehydrate yeast
- Add yeast to approx. 10 times as much room temperature water as the weight of the yeast e.g. 10g yeast in 100 ml water (0.35 oz yeast in 3.5 fluid ounces water)
Step 7 – Fermentation & dry hopping
- Allow yeast to ferment over the next two weeks (aprox)
- If you have a temperature-controlled system keep the fermenter temperature to the recommended fermentation temperature for each yeast strain (stated in the yeast ingredients section above)
- Monitor the fermentation activity over the first 10-12 days by the bubbling of the blow-off tube/airlock of your fermenter, as the bubbling slows down (roughly around day 10-12) take a gravity reading. When the gravity reaches around 1.010 raise the temperature of your fermenter by 1-2 degrees for 2 days for a diacetyl rest (if you don’t have temperature control don’t worry about this step, it's not the end of the world!)
- It's important to note that fermentation times will vary based on your circumstances like temperature, amount of yeast pitched, the healthiness of yeast, the gravity of the wort, pH, etc. so don’t stress be patient and know that these times are just a rough guide
- On day 2 of the diacetyl rest (once gravity reaches roughly 1.008) & gravity is the same 2 days in a row move onto cold crashing! (If you can’t / don’t want to cold crash go straight to kegging/bottling your beer!)
Step 8 (optional) – Cold crashing
- begin cold crashing your fermenter (bring the temperature of your fermenter down to as close to 0°C (32°F) as possible, for 2 days to a week depending on how patient you are
- If you don’t have a temp-controlled fermenter, you can cold crash by putting your fermenter in a fridge or temp-controlled chest freezer
- After you have finished cold crashing it's time to keg/bottle your beer! If you are bottling your beer from the fermenter uncarbonated remember to add about 5-7 grams (0.17 - 0.24 oz) of priming sugar to your bottles to carbonate your beer.