.png)
Xmas Pavlova Milkshake IPA (25 L / 6.6 gal)
This one’s pure Christmas indulgence. Our Xmas Pavlova Milkshake IPA takes everything we love about a classic Aussie pavlova! It's soft sweetness, tropical fruit, and creamy texture — and pours it into a hazy IPA. Loaded with oats, wheat, lactose, and punchy New Zealand hops, this beer is juicy, smooth, and packed full of the flavours of Christmas!
Stats
- Style: Hazy IPA / Milkshake IPA
- ABV: 6.3%
- OG: 1.062 (measured 1.068)
- FG: 1.014
- IBU: 19 (Tinseth)
- Colour: 10 EBC (SRM ~5)
- Carbonation: 2.4 vols CO₂
- Batch Size: 25 L (6.6 gal)
- Boil Time: 60 min
- Brewhouse Efficiency: 75%
- System: BrewZilla / RoboBrew 35 L
- Brewfather Link
Ingredients
Malt, Adjuncts & Sugars (7.04 kg / 15.5 lb total)
- 4.121 kg (9.1 lb) Ale Malt (6 EBC) – 58.6%
- 1.0 kg (2.2 lb) Rolled Oats – 14.2%
- 1.0 kg (2.2 lb) Rolled Wheat – 14.2%
- 703 g (1.55 lb) Wheat Malt – 10%
- 211 g (0.47 lb) Gladiator Malt – 3%
- 500 g (1.1 lb) Lactose (Milk Sugar)
- 500 g (1.1 lb) Rice Hulls
- 60ml (2 oz) Vanilla extract from 2 beans (added post-fermentation)
Hops (346 g / 12.2 oz total)
Mash Hop
- 20 g (0.7 oz) Riwaka – 3 IBU
Hop Stand – 20 min @ 78 °C (172 °F)
- 87 g (3.1 oz) Riwaka – 5 IBU
- 44 g (1.55 oz) Nectaron – 6 IBU
- 44 g (1.55 oz) Superdelic – 5 IBU
Dry Hop – Day 7 (48 hours)
- 75 g (2.65 oz) Riwaka
- 38 g (1.34 oz) Nectaron
- 38 g (1.34 oz) Superdelic
Yeast
- 2 packs Lallemand LalBrew Pomona
Water Profile (NEIPA-focused)
- Ca 127 ppm
- Mg 17 ppm
- Na 15 ppm
- Cl 200 ppm
- SO₄ 99 ppm
- HCO₃ 57 ppm
- SO₄/Cl ratio: 0.5
- Mash pH: 5.27
- Sparge pH: 5.4
Mash Schedule
- 68 °C (154 °F) – 90 min (main mash, medium fermentability)
- 77 °C (171 °F) – 10 min mash out
Mash water: 25 L (6.6 gal)
Sparge water: 10 L (2.6 gal)
Fermentation Schedule
- Primary fermentation at 25 °C (77 °F) for 7 days
- Dry hop on day 5-7 for 48 hours
- Package immediately after dry hop for maximum hop freshness
- Carbonate to 2.4 vols CO₂
- Brewfather_Batch55_20251219
Step-by-Step Brewing Method
1. Mash In
Mash all grains, oats, wheat, lactose, and rice hulls in 25 L (6.6 gal) of water at 68 °C (154 °F). Hold for 90 minutes to build body and creaminess.
2. Mash Hop
Add 20 g (0.7 oz) of Riwaka directly to the mash for soft hop flavour integration.
3. Mash Out & Sparge
Raise to 77 °C (171 °F) for 10 minutes. Sparge with 10 L (2.6 gal) at 77 °C to collect approximately 30 L (7.9 gal) pre-boil wort.
4. Boil – 60 Minutes
Boil for 60 minutes. No kettle hop additions beyond mash hop. Maintain a gentle but consistent boil.
5. Hop Stand
After flameout, cool wort to 78 °C (172 °F). Add Riwaka, Nectaron, and Superdelic. Hold for 20 minutes before chilling fully.
6. Chill & Transfer
Chill wort to 25 °C (77 °F). Transfer to fermenter and pitch LalBrew Pomona yeast.
7. Fermentation
Ferment at 25 °C (77 °F) for 7 days. On day 7, add dry hops and allow to steep for 48 hours.
8. Vanilla Addition & Packaging
Remove dry hops. Add vanilla extract from two beans. Package immediately to preserve hop aroma. Carbonate to 2.4 vols CO₂.
Brew Notes
- Brewed: 5 Dec 2025
- Bottled: 12 Dec 2025
- Pre-boil gravity: 1.056
- OG: 1.068
- FG: 1.014
- Result: creamy, tropical, dessert-like IPA with soft bitterness and smooth vanilla finish

.png)
So... What is it?
How do you make a juicy NEIPA even juicier? You throw it on NITRO! This 7% hazy beast is an absolute game-changer – by far the creamiest, silkiest NEIPA we’ve ever brewed. That cascading nitro pour gives it a dreamy, pillowy mouthfeel that’s smoother than velvet. Packed with mountains of hops, it’s dripping with tropical fruit, citrus, and candy-like sweetness. And because we don’t do things by halves, we hit it with not one, but TWO massive rounds of dry hopping – including a biotransformation charge – to supercharge those juicy, aromatic hop oils.
Batch Size & ABV
- Style: Hazy IPA (NEIPA)
- Batch Size: 25 L (6.6 gal)
- OG: 1.065
- FG: 1.014
- ABV: 6.7%
- IBU: 32 (Tinseth)
- Colour: 10 EBC (5 SRM)
- BU/GU: 0.5
Ingredients
Water
- Mash Water: 24 L (6.34 gal)
- Sparge Water: 10 L (2.64 gal)
- Total Water: 34 L (8.98 gal)
- Mash Schedule:
- 69 °C (156 °F) – 60 min
- 77 °C (171 °F) – 10 min Mash Out
- Mash Schedule:
- Water Profile: Ca 130 | Mg 16 | Na 15 | Cl 202 | SO₄ 100 (SO₄/Cl ratio: 0.5)
-
Grain Bill (7.33 kg / 16.15 lbs)
- 4.398 kg (9.7 lbs) Ale Malt (60%)
- 1.10 kg (2.43 lbs) Gladfield Rolled Oats (15%)
- 1.026 kg (2.26 lbs) Gladfield Wheat Malt (14%)
- 513 g (1.13 lbs) Gladfield Rolled Wheat (7%)
- 293 g (0.65 lbs) Gladfield Gladiator Malt (4%)
- 510 g (1.12 lbs) Rice Hulls (for lautering aid)
Hops & whirlfloc tablets
Mash Hop:
- 18 g (0.63 oz) Motueka (7%) – 3 IBU
Hopstand @ 78°C (172°F) for 20 min:
- 44 g (1.55 oz) El Dorado (11.6%)
- 44 g (1.55 oz) El Dorado (11.6%)
- 44 g (1.55 oz) Amarillo Lupomax (13.5%)
- 44 g (1.55 oz) Citra Lupomax (18.5%)
- 44 g (1.55 oz) Superdelic (10.5%)
Dry Hops:
- Day 2 or 3 (Biotransformation):
- 18 g (0.63 oz) Amarillo Lupomax
- 18 g (0.63 oz) Citra Lupomax
- 18 g (0.63 oz) El Dorado Lupomax
- 18 g (0.63 oz) Superdelic
- Day 7 (Near FG):
- 38 g (1.34 oz) Amarillo Lupomax
- 38 g (1.34 oz) Citra Lupomax
- 38 g (1.34 oz) El Dorado Lupomax
- 38 g (1.34 oz) Superdelic
Yeast options & fermentation temperatures
- 22 g (0.8 oz) — Lallemand (LalBrew) Pomona - 22 °C (71.6 °F)
alternatives below
- 23g (0.8 oz) Lallmand East Coast New England Ale Yeast ferment at 25°C (55°F)
- 23g (0.8 oz) Kveik (we used a Omega yeats Espe Kveik, but any kveik is great!) ferment at 32°C
- 23g (0.8 oz) US-05 – ferment at 20°C
- 23g (0.8 oz) S-04 – ferment at 19°C
Step by step process
Step 1 – Milling
- Mill grains to medium crush (set mill rollers to a gap of approx. 1mm / 0.039 inches) (BUT DONT crush the rice hulls or oats, add them into your grain separately after crushing them)
- Just keep in mind roller gap settings are not universal so as you brew more batches you will find the ideal crush size for your setup
- Alternatively if you don’t have a grain mill you can order your grains crushed from most homebrew stores, both online and in person
Step 2 – Mashing
- Add your brewing salts and mix to ensure they are fully dissolved prior to mashing in grains
- Mash for 60 minutes at 69°C (156°F)
- ensure you mix in the grains thoroughly with a mash paddle to prevent dough balls from forming (big spoons, spatulas or whisks will also work)
- its easier to mash the grains and prevent dough balls if you add a little grain at a time, mix, add more grain and repeat until all the grains are mixed
- now add your mash hops!! This is going to free a bunch of bound thiols from your hops and make this beer even more juicy! I would recommend adding these in a hop bag to make sure you can remove all the hop particles before you start boiling so you don't get extra unaccounted bitterness
- if you don’t have a mash tun with heating then ensure after you have finished mixing the grains in to insulate your mash tun (thick neoprene or heavy blankets both work well)
- after 60 minutes of mashing raise temperature to 77°C (170°F) for 10 minutes to Mash out
Step 3 (optional) – Sparging
- if your setup has the capability to sparge then do so with 25L (6.6 gal) of sparge water at 78 °C (172°F)
- if you are not sparging and using a BIAB (brew in a bag) method then remove grains from mash tun and twist and squeeze the bag to get as much liquid out of the grains as possible
- as you start sparging (or straining your BIAB bag) begin raising the temperature of your wort to a boil
Step 4 – Boiling
- once your wort begins to boil start a timer for a 60-minutes
- after 60 minutes of boiling turn of the heat and chill the temperature of the wort down to 78°C (172°F) and begin whirlpooling
- if you don’t have a wort chiller you could rest your boil kettle in an ice bucket
- if your system can’t whirlpool you can also achieve this with a mash paddle and a power drill, if you don’t have this either don’t worry about whirlpooling it’s not completely necessary
Step 5 – Whirlpooling / whirlpool hop additions
- once temperature reaches 75°C (167°F) and you have started whirlpooling add your whirlpool hops, 44 g - 1.55 oz each of Lupomax citra, Amarillo and regular Superdelic & El Dorado
- allow hops to whirlpool in the wort for 20 minutes and then begin chilling wort again down to yeast pitching temperature
- once you’ve reached yeast pitching temperature take an original gravity reading of your wort
Step 6 – Yeast Pitching
- It is best to make a yeast starter before beginning your brew day (ideally 1 day before) to ensure your yeast are as active and healthy as possible before pitching, but not completely necessary – you could also just rehydrate yeast 30 minutes before pitching.
- Pitch yeast in wort a degree or two higher than the target fermentation temperature to help yeast take off more aggressively
- To make a yeast starter you can use either:
- DME (dry malt extract) at a ratio of approx. 100g per 1L water (3.5 oz per 33 fluid ounces) for gravity of approx. 1.040
- some unfermented wort kept cold and sanitary from a previous brew day
- 70g of table sugar per 1L water (2.5 oz per 33 fluid ounces) – however, it is best to use malt sugar (wort / DME) whenever possible to reduce the chance of shocking the yeast with a different food source from starter to wort pitching
- To rehydrate yeast
- Add yeast to approx. 10 times as much room temperature water as the weight of the yeast e.g. 10g yeast in 100 ml water (0.35 oz yeast in 3.5 fluid ounces water)
Step 7 – Fermentation, dry hopping and Soft Crashing (optional)
- After 2 to 3 days of fermentation add your first round of dry hops, we are aiming for a high krausen hop addition to maximise biotransformation
- after 2-3 days of contact time remove these hops (either bu trub dumping if you can, or add your hops in a hop back with a magnet and pull them out)
- Allow yeast to ferment over the next 5 days to a week
- When the gravity reaches around 1.016 raise the temperature of your fermenter by 1-2 degrees for 2 days for a diacetyl rest
- Whilst starting your Diacetyl rest add your second round of dry hops
- 2 days after dry hopping move on to cold crashing and dump trub / remove hops and take a final gravity reading
- (If you can’t / don’t want to cold crash go straight to kegging/bottling your beer!)
Step 8 (optional) – Cold crashing
- begin cold crashing your fermenter (bring the temperature of your fermenter down to as close to 0°C (32°F) as possible, for 2 days to a week depending on how patient you are
- If you don’t have a temp-controlled fermenter, you can cold crash by putting your fermenter in a fridge or temp-controlled chest freezer
- After you have finished cold crashing it's time to keg/bottle your beer! If you are bottling your beer from the fermenter uncarbonated remember to add about 5-7 grams (0.17 - 0.24 oz) of priming sugar to your bottles to carbonate your beer.
.png)
So... What is it?
Us brewers love big punchy IPA's! But what if you want a couple on a school night? Dont knock down the flavour, just knock down the ABV! This is a full flavoured, full bodied session IPA at just 3.5% so now you can enjoy an old school west coast punchy IPA, packed full of resinous, piney and citrus character AND still be able to wake up and go to work the next day!
Batch Size & Stats
- 38L (2 19L corny kegs) / 10 gal finished beer
- 47L (12.4 gal) wort
- For a smaller 19L (5 gal) batch size simply half the ingredients of this recipe
- Starting gravity – 1.035
- Final gravity 1.008
- ABV – 3.5%
- IBU - 57
- Colour - 15 EBC
- Mash Efficiency - 89%
What ingredients?
Water
With sparging
- 30.5L (8 gal) Mash temp 70°C (158°F) 1 hour. use our calculator to determine your strike water temp
- 30.5L (8 gal) sparge water at 78°C (172°F)
Without sparging
- 60L (15.8 gal) Mash temp 70°C (158°F) 1 hour. use our calculator to determine your strike water temp
Malts: 6.13kg (13.5 lb)
- Pale Ale Malt – 5.119kg (11.3 lb) - 83.5%
- Light Munich Malt - 399g (0.88 lb) - 6.5%
- Gladfield Gladiator Malt (Dextrin Malt) - 307g (10.8 oz) - 5%
- Gladfield Medium Crystal Malt - 307g (10.8 oz) - 5%
Hops (606g / 21.4 oz) & whirlfloc tablets
Fuggles (5.3% AA)
- 10g (0.35 oz) - 3 IBU's - 60 minutes left in the boil
Centennial (8.7% AA)
- 57g (2 oz) - 8 IBU's) - 5 minutes left in the boil
- 57g (2 oz) - 3 IBU's) - 20 min whirlpool @ 75°C (167°F)
- 85g (3 oz) - Dry Hop day 7
Lupomax Citra (18.5% AA)
- 57g (2 oz) - 17 IBU's) - 5 minutes left in the boil
- 57g (2 oz) - 6 IBU's) - 20 min whirlpool @ 75°C (167°F)
- 85g (3 oz) - Dry Hop day 7
Lupomax Mosaic (16% AA)
- 57g (2 oz) - 15 IBU's) - 5 minutes left in the boil
- 57g (2 oz) - 5 IBU's) - 20 min whirlpool @ 75°C (167°F)
- 85g (3 oz) - Dry Hop day 7
Whirlfloc tablets
- 1.5g (0.052 oz) / 2 tablets – 15 minutes left in the boil
Yeast options & fermentation temperatures
- 23g Lallemand (LalBrew) Verdant IPA – ferment at 20°C (68 F)
- Any other ale or IPA yeast of choice
Water Profile
- Ca2+87
- Mg2+ 5
- Na+ 15
- Cl- 67
- SO42- 136
- HCO3- 57
Step by step process
Step 1 – Milling
- Mill grains to medium crush (set mill rollers to a gap of approx. 1.05mm / 0.041 inches)
- Just keep in mind roller gap settings are not universal so as you brew more batches you will find the ideal crush size for your setup
- Alternatively if you don’t have a grain mill you can order your grains crushed from most homebrew stores, both online and in person
Step 2 – Mashing
- Mash for 60 minutes at 70°C (158°F)
- Set your strike water to a few degrees above the target mash temperature, you can use our calculator to determine what your strike temperature should be
- ensure you mix in the grains thoroughly with a mash paddle to prevent dough balls from forming (big spoons, spatulas or whisks will also work)
- its easier to mash the grains and prevent dough balls if you add a little grain at a time, mix, add more grain and repeat until all the grains are mixed
- if you don’t have a mash tun with heating then ensure after you have finished mixing the grains in to insulate your mash tun (thick neoprene or heavy blankets both work well)
Step 3 (optional) – Sparging
- if your setup has the capability to sparge then do so with 30L (7.9 gal) sparge water at 78°C (172°F)
- if you are not sparging and using a BIAB (brew in a bag) method then remove grains from mash tun and twist and squeeze the bag to get as much liquid out of the grains as possible
- as you start sparging (or straining your BIAB bag) begin raising the temperature of your wort to a boil
Step 4 – Boiling
- once your wort begins to boil start a timer for a 60-minute boil and add your bittering hops, 10g (0.35 oz) of Fuggles
- at 15 minutes left in the boil add 2 whirlfloc tablets
- With 5 minutes left in the boil add 58g (2 oz) each of Fuggles, Centennial, Lupomax Citra & Lupomax Mosaic
Step 5 – Whirlpooling / cooling
- After 1 hour of boiling cool the wort down to 75°C (167°F) and add your whirlpool hops for a 20 min whirlpool
- After 20 mins of whirlpooling begin chilling wort down to yeast pitching temperature
- once you’ve reached yeast pitching temperature take an original gravity reading of your wort
Step 6 – Yeast Pitching
- It is best to make a yeast starter before beginning your brew day (ideally 1 day before) to ensure your yeast are as active and healthy as possible before pitching, but not completely necessary – you could also just rehydrate yeast 30 minutes before pitching.
- Pitch yeast in wort a degree or two higher than the target fermentation temperature to help yeast take off more aggressively
- To make a yeast starter you can use either:
- DME (dry malt extract) at a ratio of approx. 100g per 1L water (3.5 oz per 33 fluid ounces) for gravity of approx. 1.040
- some unfermented wort kept cold and sanitary from a previous brew day
- 70g of table sugar per 1L water (2.5 oz per 33 fluid ounces) – however, it is best to use malt sugar (wort / DME) whenever possible to reduce the chance of shocking the yeast with a different food source from starter to wort pitching
- To rehydrate yeast
- Add yeast to approx. 10 times as much room temperature water as the weight of the yeast e.g. 10g yeast in 100 ml water (0.35 oz yeast in 3.5 fluid ounces water)
Step 7 – Fermentation & dry hopping
- Allow yeast to ferment over the next two weeks (aprox)
- If you have a temperature-controlled system keep the fermenter temperature to the recommended fermentation temperature for each yeast strain (stated in the yeast ingredients section above)
- Monitor the fermentation activity over the first 10-12 days by the bubbling of the blow-off tube/airlock of your fermenter, as the bubbling slows down (roughly around day 7) take a gravity reading. When the gravity reaches around 1.010 raise the temperature of your fermenter by 1-2 degrees for 2-3 days for a diacetyl rest (if you don’t have temperature control don’t worry about this step, it's not the end of the world!)
- At the same time as starting your Diacetyl rest, add your dry hops, 85g (3 oz) each of Centennial, Lupomax Citra & Lupomax Mosaic
- It's important to note that fermentation times will vary based on your circumstances like temperature, amount of yeast pitched, the healthiness of yeast, the gravity of the wort, pH, etc. so don’t stress be patient and know that these times are just a rough guide
- On day 2 of the diacetyl rest (once gravity reaches roughly 1.009) & gravity is the same 2 days in a row move onto cold crashing! (If you can’t / don’t want to cold crash go straight to kegging/bottling your beer!)
Step 8 (optional) – Cold crashing
- begin cold crashing your fermenter (bring the temperature of your fermenter down to as close to 0°C (32°F) as possible, for 2 days to a week depending on how patient you are
- If you don’t have a temp-controlled fermenter, you can cold crash by putting your fermenter in a fridge or temp-controlled chest freezer
- After you have finished cold crashing it's time to keg/bottle your beer! If you are bottling your beer from the fermenter uncarbonated remember to add about 5-7 grams (0.17 - 0.24 oz) of priming sugar to your bottles to carbonate your beer.
.png)
So... What is it?
This is our attempt to make an already super juicy beer even JUCIER! By cramming it full of blood orange flavour and ramping it up to a 8.7% ABV! It gives Huge punchy flavours of mango, pineapple, fresh orange zest and and of course a ton of BLOOD ORANGE! For this beer we did a split batch to compare the blood orange infused version against the "regular" hazy IPA and wow were we stunned with the results, check out the full video below for the deets!
Batch Size & ABV
- 38L (2 19L corny kegs) / 10 gal finished beer
- 50L (13.2 gal) wort
- For a smaller 19L (5 gal) batch size simply half the ingredients of this recipe
- Starting gravity – 1.080
- Final gravity 1.0135
- ABV – 8.7%
- IBU - 38
- Colour - 12.6 EBC
- Mash Efficiency - 80%
Ingredients
Water
- With sparging
- 45L (11.9 gal) strike water approx. for a 60 min mash at 68°C (154.4°F) with a 10 min mash out step at the end at 77°C (170°F)
- 25L (6.6 gal) sparge water at 78°C (172°F)
- Without sparging
- 65L (17.2 gal) strike water approx. for a 60 min mash at 68°C (154.4°F) with a 10 min mash out step at the end at 77°C (170°F)
Malts: 15.995kg (35 lb) of fermentable's
- 10.395 kg - 22.9 lb (65%) — Ale Malt
- 2.5 kg - 5.5lb (15.6%) — Gladfield Rolled Oats
- 1.2 kg - 2.6 lb (7.5%) — Rolled Wheat Malt
- 1.2 kg - 2.6 lb (7.5%) — Wheat Malt
- 700 g - 1.54 lb (4.4%) — Gladiator Malt
- 1 kg (2.2 lb) — Rice Hulls
Adjuncts
- Monin Blood orange syrup - 1.4L / 0.36gal into a keg and rack the beer onto it when finished (we only did this for 1 keg)
Hops & whirlfloc tablets
112 g / 4oz (3 IBU) — Astra 7.9% — Aroma — 20 min hopstand
112 g / 4oz (7 IBU) — Lupomax Amarillo 13.5% — Aroma — 20 min hopstand @ 78 °C
87.5 g / 3oz (3 IBU) — Astra 7.9% — Aroma — 20 min hopstand @ 78 °C
87.5 g / 3oz (8 IBU) — Lupomax simco 19% — Aroma — 20 min hopstand @ 78 °C
57 g / 2oz (5 IBU) — Lupomax Citra 18.5% — Aroma — 20 min hopstand @ 78 °C
200 g / 7oz — Lupomax Amarillo 13.5% — Dry Hop — day 7
87.5 g / 3oz — Astra 7.9% — Dry Hop — day 7
57 g / 3oz — Lupomax Citra 18.5% — Dry Hop — day 7
Yeast options & fermentation temperatures (we co pitched the below but you could use any strain you like)
- 11 g — Lallemand (LalBrew) Pomona - 25 °C (77 °F)
- 22 g — Lallemand (LalBrew) New England - 25 °C (77 °F)
alternatives below
- 23g (0.8 oz) Lallmand East Coast New England Ale Yeast ferment at 25°C (55°F)
- 23g (0.8 oz) Kveik (we used a Omega yeats Espe Kveik, but any kveik is great!) ferment at 32°C
- 23g (0.8 oz) US-05 – ferment at 20°C
- 23g (0.8 oz) S-04 – ferment at 19°C
Water Profile
Ca2+ 130
Mg2+ 16
Na+ 15
Cl- 202
SO42- 100
HCO3- 57
Step by step process
Step 1 – Milling
- Mill grains to medium crush (set mill rollers to a gap of approx. 1mm / 0.039 inches) (BUT DONT crush the rice hulls or oats, add them into your grain separately after crushing them)
- Just keep in mind roller gap settings are not universal so as you brew more batches you will find the ideal crush size for your setup
- Alternatively if you don’t have a grain mill you can order your grains crushed from most homebrew stores, both online and in person
Step 2 – Mashing
- Add your brewing salts and mix to ensure they are fully dissolved prior to mashing in grains
- Mash for 60 minutes at 68°C (154.4°F)
- ensure you mix in the grains thoroughly with a mash paddle to prevent dough balls from forming (big spoons, spatulas or whisks will also work)
- its easier to mash the grains and prevent dough balls if you add a little grain at a time, mix, add more grain and repeat until all the grains are mixed
- now add your mash hops!! This is going to free a bunch of bound thiols from your hops and make this beer even more juicy! I would recommend adding these in a hop bag to make sure you can remove all the hop particles before you start boiling so you don't get extra unaccounted bitterness
- if you don’t have a mash tun with heating then ensure after you have finished mixing the grains in to insulate your mash tun (thick neoprene or heavy blankets both work well)
- after 60 minutes of mashing raise temperature to 77°C (170°F) for 10 minutes to Mash out
Step 3 (optional) – Sparging
- if your setup has the capability to sparge then do so with 25L (6.6 gal) of sparge water at 78 °C (172°F)
- if you are not sparging and using a BIAB (brew in a bag) method then remove grains from mash tun and twist and squeeze the bag to get as much liquid out of the grains as possible
- as you start sparging (or straining your BIAB bag) begin raising the temperature of your wort to a boil
Step 4 – Boiling
- once your wort begins to boil start a timer for a 60-minutes
- after 60 minutes of boiling turn of the heat and chill the temperature of the wort down to 75°C (167°F) and begin whirlpooling
- if you don’t have a wort chiller you could rest your boil kettle in an ice bucket
- if your system can’t whirlpool you can also achieve this with a mash paddle and a power drill, if you don’t have this either don’t worry about whirlpooling it’s not completely necessary
Step 5 – Whirlpooling / whirlpool hop additions
- once temperature reaches 75°C (167°F) and you have started whirlpooling add your whirlpool hops, 87.5 g - 3 oz each of Lupomax versions of Amarillo, Sabro, citra and El Dorado
- allow hops to whirlpool in the wort for 20 minutes and then begin chilling wort again down to yeast pitching temperature
- once you’ve reached yeast pitching temperature take an original gravity reading of your wort
Step 6 – Yeast Pitching
- It is best to make a yeast starter before beginning your brew day (ideally 1 day before) to ensure your yeast are as active and healthy as possible before pitching, but not completely necessary – you could also just rehydrate yeast 30 minutes before pitching.
- Pitch yeast in wort a degree or two higher than the target fermentation temperature to help yeast take off more aggressively
- To make a yeast starter you can use either:
- DME (dry malt extract) at a ratio of approx. 100g per 1L water (3.5 oz per 33 fluid ounces) for gravity of approx. 1.040
- some unfermented wort kept cold and sanitary from a previous brew day
- 70g of table sugar per 1L water (2.5 oz per 33 fluid ounces) – however, it is best to use malt sugar (wort / DME) whenever possible to reduce the chance of shocking the yeast with a different food source from starter to wort pitching
- To rehydrate yeast
- Add yeast to approx. 10 times as much room temperature water as the weight of the yeast e.g. 10g yeast in 100 ml water (0.35 oz yeast in 3.5 fluid ounces water)
Step 7 – Fermentation, dry hopping and Soft Crashing (optional)
- Allow yeast to ferment over the next 5 days to two weeks
- If you have a temperature-controlled system keep the fermenter temperature to the recommended fermentation temperature for each yeast strain (stated in the yeast ingredients section above)
- Monitor the fermentation activity over the first 7 days by the bubbling of the blow-off tube/airlock of your fermenter, as the bubbling slows down (roughly around day 7) take a gravity reading. When the gravity reaches around 1.016 raise the temperature of your fermenter by 1-2 degrees for 2 days for a diacetyl rest (if you don’t have temperature control don’t worry about this step, it's not the end of the world!)
- It's important to note that fermentation times will vary based on your circumstances like temperature, amount of yeast pitched, the healthiness of yeast, the gravity of the wort, pH, etc. so don’t stress be patient and know that these times are just a rough guide
- On day 2 of the diacetyl rest (once gravity reaches roughly 1.013 – 1.014) "Soft Crash" your beer (optional, if you cant temp control move onto dry hopping), by reducing temperature to 13°C (55.4°F)
- After 1 day of soft crashing add your dry hops, 75 g - 2.6 oz each of Lupomax versions of Amarillo, Sabro, citra and El Dorado and allow the temperature of fermentation to rise again up to 22 °C (71.6 °F)
- 1 to 2 days after dry hopping move on to cold crashing and dump trub / remove hops and take a final gravity reading
- (If you can’t / don’t want to cold crash go straight to kegging/bottling your beer!)
- After beer was finished we racked one keg onto the 1.4L / 0.36gal of Monin Blood orange syrup
Step 8 (optional) – Cold crashing
- begin cold crashing your fermenter (bring the temperature of your fermenter down to as close to 0°C (32°F) as possible, for 2 days to a week depending on how patient you are
- If you don’t have a temp-controlled fermenter, you can cold crash by putting your fermenter in a fridge or temp-controlled chest freezer
- After you have finished cold crashing it's time to keg/bottle your beer! If you are bottling your beer from the fermenter uncarbonated remember to add about 5-7 grams (0.17 - 0.24 oz) of priming sugar to your bottles to carbonate your beer.
.jpg)
So... What is it?
The Cold IPA" is a variant of the classic West Coast IPA invented by Kevin Davey from Wayfinder Beer in Portland, Oregon. This beer strips back all the malt character, and leaves it clean finishing using lager yeast, which allows the symphony of hops to truly shine completely unimpeded by malt are yeast characteristics! Leaving you with the purest form of hoppy beer!
What's ours like?
This is a truly sensational expression of pure hoppy goodness! the malt profile is extremely subdued and dry finishing curtesy of the rice (which we learned from our Japanese lager) and dextrose, and the yeast profile helps to keep everything clean but doesn't throw off any esters that get in the way of the final product. Leaving us with a 7.5% old school style hop bomb! Packed full of resinous character and pine notes, followed by west coast style grapefruit forward citrus and finishing with a slightly zesty orange note, making this an awesome way to see what these hops are really capable of!
Batch Size & Stats
- 38L (2 19L corny kegs) / 10 gal finished beer
- 45L (11.9 gal) wort
- For a smaller 19L (5 gal) batch size simply half the ingredients of this recipe
- Starting gravity – 1.066
- Final gravity 1.009
- ABV – 7.5%
- IBU - 53
- Colour - 6.1 EBC
- Mash Efficiency - 85.7%
What ingredients?
Water
With sparging
- 32L (8.45 gal) for a 30 minute mash at 63°C (145°F) followed by 30 minutes at 70°C (158°F) then a mash out at 77°C (170°F)
- 30L (7.9 gal) sparge water at 78°C (172°F)
Without sparging
- 55L (14.5 gal) for a 30 minute mash at 63°C (145°F) followed by 30 minutes at 70°C (158°F) then a mash out at 77°C (170°F)
Malts: Total 13.6 kg / 30 lb
- Pilsner malt – 8.38 kg (18.5 lb) - 74.3%
- Flaked Rice – 1.9g (4.2 lb) - 16.8%
- Dextrose Powder - 1kg (2.2lb) - 8.9%
Hops & whirlfloc tablets
Centennial
- 22.2g (0.78 oz) - 11 IBU's - 60 minutes left in the boil
- 57g (2 oz) - 11 IBU's - 10 min
- 57g (2 oz) - 0 min
- 114g (4 oz) - Dry Hops - day 15 / near final gravity
Lupomax Citra
- 57g (2 oz) - 20 IBU's - 10 min
- 57g (2 oz) - 0 min
- 114g (4 oz) - Dry Hops - day 15 / near final gravity
Simcoe
- 57g (2 oz) - 14 IBU's - 10 min
- 57g (2 oz) - 0 min
- 114g (4 oz) - Dry Hops - day 15 / near final gravity
Whirlfloc tablets
- 1.5g (0.052 oz) / 2 tablets – 15 minutes left in the boil
Yeast options & fermentation temperatures
- 23g (0.8 oz) Saflager s-23 at 13.5°C / 56.3°F for 15 days, followed by diacetyle rest for 2 days at 15°C / 59°F then a cold crash
- 23g (0.8 oz) Saflager W-34/70 at 13.5°C / 56.3°F for 15 days, followed by diacetyle rest for 2 days at 15°C / 59°F then a cold crash
Water Profile
- Ca2+110
- Mg2+ 18
- Na+ 16
- Cl- 100
- SO42- 200
- HCO3- 57
Step by step process
Step 1 – Milling
- Mill grains to medium crush (set mill rollers to a gap of approx. 1.00mm / 0.039 inches)
- Just keep in mind roller gap settings are not universal so as you brew more batches you will find the ideal crush size for your setup
- Alternatively if you don’t have a grain mill you can order your grains crushed from most homebrew stores, both online and in person
Step 2 – Mashing
- Mash for 30 minutes at 63°C (145°F) followed by 30 minutes at 70°C (158°F) then a mash out at 77°C (170°F)
- Set your strike water to a few degrees above the target mash temperature, you can use our calculator to determine what your strike temperature should be
- ensure you mix in the grains thoroughly with a mash paddle to prevent dough balls from forming (big spoons, spatulas or whisks will also work)
- its easier to mash the grains and prevent dough balls if you add a little grain at a time, mix, add more grain and repeat until all the grains are mixed
- if you don’t have a mash tun with heating then ensure after you have finished mixing the grains in to insulate your mash tun (thick neoprene or heavy blankets both work well)
- after 60 minutes of mashing raise the temp to 77°C (170°F) for 10-15 minutes to mash out, and deactivate the enzymes breaking down the sugars
Step 3 (optional) – Sparging
- if your setup has the capability to sparge then do so with 30L (7.9 gal) sparge water at 78°C (172°F)
- if you are not sparging and using a BIAB (brew in a bag) method then remove grains from mash tun and twist and squeeze the bag to get as much liquid out of the grains as possible
- as you start sparging (or straining your BIAB bag) begin raising the temperature of your wort to a boil
Step 4 – Boiling
- once your wort begins to boil start a timer for a 60-minute boil and add your bittering hops, 22.2g (0.78 oz) of Centennial
- at 15 minutes left in the boil add 2.5 whirlfloc tablets
- at 10 minutes left in the boil add 57g (2 oz) each of Centennial, Lupomax Citra and simcoe
- at Flameout / 0 minutes left in the boil add 57g (2oz) of the same hops
Step 5 – Cooling
- After 1 hour of boiling start cooling wort down to yeast pitching temperature
- once you’ve reached yeast pitching temperature take an original gravity reading of your wort
Step 6 – Yeast Pitching
- It is best to make a yeast starter before beginning your brew day (ideally 1 day before) to ensure your yeast are as active and healthy as possible before pitching, but not completely necessary – you could also just rehydrate yeast 30 minutes before pitching.
- Pitch yeast in wort a degree or two higher than the target fermentation temperature to help yeast take off more aggressively
- To make a yeast starter you can use either:
- DME (dry malt extract) at a ratio of approx. 100g per 1L water (3.5 oz per 33 fluid ounces) for gravity of approx. 1.040
- some unfermented wort kept cold and sanitary from a previous brew day
- 70g of table sugar per 1L water (2.5 oz per 33 fluid ounces) – however, it is best to use malt sugar (wort / DME) whenever possible to reduce the chance of shocking the yeast with a different food source from starter to wort pitching
- To rehydrate yeast
- Add yeast to approx. 10 times as much room temperature water as the weight of the yeast e.g. 10g yeast in 100 ml water (0.35 oz yeast in 3.5 fluid ounces water)
Step 7 – Fermentation & Dry Hopping
- Allow yeast to ferment over the next week to two weeks
- If you have a temperature controlled system keep the fermenter temperature to the recommended fermentation temperature for each yeast strain (stated in the yeast ingredients section above)
- Monitor the fermentation activity over the first 14 days by the bubbling of the blow off tube / airlock of your fermenter, as the bubbling slows down (roughly around day 7) take a gravity reading. When the gravity reaches around 1.011 raise the temperature of your fermenter by 1-2 degrees for 2 days for a diacetyl rest (if you don’t have temperature control don’t worry about this step, its not the end of the world!)
- On day 2 of the diacetyl rest its time to Dry Hop, add 114g (4 oz) each of Lupomax citra, Centennial and simcoe to the fermenter
- Its important to note that fermentation times will vary based on your circumstances like, temperature, amount of yeast pitched, healthiness of yeast, gravity of wort, pH etc. so don’t stress be patient and know that these times are just a rough guide
- Once the gravity is the same 2 days in a row move onto cold crashing! (If you can’t / don’t want to cold crash go straight to kegging/bottling your beer!)
Step 8 (optional) – Cold crashing
- begin cold crashing your fermenter (bring the temperature of your fermenter down to as close to 0°C (32°F) as possible, for 2 days to a week depending on how patient you are
- If you don’t have a temp-controlled fermenter, you can cold crash by putting your fermenter in a fridge or temp-controlled chest freezer
- After you have finished cold crashing it's time to keg/bottle your beer! If you are bottling your beer from the fermenter uncarbonated remember to add about 5-7 grams (0.17 - 0.24 oz) of priming sugar to your bottles to carbonate your beer.
.png)
So... What is it?
Our Thiolized Juicy NEIPA was amazing, so how can we make it more juicy, more hazy and more challenging? By using 100% Oats!! This is the Thiolized juicy NEIPA on hard mode! It comes in at 7% and is loaded up with all the same juicy punch characteristics of the original recipe, featuring mango, pineapple, and fresh orange zest and candy-like sweetness! The body is certainly creamy, however has a drier finish than expected, so we recommend using half the enzymes we did in our brew-day video to keep that body thick and voluptuous!
Batch Size & ABV
- 19L (1 corny kegs) / 5 gal finished beer
- 23L (6 gal) wort
- Starting gravity – 1.059
- Final gravity 1.006
- ABV – 7%
- IBU - 38
- Colour - 9.5 EBC
- Mash Efficiency - 80%
Ingredients
Water
With sparging
- 22L (5.8 gal) strike water approx. for a 60 min mash at 68°C (154.4°F) with a 10 min mash out step at the end at 77°C (170°F)
- 15L (4 gal) sparge water at 78°C (172°F)
Without sparging
- 30L (7.9 gal) strike water approx. for a 60 min mash at 68°C (154.4°F) with a 10 min mash out step at the end at 77°C (170°F)
Malts: 7.5kg (16.5 lb) of fermentable's [8kg (17.6lb) with rice hulls]
- 6.5 kg - 22.9 lb (86.7%) — Big O Malted Oats
- 1 kg - 5.4lb (13.3%) — Rolled Oats
- 0.5 kg (1.1 lb) — Rice Hulls
Hops & whirlfloc tablets
19 g / 0.67 oz (10 IBU) — Lupomax Citra 18.5% — Mash
43.8 g / 1.55 oz (5 IBU) — El Dorado 11.6% — Aroma — 20 min hopstand @ 75 °C
43.8 g / 1.55 oz (6 IBU) — Lupomax Amarillo 13.5% — Aroma — 20 min hopstand @ 75 °C
43.8 g / 1.55 oz (8 IBU) — Lupomax Citra 18.5% — Aroma — 20 min hopstand @ 75 °C
43.8 g / 1.55 oz (8 IBU) — Lupomax Sabro 19% — Aroma — 20 min hopstand @ 75 °C
37.5 g / 1.3 oz — El Dorado 11.6% — Dry Hop — day 7
37.5 g / 1.3 oz — Lupomax Amarillo 13.5% — Dry Hop — day 7
37.5 g / 1.3 oz — Lupomax Citra 18.5% — Dry Hop — day 7
37.5 g / 1.3 oz — Lupomax Sabro 19% — Dry Hop — day 7
Enzymes! (I recommend using half of the below rates to retain more body & finish with a higher gravity)
- Benzyme AA 4X - 1ml / 0.035 oz
- Benzyme Glucoamylase - 6.5ml / 0.23 oz
- Novozymes Ultraflo Max (optional) - 1.8ml / 0.06 oz
Yeast options & fermentation temperatures
- 11.5 g (0.4 oz) — Lallemand (LalBrew) Pomona - 22 °C (71.6 °F)
alternatives below
- 23g (0.8 oz) Lallmand East Coast New England Ale Yeast ferment at 25°C (55°F)
- 23g (0.8 oz) Kveik (we used a Omega yeats Espe Kveik, but any kveik is great!) ferment at 32°C
- 23g (0.8 oz) US-05 – ferment at 20°C
- 23g (0.8 oz) S-04 – ferment at 19°C
Water Profile
Ca2+ 141
Mg2+ 9
Na+ 15
Cl- 202
SO42- 100
HCO3- 57
Step by step process
Step 1 – Milling
- Mill grains to medium crush (set mill rollers to a gap of approx. 1mm / 0.039 inches) (BUT DONT crush the rice hulls or oats, add them into your grain separately after crushing them)
- Just keep in mind roller gap settings are not universal so as you brew more batches you will find the ideal crush size for your setup
- Alternatively if you don’t have a grain mill you can order your grains crushed from most homebrew stores, both online and in person
Step 2 – Mashing & Enzymes!
- Add your brewing salts and mix to ensure they are fully dissolved prior to mashing in grains
- Mash for 60 minutes at 68°C (154.4°F)
- ensure you mix in the grains thoroughly with a mash paddle to prevent dough balls from forming (big spoons, spatulas or whisks will also work)
- Mash in aprox 15% of your total grain bill then add the Enzymes listed above!! These will ensure you can actually convert sugars from the Oats because they have zero diastatic power of their own!
- its easier to mash the grains and prevent dough balls if you add a little grain at a time, mix, add more grain and repeat until all the grains are mixed
- now add your mash hops!! This is going to free a bunch of bound thiols from your hops and make this beer even more juicy! I would recommend adding these in a hop bag to make sure you can remove all the hop particles before you start boiling so you don't get extra unaccounted bitterness
- if you don’t have a mash tun with heating then ensure after you have finished mixing the grains in to insulate your mash tun (thick neoprene or heavy blankets both work well)
- after 60 minutes of mashing raise temperature to 77°C (170°F) for 10 minutes to Mash out
Step 3 (optional) – Sparging
- if your setup has the capability to sparge then do so with 15L (4 gal) of sparge water at 78 °C (172°F)
- if you are not sparging and using a BIAB (brew in a bag) method then remove grains from mash tun and twist and squeeze the bag to get as much liquid out of the grains as possible
- as you start sparging (or straining your BIAB bag) begin raising the temperature of your wort to a boil
Step 4 – Boiling
- once your wort begins to boil start a timer for a 90-minutes
- after 90 minutes of boiling turn of the heat and chill the temperature of the wort down to 75°C (167°F) and begin whirlpooling
- if you don’t have a wort chiller you could rest your boil kettle in an ice bucket
- if your system can’t whirlpool you can also achieve this with a mash paddle and a power drill, if you don’t have this either don’t worry about whirlpooling it’s not completely necessary
Step 5 – Whirlpooling / whirlpool hop additions
- once temperature reaches 75°C (167°F) and you have started whirlpooling add your whirlpool hops,43.8 g / 1.55 oz each of Lupomax versions of Amarillo, Sabro, citra and El Dorado
- allow hops to whirlpool in the wort for 20 minutes and then begin chilling wort again down to yeast pitching temperature
- once you’ve reached yeast pitching temperature take an original gravity reading of your wort
Step 6 – Yeast Pitching
- It is best to make a yeast starter before beginning your brew day (ideally 1 day before) to ensure your yeast are as active and healthy as possible before pitching, but not completely necessary – you could also just rehydrate yeast 30 minutes before pitching.
- Pitch yeast in wort a degree or two higher than the target fermentation temperature to help yeast take off more aggressively
- To make a yeast starter you can use either:
- DME (dry malt extract) at a ratio of approx. 100g per 1L water (3.5 oz per 33 fluid ounces) for gravity of approx. 1.040
- some unfermented wort kept cold and sanitary from a previous brew day
- 70g of table sugar per 1L water (2.5 oz per 33 fluid ounces) – however, it is best to use malt sugar (wort / DME) whenever possible to reduce the chance of shocking the yeast with a different food source from starter to wort pitching
- To rehydrate yeast
- Add yeast to approx. 10 times as much room temperature water as the weight of the yeast e.g. 10g yeast in 100 ml water (0.35 oz yeast in 3.5 fluid ounces water)
Step 7 – Fermentation, dry hopping and Soft Crashing (optional)
- Allow yeast to ferment over the next 5 days to two weeks
- If you have a temperature-controlled system keep the fermenter temperature to the recommended fermentation temperature for each yeast strain (stated in the yeast ingredients section above)
- Monitor the fermentation activity over the first 7 days by the bubbling of the blow-off tube/airlock of your fermenter, as the bubbling slows down (roughly around day 7) take a gravity reading. When the gravity reaches around 1.016 raise the temperature of your fermenter by 1-2 degrees for 2 days for a diacetyl rest (if you don’t have temperature control don’t worry about this step, it's not the end of the world!)
- It's important to note that fermentation times will vary based on your circumstances like temperature, amount of yeast pitched, the healthiness of yeast, the gravity of the wort, pH, etc. so don’t stress be patient and know that these times are just a rough guide
- On day 2 of the diacetyl rest (once gravity reaches roughly 1.01) "Soft Crash" your beer (optional, if you cant temp control move onto dry hopping), by reducing temperature to 13°C (55.4°F)
- After 1 day of soft crashing add your dry hops, 37.5 g / 1.3 oz oz each of Lupomax versions of Amarillo, Sabro, citra and El Dorado and allow the temperature of fermentation to rise again up to 22 °C (71.6 °F)
- 1 to 2 days after dry hopping move on to cold crashing and dump trub / remove hops and take a final gravity reading
- (If you can’t / don’t want to cold crash go straight to kegging/bottling your beer!)
Step 8 (optional) – Cold crashing
- begin cold crashing your fermenter (bring the temperature of your fermenter down to as close to 0°C (32°F) as possible, for 2 days to a week depending on how patient you are
- If you don’t have a temp-controlled fermenter, you can cold crash by putting your fermenter in a fridge or temp-controlled chest freezer
- After you have finished cold crashing it's time to keg/bottle your beer! If you are bottling your beer from the fermenter uncarbonated remember to add about 5-7 grams (0.17 - 0.24 oz) of priming sugar to your bottles to carbonate your beer.
.png)
So... What is it?
The Hazy IPA (also called NEIPA) is a super fruity low bitterness style of IPA that typically sits around the 5.5-7.5% ABV mark. This time we turned the voltage way up, making a 8.7% juice bomb! Huge punchy flavours of mango, pineapple, and fresh orange zest and candy-like sweetness make this a super drinkable boozy juice! You dont need your breakfast OJ anymore, this bad boy has you covered!
Batch Size & ABV
- 38L (2 19L corny kegs) / 10 gal finished beer
- 50L (13.2 gal) wort
- For a smaller 19L (5 gal) batch size simply half the ingredients of this recipe
- Starting gravity – 1.080
- Final gravity 1.0135
- ABV – 8.7%
- IBU - 38
- Colour - 12.6 EBC
- Mash Efficiency - 80%
Ingredients
Water
- With sparging
- 45L (11.9 gal) strike water approx. for a 60 min mash at 68°C (154.4°F) with a 10 min mash out step at the end at 77°C (170°F)
- 25L (6.6 gal) sparge water at 78°C (172°F)
- Without sparging
- 65L (17.2 gal) strike water approx. for a 60 min mash at 68°C (154.4°F) with a 10 min mash out step at the end at 77°C (170°F)
Malts: 14.5kg (32 lb) of fermentable's 16.5kg (36.4lb) with rice hulls
- 10.395 kg - 22.9 lb (63%) — Ale Malt
- 2.475 kg - 5.4lb (15%) — Gladfield Rolled Oats
- 1.98 kg - 4.36 lb (12%) — Wheat Malt
- 990 g - 2.2 lb (6%) — Rolled Wheat
- 660 g - 1.45 lb (4%) — Gladiator Malt
- 1 kg (2.2 lb) — Rice Hulls
Hops & whirlfloc tablets
50 g - 1.76 oz (9 IBU) — Lupomax Citra 18.5% — Mash
87.5 g - 3 oz (5 IBU) — El Dorado 11.6% — Aroma — 20 min hopstand @ 78 °C
87.5 g - 3 oz (6 IBU) — Lupomax Amarillo 13.5% — Aroma — 20 min hopstand @ 78 °C
87.5 g - 3 oz (8 IBU) — Lupomax Citra 18.5% — Aroma — 20 min hopstand @ 78 °C
87.5 g - 3 oz (8 IBU) — Lupomax Sabro 19% — Aroma — 20 min hopstand @ 78 °C
75 g - 2.6 oz — Lupomax Amarillo 13.5% — Dry Hop — day 7
75 g - 2.6 oz — Lupomax Citra 18.5% — Dry Hop — day 7
75 g - 2.6 oz — Lupomax El Dorado 18% — Dry Hop — day 7
75 g - 2.6 oz — Lupomax Sabro 19% — Dry Hop — day 7
Yeast options & fermentation temperatures
- 33 g — Lallemand (LalBrew) Pomona - 22 °C (71.6 °F)
alternatives below
- 23g (0.8 oz) Lallmand East Coast New England Ale Yeast ferment at 25°C (55°F)
- 23g (0.8 oz) Kveik (we used a Omega yeats Espe Kveik, but any kveik is great!) ferment at 32°C
- 23g (0.8 oz) US-05 – ferment at 20°C
- 23g (0.8 oz) S-04 – ferment at 19°C
Water Profile
Ca2+ 130
Mg2+ 16
Na+ 15
Cl- 202
SO42- 100
HCO3- 57
Step by step process
Step 1 – Milling
- Mill grains to medium crush (set mill rollers to a gap of approx. 1mm / 0.039 inches) (BUT DONT crush the rice hulls or oats, add them into your grain separately after crushing them)
- Just keep in mind roller gap settings are not universal so as you brew more batches you will find the ideal crush size for your setup
- Alternatively if you don’t have a grain mill you can order your grains crushed from most homebrew stores, both online and in person
Step 2 – Mashing
- Add your brewing salts and mix to ensure they are fully dissolved prior to mashing in grains
- Mash for 60 minutes at 68°C (154.4°F)
- ensure you mix in the grains thoroughly with a mash paddle to prevent dough balls from forming (big spoons, spatulas or whisks will also work)
- its easier to mash the grains and prevent dough balls if you add a little grain at a time, mix, add more grain and repeat until all the grains are mixed
- now add your mash hops!! This is going to free a bunch of bound thiols from your hops and make this beer even more juicy! I would recommend adding these in a hop bag to make sure you can remove all the hop particles before you start boiling so you don't get extra unaccounted bitterness
- if you don’t have a mash tun with heating then ensure after you have finished mixing the grains in to insulate your mash tun (thick neoprene or heavy blankets both work well)
- after 60 minutes of mashing raise temperature to 77°C (170°F) for 10 minutes to Mash out
Step 3 (optional) – Sparging
- if your setup has the capability to sparge then do so with 25L (6.6 gal) of sparge water at 78 °C (172°F)
- if you are not sparging and using a BIAB (brew in a bag) method then remove grains from mash tun and twist and squeeze the bag to get as much liquid out of the grains as possible
- as you start sparging (or straining your BIAB bag) begin raising the temperature of your wort to a boil
Step 4 – Boiling
- once your wort begins to boil start a timer for a 60-minutes
- after 60 minutes of boiling turn of the heat and chill the temperature of the wort down to 75°C (167°F) and begin whirlpooling
- if you don’t have a wort chiller you could rest your boil kettle in an ice bucket
- if your system can’t whirlpool you can also achieve this with a mash paddle and a power drill, if you don’t have this either don’t worry about whirlpooling it’s not completely necessary
Step 5 – Whirlpooling / whirlpool hop additions
- once temperature reaches 75°C (167°F) and you have started whirlpooling add your whirlpool hops, 87.5 g - 3 oz each of Lupomax versions of Amarillo, Sabro, citra and El Dorado
- allow hops to whirlpool in the wort for 20 minutes and then begin chilling wort again down to yeast pitching temperature
- once you’ve reached yeast pitching temperature take an original gravity reading of your wort
Step 6 – Yeast Pitching
- It is best to make a yeast starter before beginning your brew day (ideally 1 day before) to ensure your yeast are as active and healthy as possible before pitching, but not completely necessary – you could also just rehydrate yeast 30 minutes before pitching.
- Pitch yeast in wort a degree or two higher than the target fermentation temperature to help yeast take off more aggressively
- To make a yeast starter you can use either:
- DME (dry malt extract) at a ratio of approx. 100g per 1L water (3.5 oz per 33 fluid ounces) for gravity of approx. 1.040
- some unfermented wort kept cold and sanitary from a previous brew day
- 70g of table sugar per 1L water (2.5 oz per 33 fluid ounces) – however, it is best to use malt sugar (wort / DME) whenever possible to reduce the chance of shocking the yeast with a different food source from starter to wort pitching
- To rehydrate yeast
- Add yeast to approx. 10 times as much room temperature water as the weight of the yeast e.g. 10g yeast in 100 ml water (0.35 oz yeast in 3.5 fluid ounces water)
Step 7 – Fermentation, dry hopping and Soft Crashing (optional)
- Allow yeast to ferment over the next 5 days to two weeks
- If you have a temperature-controlled system keep the fermenter temperature to the recommended fermentation temperature for each yeast strain (stated in the yeast ingredients section above)
- Monitor the fermentation activity over the first 7 days by the bubbling of the blow-off tube/airlock of your fermenter, as the bubbling slows down (roughly around day 7) take a gravity reading. When the gravity reaches around 1.016 raise the temperature of your fermenter by 1-2 degrees for 2 days for a diacetyl rest (if you don’t have temperature control don’t worry about this step, it's not the end of the world!)
- It's important to note that fermentation times will vary based on your circumstances like temperature, amount of yeast pitched, the healthiness of yeast, the gravity of the wort, pH, etc. so don’t stress be patient and know that these times are just a rough guide
- On day 2 of the diacetyl rest (once gravity reaches roughly 1.013 – 1.014) "Soft Crash" your beer (optional, if you cant temp control move onto dry hopping), by reducing temperature to 13°C (55.4°F)
- After 1 day of soft crashing add your dry hops, 75 g - 2.6 oz each of Lupomax versions of Amarillo, Sabro, citra and El Dorado and allow the temperature of fermentation to rise again up to 22 °C (71.6 °F)
- 1 to 2 days after dry hopping move on to cold crashing and dump trub / remove hops and take a final gravity reading
- (If you can’t / don’t want to cold crash go straight to kegging/bottling your beer!)
Step 8 (optional) – Cold crashing
- begin cold crashing your fermenter (bring the temperature of your fermenter down to as close to 0°C (32°F) as possible, for 2 days to a week depending on how patient you are
- If you don’t have a temp-controlled fermenter, you can cold crash by putting your fermenter in a fridge or temp-controlled chest freezer
- After you have finished cold crashing it's time to keg/bottle your beer! If you are bottling your beer from the fermenter uncarbonated remember to add about 5-7 grams (0.17 - 0.24 oz) of priming sugar to your bottles to carbonate your beer.
.jpg)
So... What is it?
The Red Rye IPA is a daughter of the American West Coast IPA, sitting between 5.5%-7.5% with a similar hop & bitterness profile to a westcoast. However the malt backbone leans deeper into the rich caramel, toffee, and/or dark fruit malt character side of things, similar in some ways to an Irish red ale, and of course a strong earthy spicy note from a hefty addition of Rye malt!
What's ours like?
This is our second crack at a red rye on the channel and we can easily say it is significantly better than our first attempt! The rye is far more balanced, the body thinner (in a good way!) making it far more drinkable, the IBU's and hop character are also far more in balance with the fruitcake, caramel and sticky date flavour of the complex malt bill. Coming in at 6.6% it still carries decent weight both in terms of ABV and overall flavour and character! Definitely a great beer for all seasons, holding more depth than a traditional IPA, but not so heavy as a black!
Batch Size & Stats
- 38L (2 19L corny kegs) / 10 gal finished beer
- 45L (11.9 gal) wort
- For a smaller 19L (5 gal) batch size simply half the ingredients of this recipe
- Starting gravity – 1.073
- Final gravity 1.012
- ABV – 6.6%
- IBU - 66
- Colour - 36 EBC
- Mash Efficiency - 80%
What ingredients?
Water
With sparging
- 40L (10.6 gal) for a 65°C (149°F) mash (you can use our strike water calculator to find your ideal strike temp)
- 25L (6.6 gal) sparge water at 78°C (172°F) - fermenter topped up with 4L (1 gal) post boil to reduce OG
Without sparging
- 55L (14.5 gal) for a 65°C (149°F) mash (you can use our strike water calculator to find your ideal strike temp)
Malts: Total 12.46 kg / 27.5 lb
- Pale ale malt – 7.727 kg (17 lb) - 62%
- Flaked Rye - 1.869 kg (4.12 lb) - 15%
- Red Back - 1.495 kg (3.3 lb) - 12%
- Aurora - 748 g (1.65 lb) 6%
- Supernova – 679g (1.01 lb) - 4%
- Midnight Wheat- 125g (4.4 oz) - 1%
Hops & whirlfloc tablets
Northern Brewer
- 57g (22 IBU) (2 oz) – 60 mins
Citra
- 57g (12 IBU) (2 oz) – 10 mins
- 57g (2 oz) - 0 min flame out
- 57g (2 oz) - dry hop day 7
Rakau
- 57g (10 IBU) (2 oz) – 10 mins
- 57g (2 oz) - 0 min flame out
- 105g (3.5 oz) - dry hop day 7
Lupomax Mosaic
- 57g (10IBU) (2 oz) – 10 mins
- 57g (2 oz) - 0 min flame out
- 100g (3.5 oz) - dry hop day 7
Whirlfloc tablets
- 1.5g (0.052 oz) / 2 tablets – 15 minutes left in the boil
Yeast options & fermentation temperatures
- 23g (0.8 oz) Aus-05– ferment at 18°C / 64.4°F
- 23g (0.8 oz) US-05 – ferment at 18°C / 64.4°F
- 23g (0.8 oz) S-04 – ferment at 18°C / 64.4°F
Water Profile
- Ca2+111
- Mg2+ 18
- Na+ 16
- Cl- 100
- SO42- 200
- HCO3- 57
Step by step process
Step 1 – Milling
- Mill grains to medium crush (set mill rollers to a gap of approx. 1.00mm / 0.039 inches)
- Just keep in mind roller gap settings are not universal so as you brew more batches you will find the ideal crush size for your setup
- Alternatively if you don’t have a grain mill you can order your grains crushed from most homebrew stores, both online and in person
Step 2 – Mashing
- Mash for 60 minutes at 65°C (149°F)
- Set your strike water to a few degrees above the target mash temperature, you can use our calculator to determine what your strike temperature should be
- ensure you mix in the grains thoroughly with a mash paddle to prevent dough balls from forming (big spoons, spatulas or whisks will also work)
- its easier to mash the grains and prevent dough balls if you add a little grain at a time, mix, add more grain and repeat until all the grains are mixed
- if you don’t have a mash tun with heating then ensure after you have finished mixing the grains in to insulate your mash tun (thick neoprene or heavy blankets both work well)
- after 60 minutes of mashing raise the temp to 77°C (170°F) for 10-15 minutes to mash out, and deactivate the enzymes breaking down the sugars
Step 3 (optional) – Sparging
- if your setup has the capability to sparge then do so with 25L (6.6 gal) sparge water at 78°C (172°F)
- if you are not sparging and using a BIAB (brew in a bag) method then remove grains from mash tun and twist and squeeze the bag to get as much liquid out of the grains as possible
- as you start sparging (or straining your BIAB bag) begin raising the temperature of your wort to a boil
Step 4 – Boiling
- once your wort begins to boil start a timer for a 60-minute boil and add your bittering hops, 57g (2 oz) of Northern Brewer
- at 15 minutes left in the boil add 2.5 whirlfloc tablets
- at 10 minutes left in the boil add 57g (2 oz) each of Citra, Lupomax Mosaic and Rakau
- at Flameout / 0 minutes left in the boil add 57g (2oz) of Citra, Lupomax Mosaic and Rakau
Step 5 – Cooling
- After 1 hour of boiling start cooling wort down to yeast pitching temperature
- once you’ve reached yeast pitching temperature take an original gravity reading of your wort
Step 6 – Yeast Pitching
- It is best to make a yeast starter before beginning your brew day (ideally 1 day before) to ensure your yeast are as active and healthy as possible before pitching, but not completely necessary – you could also just rehydrate yeast 30 minutes before pitching.
- Pitch yeast in wort a degree or two higher than the target fermentation temperature to help yeast take off more aggressively
- To make a yeast starter you can use either:
- DME (dry malt extract) at a ratio of approx. 100g per 1L water (3.5 oz per 33 fluid ounces) for gravity of approx. 1.040
- some unfermented wort kept cold and sanitary from a previous brew day
- 70g of table sugar per 1L water (2.5 oz per 33 fluid ounces) – however, it is best to use malt sugar (wort / DME) whenever possible to reduce the chance of shocking the yeast with a different food source from starter to wort pitching
- To rehydrate yeast
- Add yeast to approx. 10 times as much room temperature water as the weight of the yeast e.g. 10g yeast in 100 ml water (0.35 oz yeast in 3.5 fluid ounces water)
Step 7 – Fermentation & Dry Hopping
- Allow yeast to ferment over the next week to two weeks
- If you have a temperature controlled system keep the fermenter temperature to the recommended fermentation temperature for each yeast strain (stated in the yeast ingredients section above)
- Monitor the fermentation activity over the first 7 days by the bubbling of the blow off tube / airlock of your fermenter, as the bubbling slows down (roughly around day 7) take a gravity reading. When the gravity reaches around 1.014 raise the temperature of your fermenter by 1-2 degrees for 2 days for a diacetyl rest (if you don’t have temperature control don’t worry about this step, its not the end of the world!)
- On day 2 of the diacetyl rest its time to Dry Hop, add 113g (3 oz) each of citra and Lupomax Mosaic, and 105g (3.7 oz) of Rakau to the fermenter
- Its important to note that fermentation times will vary based on your circumstances like, temperature, amount of yeast pitched, healthiness of yeast, gravity of wort, pH etc. so don’t stress be patient and know that these times are just a rough guide
- Once the gravity is the same 2 days in a row move onto cold crashing! (If you can’t / don’t want to cold crash go straight to kegging/bottling your beer!)
Step 8 (optional) – Cold crashing
- begin cold crashing your fermenter (bring the temperature of your fermenter down to as close to 0°C (32°F) as possible, for 2 days to a week depending on how patient you are
- If you don’t have a temp-controlled fermenter, you can cold crash by putting your fermenter in a fridge or temp-controlled chest freezer
- After you have finished cold crashing it's time to keg/bottle your beer! If you are bottling your beer from the fermenter uncarbonated remember to add about 5-7 grams (0.17 - 0.24 oz) of priming sugar to your bottles to carbonate your beer.
So... What is it?
A Black IPA, or Cascadian Dark Ale, originated in the early 2000s in the Pacific Northwest, combining the roasted malt characteristics of stouts or porters with the hoppy profile of an IPA. Typically having an ABV of 6.0%-8.5% and an IBU range of 50-90, this style offers a balance of dark roasted malt flavors like coffee and chocolate with bold hop notes of pine, resin, and citrus. Its deep brown to black color and medium body create a complex, layered taste experience that appeals to fans of both dark ales and hop-forward beers.
What's ours like?
Big, bold, fierce and intense! These are the qualities of house Targaryen, and these are the qualities we incorporated into this big & bold Black IPA! Coming in at a hefty 7.9% it certainly packs a punch, but it doesn't drink like it! Balanced by a robust malt body and 69 IBU's (not intentional!) the beer comes together perfectly, expressing big punchy citrus, piney, earthy and spicy hop character, followed by a dark chocolate to smoky espresso finish thanks to the addition of the heavily roasted wheat malt. Truly this is the beer that represents house Targaryen in the dance of dragons!
Batch Size & Stats
- 38L (2 19L corny kegs) / 10 gal finished beer
- 47L (12.4 gal) wort
- For a smaller 19L (5 gal) batch size simply half the ingredients of this recipe
- Starting gravity – 1.073
- Final gravity 1.012
- ABV – 8%
- IBU - 76
- Colour - 24 EBC
- Mash Efficiency - 82%
What ingredients?
Water
With sparging
- 40L (10.6 gal) for a 65°C (149°F) mash (you can use our strike water calculator to find your ideal strike temp)
- 22L (5.8 gal) sparge water at 78°C (172°F) - fermenter topped up with 4L (1 gal) post boil to reduce OG
Without sparging
- 55L (14.5 gal) for a 65°C (149°F) mash (you can use our strike water calculator to find your ideal strike temp)
Malts: Total 13.6 kg / 30 lb
- Pale ale malt – 11.63 kg (25.6 lb) - 85.5%
- Briess Midnight Wheat Malt - 883 g (1.95 lb) 6.5%
- Medium Crystal Malt – 679g (1.5 lb) - 5%
- Gladiator Malt (dextrin malt) - 408g (0.9lb) - 3%
Hops & whirlfloc tablets
Chinook
- 57g (2 oz) – 60 minutes left in the boil
- 57g (2 oz) – 10 minutes left in the boil
- 57g (2 oz) - dry hop day 8
Riwaka
- 57g (2 oz) – 10 minutes left in the boil
- 57g (2 oz) - 0 min flame out
- 113g (4 oz) - dry hop day 8
Citra
- 57g (2 oz) – 10 minutes left in the boil
- 57g (2 oz) - 0 min flame out
- 113g (4 oz) - dry hop day 8
Whirlfloc tablets
- 1.5g (0.052 oz) / 2 tablets – 15 minutes left in the boil
Yeast options & fermentation temperatures
- 23g (0.8 oz) Aus-05– ferment at 18°C / 64.4°F
- 23g (0.8 oz) US-05 – ferment at 18°C / 64.4°F
- 23g (0.8 oz) S-04 – ferment at 18°C / 64.4°F
Water Profile
- Ca2+110
- Mg2+ 18
- Na+ 16
- Cl- 100
- SO42- 200
- HCO3- 57
Step by step process
Step 1 – Milling
- Mill grains to medium crush (set mill rollers to a gap of approx. 1.00mm / 0.039 inches)
- Just keep in mind roller gap settings are not universal so as you brew more batches you will find the ideal crush size for your setup
- Alternatively if you don’t have a grain mill you can order your grains crushed from most homebrew stores, both online and in person
Step 2 – Mashing
- Mash for 60 minutes at 65°C (149°F)
- Set your strike water to a few degrees above the target mash temperature, you can use our calculator to determine what your strike temperature should be
- ensure you mix in the grains thoroughly with a mash paddle to prevent dough balls from forming (big spoons, spatulas or whisks will also work)
- its easier to mash the grains and prevent dough balls if you add a little grain at a time, mix, add more grain and repeat until all the grains are mixed
- if you don’t have a mash tun with heating then ensure after you have finished mixing the grains in to insulate your mash tun (thick neoprene or heavy blankets both work well)
- after 60 minutes of mashing raise the temp to 77°C (170°F) for 10-15 minutes to mash out, and deactivate the enzymes breaking down the sugars
Step 3 (optional) – Sparging
- if your setup has the capability to sparge then do so with 22L (5.8 gal) sparge water at 78°C (172°F)
- if you are not sparging and using a BIAB (brew in a bag) method then remove grains from mash tun and twist and squeeze the bag to get as much liquid out of the grains as possible
- as you start sparging (or straining your BIAB bag) begin raising the temperature of your wort to a boil
Step 4 – Boiling
- once your wort begins to boil start a timer for a 60-minute boil and add your bittering hops, 57g (2 oz) of Bravo
- at 15 minutes left in the boil add 2.5 whirlfloc tablets
- at 10 minutes left in the boil add 57g (2 oz) each of Chinook, Citra and Riwaka
- at Flameout / 0 minutes left in the boil add 57g (2oz) of Citra & Riwaka
Step 5 – Cooling
- After 1 hour of boiling start cooling wort down to yeast pitching temperature
- once you’ve reached yeast pitching temperature take an original gravity reading of your wort
Step 6 – Yeast Pitching
- It is best to make a yeast starter before beginning your brew day (ideally 1 day before) to ensure your yeast are as active and healthy as possible before pitching, but not completely necessary – you could also just rehydrate yeast 30 minutes before pitching.
- Pitch yeast in wort a degree or two higher than the target fermentation temperature to help yeast take off more aggressively
- To make a yeast starter you can use either:
- DME (dry malt extract) at a ratio of approx. 100g per 1L water (3.5 oz per 33 fluid ounces) for gravity of approx. 1.040
- some unfermented wort kept cold and sanitary from a previous brew day
- 70g of table sugar per 1L water (2.5 oz per 33 fluid ounces) – however, it is best to use malt sugar (wort / DME) whenever possible to reduce the chance of shocking the yeast with a different food source from starter to wort pitching
- To rehydrate yeast
- Add yeast to approx. 10 times as much room temperature water as the weight of the yeast e.g. 10g yeast in 100 ml water (0.35 oz yeast in 3.5 fluid ounces water)
Step 7 – Fermentation & Dry Hopping
- Allow yeast to ferment over the next week to two weeks
- If you have a temperature controlled system keep the fermenter temperature to the recommended fermentation temperature for each yeast strain (stated in the yeast ingredients section above)
- Monitor the fermentation activity over the first 7 days by the bubbling of the blow off tube / airlock of your fermenter, as the bubbling slows down (roughly around day 7) take a gravity reading. When the gravity reaches around 1.017 raise the temperature of your fermenter by 1-2 degrees for 2 days for a diacetyl rest (if you don’t have temperature control don’t worry about this step, its not the end of the world!)
- On day 2 of the diacetyl rest its time to Dry Hop, add 113g (4 oz) each of citra and simcoe, and 57g (2 oz) of chinook to the fermenter
- Its important to note that fermentation times will vary based on your circumstances like, temperature, amount of yeast pitched, healthiness of yeast, gravity of wort, pH etc. so don’t stress be patient and know that these times are just a rough guide
- Once the gravity is the same 2 days in a row move onto cold crashing! (If you can’t / don’t want to cold crash go straight to kegging/bottling your beer!)
Step 8 (optional) – Cold crashing
- begin cold crashing your fermenter (bring the temperature of your fermenter down to as close to 0°C (32°F) as possible, for 2 days to a week depending on how patient you are
- If you don’t have a temp-controlled fermenter, you can cold crash by putting your fermenter in a fridge or temp-controlled chest freezer
- After you have finished cold crashing it's time to keg/bottle your beer! If you are bottling your beer from the fermenter uncarbonated remember to add about 5-7 grams (0.17 - 0.24 oz) of priming sugar to your bottles to carbonate your beer.

So... What is it?
An old-school West Coast IPA is a bold and assertive beer that pays homage to the origins of the American craft beer movement. Characterized by its golden to amber hue, this IPA boasts a crystal-clear appearance with a generous, foamy white head. The aroma is a vibrant bouquet of pine, resin, and citrus, with grapefruit and orange peel notes taking center stage. On the palate, it delivers a robust bitterness balanced by a sturdy malt backbone, offering hints of caramel and toasted bread. The finish is dry and crisp, leaving a lingering bitterness that invites another sip.
What's ours like?
This one is a booze filled celebration of the old school style of American IPA's! our version coming in at a a very generous 8%, packs a huge hop forward presence of citrus, fruit and a touch of resinous dank pine notes. The body hold up to the bitterness and impressive quantity of a whopping 76 IBU's! On paper this beer is bitter beyond belief... but it definitely doesn't drink like it! It holds a fantastic balance between thick, sweet and chewy mouthfeel, booziness and a hop forward explosion, making this beer deliciously moreish!
Batch Size & Stats
- 38L (2 19L corny kegs) / 10 gal finished beer
- 47L (12.4 gal) wort
- For a smaller 19L (5 gal) batch size simply half the ingredients of this recipe
- Starting gravity – 1.073
- Final gravity 1.012
- ABV – 8%
- IBU - 76
- Colour - 24 EBC
- Mash Efficiency - 82%
Brewfather link
https://share.brewfather.app/9cX1VWrxmbRBAT
What ingredients?
Water
With sparging
- 40L (10.6 gal) for a 65°C (149°F) mash (you can use our strike water calculator to find your ideal strike temp)
- 20L (5.3 gal) sparge water at 78°C (172°F) - fermenter topped up with 4L (1 gal) post boil to reduce OG
Without sparging
- 55L (14.5 gal) for a 65°C (149°F) mash (you can use our strike water calculator to find your ideal strike temp)
Malts: Total 13.6 kg / 30 lb
- Pale ale malt – 12.512 kg (27.58 lb) - 92%
- Medium Crystal Malt – 680g (1.5 lb) - 5%
- Gladiator Malt (dextrin malt) - 408g (0.9lb) - 3%
Hops & whirlfloc tablets
Bravo
- 70g (2.5 oz) - 60 minutes left in the boil
Chinook
- 57g (2 oz) – 10 minutes left in the boil
Simcoe
- 57g (2 oz) – 10 minutes left in the boil
- 57g (2 oz) - dry hop day 7
Citra
- 57g (2 oz) – Flameout / 0 minutes left in the boil
- 57g (2 oz) - dry hop day 7
Whirlfloc tablets
- 1.5g (0.052 oz) / 2 tablets – 15 minutes left in the boil
Yeast options & fermentation temperatures
- 23g (0.8 oz) Aus-05– ferment at 18°C / 64.4°F
- 23g (0.8 oz) US-05 – ferment at 18°C / 64.4°F
- 23g (0.8 oz) S-04 – ferment at 18°C / 64.4°F
Water Profile
- Ca2+111
- Mg2+ 18
- Na+ 16
- Cl- 101
- SO42- 200
- HCO3- 57
Step by step process
Step 1 – Milling
- Mill grains to medium crush (set mill rollers to a gap of approx. 1.00mm / 0.039 inches)
- Just keep in mind roller gap settings are not universal so as you brew more batches you will find the ideal crush size for your setup
- Alternatively if you don’t have a grain mill you can order your grains crushed from most homebrew stores, both online and in person
Step 2 – Mashing
- Mash for 60 minutes at 65°C (149°F)
- Set your strike water to a few degrees above the target mash temperature, you can use our calculator to determine what your strike temperature should be
- ensure you mix in the grains thoroughly with a mash paddle to prevent dough balls from forming (big spoons, spatulas or whisks will also work)
- its easier to mash the grains and prevent dough balls if you add a little grain at a time, mix, add more grain and repeat until all the grains are mixed
- if you don’t have a mash tun with heating then ensure after you have finished mixing the grains in to insulate your mash tun (thick neoprene or heavy blankets both work well)
- after 60 minutes of mashing raise the temp to 77°C (170°F) for 10-15 minutes to mash out, and deactivate the enzymes breaking down the sugars
Step 3 (optional) – Sparging
- if your setup has the capability to sparge then do so with 20L (5.3 gal) sparge water at 78°C (172°F)
- if you are not sparging and using a BIAB (brew in a bag) method then remove grains from mash tun and twist and squeeze the bag to get as much liquid out of the grains as possible
- as you start sparging (or straining your BIAB bag) begin raising the temperature of your wort to a boil
Step 4 – Boiling
- once your wort begins to boil start a timer for a 60-minute boil and add your bittering hops, 70g (2.5 oz) of Bravo
- at 15 minutes left in the boil add 2.5 whirlfloc tablets
- at 10 minutes left in the boil add 57g (2 oz) each of chinook and simcoe
- at Flameout / 0 minutes left in the boil add 57g (2oz) of citra
Step 5 – Cooling
- After 1 hour of boiling start cooling wort down to yeast pitching temperature
- once you’ve reached yeast pitching temperature take an original gravity reading of your wort
Step 6 – Yeast Pitching
- It is best to make a yeast starter before beginning your brew day (ideally 1 day before) to ensure your yeast are as active and healthy as possible before pitching, but not completely necessary – you could also just rehydrate yeast 30 minutes before pitching.
- Pitch yeast in wort a degree or two higher than the target fermentation temperature to help yeast take off more aggressively
- To make a yeast starter you can use either:
- DME (dry malt extract) at a ratio of approx. 100g per 1L water (3.5 oz per 33 fluid ounces) for gravity of approx. 1.040
- some unfermented wort kept cold and sanitary from a previous brew day
- 70g of table sugar per 1L water (2.5 oz per 33 fluid ounces) – however, it is best to use malt sugar (wort / DME) whenever possible to reduce the chance of shocking the yeast with a different food source from starter to wort pitching
- To rehydrate yeast
- Add yeast to approx. 10 times as much room temperature water as the weight of the yeast e.g. 10g yeast in 100 ml water (0.35 oz yeast in 3.5 fluid ounces water)
Step 7 – Fermentation & Dry Hopping
- Allow yeast to ferment over the next week to two weeks
- If you have a temperature controlled system keep the fermenter temperature to the recommended fermentation temperature for each yeast strain (stated in the yeast ingredients section above)
- Monitor the fermentation activity over the first 7 days by the bubbling of the blow off tube / airlock of your fermenter, as the bubbling slows down (roughly around day 7) take a gravity reading. When the gravity reaches around 1.015 raise the temperature of your fermenter by 1-2 degrees for 2 days for a diacetyl rest (if you don’t have temperature control don’t worry about this step, its not the end of the world!)
- On day 2 of the diacetyl rest its time to Dry Hop, add 57g (2 oz) each of citra and simcoe to the fermenter
- Its important to note that fermentation times will vary based on your circumstances like, temperature, amount of yeast pitched, healthiness of yeast, gravity of wort, pH etc. so don’t stress be patient and know that these times are just a rough guide
- Once the gravity is the same 2 days in a row move onto cold crashing! (If you can’t / don’t want to cold crash go straight to kegging/bottling your beer!)
Step 8 (optional) – Cold crashing
- begin cold crashing your fermenter (bring the temperature of your fermenter down to as close to 0°C (32°F) as possible, for 2 days to a week depending on how patient you are
- If you don’t have a temp-controlled fermenter, you can cold crash by putting your fermenter in a fridge or temp-controlled chest freezer
- After you have finished cold crashing it's time to keg/bottle your beer! If you are bottling your beer from the fermenter uncarbonated remember to add about 5-7 grams (0.17 - 0.24 oz) of priming sugar to your bottles to carbonate your beer.
So... What is it?
The Hazy IPA (also called NEIPA) is a super fruity low bitterness style of IPA that typically sits around the 5.5-7.5% ABV mark. This particular recipe makes an 7.9% tropical juice bomb! Huge punchy flavours of mango, pineapple, and fresh orange zest and candy-like sweetness make this a super drinkable boozy juice! And with the hefty amount of wheat and oats added to the grain bill, it has a super silky balanced mouthfeel, accentuating all the hoppy goodness!
Batch Size & ABV
38L (2 19L corny kegs) / 10 gal finished beer
50L (13.2 gal) wort
For a smaller 19L (5 gal) batch size simply half the ingredients of this recipe
Starting gravity – 1.073
Final gravity 1.013
ABV – 7.9%
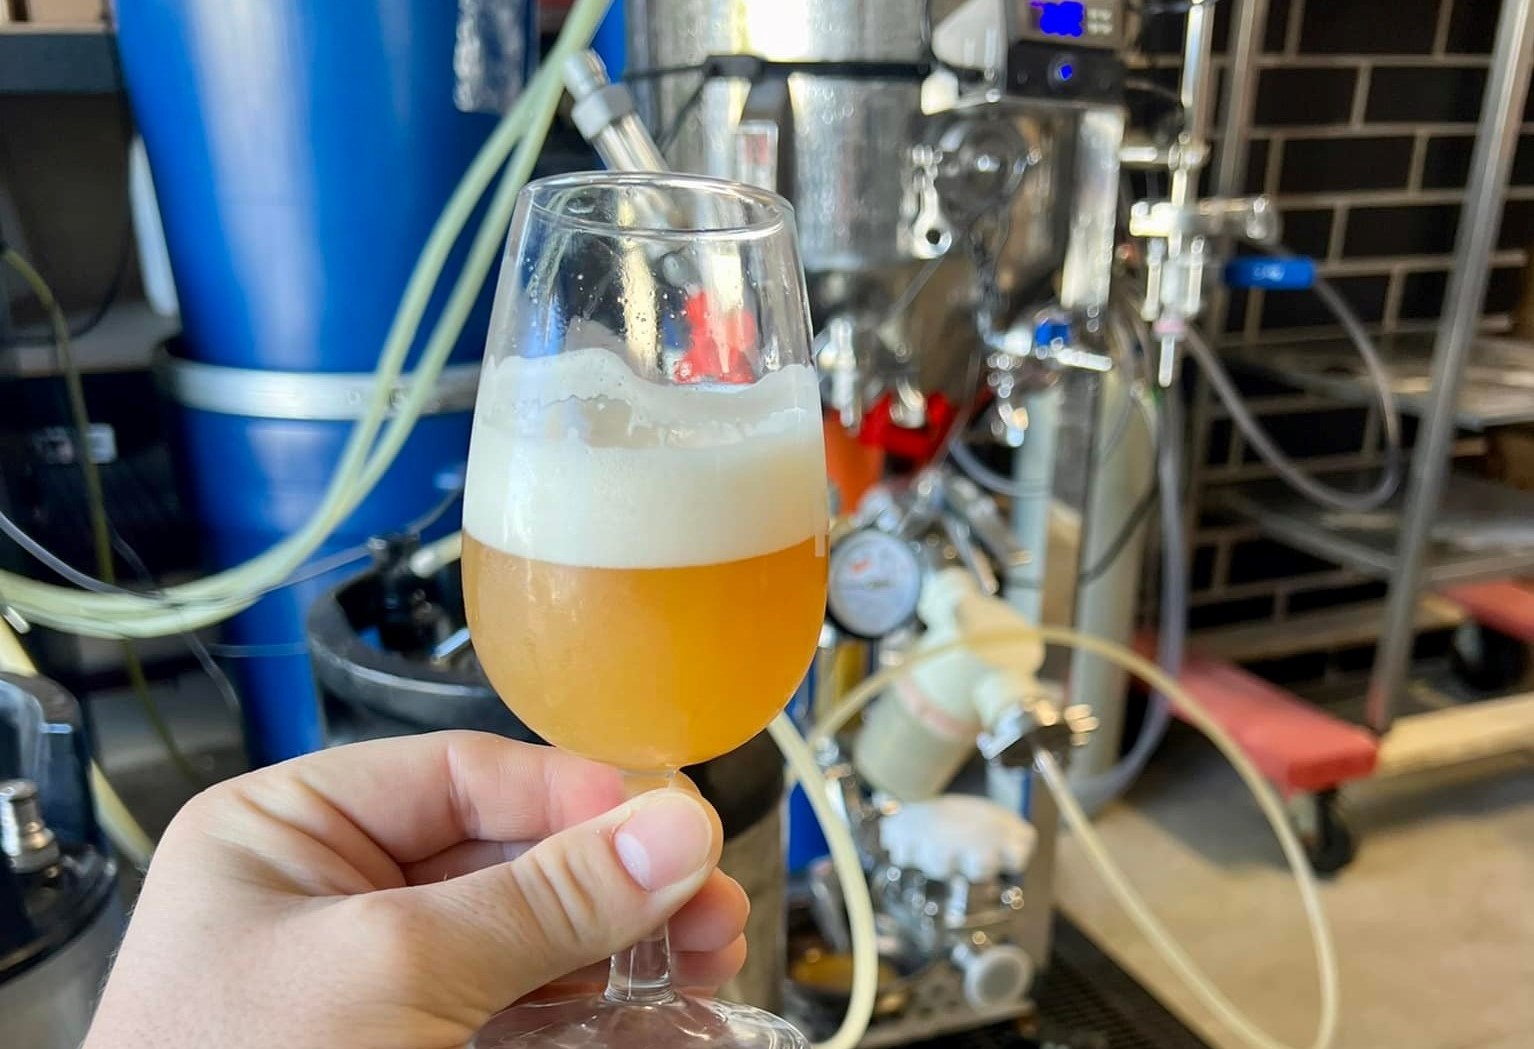
Ingredients
Water
- With sparging
- 40L (10.6 gal) strike water approx. for a 60 min mash at 68°C (154.4°F) with a 10 min mash out step at the end at 77°C (170°F)
- 30L (7.9 gal) sparge water at 78°C (172°F)
- Without sparging
- 60L (7.9 gal) strike water approx. for a 60 min mash at 68°C (154.4°F) with a 10 min mash out step at the end at 77°C (170°F)
Malts: 14.5kg (32 lb) of fermentable's 15.5kg (34lb) with rice hulls
- Pale ale malt – 10.5kg (23 lb)
- Rolled Oats – 2kg (4.4 lb)
- Wheat malt – 2kg (4.4 lb)
- Rice Hulls (not necessary, just helps with sparging) – 1g (2.2 lb)
Hops & whirlfloc tablets
Northern Brewer
- 20g (0.7 oz) - First Wort Hops
Lupomax El Dorado
- 50g (1.76 oz) – whirlpool for 20 minutes at 75°C (167°F)
- 50g (1.76 oz) - Dry hop at gravity 1.014 (approx. day 5-10 depending on your yeast)
Lupomax Mosaic
- 50g (1.76 oz) – whirlpool for 20 minutes at 75°C (167°F)
- 50g (1.76 oz) - Dry hop at gravity 1.014 (approx. day 5-10 depending on your yeast)
Lupomax Sabro
- 50g (1.76 oz) – whirlpool for 20 minutes at 75°C (167°F)
- 50g (1.76 oz) - Dry hop at gravity 1.014 (approx. day 5-10 depending on your yeast)
Lupomax Amarillo
- 50g (1.76 oz) – whirlpool for 20 minutes at 75°C (167°F)
- 50g (1.76 oz) - Dry hop at gravity 1.014 (approx. day 5-10 depending on your yeast)
Lupomax Citra
- 50g (1.76 oz) – whirlpool for 20 minutes at 75°C (167°F)
- 50g (1.76 oz) - Dry hop at gravity 1.014 (approx. day 5-10 depending on your yeast)
Whirlfloc
- 1.5g granulated whirlfloc / 2 tablets – 15 minutes left in the boil
Yeast options & fermentation temperatures
- 23g (0.8 oz) Lallmand East Coast New England Ale Yeast ferment at 25°C (55°F)
- 23g (0.8 oz) Kveik (we used a Omega yeats Espe Kveik, but any kveik is great!) ferment at 32°C
- 23g (0.8 oz) US-05 – ferment at 20°C
- 23g (0.8 oz) S-04 – ferment at 19°C
Water Profile
Ca2+ 131 Mg2+ 15 Na+ 15 Cl- 199 SO42- 100 HCO3- 57
Brewing Salts & Water Adjustments (this is for my original water profile, so adjust yours to your own profile, you can watch the video under here to learn more!)
14 g — Calcium Chloride (CaCl2) — Mash
3.9 g — Epsom Salt (MgSO4) — Mash
3.9 g — Gypsum (CaSO4) — Mash
4.5 ml — Phosphoric Acid 85% — Mash
10.5 g — Calcium Chloride (CaCl2) — Sparge
2.93 g — Epsom Salt (MgSO4) — Sparge
2.93 g — Gypsum (CaSO4) — Sparge
1.73 ml — Phosphoric Acid 85% — Sparge
Step by step process
Step 1 – Milling
- Mill grains to medium crush (set mill rollers to a gap of approx. 1mm / 0.039 inches) (BUT DONT crush the rice hulls or oats, add them into your grain separately after crushing them)
- Just keep in mind roller gap settings are not universal so as you brew more batches you will find the ideal crush size for your setup
- Alternatively if you don’t have a grain mill you can order your grains crushed from most homebrew stores, both online and in person
Step 2 – Mashing
- Add your brewing salts and mix to ensure they are fully dissolved prior to mashing in grains
- Mash for 60 minutes at 68°C (154.4°F) with 40L (10.6 gal)
- ensure you mix in the grains thoroughly with a mash paddle to prevent dough balls from forming (big spoons, spatulas or whisks will also work)
- its easier to mash the grains and prevent dough balls if you add a little grain at a time, mix, add more grain and repeat until all the grains are mixed
- if you don’t have a mash tun with heating then ensure after you have finished mixing the grains in to insulate your mash tun (thick neoprene or heavy blankets both work well)
- after 60 minutes of mashing raise temperature to 77°C (170°F) for 10 minutes to Mash out
Step 3 (optional) – Sparging
- if your setup has the capability to sparge then do so with 30L (7.9 gal) of sparge water at 78 °C (172°F)
- if you are not sparging and using a BIAB (brew in a bag) method then remove grains from mash tun and twist and squeeze the bag to get as much liquid out of the grains as possible
- as you start sparging (or straining your BIAB bag) begin raising the temperature of your wort to a boil
Step 4 – Boiling
- After removing the grains from your mash tun add your first wort hops (before wort begins to boil)
- once your wort begins to boil start a timer for a 60-minutes
- at 15 minutes left in the boil add 2 whirlfloc tablets
- after 60 minutes of boiling turn of the heat and chill the temperature of the wort down to 75°C (167°F) and begin whirlpooling
- if you don’t have a wort chiller you could rest your boil kettle in an ice bucket
- if your system can’t whirlpool you can also achieve this with a mash paddle and a power drill, if you don’t have this either don’t worry about whirlpooling it’s not completely necessary
Step 5 – Whirlpooling / whirlpool hop additions
- once temperature reaches 75°C (167°F) and you have started whirlpooling add your whirlpool hops, 50g (1.76 oz) each of Lupomax versions of Mosaic, Amarillo, Sabro, citra and El Dorado
- allow hops to whirlpool in the wort for 20 minutes and then begin chilling wort again down to yeast pitching temperature
- once you’ve reached yeast pitching temperature take an original gravity reading of your wort
Step 6 – Yeast Pitching
- It is best to make a yeast starter before beginning your brew day (ideally 1 day before) to ensure your yeast are as active and healthy as possible before pitching, but not completely necessary – you could also just rehydrate yeast 30 minutes before pitching.
- Pitch yeast in wort a degree or two higher than the target fermentation temperature to help yeast take off more aggressively
- To make a yeast starter you can use either:
- DME (dry malt extract) at a ratio of approx. 100g per 1L water (3.5 oz per 33 fluid ounces) for gravity of approx. 1.040
- some unfermented wort kept cold and sanitary from a previous brew day
- 70g of table sugar per 1L water (2.5 oz per 33 fluid ounces) – however, it is best to use malt sugar (wort / DME) whenever possible to reduce the chance of shocking the yeast with a different food source from starter to wort pitching
- To rehydrate yeast
- Add yeast to approx. 10 times as much room temperature water as the weight of the yeast e.g. 10g yeast in 100 ml water (0.35 oz yeast in 3.5 fluid ounces water)
Step 7 – Fermentation, dry hopping and Soft Crashing (optional)
- Allow yeast to ferment over the next 5 days to two weeks
- If you have a temperature-controlled system keep the fermenter temperature to the recommended fermentation temperature for each yeast strain (stated in the yeast ingredients section above)
- Monitor the fermentation activity over the first 7 days by the bubbling of the blow-off tube/airlock of your fermenter, as the bubbling slows down (roughly around day 7) take a gravity reading. When the gravity reaches around 1.014 raise the temperature of your fermenter by 1-2 degrees for 2 days for a diacetyl rest (if you don’t have temperature control don’t worry about this step, it's not the end of the world!)
- It's important to note that fermentation times will vary based on your circumstances like temperature, amount of yeast pitched, the healthiness of yeast, the gravity of the wort, pH, etc. so don’t stress be patient and know that these times are just a rough guide
- On day 2 of the diacetyl rest (once gravity reaches roughly 1.013 – 1.014) "Soft Crash" your beer (optional, if you cant temp control move onto dry hopping), by reducing temperature to 13°C (55.4°F)
- After 1 day of soft crashing add your dry hops, 50g (1.76 oz) each of Lupomax versions of Mosaic, Amarillo, Sabro, citra and El Dorado
- 1 to 2 days after dry hopping move on to cold crashing and dump trub / remove hops and take a final gravity reading
- (If you can’t / don’t want to cold crash go straight to kegging/bottling your beer!)
Step 8 (optional) – Cold crashing
- begin cold crashing your fermenter (bring the temperature of your fermenter down to as close to 0°C (32°F) as possible, for 2 days to a week depending on how patient you are
- If you don’t have a temp-controlled fermenter, you can cold crash by putting your fermenter in a fridge or temp-controlled chest freezer
- After you have finished cold crashing it's time to keg/bottle your beer! If you are bottling your beer from the fermenter uncarbonated remember to add about 5-7 grams (0.17 - 0.24 oz) of priming sugar to your bottles to carbonate your beer.
.png)
So... What is it?
A hazy IPA is a modern style of beer known for its cloudy appearance and juicy, fruity flavors. It's brewed with a combination of hops, grains like oats and wheat, and yeast strains that contribute to its hazy appearance and smooth texture. The result is a refreshing and aromatic beer with a tropical fruit-forward taste, often featuring notes of citrus, mango, and pineapple. Hazy IPAs typically have an alcohol by volume (ABV) ranging from 6% to 7.5% and an International Bitterness Units (IBU) range of 30 to 50, providing a balanced bitterness that complements the fruity hop character.
What's our like?
Crafted by an AI chat GPT model, our hazy IPA is a masterpiece of flavor innovation. Coming in at a boozy 8.4% and bursting with juicy citrus and tropical fruit aromas, it tantalizes the palate with notes of ripe mango, zesty orange, and succulent pineapple. The soft, pillowy mouthfeel from the addition of flaked oats and wheat creates a smooth canvas for the explosion of hoppy goodness. With each sip, you'll experience a harmonious balance of hop bitterness and fruity sweetness, culminating in a lingering finish that leaves you craving another taste. Whether enjoyed on a sunny day or as a delightful indulgence, our AI-crafted hazy IPA offers a refreshing twist on traditional beer styles, inviting you to savor every moment of its flavorful journey
Batch Size & Stats
- 14.5L / 3.8 gal finished beer - (yes we stuffed up our mash efficiency on the day!! im sure you can do better than us)
- 20L (6.3 gal) wort
- Starting gravity – 1.076
- Final gravity 1.012
- ABV – 8.4%
What ingredients?
Water
With sparging
- 20L (5.2 gal) strike water approx. 66°C (15.8°F)
- 8.3L (2.2 gal) sparge water at 78°C (172°F)
Without sparging
- 30L (7.9 gal) strike water approx. 66°C (15.8°F)
Malts
Total Grain Bill 7.5kg (16.5 4lb)
- 5.5 kg (12.1 lbs) Pale Malt
- 1 kg (2.2 lbs) Flaked Oats
- 0.5 kg (1.1 lbs) White Wheat Malt
- 0.5 kg (1.1 lbs) Munich Malt
- Rice Hulls – 400g (1.1 lb)
Hops & whirlfloc tablets
- 30 g (1.1 oz) Citra (12% AA) - First Wort Hop
- 30 g (1.1 oz) Citra (12% AA) - 15 minutes
- 60 g (2.1 oz) Citra (12% AA) - Whirlpool for 20 minutes at 80°C (176°F)
- 60 g (2.1 oz) Mosaic (12% AA) - Whirlpool for 20 minutes at 80°C (176°F)
- Dry Hop #1: 60 g (2.1 oz) Citra + 60 g (2.1 oz) Mosaic - After primary fermentation, for 3-4 days
- Dry Hop #2: 60 g (2.1 oz) Citra + 60 g (2.1 oz) Mosaic - 3 days before bottling/kegging
Whirlfloc
- 1.5g (0.052 oz) / 2 tablets – 15 minutes left in the boil
Water Profile:
- Calcium: 143 ppm
- Magnesium: 20 ppm
- Sodium: 15 ppm
- Sulfate: 150 ppm
- Chloride: 199 ppm
- Bicarbonate: 57
Yeast options & fermentation temperatures
- LalBrew New England™ – ferment at 24°C (75.2°F) 10g (0.35 oz) / (1 packets)
Step by step process
Step 1 – Milling
- Mill grains to medium crush (set mill rollers to a gap of approx. 1.00mm / 0.039 inches (credit card width)
- Just keep in mind roller gap settings are not universal so as you brew more batches you will find the ideal crush size for your setup
- Alternatively if you don’t have a grain mill you can order your grains crushed from most homebrew stores, both online and in person
Step 2 – Mashing
Mash for 60 minutes at 66°C (150.8°F) with 20L (5.2 gal) of strike water
- Set your strike water to a few degrees above the target mash temperature (you can use the calculator in our website for this)
- ensure you mix in the grains thoroughly with a mash paddle to prevent dough balls from forming (big spoons, spatulas or whisks will also work)
- its easier to mash the grains and prevent dough balls if you add a little grain at a time, mix, add more grain and repeat until all the grains are mixed
if you don’t have a mash tun with heating then ensure after you have finished mixing the grains in to insulate your mash tun (thick neoprene or heavy blankets both work well)
Step 3 (optional) – Sparging
- if your setup has the capability to sparge then do so with 8.3L (2.2 gal) sparge water at 78°C (172°F)
- if you are not sparging and using a BIAB (brew in a bag) method then remove grains from mash tun and twist and squeeze the bag to get as much liquid out of the grains as possible
- as you start sparging (or straining your BIAB bag) begin raising the temperature of your wort to a boil
Step 4 – Boiling
- once your wort begins to boil start a timer for a 60-minute boil and add your bittering hops, 30g (1 oz) of Citra
- at 15 minutes left in the boil add 1 whirlfloc tablet (OR granulated whirlfloc 0.7g (0.025 oz)) and 30g (1 oz) of Citra
Step 5 – Whirlpooling / cooling
- after 60 mins of boil turn off your heat source and cool wort down to 80°C (176°F) & add 60g (2.1 oz) each of Citra and Mosaic
- after 20 minutes of hop steeping / whirlpooling cool wort down to yeast pitching temperature & take an original gravity reading of your wort
Step 6 – Yeast Pitching
- It is best to make a yeast starter before beginning your brew day (ideally 1 day before) to ensure your yeast are as active and healthy as possible before pitching, but not completely necessary – you could also just rehydrate yeast 30 minutes before pitching.
- Wort Aeration (Optional) if you have a paint mixer give your wort a quick blitz before pitching yeast to help add more dissolved oxygen into the wort to help the yeast have a healthier kick start into fermentation
- Now add your tincture of Vanilla extract! (or you can wait till end of fermentation if you prefer)
- Pitch yeast in wort a degree or two higher than the target fermentation temperature to help yeast take off more aggressively
- To make a yeast starter you can use either:
- DME (dry malt extract) at a ratio of approx. 100g per 1L water (3.5 oz per 33 fluid ounces) for gravity of approx. 1.040
- some unfermented wort kept cold and sanitary from a previous brew day
- 70g of table sugar per 1L water (2.5 oz per 33 fluid ounces) – however, it is best to use malt sugar (wort / DME) whenever possible to reduce the chance of shocking the yeast with a different food source from starter to wort pitching
- To rehydrate yeast
- Add yeast to approx. 10 times as much room temperature water as the weight of the yeast e.g. 10g yeast in 100 ml water (0.35 oz yeast in 3.5 fluid ounces water)
Step 7 – Fermentation & Dry Hopping
- Allow yeast to ferment over the next week to two weeks (aprox)
- If you have a temperature-controlled system keep the fermenter temperature to the recommended fermentation temperature for each yeast strain (stated in the yeast ingredients section above)
- After 4 days of fermentation or around 1.02 gravity, its time for the first dry hop of 60 g (2.1 oz) each of citra and mosaic. put the hops in a hop bag so that you can remove them after 2 days
- at final gravity (around 1.014) add the final hop edition 60 g (2.1 oz) each of citra and mosaic and leave for 2 more days before kegging/bottling
- If you have temp control then when there are 2 days left of fermentation raise the temperature by 2 degrees for a diacetyl rest (once gravity reaches roughly 1.014) & gravity is the same 3 days in a row move onto cold crashing! (If you can’t / don’t want to cold crash go straight to kegging/bottling your beer!)
Step 8 (optional) – Cold crashing
- begin cold crashing your fermenter (bring the temperature of your fermenter down to as close to 0°C (32°F) as possible, for 2 days to a week depending on how patient you are
- If you don’t have a temp-controlled fermenter, you can cold crash by putting your fermenter in a fridge or temp-controlled chest freezer
- After you have finished cold crashing it's time to keg/bottle your beer! If you are bottling your beer from the fermenter uncarbonated, remember to add about 5-7 grams (0.17 - 0.24 oz) of priming sugar to your bottles to carbonate your beer.

So... What is it?
The HotD Red IPA (Red India Pale Ale) is a daughter of the American West Coast IPA, sitting between 5.5%-7.5% with a similar hop & bitterness profile to a westcoast. However the malt backbone leans deeper into the rich caramel, toffee, and/or dark fruit malt character side of things, similar in some ways to an Irish red ale.
What's our like?
This particular recipe makes a 6.5% IPA with a creamy mouthfeel, red hues and citrus & blueberry-like hop flavour. However, the biggest flavour by far is the spicy earthiness of the ryle malt and almost chewy flavours of rich fruitcake and caramel like flavours from the malt base.
Batch Size & Stats
- 38L (2 19L corny kegs) / 10 gal finished beer
- 49L (13.2 gal) wort
- For a smaller 19L (5 gal) batch size simply half the ingredients of this recipe
- Starting gravity – 1.072
- Final gravity 1.022
- ABV – 6.5%
What ingredients?
Water
With sparging
- 30L (7.9 gal) 67°C (152°F) mash (you can use our strike temp calculator to find your ideal start temp)
- 30L (7.9 gal) sparge water at 78°C (172°F)
Without sparging
- 55L (14.5 gal) 67°C (152°F) mash (you can use our strike temp calculator to find your ideal start temp)
Malts
Total Grain Bill 12kg (15.4lb)
- Pale ale malt – 7.2kg (15.8 lb)
- rye – 1.8kg (3.9 lb)
- Aurora (Gladfield) – 1kg (2.2 lb)
- Red Back (Gladfield) – 1kg (2.2 lb)
- Supernova (Gladfield) – 1kg (2.2 lb)
- Rice Hulls (not essential but helpful for sparging) - 500g (1.1 lb)
Hops & whirlfloc tablets
Galaxy
- 15g (0.52 oz) - 60 minutes left in the boil
- 70g (2.47 oz) - 5 minutes left in the boil
- 70g (2.47 oz) - Dry hop at gravity 1.023 (approx. day 6-10 depending on your yeast)
Topaz
- 70g (2.47 oz) - 5 minutes left in the boil
- 70g (2.47 oz) - Dry hop at gravity 1.023 (approx. day 6-10 depending on your yeast)
Riwaka
- 70g (2.47 oz) - 5 minutes left in the boil
- 70g (2.47 oz) - Dry hop at gravity 1.023 (approx. day 6-10 depending on your yeast)
Whirlfloc
- 1.5g granulated or 2 tablets – 15 minutes left in the boil
Yeast options & fermentation temperatures
- US-05 – ferment at 20°C (68°F) 23g (0.81 oz) / (2 packets)
- AUS-05 – ferment at 20°C (68°F) 23g (0.81 oz) / (2 packets)
- S-04 – ferment at 18°C (64.4°F) 22g (0.81 oz) / (2 packets)
- Kveik - ferment at 32°C (89°F) 22g (0.81 oz) / (2 packets)

Step by step process
Step 1 – Milling
- Mill grains to medium crush (set mill rollers to a gap of approx. 1.00mm / 0.039 inches (credit card width)
- Just keep in mind roller gap settings are not universal so as you brew more batches you will find the ideal crush size for your setup
- Alternatively if you don’t have a grain mill you can order your grains crushed from most homebrew stores, both online and in person
Step 2 – Mashing
- Mash for 60 minutes at 67°C (152°F)
- Set your strike water to a few degrees above the target mash temperature (you can use the calculator in our website for this)
- ensure you mix in the grains thoroughly with a mash paddle to prevent dough balls from forming (big spoons, spatulas or whisks will also work)
- its easier to mash the grains and prevent dough balls if you add a little grain at a time, mix, add more grain and repeat until all the grains are mixed
if you don’t have a mash tun with heating then ensure after you have finished mixing the grains in to insulate your mash tun (thick neoprene or heavy blankets both work well)
Step 3 (optional) – Sparging
- if your setup has the capability to sparge then do so with 30L (7.9 gal) sparge water at 78°C (172°F)
- if you are not sparging and using a BIAB (brew in a bag) method then remove grains from mash tun and twist and squeeze the bag to get as much liquid out of the grains as possible
- as you start sparging (or straining your BIAB bag) begin raising the temperature of your wort to a boil
Step 4 – Boiling
- once your wort begins to boil start a timer for a 60-minute boil and add your bittering hops, 10g (0.35 oz) of Galaxy
- at 15 minutes left in the boil add 2 whirlfloc tablets
- at 5 minutes left in the boil add 70g (2.47 oz) each of Galaxy, Topaz and Riwaka
Step 5 – Whirlpooling / cooling
- once wort has been boiling for 60 minutes in total turn off your heat source and begin chilling wort down to yeast pitching temperature
- once you’ve reached yeast pitching temperature take an original gravity reading of your wort
Step 6 – Yeast Pitching
- It is best to make a yeast starter before beginning your brew day (ideally 1 day before) to ensure your yeast are as active and healthy as possible before pitching, but not completely necessary – you could also just rehydrate yeast 30 minutes before pitching.
- Wort Aeration (Optional) if you have a paint mixer give your wort a quick blitz before pitching yeast to help add more dissolved oxygen into the wort to help the yeast have a healthier kick start into fermentation
- Now add your tincture of Vanilla extract! (or you can wait till end of fermentation if you prefer)
- Pitch yeast in wort a degree or two higher than the target fermentation temperature to help yeast take off more aggressively
To make a yeast starter you can use either:
- DME (dry malt extract) at a ratio of approx. 100g per 1L water (3.5 oz per 33 fluid ounces) for gravity of approx. 1.040
- some unfermented wort kept cold and sanitary from a previous brew day
- 70g of table sugar per 1L water (2.5 oz per 33 fluid ounces) – however, it is best to use malt sugar (wort / DME) whenever possible to reduce the chance of shocking the yeast with a different food source from starter to wort pitching
To rehydrate yeast
- Add yeast to approx. 10 times as much room temperature water as the weight of the yeast e.g. 10g yeast in 100 ml water (0.35 oz yeast in 3.5 fluid ounces water)
Step 7 – Fermentation & dry hopping
- Allow yeast to ferment over the next week to two weeks
- If you have a temperature-controlled system keep the fermenter temperature to the recommended fermentation temperature for each yeast strain (stated in the yeast ingredients section above)
- Monitor the fermentation activity over the first 7 days by the bubbling of the blow-off tube/airlock of your fermenter, as the bubbling slows down (roughly around day 7) take a gravity reading. When the gravity reaches around 1.023 raise the temperature of your fermenter by 1-2 degrees for 2 days for a diacetyl rest (if you don’t have temperature control don’t worry about this step, it's not the end of the world!)
- It's important to note that fermentation times will vary based on your circumstances like temperature, amount of yeast pitched, the healthiness of yeast, the gravity of the wort, pH, etc. so don’t stress be patient and know that these times are just a rough guide
- On day 2 of the diacetyl rest (once gravity reaches roughly 1.022) add 70g (2.47 oz) each of Galaxy, Topaz and Riwaka
- One day after dry hopping take a gravity reading, fermentation should finish at about 1.022, if you haven't reached this yet wait another day and take another reading, once the gravity is the same 2 days in a row move onto cold crashing! (If you can’t / don’t want to cold crash go straight to kegging/bottling your beer!)
Step 8 (optional) – Cold crashing
- begin cold crashing your fermenter (bring the temperature of your fermenter down to as close to 0°C (32°F) as possible, for 2 days to a week depending on how patient you are
- If you don’t have a temp-controlled fermenter, you can cold crash by putting your fermenter in a fridge or temp-controlled chest freezer
- After you have finished cold crashing it's time to keg/bottle your beer! If you are bottling your beer from the fermenter uncarbonated, remember to add about 5-7 grams (0.17 - 0.24 oz) of priming sugar to your bottles to carbonate your beer.
So... What is it?
The India Pale Ale (IPA) is a hop-forward beer style with higher alcohol content (typically average 7-7.5%). It originated in the 18th century during British colonization of India, when brewers added extra hops and increased alcohol to preserve beer for long journeys. George Hodgson's "October beer" gained popularity in India, leading to the term "India Pale Ale." Now the IPA has evolved, and is largely responsible for the boom of the new era of craft beer, with breweries the world over experimenting and creating various sub-styles of amazing and unique IPA’s!
What's our like?
So what the heck is a “Mid-Coast” IPA? Well to be honest… it's not really a thing! but it's our tongue and cheek joke at an IPA that sits somewhere in the worlds between a West Coast and an East Coast style. For our “Mid-Coast” the grain bill leans towards a west Coast style, whereas the hop schedule leans more towards an East coast style, almost NEIPA-esque, with low bitterness but big bold citrus, berries and tropical juice hop character! Clocking in at 7.2% it sits in the average ballpark for the IPA style and the crystal backbone makes it a very balanced and smashable IPA!
Batch Size & Stats
- 38L (2 19L corny kegs) / 10 gal finished beer
- 48L (12.7 gal) wort
- For a smaller 19L (5 gal) batch size simply half the ingredients of this recipe
- Starting gravity – 1.067
- Final gravity 1.012
- ABV – 7.2%
What ingredients?
Water
With sparging
- 30L (7.9 gal) strike water approx. mash temp of 66°C (151°F) for 60 mins
- 35L (9.2 gal) sparge water at 78°C (172°F)
Without sparging
- 60L (15.8 gal) strike water approx. mash temp of 66°C (151°F) for 60 mins
-
Malts
Total Grain Bill 7kg (15.4lb)
- Pale Ale – 11.2kg (24.7 lb)
- Medium Crystal – 800g (1.76 lb)
- (I would recommend adding some carapils / cara foam for better body, maybe swap out 500g (1.1lb) from the pale ale malt)
Hops & whirlfloc tablets
Galaxy
- 10g (0.35 oz) - 60 minutes left in the boil
- 10g (0.35 oz) - 10 minutes left in the boil
- 10g (0.35 oz) - 5 minutes left in the boil
- 60g (2.1 oz) - 20 minutes whirlpool after boil at 75 °C (167°F)
Lotus
- 10g (0.35 oz) - 10 minutes left in the boil
- 10g (0.35 oz) - 5 minutes left in the boil
- 60g (2.1 oz) - 20 minutes whirlpool after boil at 75 °C (167°F)
Lupomax Sabro
- 10g (0.35 oz) - 10 minutes left in the boil
- 10g (0.35 oz) - 5 minutes left in the boil
- 60g (2.1 oz) - 20 minutes whirlpool after boil at 75 °C (167°F)
- 100g (3.53 oz) - Dry hop near end of fermentation (around day 7 & 1.013 gravity)
Lupomax Mosaic
- 100g (3.53 oz) - Dry hop near end of fermentation (around day 7 & 1.013 gravity)
Whirlfloc
- 1.5g granulated or 2 tablets – 15 minutes left in the boil
Yeast options & fermentation temperatures
- LalBrew Verdant IPA – ferment at 20°C (68°F) to 25°C (77°F) 22g (0.77 oz) / (2 packet)
- lallemand west coast ale – ferment at 20°C (68°F) to 25°C (77°F) 22g (2 packet)
- US-05 – ferment at 20°C (68°F) 23g (0.81 oz) / (2 packets)
- AUS-05 – ferment at 20°C (68°F) 23g (0.81 oz) / (2 packets)
- S-04 – ferment at 18°C (64.4°F) 22g (0.81 oz) / (2 packets)
Step by step process
Step 1 – Milling
- Mill grains to medium crush (set mill rollers to a gap of approx. 1.00mm / 0.039 inches (credit card width)
- Just keep in mind roller gap settings are not universal so as you brew more batches you will find the ideal crush size for your setup
- Alternatively if you don’t have a grain mill you can order your grains crushed from most homebrew stores, both online and in person
Step 2 – Mashing
Mash for 60 minutes at 66°C (151°F)
- Set your strike water to a few degrees above the target mash temperature (you can use the calculator in our website for this)
- ensure you mix in the grains thoroughly with a mash paddle to prevent dough balls from forming (big spoons, spatulas or whisks will also work)
- its easier to mash the grains and prevent dough balls if you add a little grain at a time, mix, add more grain and repeat until all the grains are mixed
if you don’t have a mash tun with heating then ensure after you have finished mixing the grains in to insulate your mash tun (thick neoprene or heavy blankets both work well)
Step 3 (optional) – Sparging
- if your setup has the capability to sparge then do so with 35L (9.2 gal) sparge water at 78°C (172°F)
- if you are not sparging and using a BIAB (brew in a bag) method then remove grains from mash tun and twist and squeeze the bag to get as much liquid out of the grains as possible
- as you start sparging (or straining your BIAB bag) begin raising the temperature of your wort to a boil
Step 4 – Boiling
- once your wort begins to boil start a timer for a 60-minute boil and add your bittering hops, 10g (0.35 oz) of Galaxy
- at 15 minutes left in the boil add 2 whirlfloc tablets / 1.5g of granulated whirlfloc
- at 10 minutes left in the boil add 10g (0.35 oz) of Galaxy, Lupomax Sabro & Lotus
- at 5 minutes left in the boil add 10g (0.35 oz) of Galaxy, Lupomax Sabro & Lotus
- once wort has been boiling for 60 minutes in total bring the temperature of the wort down to 75 °C (167°F) and add 60g (2.1 oz) each of galaxy, lotus, & lupomax sabro and hold temperature here for 20 minutes
Step 5 – Whirlpooling / cooling
- after your 20 minute hop steep / whirlpool off your heat source and begin chilling wort down to yeast pitching temperature
- once you’ve reached yeast pitching temperature take an original gravity reading of your wort
Step 6 – Yeast Pitching
- It is best to make a yeast starter before beginning your brew day (ideally 1 day before) to ensure your yeast are as active and healthy as possible before pitching, but not completely necessary – you could also just rehydrate yeast 30 minutes before pitching.
- Wort Aeration (Optional) if you have a paint mixer give your wort a quick blitz before pitching yeast to help add more dissolved oxygen into the wort to help the yeast have a healthier kick start into fermentation
- Now add your tincture of Vanilla extract! (or you can wait till end of fermentation if you prefer)
- Pitch yeast in wort a degree or two higher than the target fermentation temperature to help yeast take off more aggressively
- To make a yeast starter you can use either:
- DME (dry malt extract) at a ratio of approx. 100g per 1L water (3.5 oz per 33 fluid ounces) for gravity of approx. 1.040
- some unfermented wort kept cold and sanitary from a previous brew day
- 70g of table sugar per 1L water (2.5 oz per 33 fluid ounces) – however, it is best to use malt sugar (wort / DME) whenever possible to reduce the chance of shocking the yeast with a different food source from starter to wort pitching
- To rehydrate yeast
- Add yeast to approx. 10 times as much room temperature water as the weight of the yeast e.g. 10g yeast in 100 ml water (0.35 oz yeast in 3.5 fluid ounces water)
Step 7 – Fermentation & Dry Hopping
- Allow yeast to ferment over the next two weeks (aprox)
- If you have a temperature-controlled system keep the fermenter temperature to the recommended fermentation temperature for each yeast strain (stated in the yeast ingredients section above)
- Monitor the fermentation activity over the first 5-7 days by the bubbling of the blow-off tube/airlock of your fermenter, as the bubbling slows down (roughly around day 5-7) take a gravity reading. When the gravity reaches around 1.015 raise the temperature of your fermenter by 1-2 degrees for 2 days for a diacetyl rest (if you don’t have temperature control don’t worry about this step, it's not the end of the world!)
- whilst you start your diacetyl rest add your dry hops, 100g (3.53 oz) each of lupomax mosaic & lupomax sabro!
- It's important to note that fermentation times will vary based on your circumstances like temperature, amount of yeast pitched, the healthiness of yeast, the gravity of the wort, pH, etc. so don’t stress be patient and know that these times are just a rough guide
- On day 2 of the diacetyl rest (once gravity reaches roughly 1.012) & gravity is the same 2 days in a row move onto cold crashing! (If you can’t / don’t want to cold crash go straight to kegging/bottling your beer!)
Step 8 (optional) – Cold crashing
- begin cold crashing your fermenter (bring the temperature of your fermenter down to as close to 0°C (32°F) as possible, for 2 days to a week depending on how patient you are
- If you don’t have a temp-controlled fermenter, you can cold crash by putting your fermenter in a fridge or temp-controlled chest freezer
- After you have finished cold crashing it's time to keg/bottle your beer! If you are bottling your beer from the fermenter uncarbonated, remember to add about 5-7 grams (0.17 - 0.24 oz) of priming sugar to your bottles to carbonate your beer.

So... What is it?
The India Pale Ale (IPA) is a hop-forward beer style with higher alcohol content (typically average 7-7.5%). It originated in the 18th century during British colonization of India, when brewers added extra hops and increased alcohol to preserve beer for long journeys. George Hodgson's "October beer" gained popularity in India, leading to the term "India Pale Ale." Now the IPA has evolved, and is largely responsible for the boom of the new era of craft beer, with breweries the world over experimenting and creating various sub-styles of amazing and unique IPA’s!
What's our like?
So how do you take such a popular and notorious style of beer to the next level? you get open AI (artificial intelligence) from Chat GPT to write you a recipe and brew it to the letter!
This may be a beer made by a machine, but it punches with the classic flavour of an old school west coast IPA, and this AI IPA has balls! coming in at a boozy 8.1% The mouthfeel is full and well rounded with a decent weight of bitterness balancing the malty backbone. The hops come punching through with citrus, a touch of pine and finishing with a resinous weight of hop oil.
Batch Size & Stats
- 19L / 5 gal finished beer
- 24L (6.3 gal) wort
- Starting gravity – 1.076
- Final gravity 1.014
- ABV – 8.1%
What ingredients?
Water
With sparging
- 23L (6 gal) strike water approx. 67°C (152.6°F)
- 9.3L (2.4 gal) sparge water at 78°C (172°F)
Without sparging
- 30L (7.9 gal) strike water approx. 67°C (152.6°F)
Malts
Total Grain Bill 7kg (15.4lb)
- Pale ale malt – 5.5kg (12.1 lb)
- Light Munich malt – 500g (1.1 lb)
- Carapils malt – 500g (1.1 lb)
- medium crystal malt – 500g (1.1 lb)
Hops & whirlfloc tablets
Chinook
- 50g (1.7 oz) - 60 minutes left in the boil
Citra
- 50g (1.7 oz) - flame out boil then allow to steep for 15 mins
- 50g (1.7 oz) - dry hop day 7
Simcoe
- 50g (1.7 oz) - after Citra’s been steeping for 10 mins add citra and steep for 5 more mins
- 50g (1.7 oz) - dry hop day 7
Whirlfloc
- 1.5g (0.052 oz) / 2 tablets – 15 minutes left in the boil
Yeast options & fermentation temperatures
- lallemand west coast ale – ferment at 20°C (68°F) to 25°C (77°F) 11g (1 packet)
- US-05 – ferment at 20°C (68°F) 23g (0.81 oz) / (2 packets)
- AUS-05 – ferment at 20°C (68°F) 23g (0.81 oz) / (2 packets)
- S-04 – ferment at 18°C (64.4°F) 22g (0.81 oz) / (2 packets)
Step by step process
Step 1 – Milling
- Mill grains to medium crush (set mill rollers to a gap of approx. 1.00mm / 0.039 inches (credit card width)
- Just keep in mind roller gap settings are not universal so as you brew more batches you will find the ideal crush size for your setup
- Alternatively if you don’t have a grain mill you can order your grains crushed from most homebrew stores, both online and in person
Step 2 – Mashing
Mash for 60 minutes at 67°C (152.6°F) with 23L (6 gal) of strike water
- Set your strike water to a few degrees above the target mash temperature (you can use the calculator in our website for this)
- ensure you mix in the grains thoroughly with a mash paddle to prevent dough balls from forming (big spoons, spatulas or whisks will also work)
- its easier to mash the grains and prevent dough balls if you add a little grain at a time, mix, add more grain and repeat until all the grains are mixed
if you don’t have a mash tun with heating then ensure after you have finished mixing the grains in to insulate your mash tun (thick neoprene or heavy blankets both work well)
Step 3 (optional) – Sparging
- if your setup has the capability to sparge then do so with 9.3L (2.4 gal) sparge water at 78°C (172°F)
- if you are not sparging and using a BIAB (brew in a bag) method then remove grains from mash tun and twist and squeeze the bag to get as much liquid out of the grains as possible
- as you start sparging (or straining your BIAB bag) begin raising the temperature of your wort to a boil
Step 4 – Boiling
- once your wort begins to boil start a timer for a 60-minute boil and add your bittering hops, 50g (1.76 oz) of Chinook
- at 15 minutes left in the boil add 1 whirlfloc tablet (OR granulated whirlfloc 0.7g (0.025 oz)
- after 60 mins of boil turn off your heat source and add 50g (1.7 oz) of Citra and allow to steep for a total of 15 minutes
- after citra has been steeping for 10 minutes add 50g (1.7 oz) of simcoe and allow all to steep for a further 5 minutes. then move on to cooling
Step 5 – Whirlpooling / cooling
- After 15 mins total of hop steeping begin chilling wort down to yeast pitching temperature
- once you’ve reached yeast pitching temperature take an original gravity reading of your wort
Step 6 – Yeast Pitching
- It is best to make a yeast starter before beginning your brew day (ideally 1 day before) to ensure your yeast are as active and healthy as possible before pitching, but not completely necessary – you could also just rehydrate yeast 30 minutes before pitching.
- Wort Aeration (Optional) if you have a paint mixer give your wort a quick blitz before pitching yeast to help add more dissolved oxygen into the wort to help the yeast have a healthier kick start into fermentation
- Now add your tincture of Vanilla extract! (or you can wait till end of fermentation if you prefer)
- Pitch yeast in wort a degree or two higher than the target fermentation temperature to help yeast take off more aggressively
- To make a yeast starter you can use either:
- DME (dry malt extract) at a ratio of approx. 100g per 1L water (3.5 oz per 33 fluid ounces) for gravity of approx. 1.040
- some unfermented wort kept cold and sanitary from a previous brew day
- 70g of table sugar per 1L water (2.5 oz per 33 fluid ounces) – however, it is best to use malt sugar (wort / DME) whenever possible to reduce the chance of shocking the yeast with a different food source from starter to wort pitching
- To rehydrate yeast
- Add yeast to approx. 10 times as much room temperature water as the weight of the yeast e.g. 10g yeast in 100 ml water (0.35 oz yeast in 3.5 fluid ounces water)
Step 7 – Fermentation & Dry Hopping
- Allow yeast to ferment over the next two weeks (aprox)
- If you have a temperature-controlled system keep the fermenter temperature to the recommended fermentation temperature for each yeast strain (stated in the yeast ingredients section above)
- After 7 days of fermentation its time to dry hop, add 50g (1.7 oz) each of simcoe and Citra and allow fermentation to continue for a further 5-7 days
- It's important to note that fermentation times will vary based on your circumstances like temperature, amount of yeast pitched, the healthiness of yeast, the gravity of the wort, pH, etc. so don’t stress be patient and know that these times are just a rough guide
- If you have temp control then when there are 2 days left of fermentation raise the temperature by 2 degrees for a diacetyl rest (once gravity reaches roughly 1.014) & gravity is the same 3 days in a row move onto cold crashing! (If you can’t / don’t want to cold crash go straight to kegging/bottling your beer!)
Step 8 (optional) – Cold crashing
- begin cold crashing your fermenter (bring the temperature of your fermenter down to as close to 0°C (32°F) as possible, for 2 days to a week depending on how patient you are
- If you don’t have a temp-controlled fermenter, you can cold crash by putting your fermenter in a fridge or temp-controlled chest freezer
- After you have finished cold crashing it's time to keg/bottle your beer! If you are bottling your beer from the fermenter uncarbonated, remember to add about 5-7 grams (0.17 - 0.24 oz) of priming sugar to your bottles to carbonate your beer.
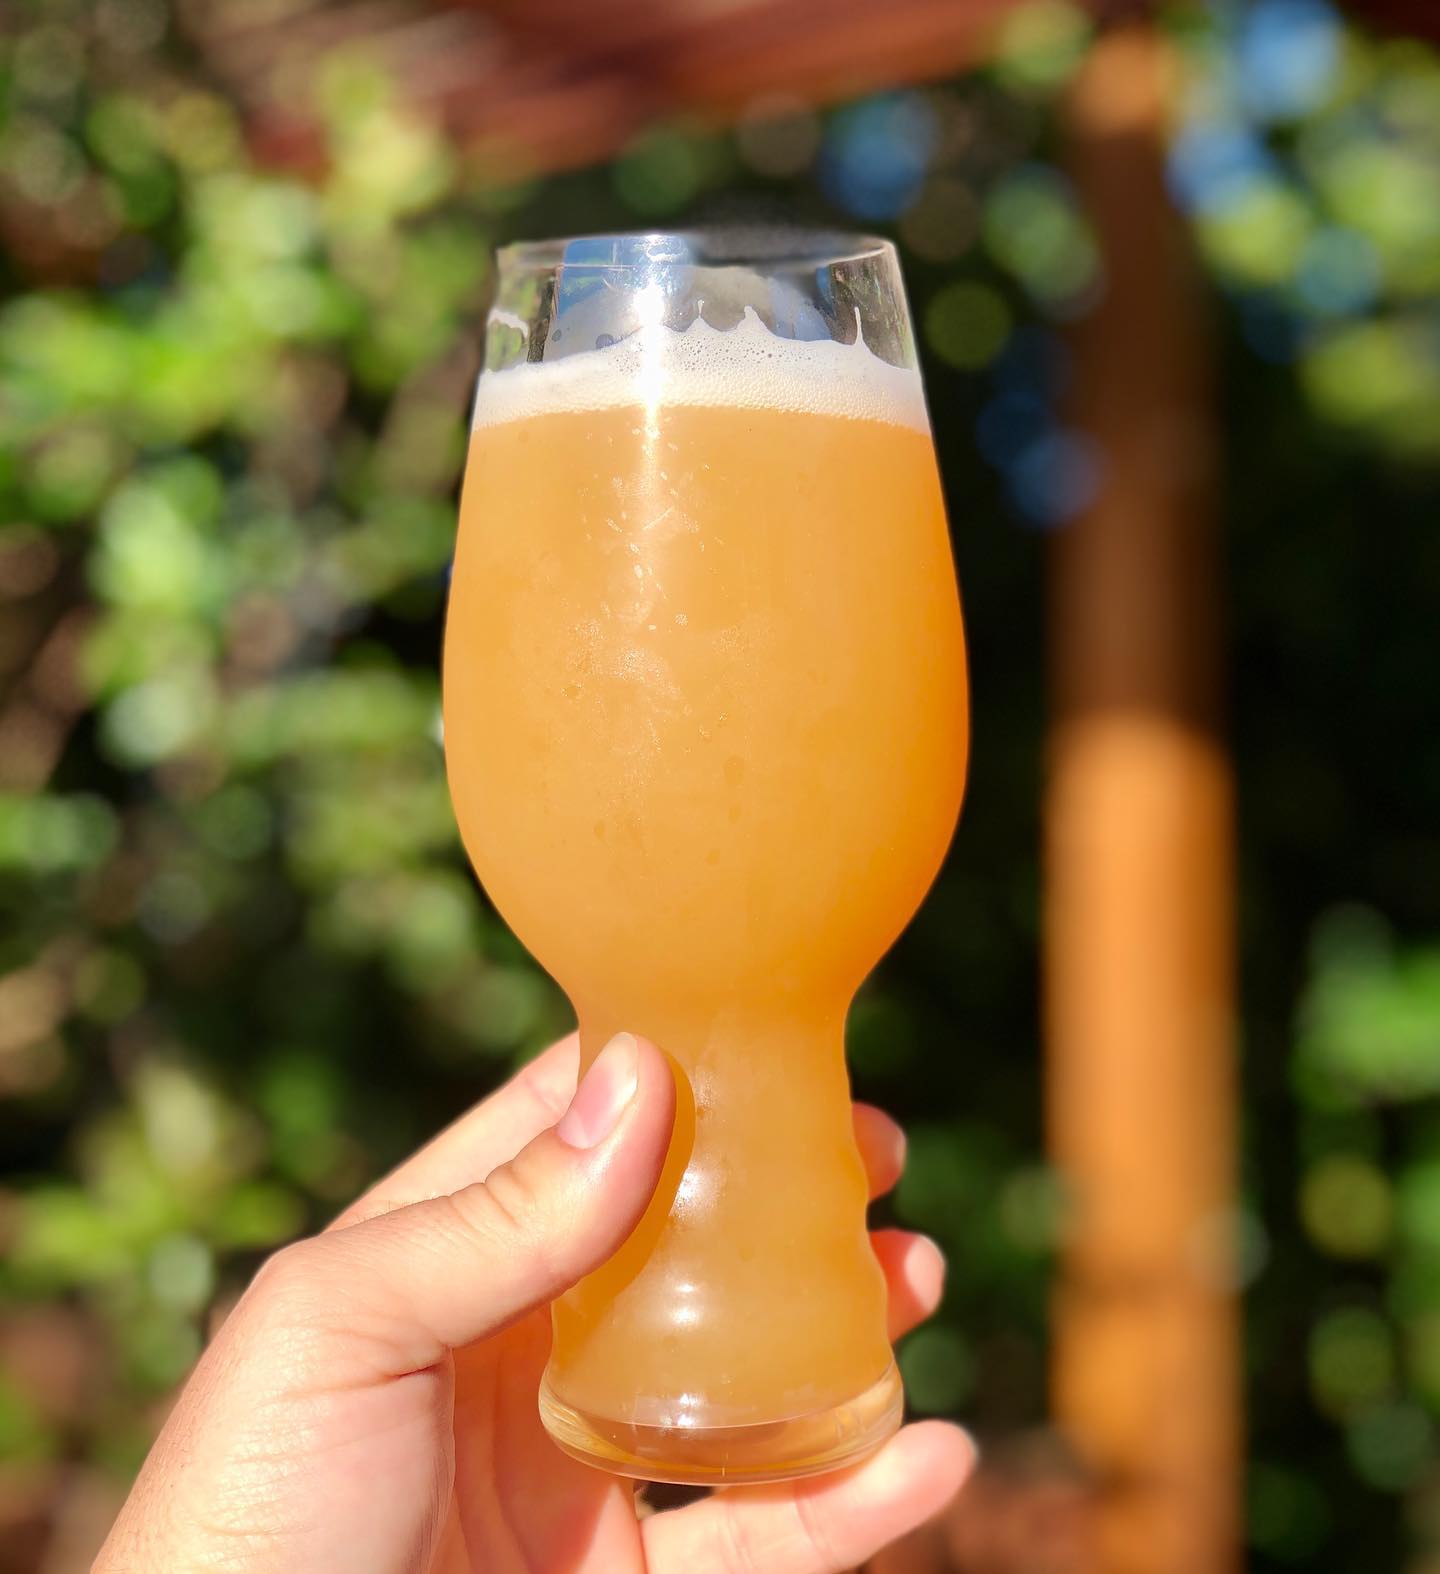
So... What is it?
The New England India Pale Ale (NEIPA) is a super fruity low bitterness style of IPA that typically sits around the 5.5-7.5% ABV mark. This particular recipe makes a 6.5% tropical juice bomb of a beer, with big flavors and aromas of mango, peaches, guava, orange, pineapple, and a touch of watermelon, lychee, and candy-like sweetness! If you haven't brewed a NEIPA before or just wanted to know what ingredients go into brewing a NEIPA, this is the guide for you!
Batch Size & ABV
38L (2 19L corny kegs) / 10 gal finished beer
50L (13.2 gal) wort
For a smaller 19L (5 gal) batch size simply half the ingredients of this recipe
Starting gravity – 1.063
Final gravity 1.013
ABV – 6.5%
Ingredients
Water
- With sparging
- 30L (7.9 gal) strike water approx. 75°C (167°F) use this calculator to determine your strike water starting temp for a 69°C (156°F) mash https://chasethecraft.com/calculators
- 30L (7.9 gal) sparge water at 78°C (172°F)
- Without sparging
- 60L (7.9 gal) strike water approx. 74°C (165°F) use this calculator to determine your strike water starting temp for a 69°C (156°F) mash https://chasethecraft.com/calculators
Malts:
- Pale ale malt – 7.7kg (17 lb)
- Wheat Malt – 1.65kg (3.6 lb)
- Rolled Oat – 1.1kg (2.4 lb)
- Crisp Cara Gold (light caramalt) – 550g (1.2 lb)
- Rice Hulls (not necessary, just helps with sparging) – 550g (1.2 lb)
Hops & whirlfloc tablets
Galaxy
- 10g (0.35 oz) - 60 minutes left in the boil
Lupomax El Dorado
- 40g (1.4 oz) – whirlpool for 20 minutes at 75°C (167°F)
- 65g (2.3 oz) - Dry hop at gravity 1.017 (approx. day 6-10 depending on your yeast)
Lupomax Mosaic
- 40g (1.4 oz) – whirlpool for 20 minutes at 75°C (167°F)
- 65g (2.3 oz) - Dry hop at gravity 1.017 (approx. day 6-10 depending on your yeast)
Lupomax Sabro
- 40g (1.4 oz) – whirlpool for 20 minutes at 75°C (167°F)
- 65g (2.3 oz) - Dry hop at gravity 1.017 (approx. day 6-10 depending on your yeast)
Lupomax Amarillio
- 40g (1.4 oz) – whirlpool for 20 minutes at 75°C (167°F)
- 65g (2.3 oz) - Dry hop at gravity 1.017 (approx. day 6-10 depending on your yeast)
- Whirlfloc tablets
- 2 tablets – 15 minutes left in the boil
Yeast options & fermentation temperatures
- 23g (0.8 oz) Kveik (we used a Omega yeats Espe Kveik, but any kveik is great!) ferment at 32°C
- 23g (0.8 oz) US-05 – ferment at 20°C
- 23g (0.8 oz) S-04 – ferment at 19°C
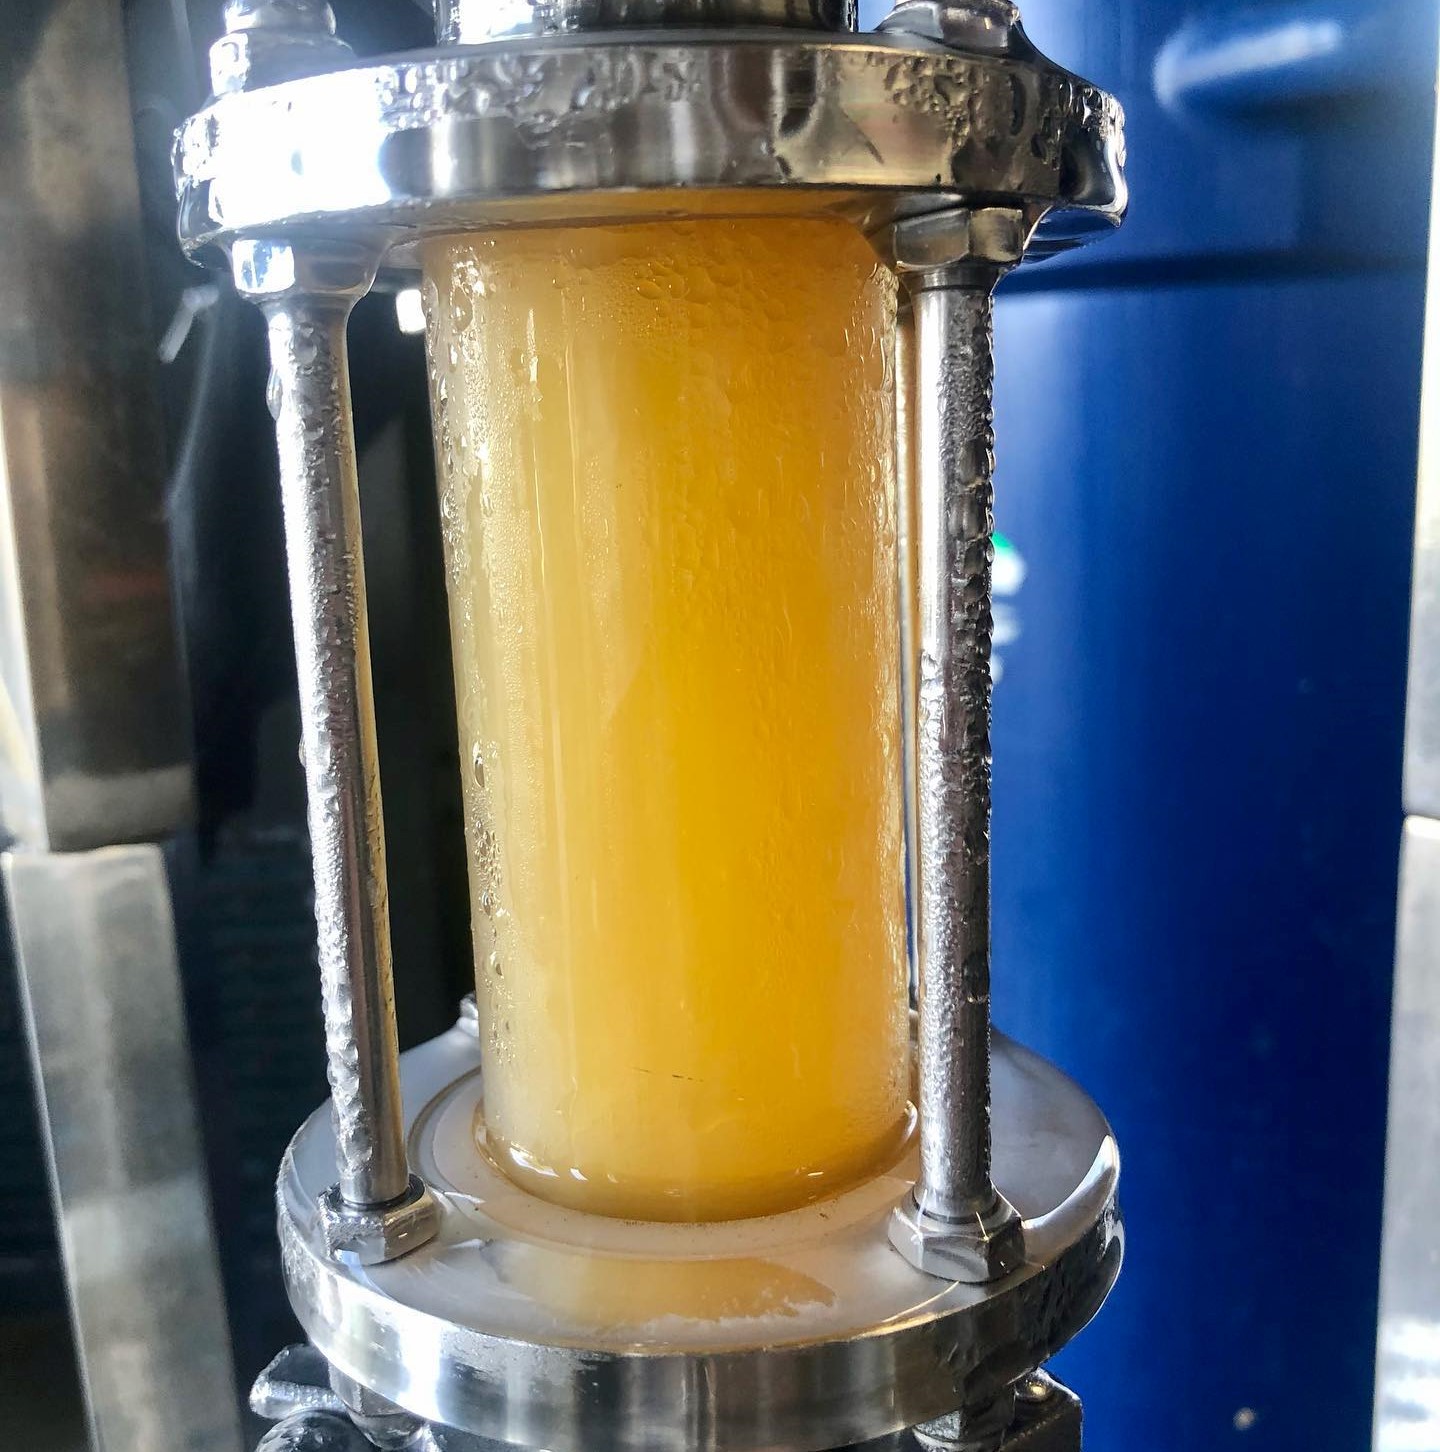
Step by step process
Step 1 – Milling
- Mill grains to medium crush (set mill rollers to a gap of approx. 1mm / 0.039 inches)
- Just keep in mind roller gap settings are not universal so as you brew more batches you will find the ideal crush size for your setup
- Alternatively if you don’t have a grain mill you can order your grains crushed from most homebrew stores, both online and in person
Step 2 – Mashing
- Mash for 60 minutes at 69°C (156°F)
- Set your strike water to a few degrees above the target mash temperature, you can use this calculator to determine what your strike temperature should be https://chasethecraft.com/calculators
- ensure you mix in the grains thoroughly with a mash paddle to prevent dough balls from forming (big spoons, spatulas or whisks will also work)
- its easier to mash the grains and prevent dough balls if you add a little grain at a time, mix, add more grain and repeat until all the grains are mixed
- if you don’t have a mash tun with heating then ensure after you have finished mixing the grains in to insulate your mash tun (thick neoprene or heavy blankets both work well)
Step 3 (optional) – Sparging
- if your setup has the capability to sparge then do so with 30L (7.9 gal) of sparge water at 78 °C (172°F)
- if you are not sparging and using a BIAB (brew in a bag) method then remove grains from mash tun and twist and squeeze the bag to get as much liquid out of the grains as possible
- as you start sparging (or straining your BIAB bag) begin raising the temperature of your wort to a boil
Step 4 – Boiling
- once your wort begins to boil start a timer for a 60-minute boil and add your bittering hops, 10g (0.35 oz) of Galaxy
- at 15 minutes left in the boil add 2 whirlfloc tablets
- after 60 minutes of boiling turn of the heat and chill the temperature of the wort down to 75°C (167°F) and begin whirlpooling
- if you don’t have a wort chiller you could rest your boil kettle in an ice bucket
- if your system can’t whirlpool you can also achieve this with a mash paddle and a power drill, if you don’t have this either don’t worry about whirlpooling it’s not completely necessary
Step 5 – Whirlpooling / whirlpool hop additions
- once temperature reaches 75°C (167°F) and you have started whirlpooling add your whirlpool hops, 40g (1.4 oz) each of Lupomax versions of Mosaic, Amarillo, Sabro and El Dorado
- allow hops to whirlpool in the wort for 20 minutes and then begin chilling wort again down to yeast pitching temperature
- once you’ve reached yeast pitching temperature take an original gravity reading of your wort
Step 6 – Yeast Pitching
- It is best to make a yeast starter before beginning your brew day (ideally 1 day before) to ensure your yeast are as active and healthy as possible before pitching, but not completely necessary – you could also just rehydrate yeast 30 minutes before pitching.
- Pitch yeast in wort a degree or two higher than the target fermentation temperature to help yeast take off more aggressively
- To make a yeast starter you can use either:
- DME (dry malt extract) at a ratio of approx. 100g per 1L water (3.5 oz per 33 fluid ounces) for gravity of approx. 1.040
- some unfermented wort kept cold and sanitary from a previous brew day
- 70g of table sugar per 1L water (2.5 oz per 33 fluid ounces) – however, it is best to use malt sugar (wort / DME) whenever possible to reduce the chance of shocking the yeast with a different food source from starter to wort pitching
- To rehydrate yeast
- Add yeast to approx. 10 times as much room temperature water as the weight of the yeast e.g. 10g yeast in 100 ml water (0.35 oz yeast in 3.5 fluid ounces water)
Step 7 – Fermentation & dry hopping
- Allow yeast to ferment over the next week to two weeks
- If you have a temperature-controlled system keep the fermenter temperature to the recommended fermentation temperature for each yeast strain (stated in the yeast ingredients section above)
- Monitor the fermentation activity over the first 7 days by the bubbling of the blow-off tube/airlock of your fermenter, as the bubbling slows down (roughly around day 7) take a gravity reading. When the gravity reaches around 1.014 raise the temperature of your fermenter by 1-2 degrees for 2 days for a diacetyl rest (if you don’t have temperature control don’t worry about this step, it's not the end of the world!)
- It's important to note that fermentation times will vary based on your circumstances like temperature, amount of yeast pitched, the healthiness of yeast, the gravity of the wort, pH, etc. so don’t stress be patient and know that these times are just a rough guide
- On day 2 of the diacetyl rest (once gravity reaches roughly 1.015 – 1.017) add 65g (2.3 oz) each of Lupomax versions of Mosaic, Amarillo, Sabro, and El Dorado
- One day after dry hopping take a gravity reading, fermentation should finish at about 1.013, if you haven't reached this yet wait another day and take another reading, once the gravity is the same 2 days in a row move onto cold crashing! (If you can’t / don’t want to cold crash go straight to kegging/bottling your beer!)
Step 8 (optional) – Cold crashing
- begin cold crashing your fermenter (bring the temperature of your fermenter down to as close to 0°C (32°F) as possible, for 2 days to a week depending on how patient you are
- If you don’t have a temp-controlled fermenter, you can cold crash by putting your fermenter in a fridge or temp-controlled chest freezer
- After you have finished cold crashing it's time to keg/bottle your beer! If you are bottling your beer from the fermenter uncarbonated remember to add about 5-7 grams (0.17 - 0.24 oz) of priming sugar to your bottles to carbonate your beer.