.png)
ANZAC Biscuit Ale (48 L / 12.7 gal)
A tribute brew for the diggers, the brave ANZAC soldiers who gave their lives so we may live, and the ANZAC biscuits that they created! This ale combines oats, golden syrup, coconut, and rich biscuit malt to recreate those familiar flavours in liquid form. Smooth, lightly sweet, and rich in biscuit character, this beer honours tradition while bringing a uniquely Australian twist to homebrewing.
Stats
- Style: Historical / Specialty Ale
- ABV: 5.9%
- OG: 1.049 (measured 1.054)
- FG: 1.006 (measured 1.009)
- IBU: 22
- Colour: 12 EBC
- Carbonation: 2.4 vols CO₂
- Batch Size: 48 L (12.7 gal)
- Boil Time: 60 min
- Brewhouse Efficiency: 80%
- System: BrewZilla Gen 4 - 65 L
Ingredients
Grain Bill (8.43 kg / 18.6 lb total)
- 6.07 kg (13.4 lb) Golden Promise Pale Ale Malt — 72%
- 1.012 kg (2.23 lb) Rolled Oats — 12%
- 506 g (1.12 lb) Biscuit Malt — 6%
- 506 g (1.12 lb) Light Munich Malt — 6%
- 337 g (0.74 lb) Honey Malt — 4%
Adjuncts & Flavour Additions
- 1.2 kg (2.65 lb) Golden Syrup @ 5 min
- 500 g (1.1 lb) Toasted Coconut (secondary, toast ~8 min @ 180 °C / 356 °F)
Hops — Pride of Ringwood (125 g / 4.4 oz total)
- 25 g (0.88 oz) @ 60 min — 13 IBU
- 100 g (3.5 oz) @ 5 min — 9 IBU
Yeast
- 24 g Fermentis US-05 (with 2 L starter)
Water Profile (Amber Malty)
- Ca 50 ppm • Mg 5 ppm • Na 15 ppm
- Cl 65 ppm • SO₄ 51 ppm • HCO₃ 57 ppm
- SO₄/Cl ratio: 0.8
- Mash pH: 5.45
Additions
- Mash: 2.16 g CaCl₂, 2.3 g Gypsum, 2.4 ml Phosphoric Acid
- Sparge: 2.34 g CaCl₂, 2.5 g Gypsum, 1.88 ml Phosphoric Acid
- Boil: 1.67 g Whirlfloc @ 15 min
Mash Schedule
- 65 °C (149 °F) — 60 min (high fermentability)
Mash water: 30 L (7.9 gal)
Sparge water: 33 L (8.7 gal)
Fermentation Schedule
- Primary: 18 °C (64 °F) for 14 days
- Carbonation: 2.4 vols CO₂
Step-by-Step Brewing Method
1. Mash In
Mash all grains and oats in 30 L (7.9 gal) of water at 65 °C (149 °F). Hold for 60 minutes to produce a clean, fermentable wort.
2. Lauter & Sparge
Sparge with 33 L (8.7 gal) at ~77 °C (170 °F) to collect around 56–58 L (14.8–15.3 gal) pre-boil wort.
3. Boil – 60 Minutes
- Add 25 g Pride of Ringwood at 60 minutes
- Add Whirlfloc at 15 minutes
- Add 1.2 kg golden syrup at 5 minutes
- Add 100 g Pride of Ringwood at 5 minutes
Boil hard to integrate sugars and develop light colour.
4. Chill & Transfer
Chill wort to 18 °C (64 °F) and transfer to fermenter.
5. Fermentation
Pitch 24 g US-05 yeast. Ferment at 18 °C (64 °F) for 14 days.
6. Secondary Addition
Add 500 g toasted coconut and allow to steep for several days until flavour is achieved.
7. Package
Bottle or keg and carbonate to 2.4 vols CO₂. Condition briefly before serving.

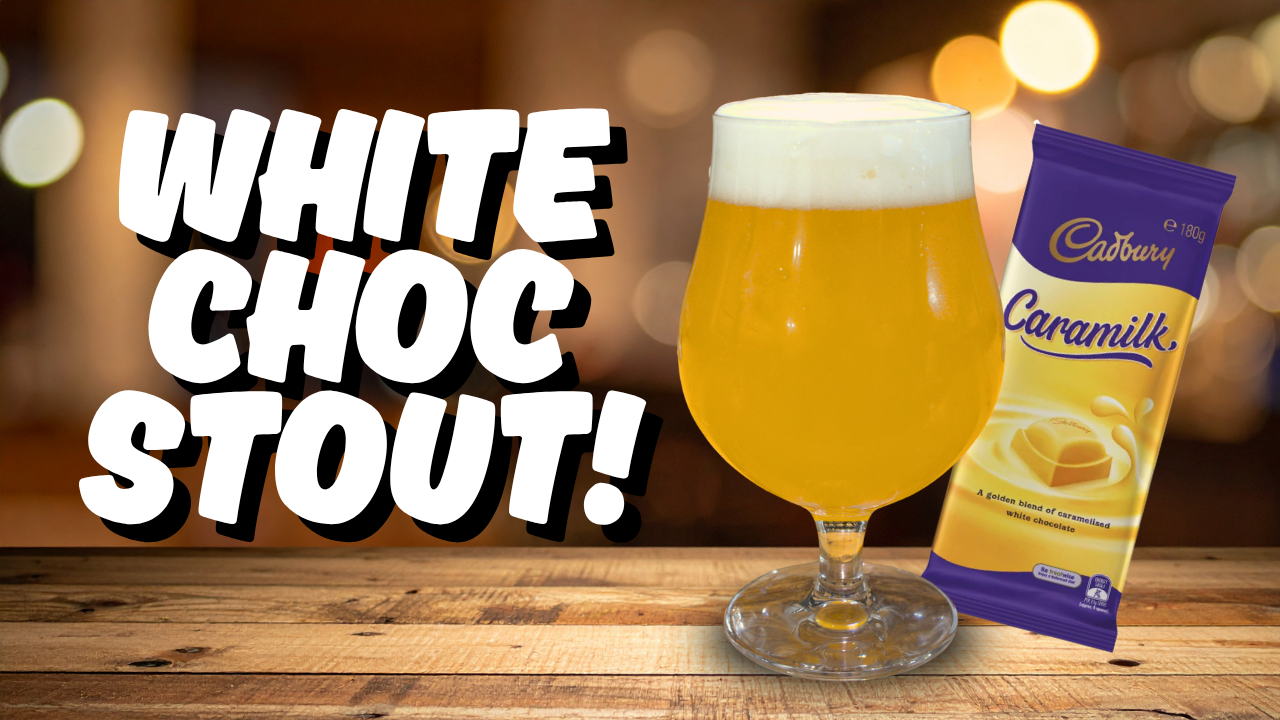
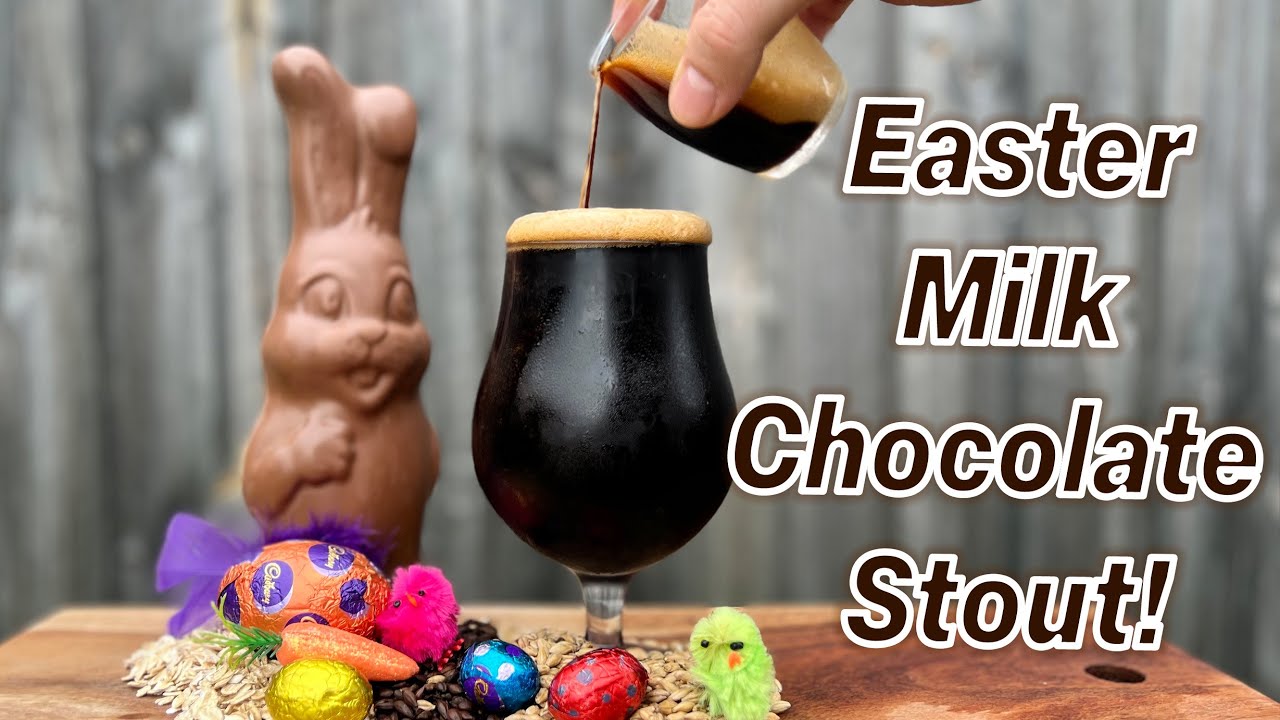
White Chocolate Stout – Easter Beer (25 L / 6.6 gal)
A decadent twist on a stout — this “white stout” delivers all the flavours of a traditional stout without the dark colour. Built on a pale malt base with oats, wheat, coffee, lactose, and Cadbury Caramilk white chocolate, this beer brings creamy body, espresso notes, and dessert-like sweetness in a light golden pour.
Stats
- Style: White Stout / Specialty Blonde Ale
- ABV: 5.4%
- OG: 1.057 (measured 1.062)
- FG: 1.020 (measured 1.021)
- IBU: 16
- Colour: 10 EBC
- Carbonation: 2.4 vols CO₂
- Batch Size: 25 L (6.6 gal)
- Boil Time: 60 min
- Efficiency: 72%
Ingredients
Grain & Adjuncts (4.91 kg / 10.8 lb base + additions)
- 3.928 kg (8.66 lb) Pale Ale Malt — 80%
- 344 g (0.76 lb) Rolled Oats — 7%
- 245 g (0.54 lb) Rolled Wheat — 5%
- 245 g (0.54 lb) Wheat Malt — 5%
- 147 g (0.32 lb) Gladiator Malt — 3%
- 250 g (0.55 lb) Rice Hulls
Flavour Additions
- 1.08 kg (2.38 lb) Cadbury Caramilk white chocolate (boil)
- 350 g (0.77 lb) Lactose @ 10 min
- 400 g (0.88 lb) Coffee beans (secondary)
- 60 ml vanilla extract (secondary)
Hops (72 g / 2.5 oz total)
- 22 g (0.78 oz) Fuggle @ 60 min — 9 IBU
- 50 g (1.76 oz) Spalt @ 15 min — 7 IBU
Yeast
- 2 packs Fermentis SafAle S-04
Water Profile (NEIPA-style for softness)
- Ca 62 ppm • Mg 9 ppm • Na 15 ppm
- Cl 98 ppm • SO₄ 49 ppm • HCO₃ 57 ppm
- SO₄/Cl ratio: 0.5
- Mash pH: 5.41
Mash Schedule
- 69 °C (156 °F) — 60 min (medium body)
Mash water: 20 L (5.3 gal)
Sparge water: 15 L (4 gal)
Fermentation Schedule
- Primary: 25 °C (77 °F) — 7 days
- Secondary: 21 °C (70 °F) — 7 days
- Cold crash: 1 °C (34 °F) — 2 days
- Carbonation: 2.4 vols CO₂
Step-by-Step Brewing Method
1. Mash In
Mash grains, oats, wheat, and rice hulls in 20 L (5.3 gal) at 69 °C (156 °F). Hold for 60 minutes to build body and mouthfeel.
2. Lauter & Sparge
Sparge with 15 L (4 gal) at ~77–80 °C (170–176 °F) to collect ~30 L (7.9 gal) pre-boil wort.
3. Boil – 60 Minutes
- Add Fuggle hops at 60 minutes
- Add Spalt hops at 15 minutes
- Add lactose and Whirlfloc at 10–15 minutes
- Add Cadbury Caramilk white chocolate during the boil to fully dissolve
4. Chill & Transfer
Cool wort to 25 °C (77 °F) and transfer to fermenter. Pitch S-04 yeast.
5. Primary Fermentation
Ferment at 25 °C (77 °F) for 7 days.
6. Secondary Additions
Add coffee beans, and vanilla extract. Hold at 21 °C (70 °F) for another 7 days.
7. Cold Crash & Package
Cold crash at 1 °C (34 °F) for 2 days. Package and carbonate to 2.4 vols CO₂.
Brew Notes
- Brewed: 20 March 2026
- Bottled: 5 April 2026
- OG: 1.062
- FG: 1.021
- Result: creamy, dessert-like beer with coffee, vanilla, and white chocolate character

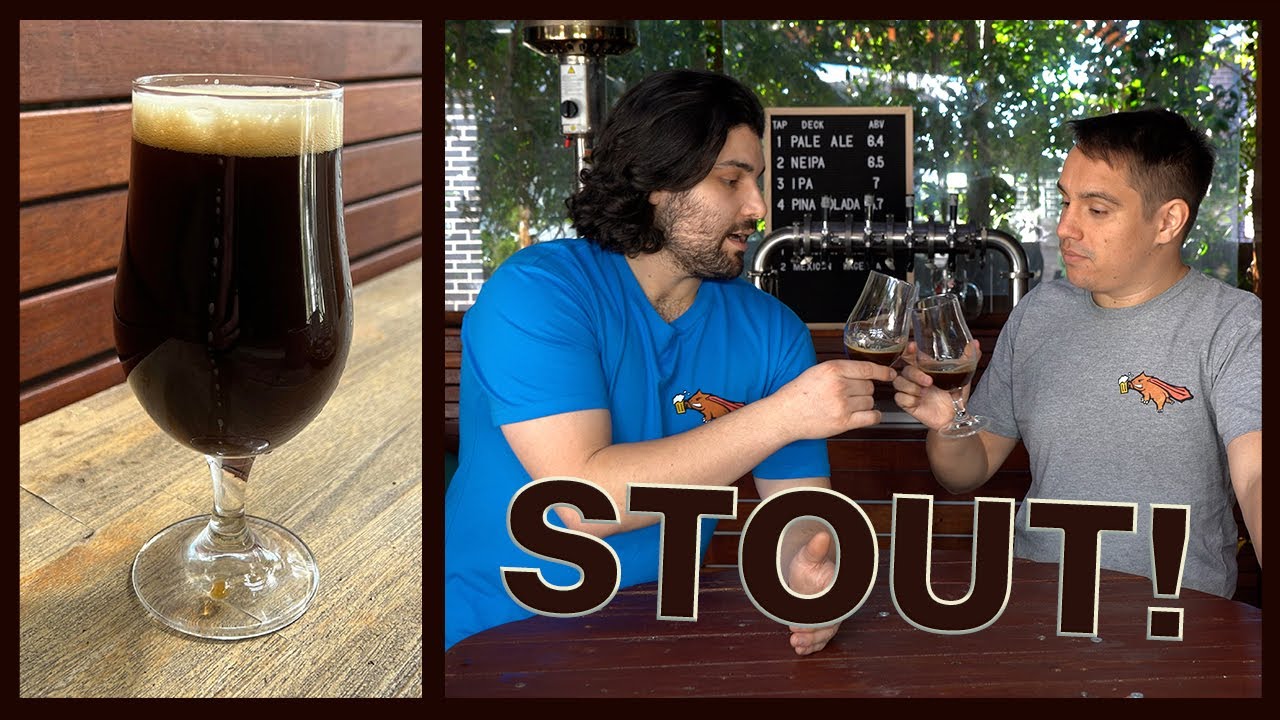
Guinness Clone – Irish Stout (21 L / 5.5 gal)
Few beers are as recognizable as Guinness, the unequivical king of beers, the black gold! This clone captures the essential character of Ireland’s famous stout, roasted barley bitterness, creamy texture from flaked barley, a clean dry finish, and of course poured on Nitro! Brewed with traditional English hops and served with low carbonation, it’s a simple recipe that produces a deeply satisfying pint.
Stats
- Style: Irish Dry Stout
- ABV: 5.6%
- OG: 1.047
- FG: 1.004
- IBU: 45
- Colour: 69 EBC
- Carbonation: 1.5 vols CO₂
- Batch Size: 21 L (5.5 gal)
- Boil Time: 60 min
- Brewhouse Efficiency: 75.7%
- System: BrewZilla 65L Gen4
Ingredients
Grain Bill (3.9 kg / 8.6 lb total)
- 2.535 kg (5.59 lb) Golden Promise Pale Ale Malt — 65%
- 975 g (2.15 lb) Flaked Barley — 25%
- 390 g (0.86 lb) Roasted Barley — 10%
Hops — East Kent Goldings (100 g / 3.5 oz total)
- 50 g (1.76 oz) @ 60 min
- 50 g (1.76 oz) @ 10 min
Yeast
- 2 packs Lallemand LalBrew Windsor Ale Yeast
Water Profile (Inspired by Wicklow Mountain Water)
- Ca 18 ppm
- Mg 5 ppm
- Na 16 ppm
- Cl 32 ppm
- SO₄ 22 ppm
- HCO₃ 57 ppm
- SO₄/Cl ratio: 0.7
- Mash pH: 5.37
- Sparge pH: 5.5
Mash Additions
- 0.3 g Gypsum
- 3 ml Lactic Acid (80%)
Sparge Additions
- 0.31 g Gypsum
- 1.27 ml Lactic Acid (80%)
Mash Schedule
- 65 °C (149 °F) — 60 min
- 77 °C (171 °F) — 10 min mash out
Mash water: 15.98 L (4.2 gal)
Sparge water: 16.36 L (4.3 gal) @ 80 °C (176 °F)
Fermentation Schedule
- Primary fermentation: 20 °C (68 °F) for 14 days
- Carbonation: 1.5 vols CO₂ (traditional stout level)
- Brewfather_Batch58_20260310
Step-by-Step Brewing Method
1. Mash In
Mash 3.9 kg (8.6 lb) of grain in 15.98 L (4.2 gal) water at 65 °C (149 °F). Hold for 60 minutes to produce a dry, fermentable wort.
2. Mash Out & Sparge
Raise to 77 °C (171 °F) for 10 minutes. Sparge with 16.36 L (4.3 gal) at 80 °C (176 °F) to collect roughly 28–29 L (7.5 gal) pre-boil wort.
3. Boil – 60 Minutes
Add East Kent Goldings hops:
- 50 g at 60 minutes
- 50 g at 10 minutes
Boil vigorously for 60 minutes to develop colour and bitterness.
4. Chill & Transfer
Chill wort to 20 °C (68 °F) and transfer to fermenter.
5. Fermentation
Pitch two packs of LalBrew Windsor yeast and ferment at 20 °C (68 °F) for approximately 14 days.
6. Packaging
Bottle or keg and carbonate to 1.5 volumes CO₂. For a true Guinness-style pour, serve on nitrogen using a stout faucet.
Brew Notes
- Brew Date: 27 Feb 2026
- Fermentation Start: 27 Feb 2026
- Bottled: 13 Mar 2026
- Pre-Boil Gravity: 1.033
- OG: 1.047
- FG: 1.004
- Boiled on 3000W
- Added + 10ml glucoamylase on day 5 of ferm & 2 packs US05 to fix stuck fermentation
- Second ferm kicked off too fast after gluco. Transferred to keg and fridge at 1.004 to attempt to stop ferm and save some body - DONT DO WHAT I DID! Get mash temps correct!
- Brewfather link
.png)
So... What is it?
The white stout is an extra weird beer in the world of craft brews! Taking what is essentially a blonde ale and cramming it full of coffee beans (and any other adjuncts) to give it the toasty, roasty flavours of a full bodies stout, whilst having the appearance and mouthfeel of an easy drinking blonde ale! This one came out at a cruisy 5.1% and is so ridiculously easy! Carrying delicious flavours of toasted coconut, roasty espresso and a silky but light body and subdued bitterness.
POST BREW ALTERATIONS
- In hindsight we would increase our Toasted coconut in the fermenter from 500g (1.1 lb) to 1kg (2.2 lb) to really boost the cocnut infusion!
Batch Size & Stats
- 19L / 5 gal finished beer
- 25L (6.6 gal) wort
- Starting gravity – 1.055
- Final gravity 1.016
- ABV – 5.1%
- IBU - 18
- Colour - 9.5 ECB
What ingredients?
Water
With sparging
- 20L (5.2 gal) Strike water at 69°C (156.2°F)
- 15L (3.9 gal) Sparge water approx. 78°C (172°F)
Without sparging
- 30L (7.9 gal) strike water approx. 69°C (156.2°F)
Malts
Total Grain Bill 4.91kg (10.8 4lb)
- Pale ale malt - 81.1% – 3.98kg (8.77 lb) -
- wheat - 10% – 490g (1.08 lb)
- Rolled Oats - 5.9% - 290g (0.64 lb)
- Gladiator malt (dextrin malt) - 3.1% – 150g (0.33 lb)
- Rice Hulls - 250g (0.55 lb)
Adjuncts
- Lactose - start of boil250g (0.55 lb)
- Coffee Beans - 410g (0.9 lb) for a few days after primary fermentation
- Toasted Coconut Shavings (toasted at 180C / 356F for 8 mins) 1kg (2.2 lb) - half added in the last 10 mins of boil, half added after primary fermentation
In hindsight, we reccomend doubling the fermenter addition of shavings
Hops & whirlfloc tablets
Fuggles
- 28g (1 oz) / 15 IBU's - 60 min
- 35g (1.2 oz) 4 IBU's - 5 min
Whirlfloc
- 0.75g (0.025 oz) / 1 tablet – 15 minutes left in the boil
Yeast options & fermentation temperatures
- US-05 – ferment at 20°C (68°F) 23g (0.81 oz) / (2 packets)
- AUS-05 – ferment at 20°C (68°F) 23g (0.81 oz) / (2 packets)
- S-04 – ferment at 18°C (64.4°F) 22g (0.81 oz) / (2 packets)
Water Profile
- Ca2+62
- Mg2+ 9
- Na+ 15
- Cl- 98
- SO42- 49
- HCO3- 57
Step by step process
Step 1 – Milling
- Mill grains to medium crush (set mill rollers to a gap of approx. 1.00mm / 0.039 inches (credit card width)
- Just keep in mind roller gap settings are not universal so as you brew more batches you will find the ideal crush size for your setup
- Alternatively if you don’t have a grain mill you can order your grains crushed from most homebrew stores, both online and in person
Step 2 – Mashing
Mash for 60 minutes at 69°C (156.2°F) with 20L (5.2 gal) of strike water (with sparging - 30L (7.9 gal without sparging)
- Set your strike water to a few degrees above the target mash temperature (you can use the calculator in our website for this)
- ensure you mix in the grains thoroughly with a mash paddle to prevent dough balls from forming (big spoons, spatulas or whisks will also work)
- its easier to mash the grains and prevent dough balls if you add a little grain at a time, mix, add more grain and repeat until all the grains are mixed
if you don’t have a mash tun with heating then ensure after you have finished mixing the grains in to insulate your mash tun (thick neoprene or heavy blankets both work well)
Step 3 (optional) – Sparging
- if your setup has the capability to sparge then do so with 15L (3.9 gal) Sparge water approx. 78°C (172°F)
- if you are not sparging and using a BIAB (brew in a bag) method then remove grains from mash tun and twist and squeeze the bag to get as much liquid out of the grains as possible
- as you start sparging (or straining your BIAB bag) begin raising the temperature of your wort to a boil
Step 4 – Boiling
- once your wort begins to boil start a timer for a 60-minute boil and add your bittering hops, 28g (1 oz) of Fuggles
- at 15 minutes left in the boil add 1 whirlfloc tablet (OR granulated whirlfloc 0.7g (0.025 oz)
- at 10 mins left add your coconut shavings to the boil. (toast 500g / 1.1 lbs of shavings at 180C / 356F for 8 mins)
- at 5 minutes left in the boil add 35g (1.23 oz) of Fuggles
- after 60 mins of boil turn off your heat source
Step 5 – Whirlpooling / cooling
- after 60 mins of boil turn off your heat source and begin cooling
- once you’ve reached yeast pitching temperature take an original gravity reading of your wort
Step 6 – Yeast Pitching
- It is best to make a yeast starter before beginning your brew day (ideally 1 day before) to ensure your yeast are as active and healthy as possible before pitching, but not completely necessary – you could also just rehydrate yeast 30 minutes before pitching.
- Wort Aeration (Optional) if you have a paint mixer give your wort a quick blitz before pitching yeast to help add more dissolved oxygen into the wort to help the yeast have a healthier kick start into fermentation
- Now add your tincture of Vanilla extract! (or you can wait till end of fermentation if you prefer)
- Pitch yeast in wort a degree or two higher than the target fermentation temperature to help yeast take off more aggressively
- To make a yeast starter you can use either:
- DME (dry malt extract) at a ratio of approx. 100g per 1L water (3.5 oz per 33 fluid ounces) for gravity of approx. 1.040
- some unfermented wort kept cold and sanitary from a previous brew day
- 70g of table sugar per 1L water (2.5 oz per 33 fluid ounces) – however, it is best to use malt sugar (wort / DME) whenever possible to reduce the chance of shocking the yeast with a different food source from starter to wort pitching
- To rehydrate yeast
- Add yeast to approx. 10 times as much room temperature water as the weight of the yeast e.g. 10g yeast in 100 ml water (0.35 oz yeast in 3.5 fluid ounces water)
Step 7 – Fermentation & Coconut addition
- Allow yeast to ferment over the next week or two (aprox)
- If you have a temperature-controlled system keep the fermenter temperature to the recommended fermentation temperature for each yeast strain (stated in the yeast ingredients section above)
- After 7 days of fermentation or around 1.018 gravity, we added our fermenter Coconut shavings & 410g (0.9 lb) of Arabica coffee beans and raised the temperature of fermentation by 2 degrees for a diacetyl rest for the next 2 days
- 2 days after adding the coffee and spice tincture it is time to cold crash (if you can) and bottle / keg!
- It's important to note that fermentation times will vary based on your circumstances like temperature, amount of yeast pitched, the healthiness of yeast, the gravity of the wort, pH, etc. so don’t stress be patient and know that these times are just a rough guide
- If you have temp control then when there are 2 days left of fermentation raise the temperature by 2 degrees for a diacetyl rest (once gravity reaches roughly 1.014) & gravity is the same 3 days in a row move onto cold crashing! (If you can’t / don’t want to cold crash go straight to kegging/bottling your beer!)
Step 8 (optional) – Cold crashing
- begin cold crashing your fermenter (bring the temperature of your fermenter down to as close to 0°C (32°F) as possible, for 2 days to a week depending on how patient you are
- If you don’t have a temp-controlled fermenter, you can cold crash by putting your fermenter in a fridge or temp-controlled chest freezer
- After you have finished cold crashing it's time to keg/bottle your beer! If you are bottling your beer from the fermenter uncarbonated, remember to add about 5-7 grams (0.17 - 0.24 oz) of priming sugar to your bottles to carbonate your beer.
.png)
So... What is it?
Its finally getting to winter in the land down under, so its time for a delicious fire side sipper! Enter, the sweet stout! A thick velvety milk stout crammed full of toasted coconut and caramelized toasted marshmallows! This beer is silky on the mouth, and complex on the pallet, starting off with a wave of dark chocolate and coffee, followed by sweet toasted marshmallowy goodness and finishing with the layered flavours and aromas of toasted coconut shavings, this is a winter slam dunk!
Batch Size & Stats
- 19L / 5 gal finished beer
- 24L (6.3 gal) wort
- Starting gravity – 1.072
- Final gravity 1.02
- ABV – 7.6%
- IBU - 22
- Colour - 84 EBC
- Mash Efficiency - 87%
What ingredients?
Water
With sparging
- 20L (5.2 gal) for a 68°C (154.4°F) mash for 1 hour
- 15L (4 gal) sparge water at 78°C (172°F)
Without sparging
- 30L (7.9 gal) for a 68°C (154.4°F) mash (you can use our strike water calculator to find your ideal strike temp)
Malts: Total 4.711 kg/ 10.4 lb
- 3.178 kg / 7 lb (62.2%) — Ale Malt
- 460g / 1 lb (9%) — Rolled Oats
- 409 g / 0.9lb (8%) — Dark Chocolate Malt
- 320 g / 11.3 oz (7%) — Wheat Malt
- 307 g / 10.8 oz (6%) — Medium Crystal Malt
- 256 g / 9 oz (5%) — Gladiator (Dextrin) Malt
- 102 g / 3.6 oz (4%) — Midnight Wheat Malt
- 560 g / 1lb — Rice Hulls
Adjuncts
- 400g (14.1 oz) — Lactose (added start of boil)
- 0.5 kg (1.1 lb) — Toasted coconut shavings added in the last 5 mins of Boil (toasted in oven for 8 mins at 180C / 356F)
- 0.5 kg (1.1 lb) — Toasted coconut shavings added in secondary fermentation, around day 7 (toasted in oven for 8 mins at 180C / 356F)
- 2kg (4.4 lb) — Toasted Marshmallows added in the last 5 mins of boil (5 mins at 200C / 392F and bronzed with a kitchen blow torch)
Hops & whirlfloc tablets
Northern Brewer
- 14g (11 IBU's) - (0.5 oz) – 60 mins
- 28g (8 IBU's) - (1 oz) – 10 mins
Fuggles
- 28g (5 IBU's) (1 oz) – 10 mins
Whirlfloc tablets
- 0.75g (0.025 oz) / 1 tablet – 15 minutes left in the boil
Yeast options & fermentation temperatures
- 20g (0.7 oz) Lallemand (LalBrew) Nottingham Yeast – ferment at 18°C / 64.4°F
- 23g (0.8 oz) Aus-05– ferment at 18°C / 64.4°F
- 23g (0.8 oz) US-05 – ferment at 18°C / 64.4°F
- 23g (0.8 oz) S-04 – ferment at 18°C / 64.4°F
Water Profile
- Ca2+102
- Mg2+ 7
- Na+ 28
- Cl- 127
- SO42- 66
- HCO3- 134
Step by step process
Step 1 – Milling
- Mill grains to medium crush (set mill rollers to a gap of approx. 1.00mm / 0.039 inches)
- Just keep in mind roller gap settings are not universal so as you brew more batches you will find the ideal crush size for your setup
- Alternatively if you don’t have a grain mill you can order your grains crushed from most homebrew stores, both online and in person
Step 2 – Mashing
- Mash for 60 mins at 68°C (154.4°F)
- Set your strike water to a few degrees above the target mash temperature, you can use our calculator to determine what your strike temperature should be
- ensure you mix in the grains thoroughly with a mash paddle to prevent dough balls from forming (big spoons, spatulas or whisks will also work)
- its easier to mash the grains and prevent dough balls if you add a little grain at a time, mix, add more grain and repeat until all the grains are mixed
- if you don’t have a mash tun with heating then ensure after you have finished mixing the grains in to insulate your mash tun (thick neoprene or heavy blankets both work well)
- after 60 minutes of mashing raise the temp to 77°C (170°F) for 10-15 minutes to mash out, and deactivate the enzymes breaking down the sugars
Step 3 (optional) – Sparging
- if your setup has the capability to sparge then do so with 15L (4 gal) sparge water at 78°C (172°F)
- if you are not sparging and using a BIAB (brew in a bag) method then remove grains from mash tun and twist and squeeze the bag to get as much liquid out of the grains as possible
- as you start sparging (or straining your BIAB bag) begin raising the temperature of your wort to a boil
Step 4 – Boiling
- once your wort begins to boil start a timer for a 60-minute boil and add your bittering hops, 14g (0.5 oz) of Northern Brewer
- at 20 minutes left in the boil add your 400g / 0.88b of lactose
- at 15 minutes left in the boil add 1 whirlfloc tablets (or 0.75g of granulated whirlfloc)
- at 10 min left in the boil add 28g (1 oz) each of fuggles and northern brewer
- with 5 minutes left add both the toasted coconut shavings and toasted marshmallows
Step 5 – Cooling
- After 1 hour of boiling start cooling wort down to yeast pitching temperature
- once you’ve reached yeast pitching temperature take an original gravity reading of your wort
Step 6 – Yeast Pitching
- It is best to make a yeast starter before beginning your brew day (ideally 1 day before) to ensure your yeast are as active and healthy as possible before pitching, but not completely necessary – you could also just rehydrate yeast 30 minutes before pitching.
- Pitch yeast in wort a degree or two higher than the target fermentation temperature to help yeast take off more aggressively
- To make a yeast starter you can use either:
- DME (dry malt extract) at a ratio of approx. 100g per 1L water (3.5 oz per 33 fluid ounces) for gravity of approx. 1.040
- some unfermented wort kept cold and sanitary from a previous brew day
- 70g of table sugar per 1L water (2.5 oz per 33 fluid ounces) – however, it is best to use malt sugar (wort / DME) whenever possible to reduce the chance of shocking the yeast with a different food source from starter to wort pitching
- To rehydrate yeast
- Add yeast to approx. 10 times as much room temperature water as the weight of the yeast e.g. 10g yeast in 100 ml water (0.35 oz yeast in 3.5 fluid ounces water)
Step 7 – Fermentation
- Allow yeast to ferment over the next week to two weeks
- If you have a temperature controlled system keep the fermenter temperature to the recommended fermentation temperature for each yeast strain (stated in the yeast ingredients section above)
- Monitor the fermentation activity over the first 7 days by the bubbling of the blow off tube / airlock of your fermenter, as the bubbling slows down (roughly around day 7) take a gravity reading. When the gravity reaches around 1.022 raise the temperature of your fermenter by 1-2 degrees for 2 days for a diacetyl rest (if you don’t have temperature control don’t worry about this step, its not the end of the world!)
- at this point add the toasted coconut shavings to the fermenter and let it sit in the tank for at least 2 days
- Once the gravity is the same 2 days in a row move onto cold crashing! (If you can’t / don’t want to cold crash go straight to kegging/bottling your beer!)
Step 8 (optional) – Cold crashing
- begin cold crashing your fermenter (bring the temperature of your fermenter down to as close to 0°C (32°F) as possible, for 2 days to a week depending on how patient you are
- If you don’t have a temp-controlled fermenter, you can cold crash by putting your fermenter in a fridge or temp-controlled chest freezer
- After you have finished cold crashing it's time to keg/bottle your beer! If you are bottling your beer from the fermenter uncarbonated remember to add about 5-7 grams (0.17 - 0.24 oz) of priming sugar to your bottles to carbonate your beer.
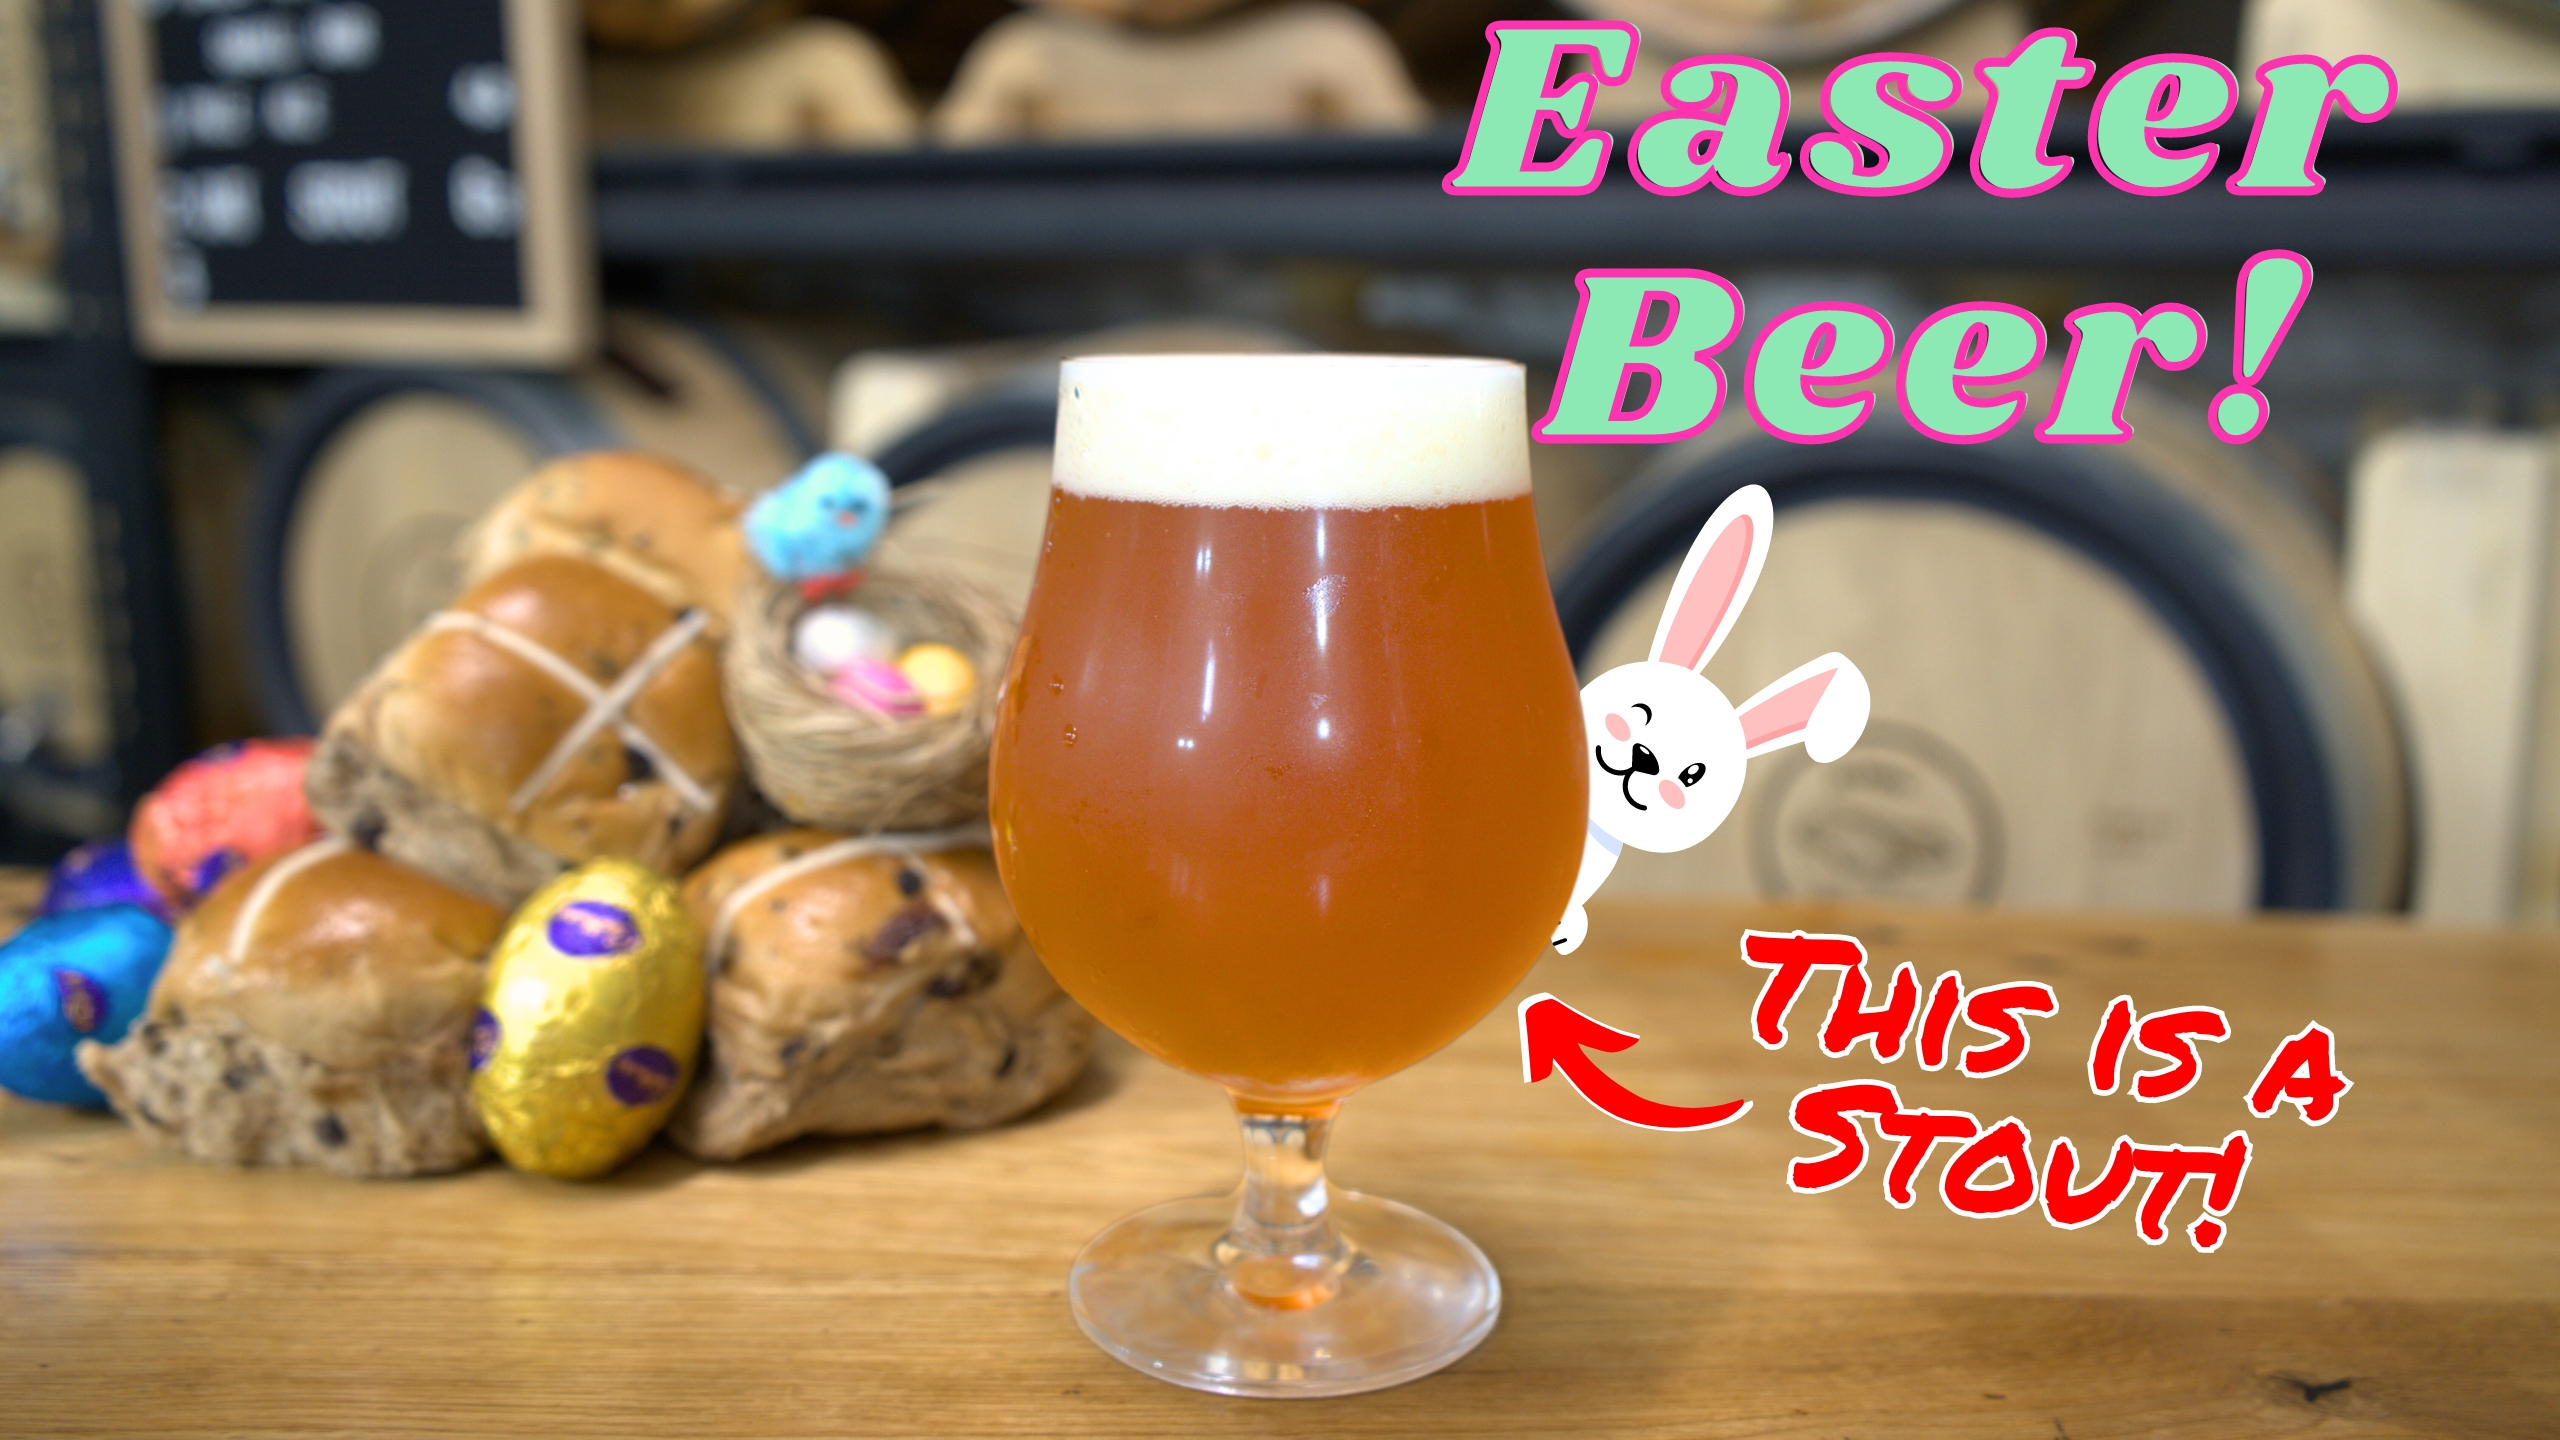
So... What is it?
A white stout is a beer that challenges traditional expectations by combining the appearance of a light-colored beer, often resembling a pale ale or even a golden lager, with the flavors typically associated with a stout. Unlike a traditional stout, which is typically dark brown to black in color with roasted malt flavors, a white stout achieves its stout-like characteristics through the use of coffee beans, cocoa nibs and even spiced tinctures in the fermentation step, to maintain a lighter color with full body stouty goodness!
What's our like?
Our White stout takes an already strange style... and makes it even stranger! not only is ours a blonde ale infused with all the roasty goodness of a coffee bean based stout, it is also packed full of spices such as vanilla, sultanas, allspice berries, cinnamon, cacao nib extract and of course, REAL hot cross buns thrown into the mash! To top it all off is a late boil addition of lactose to bring everything together with a creamy sweetness that lingers on the tongue. Coming in at a reasonable 4.7% it is a very sessionable hot cross bun in a glass to keep you warm and cozy all Easter weekend long!
POST BREW ALTERATIONS
- In hindsight we would increase our sultana (raisin) addition from 500g (1.1 lb) to 1kg (2.2 lb) to really boost the Hot cross bun character!
Batch Size & Stats
- 19L / 5 gal finished beer
- 25L (6.6 gal) wort
- Starting gravity – 1.048
- Final gravity 1.013
- ABV – 4.7%
What ingredients?
Water
With sparging
- 20L (5.2 gal) Strike water at 69°C (156.2°F)
- 15L (3.9 gal) Sparge water approx. 78°C (172°F)
Without sparging
- 30L (7.9 gal) strike water approx. 69°C (156.2°F)
Malts
Total Grain Bill 4.91kg (10.8 4lb)
- Pale ale malt – 3.98kg (8.77 lb)
- wheat – 490g (1.08 lb)
- Rolled Oats - 290g (0.64 lb)
- Gladiator malt (dextrin malt)– 150g (0.33 lb)
- Rice Hulls - 250g (0.55 lb)
Adjuncts
- Traditional Hot Cross Buns - 450g (1 lb) in Mash
- Lactose - 220g (0.48 lb) start of boil
- sultanas (raisins) - 500g (1.1 lb) - end of fermentation
- coffee beans - 250g (0.5 lbs) - end of fermentation
Spice Tincture - soak all spices in cacao nib spirit for a week before adding to fermenter at final gravity
- 2 vanilla beans
- 1 cinnamon stick
- 8 all spice berries
- cacao nib spirit 250mL - (to make this toast 500g of cacao nibs at 180°C (356°F) for 5 mins then soak nibs in 700mL of rum or vodka for a week then strain)
Hops & whirlfloc tablets
Northern Brewer
- 20g (0.7 oz) - 60 minutes left in the boil
Spalt Spalter
- 35g (1.23 oz) - 5 minutes left in the boil
Whirlfloc
- 0.75g (0.025 oz) / 1 tablet – 15 minutes left in the boil
Yeast options & fermentation temperatures
- US-05 – ferment at 20°C (68°F) 23g (0.81 oz) / (2 packets)
- AUS-05 – ferment at 20°C (68°F) 23g (0.81 oz) / (2 packets)
- S-04 – ferment at 18°C (64.4°F) 22g (0.81 oz) / (2 packets)
Water Profile
- Ca2+62
- Mg2+ 9
- Na+ 15
- Cl- 98
- SO42- 49
- HCO3- 57
Step by step process
Step 1 – Milling
- Mill grains to medium crush (set mill rollers to a gap of approx. 1.00mm / 0.039 inches (credit card width)
- Just keep in mind roller gap settings are not universal so as you brew more batches you will find the ideal crush size for your setup
- Alternatively if you don’t have a grain mill you can order your grains crushed from most homebrew stores, both online and in person
Step 2 – Mashing
Mash for 60 minutes at 69°C (156.2°F) with 20L (5.2 gal) of strike water (with sparging - 30L (7.9 gal without sparging)
- Set your strike water to a few degrees above the target mash temperature (you can use the calculator in our website for this)
- ensure you mix in the grains thoroughly with a mash paddle to prevent dough balls from forming (big spoons, spatulas or whisks will also work)
- its easier to mash the grains and prevent dough balls if you add a little grain at a time, mix, add more grain and repeat until all the grains are mixed
if you don’t have a mash tun with heating then ensure after you have finished mixing the grains in to insulate your mash tun (thick neoprene or heavy blankets both work well)
Step 3 (optional) – Sparging
- if your setup has the capability to sparge then do so with 15L (3.9 gal) Sparge water approx. 78°C (172°F)
- if you are not sparging and using a BIAB (brew in a bag) method then remove grains from mash tun and twist and squeeze the bag to get as much liquid out of the grains as possible
- as you start sparging (or straining your BIAB bag) begin raising the temperature of your wort to a boil
Step 4 – Boiling
- once your wort begins to boil start a timer for a 60-minute boil and add your bittering hops, 20g (0.7 oz) of Northern Brewer
- at 15 minutes left in the boil add 1 whirlfloc tablet (OR granulated whirlfloc 0.7g (0.025 oz)
- at 5 minutes left in the boil add 35g (1.23 oz) of Spalt Spatler
- after 60 mins of boil turn off your heat source
Step 5 – Whirlpooling / cooling
- after 60 mins of boil turn off your heat source and begin cooling
- once you’ve reached yeast pitching temperature take an original gravity reading of your wort
Step 6 – Yeast Pitching
- It is best to make a yeast starter before beginning your brew day (ideally 1 day before) to ensure your yeast are as active and healthy as possible before pitching, but not completely necessary – you could also just rehydrate yeast 30 minutes before pitching.
- Wort Aeration (Optional) if you have a paint mixer give your wort a quick blitz before pitching yeast to help add more dissolved oxygen into the wort to help the yeast have a healthier kick start into fermentation
- Now add your tincture of Vanilla extract! (or you can wait till end of fermentation if you prefer)
- Pitch yeast in wort a degree or two higher than the target fermentation temperature to help yeast take off more aggressively
- To make a yeast starter you can use either:
- DME (dry malt extract) at a ratio of approx. 100g per 1L water (3.5 oz per 33 fluid ounces) for gravity of approx. 1.040
- some unfermented wort kept cold and sanitary from a previous brew day
- 70g of table sugar per 1L water (2.5 oz per 33 fluid ounces) – however, it is best to use malt sugar (wort / DME) whenever possible to reduce the chance of shocking the yeast with a different food source from starter to wort pitching
- To rehydrate yeast
- Add yeast to approx. 10 times as much room temperature water as the weight of the yeast e.g. 10g yeast in 100 ml water (0.35 oz yeast in 3.5 fluid ounces water)
Step 7 – Fermentation & Fruit and Spice additions!
- Allow yeast to ferment over the next week or two (aprox)
- If you have a temperature-controlled system keep the fermenter temperature to the recommended fermentation temperature for each yeast strain (stated in the yeast ingredients section above)
- After 4 days of fermentation or around 1.015 gravity, we added our sultanas (raisins)
- On day 6 of fermentation we added our 250g (0.5 lb) of Arabica coffee beans and spice tincture and if you have temp control then raise the temperature of fermentation by 2 degrees for a diacetyl rest for the next 2 days
- 2 days after adding the coffee and spice tincture it is time to cold crash (if you can) and bottle / keg!
- It's important to note that fermentation times will vary based on your circumstances like temperature, amount of yeast pitched, the healthiness of yeast, the gravity of the wort, pH, etc. so don’t stress be patient and know that these times are just a rough guide
- If you have temp control then when there are 2 days left of fermentation raise the temperature by 2 degrees for a diacetyl rest (once gravity reaches roughly 1.014) & gravity is the same 3 days in a row move onto cold crashing! (If you can’t / don’t want to cold crash go straight to kegging/bottling your beer!)
Step 8 (optional) – Cold crashing
- begin cold crashing your fermenter (bring the temperature of your fermenter down to as close to 0°C (32°F) as possible, for 2 days to a week depending on how patient you are
- If you don’t have a temp-controlled fermenter, you can cold crash by putting your fermenter in a fridge or temp-controlled chest freezer
- After you have finished cold crashing it's time to keg/bottle your beer! If you are bottling your beer from the fermenter uncarbonated, remember to add about 5-7 grams (0.17 - 0.24 oz) of priming sugar to your bottles to carbonate your beer.
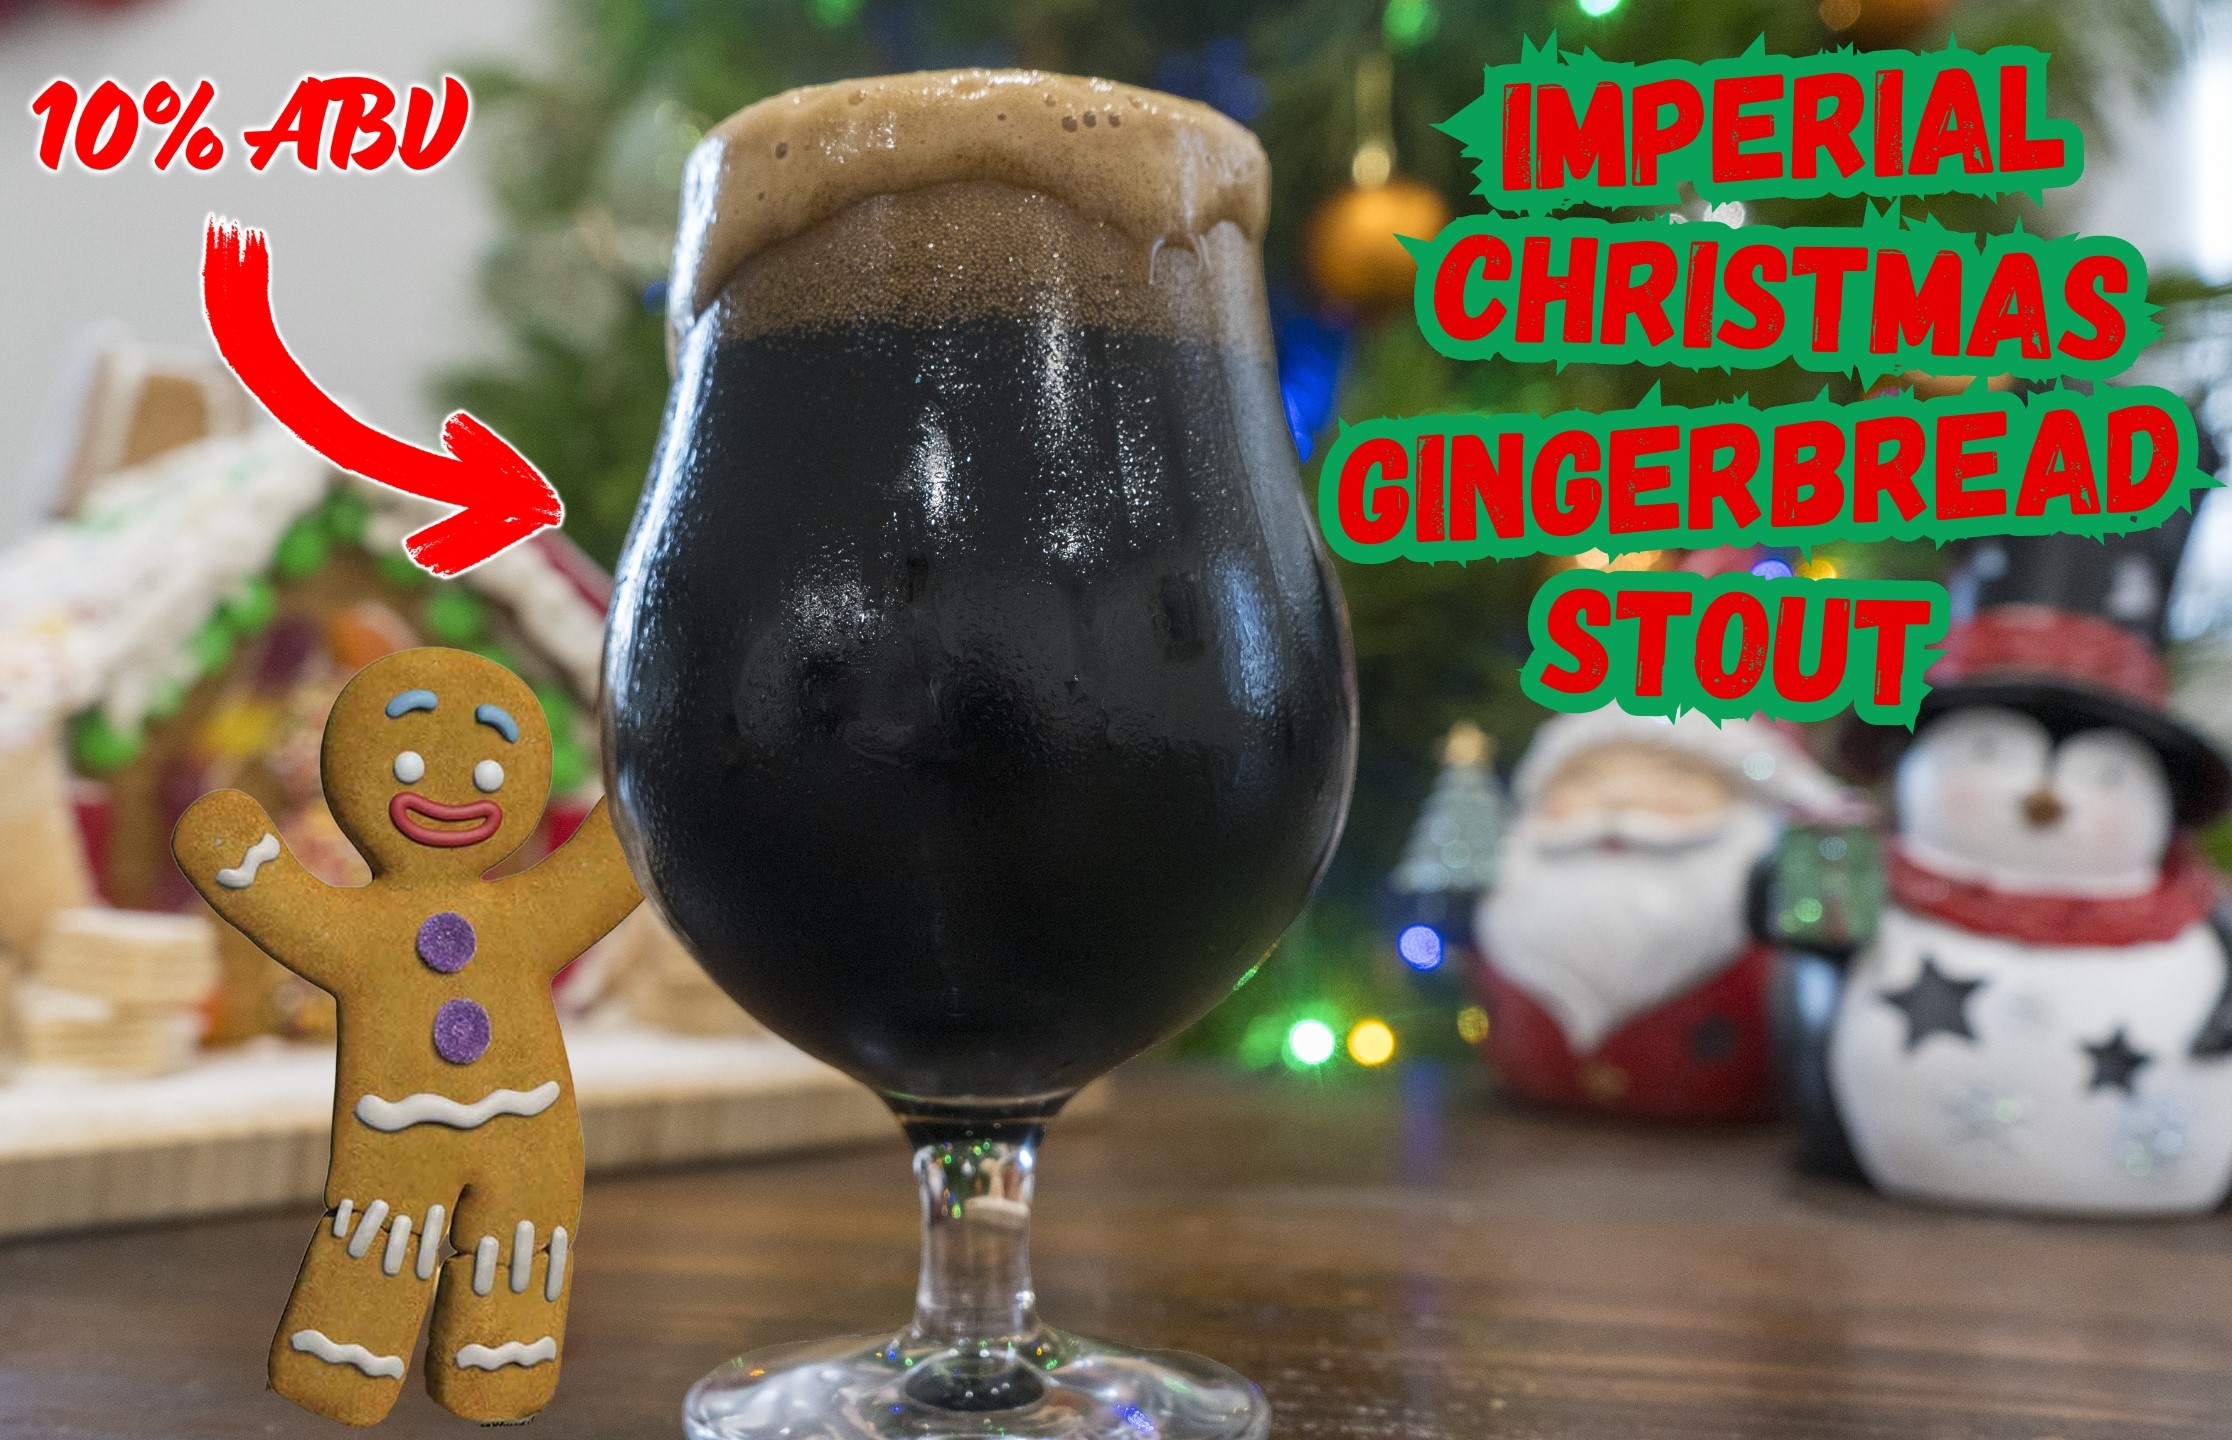
So... What is it?
Imperial Stouts, originating in 18th-century England, are robust beers known for their intense flavors and high alcohol content. Inspired by a desire for a stronger stout, these brews have a deep history tied to the Russian imperial court. With a dark, rich appearance and opulent malt profiles, Imperial Stouts offer a complex taste of chocolate, coffee, dark fruit, and caramel. Boasting an alcohol content surpassing 8% ABV, these ales are revered for their indulgent sipping experience.
What is ours like?
So what better way to get silly for the silly season than with Christmas in a glass! This 10% Imperial Gingerbread Christmas Stout is creamy with a decent heft of body considering its impressive abv! The bitterness definitely sits on the lower side at 32 IBU’s and feels even lower than that due to the high gravity and ABV of the beer (next time I make this id bump the IBU’s up to 50-60). The malt character comes bounding through with bready biscuit, strong espresso, a touch of burnt coffee and sweet caramel toffee notes infused with a touch of sticky date pudding and plums! But the true star of the show is the big ginger note that cuts through the sweetness of the beer, tasting a little more like fresh ginger than gingerbread, but perfectly in balance with the bouquet of spices from the cinnamon, allspice and nutmeg. Don't leave too many of these out for Santa or he may not be able to drive his sleigh!
Batch Size & Stats
- 41.1L / 10.85 gal finished beer
- 47.9L (12.65 gal) wort
- Starting gravity – 1.097 (approx likely a bit higher)
- Final gravity 1.022
- ABV – 10% (incl. Vodka addition and measuring bias)
- IBU - 32
- Mash Efficiency 81%
- Brewhouse Efficiency 73%
What ingredients?
Water
With sparging
- 90 minutes, 60L (15.85 gal) strike water 69°C (156.2°F) mash
- 16L (4.2 gal) sparge water at 78°C (172°F)
Without sparging
- 90 minutes, 70L (18.5 gal) strike water 69°C (156.2°F) mash
Water Chemistry (Salts) - (optional)
Mash water
- Calcium Chloride (CaCl2) - 6.1g (0.22 oz)
- Epsom Salt (MgSO4) - 4.9g (0.1.7 oz)
- Slaked Lime (Ca(OH)2) - 3g (0.1 oz)
Sparge water
- Calcium Chloride (CaCl2) - 1.63g (0.057 oz)
- Epsom Salt (MgSO4) - 1.31g (0.046 oz)
- Slaked Lime (Ca(OH)2) - 0.8g (0.028 oz)
- Phosphoric Acid (85%) – 2.2ml (0.0744 oz)
Malts
Total Grain Bill 20.12kg (44.35 lb) + 1.7kg (3.75 lb) rice hulls
Total Fermentables - 21.12kg (46.6 lb)
- Pale Malt – 10.07kg (22.2 lb) - 50.1%
- Dark Munich - 3.01kg (6.63 lb) - 15%
- Rolled Oats - 1.61kg (3.55 lb) - 8%
- Wheat malt – 1.61kg (3.55 lb) - 8%
- Dark Chocolate malt 1.41kg (3.1 lb) - 7%
- Medium Crystal Malt - 1.41kg (3.1 lb) - 7%
- Roasted Barley - 1kg (2.2 lb) - 5%
- Rice Hulls – 1.7kg (3.75 lb)
Adjuncts
- Extra Dark Belgium Candi Syrup - 1kg (2.2 lb)
Extra Flavouring Additions
For these additions split all ingredients in half, and in 2 separate jars soak the spices to make a tincture, ideally to soak for 5 days before brewday
Use half the tincture after flameout on brewday, use the other half in the fermenter near final gravity (id recommend straining out the spices for the fermenter addition)
- 400 ml Vodka (40% abv)
- Ginger Root (dry and kibbled) - 120g
- All Spice (bought whole then roughly crushed) - 16 berries
- Cinnamon stick (bought whole then roughly crushed) - 2 sticks
- Nutmeg (bought whole then roughly crushed) - 2 tsp
- Vanilla Beans (whole then cut in half and seeds scraped out) - 4 beans
- Cloves (bought whole then roughly crushed) - 4 cloves
Hops & whirlfloc tablets
Northern Brewer
- 52.7g (1.86 oz) - 90 minutes left in the boil
- 50g (1.76 oz) 15 minutes left in the boil
Fuggles
- 50g (1.76 oz) 15 minutes left in the boil
Whirlfloc
- 1.5g (0.052 oz) / 2 tablets – 15 minutes left in the boil
Yeast options & fermentation temperatures
- Lalbrew Nottingham Ale yeast – ferment at 20°C (68°F) 23g (0.81 oz) / (2 packets)
- US-05 – ferment at 20°C (68°F) 23g (0.81 oz) / (2 packets)
- AUS-05 – ferment at 20°C (68°F) 23g (0.81 oz) / (2 packets)
- S-04 – ferment at 18°C (64.4°F) 22g (0.81 oz) / (2 packets)
Step by step process
Step 0 - Prep spices! (pre brew-day step)
For these additions, split all ingredients in half, and lightly crush whole ingredients with a mortar and pestle, and slice the vanilla beans in half and scrape out the insides to help the flavour be released.
Then place all ingredients evenly into 2 separate jars with the vodka to make a tincture, ideally to soak for 5 days before brewday
Use half the tincture after flameout on brewday, use the other half in the fermenter near final gravity (id recommend straining out the spices for the fermenter addition)
Step 1 – Milling
- Mill grains to medium crush (set mill rollers to a gap of approx. 1.00mm / 0.039 inches (credit card width)
- Just keep in mind roller gap settings are not universal so as you brew more batches you will find the ideal crush size for your setup
- Alternatively if you don’t have a grain mill you can order your grains crushed from most homebrew stores, both online and in person
Step 2 – Mashing
- Mash for 90 minutes at 69°C (156.2°F)
- Set your strike water to a few degrees above the target mash temperature
- ensure you mix in the grains thoroughly with a mash paddle to prevent dough balls from forming (big spoons, spatulas or whisks will also work)
- its easier to mash the grains and prevent dough balls if you add a little grain at a time, mix, add more grain, and repeat until all the grains are mixed
- if you don’t have a mash tun with heating then ensure after you have finished mixing the grains in to insulate your mash tun (thick neoprene or heavy blankets both work well)
Step 3 (optional) – Sparging
- if your setup has the capability to sparge then do so with 16L (4.2 gal) sparge water at 78°C (172°F)
- if you are not sparging and using a BIAB (brew in a bag) method then remove grains from mash tun and twist and squeeze the bag to get as much liquid out of the grains as possible
- as you start sparging (or straining your BIAB bag) begin raising the temperature of your wort to a boil
Step 4 – Boiling
- (Optional) - for this beer we wanted to bump up the starting gravity, so we boiled the wort for an extra half hour BEFORE we added our 90min bittering hops when the “real” boil began!
- At the beginning of the boil add your belgian Candi Syrup
- once your wort begins to boil start a timer for a 90-minute boil and add your bittering hops, 52.7g (1.86 oz) of Northern Brewer
- at 15 minutes left in the boil add 2 whirlfloc tablets (OR granulated whirlfloc 1.5g (0.053 oz)) and 50g (1.76 oz) each of Northern Brewer & Fuggles
Step 5 – Whirlpooling / cooling
- once wort has been boiling for 60 minutes in total turn off your heat source and begin chilling wort down to yeast pitching temperature
- Right after flameout strain out the spices from 1 tincture jar and add it to the boil kettle, then add the tincture liquid directly to the fermenter
- once you’ve reached yeast pitching temperature take an original gravity reading of your wort
Step 6 – Yeast Pitching
- It is best to make a yeast starter before beginning your brew day (ideally 1 day before) to ensure your yeast are as active and healthy as possible before pitching, but not completely necessary – you could also just rehydrate yeast 30 minutes before pitching.
- Wort Aeration (Optional) if you have a paint mixer give your wort a quick blitz before pitching yeast to help add more dissolved oxygen into the wort to help the yeast have a healthier kick start into fermentation
- Now add your tincture of Vanilla extract! (or you can wait till end of fermentation if you prefer)
- Pitch yeast in wort a degree or two higher than the target fermentation temperature to help yeast take off more aggressively
- To make a yeast starter you can use either:
- DME (dry malt extract) at a ratio of approx. 100g per 1L water (3.5 oz per 33 fluid ounces) for gravity of approx. 1.040
- some unfermented wort kept cold and sanitary from a previous brew day
- 70g of table sugar per 1L water (2.5 oz per 33 fluid ounces) – however, it is best to use malt sugar (wort / DME) whenever possible to reduce the chance of shocking the yeast with a different food source from starter to wort pitching
- To rehydrate yeast
- Add yeast to approx. 10 times as much room temperature water as the weight of the yeast e.g. 10g yeast in 100 ml water (0.35 oz yeast in 3.5 fluid ounces water)
Step 7 – Fermentation
- Allow yeast to ferment over the next two weeks (approx.)
- If you have a temperature-controlled system keep the fermenter temperature to the recommended fermentation temperature for each yeast strain (stated in the yeast ingredients section above)
- Monitor the fermentation activity over the first 7-10 days by the bubbling of the blow-off tube/airlock of your fermenter, as the bubbling slows down (roughly around day 10-12) take a gravity reading. When the gravity reaches around 1.024 raise the temperature of your fermenter by 1-2 degrees for 2 days for a diacetyl rest (if you don’t have temperature control don’t worry about this step, it's not the end of the world!)
- At this point strain out your last jar of tincture and add the LIQUID only to your fermenter
- On day 2 of the diacetyl rest (once gravity reaches roughly 1.018) & gravity is the same 3 days in a row move onto cold crashing! (If you can’t / don’t want to cold crash go straight to kegging/bottling your beer!)
Step 8 (optional) – Cold crashing
- begin cold crashing your fermenter (bring the temperature of your fermenter down to as close to 0°C (32°F) as possible, for 2 days to a week depending on how patient you are
- If you don’t have a temp-controlled fermenter, you can cold crash by putting your fermenter in a fridge or temp-controlled chest freezer
- After you have finished cold crashing it's time to keg/bottle your beer! If you are bottling your beer from the fermenter uncarbonated, remember to add about 5-7 grams (0.17 - 0.24 oz) of priming sugar to your bottles to carbonate your beer.
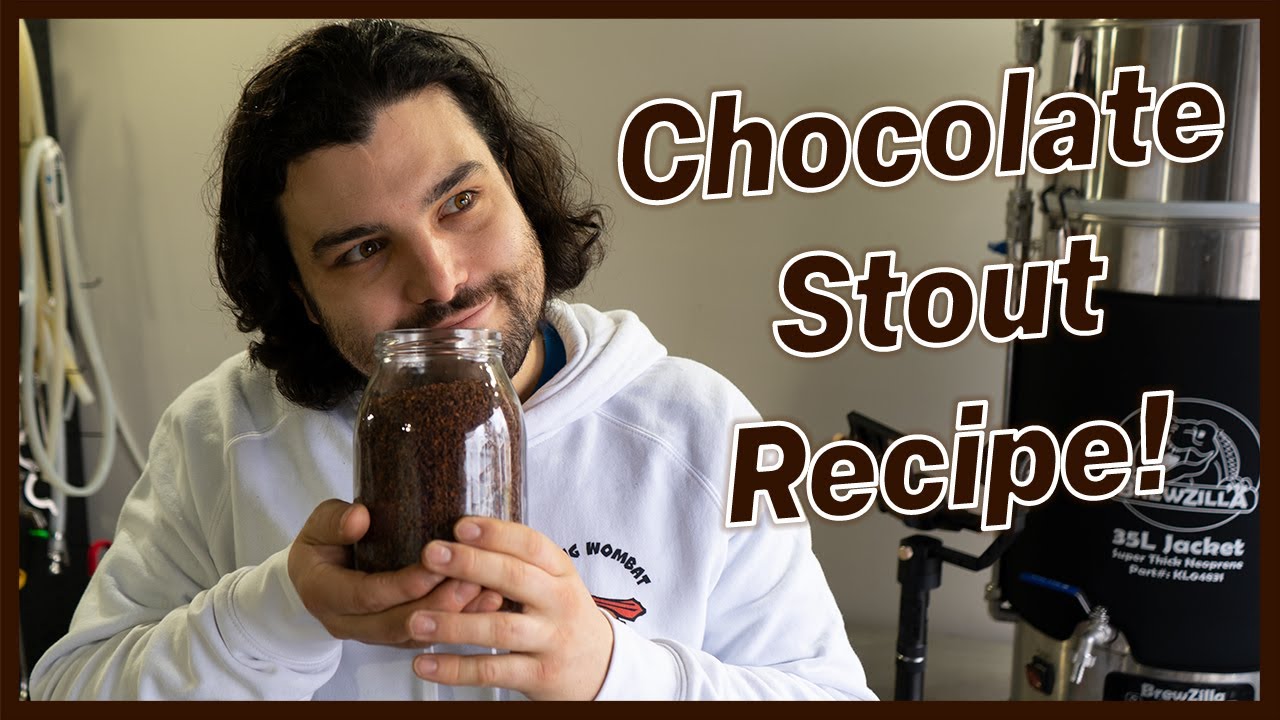
So... What is it?
The Chocolate stout is a rich beer that combines the robustness of stout with luscious chocolate. Its roots date back to the 18th century, gaining popularity in England. This decadent brew features a velvety texture, dark color, and a delightful aroma blending roasted malt notes with hints of cocoa and espresso. The flavor offers a harmonious mix of bittersweet chocolate, roasted malts, and subtle caramel undertones, creating a satisfying complexity for beer enthusiasts seeking a luxurious treat.
What's ours like?
Ours is packed full of chocolate like you wouldn't believe! on the nose its all dark choc and fresh baked dark bread. The palate its far less bitter and astringent than what you would usually get in a stout that uses heavily roasted malts and leans more into dark chocolate rather than espresso or cold drip coffee. Coming in at a moderate 5.7% its easy drinking for a dark beer, but if we couldve changed a couple thing with this brewday we would add more chocolate malt, Oats and increase the mash temp to 69°C (156°F) to give a little more body and mouthfeel!
Batch Size & Stats
- 38L (2 19L corny kegs) / 10 gal finished beer
- 49L (13.2 gal) wort
- For a smaller 19L (5 gal) batch size simply half the ingredients of this recipe
- Starting gravity – 1.066
- Final gravity 1.015
- ABV – 5.7% (before rum addition) – 7.2% (after rum addition)
- You can use this website to calculate final ABV after rum addition Vinocalc
What ingredients?
Water
With sparging
- 30L (7.9 gal) strike water for a 67°C (152°F) 60 min mash (you can use our calculator to measure ideal temp for strike)
- 30L (7.9 gal) sparge water at 78°C (172°F)
Without sparging
- 57L (15 gal) strike water for a 67°C (152°F) 60 min mash (you can use our calculator to measure ideal temp for strike)
Post brew edits / potential changes thoughts: perhaps mash at 69°C (156°F) to give more body
Malts:
- Light Munich – 8.625kg (19 lb)
- Big O (oat malt) – 1.575kg (3.47 lb)
- Golden Naked Oats – 840g (1.85 lb)
- Medium Crystal Malt – 480g (1.05 lb)
- Dark Chocolate – 480g (1.05 lb)
Post brew edits / potential changes thoughts: for more body and darker colour
- increase dark chocolate to 624g (1.38 lb)
- add wheat malt 840g (1.85 lb)
Hops & whirlfloc tablets
Northern Brewer
- 20g (0.7 oz) - 60 minutes left in the boil
- 50g (1.76 oz) 15 minutes left in the boil
Fuggles
- 50g (1.76 oz) 15 minutes left in the boil
Whirlfloc tablets
- 1.5g (0.052 oz) / 2 tablets – 15 minutes left in the boil
Adjuncts
Cocoa Nibs (lightly crushed with either mortar & pestle or food processor and toasted at 180°C (356°F) for 5 mins
- 500g (1.1 lb) – 5 minutes left in the boil
- 500g (1.1 lb) – soaked in 700ml of rum for at least a week – “dry hop” fermenter when fermentation is close to finished (e.g. 1.020) around day 7-10
Yeast options & fermentation temperatures
- US-05 – ferment at 20°C (68°F) 23g (0.81 oz) / (2 packets)
- AUS-05 – ferment at 20°C (68°F) 23g (0.81 oz) / (2 packets)
- S-04 – ferment at 18°C (64.4°F) 22g (0.81 oz) / (2 packets)
Step by step process
Step 1 – Milling
- Mill grains to medium crush (set mill rollers to a gap of approx. 1.00mm / 0.039 inches)
- Just keep in mind roller gap settings are not universal so as you brew more batches you will find the ideal crush size for your setup
- Alternatively if you don’t have a grain mill you can order your grains crushed from most homebrew stores, both online and in person
Step 2 – Mashing
- Mash for 60 minutes at 67°C (152°F)
- Set your strike water to a few degrees above the target mash temperature, you can use our calculator to determine what your strike temperature should be
- ensure you mix in the grains thoroughly with a mash paddle to prevent dough balls from forming (big spoons, spatulas or whisks will also work)
- its easier to mash the grains and prevent dough balls if you add a little grain at a time, mix, add more grain and repeat until all the grains are mixed
- if you don’t have a mash tun with heating then ensure after you have finished mixing the grains in to insulate your mash tun (thick neoprene or heavy blankets both work well)
Step 3 (optional) – Sparging
- if your setup has the capability to sparge then do so with 30L (7.9 gal) sparge water at 78°C (172°F)
- if you are not sparging and using a BIAB (brew in a bag) method then remove grains from mash tun and twist and squeeze the bag to get as much liquid out of the grains as possible
- as you start sparging (or straining your BIAB bag) begin raising the temperature of your wort to a boil
Step 4 – Boiling
- once your wort begins to boil start a timer for a 60-minute boil and add your bittering hops, 20g (0.7 oz) of Northern Brewer
- at 15 minutes left in the boil add 2.5 whirlfloc tablets & remaining hops, 50g (1.76 oz) each of Northern Brewer & Fuggles
Step 5 – Whirlpooling / cooling
- once wort has been boiling for 60 minutes in total turn off your heat source and begin chilling wort down to yeast pitching temperature
- once you’ve reached yeast pitching temperature take an original gravity reading of your wort
Step 6 – Yeast Pitching
- It is best to make a yeast starter before beginning your brew day (ideally 1 day before) to ensure your yeast are as active and healthy as possible before pitching, but not completely necessary – you could also just rehydrate yeast 30 minutes before pitching.
- Pitch yeast in wort a degree or two higher than the target fermentation temperature to help yeast take off more aggressively
- To make a yeast starter you can use either:
- DME (dry malt extract) at a ratio of approx. 100g per 1L water (3.5 oz per 33 fluid ounces) for gravity of approx. 1.040
- some unfermented wort kept cold and sanitary from a previous brew day
- 70g of table sugar per 1L water (2.5 oz per 33 fluid ounces) – however, it is best to use malt sugar (wort / DME) whenever possible to reduce the chance of shocking the yeast with a different food source from starter to wort pitching
- To rehydrate yeast
- Add yeast to approx. 10 times as much room temperature water as the weight of the yeast e.g. 10g yeast in 100 ml water (0.35 oz yeast in 3.5 fluid ounces water)
Step 7 – Fermentation
- Allow yeast to ferment over the next week to two weeks
- If you have a temperature-controlled system keep the fermenter temperature to the recommended fermentation temperature for each yeast strain (stated in the yeast ingredients section above)
- Monitor the fermentation activity over the first 7 days by the bubbling of the blow off tube / airlock of your fermenter, as the bubbling slows down (roughly around day 7) take a gravity reading. If its around 1.020 – 1.025 “dry hop” with rum soaked cocoa nibs
- When the gravity reaches around 1.018 raise the temperature of your fermenter by 1-2 degrees for 2 days for a diacetyl rest (if you don’t have temperature control don’t worry about this step, its not the end of the world!)
- Its important to note that fermentation times will vary based on your circumstances like, temperature, amount of yeast pitched, healthiness of yeast, gravity of wort, pH etc. so don’t stress be patient and know that these times are just a rough guide
- Two days after dry hopping take a gravity reading, fermentation should finish at about 1.015, if you haven’t reached this yet wait another day and take another reading, once the gravity is the same 2 days in a row move onto cold crashing! (If you can’t / don’t want to cold crash go straight to kegging/bottling your beer!)
Step 8 (optional) – Cold crashing
- begin cold crashing your fermenter (bring the temperature of your fermenter down to as close to 0°C (32°F) as possible, for 2 days to a week depending on how patient you are
- If you don’t have a temp-controlled fermenter, you can cold crash by putting your fermenter in a fridge or temp-controlled chest freezer
- After you have finished cold crashing it's time to keg/bottle your beer! If you are bottling your beer from the fermenter uncarbonated remember to add about 5-7 grams (0.17 - 0.24 oz) of priming sugar to your bottles to carbonate your beer.
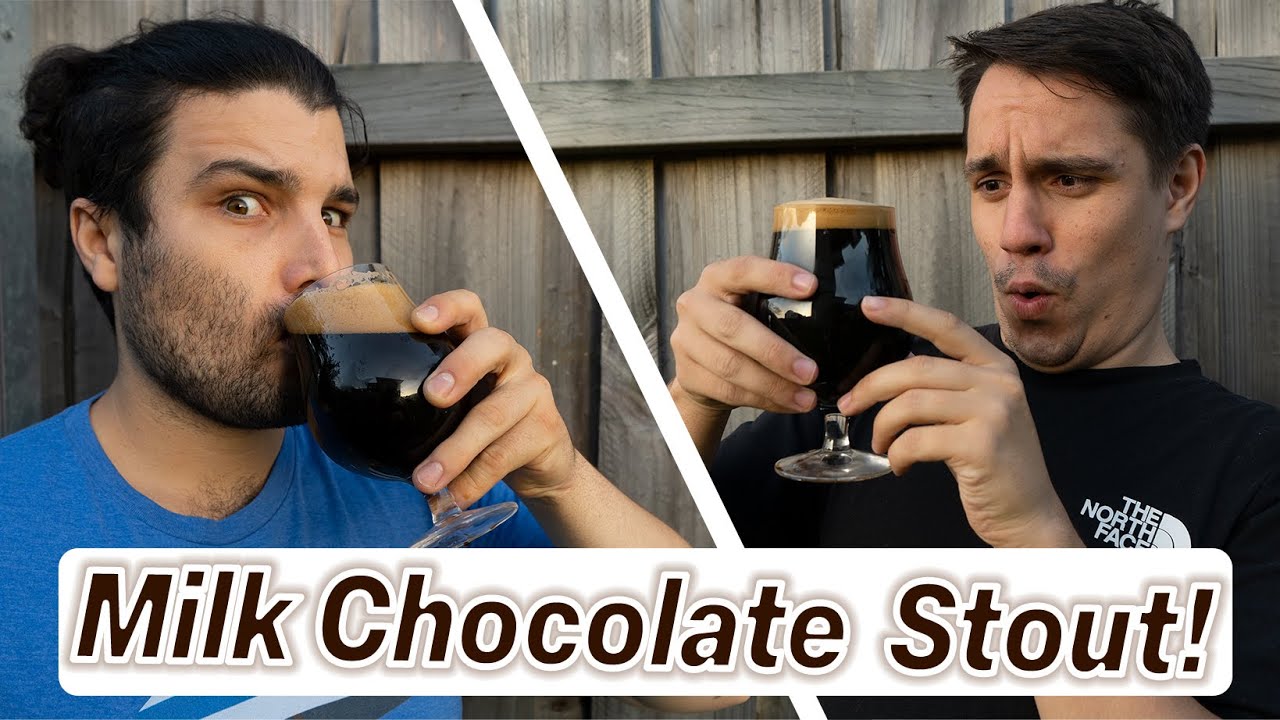
So... What is it?
The Milk Chocolate Stout is a dark, creamy and rich full-bodied black beer, overflowing with roasted espresso and dark chocolate-like flavours. The sweet silky body is owed not just to the wheat and oats often used in the grain bill, but also lactose which is added to provide unfermentable milk-based sugars. Typically these beers range from 4-6% ABV with a few leaning into the boozy above 7% side of the spectrum, and have a high final gravity, which is why they remain so thick, creamy, and luxurious!
What's our like?
Our Easter-themed version of the big black stout comes in at a hefty 7.2% so sip slowly, don't chug! The mouthfeel is creamy, silky, and luxuriously thick, the bitterness very subdued, and thanks to the huge additions of REAL milk chocolate, cacao nibs, lactose, and vanilla extract this stout exudes massive flavours and aromas of rich dark chocolate, freshly baked pastries, and just enough sweet malty character to keep it all in balance! So enjoy this bad boy in the depths of winter and feel snug as a bug in a rug as the rich boozy choccy milk stout warms you from the inside out!
Batch Size & Stats
- 42L / 11 gal finished beer
- 48L (12.6 gal) wort
- Starting gravity – 1.077
- Final gravity 1.024
- ABV – 7%
What ingredients?
Water
With sparging
- 90 minutes, 30L (7.9 gal) strike water 69°C (156.2°F) mash
- 34L (9 gal) sparge water at 78°C (172°F)
Without sparging
- 90 minutes, 65L (17.2 gal) strike water 69°C (156.2°F) mash
Malts
Total Grain Bill 12kg (15.4lb)
- Light Munich – 7.2kg (15.9 lb) - 60%
- Wheat malt – 1.3kg (2.8 lb) - 10.8%
- Rolled Oats - 1.2kg (2.6 lb) - 10%
- Eclipse Midnight Wheat - 1kg (2.2 lb) - 8.5%
- Medium Crystal Malt - 720g (1.58 lb) - 6%
- Dark Chocolate Malt - 580g (1.27 lb) - 5%
- Rice Hulls – 1kg (2.2 lb)
Adjuncts (A LOT!)
- 2.2kg (4.8 lb) of milk chocolate (added last 10 mins of boil)
- 250g (0.55 lb) Lactose (added last 15 mins of boil)
- 500g (1.1 lb) cacao nibs oven-toasted at 180°C (356°F) for 7 minutes and added to last 10 mins of boil
- 500g (1.1 lb) cacao nibs oven-toasted at 180°C (356°F) for 7 minutes and soaked in 700ml of vodka for a week then added to the fermenter at the end of fermentation
- 60ml (2 oz) Vanilla extract - added to the fermenter at the end of fermentation
Hops & whirlfloc tablets
Northern Brewer
15g (0.52 oz) - 60 minutes left in the boil
- 50g (1.76 oz) 15 minutes left in the boil
Fuggles
- 50g (1.76 oz) 15 minutes left in the boil
Whirlfloc
- 1.5g granulated or 2 tablets – 15 minutes left in the boil
Yeast options & fermentation temperatures
- US-05 – ferment at 20°C (68°F) 23g (0.81 oz) / (2 packets)
- AUS-05 – ferment at 20°C (68°F) 23g (0.81 oz) / (2 packets)
- S-04 – ferment at 18°C (64.4°F) 22g (0.81 oz) / (2 packets)
Step by step process
Step 1 – Milling
- Mill grains to medium crush (set mill rollers to a gap of approx. 1.00mm / 0.039 inches (credit card width)
- Just keep in mind roller gap settings are not universal so as you brew more batches you will find the ideal crush size for your setup
- Alternatively if you don’t have a grain mill you can order your grains crushed from most homebrew stores, both online and in person
Step 2 – Mashing
Mash for 90 minutes at 69°C (156.2°F)
- Set your strike water to a few degrees above the target mash temperature (you can use the calculator in our website for this)
- ensure you mix in the grains thoroughly with a mash paddle to prevent dough balls from forming (big spoons, spatulas or whisks will also work)
- its easier to mash the grains and prevent dough balls if you add a little grain at a time, mix, add more grain and repeat until all the grains are mixed
if you don’t have a mash tun with heating then ensure after you have finished mixing the grains in to insulate your mash tun (thick neoprene or heavy blankets both work well)
Step 3 (optional) – Sparging
- if your setup has the capability to sparge then do so with 35L (9.2 gal) sparge water at 78°C (172°F)
- if you are not sparging and using a BIAB (brew in a bag) method then remove grains from mash tun and twist and squeeze the bag to get as much liquid out of the grains as possible
- as you start sparging (or straining your BIAB bag) begin raising the temperature of your wort to a boil
Step 4 – Boiling
- once your wort begins to boil start a timer for a 60-minute boil and add your bittering hops, 15g (0.52 oz) of Northern Brewer
- at 15 minutes left in the boil add 2 whirlfloc tablets (OR granulated whirlfloc 1.5g (0.053 oz)), 250g (0.55 lb) Lactose and 50g (1.76 oz) each of Northern Brewer & Fuggles
- at 10 minutes left in the boil add 2.2kg (4.8 lb) of milk chocolate and 500g (1.1 lb) of oven-toasted cacao nibs
Step 5 – Whirlpooling / cooling
- once wort has been boiling for 60 minutes in total turn off your heat source and begin chilling wort down to yeast pitching temperature
- once you’ve reached yeast pitching temperature take an original gravity reading of your wort
Step 6 – Yeast Pitching
- It is best to make a yeast starter before beginning your brew day (ideally 1 day before) to ensure your yeast are as active and healthy as possible before pitching, but not completely necessary – you could also just rehydrate yeast 30 minutes before pitching.
- Wort Aeration (Optional) if you have a paint mixer give your wort a quick blitz before pitching yeast to help add more dissolved oxygen into the wort to help the yeast have a healthier kick start into fermentation
- Now add your tincture of Vanilla extract! (or you can wait till end of fermentation if you prefer)
- Pitch yeast in wort a degree or two higher than the target fermentation temperature to help yeast take off more aggressively
To make a yeast starter you can use either:
- DME (dry malt extract) at a ratio of approx. 100g per 1L water (3.5 oz per 33 fluid ounces) for gravity of approx. 1.040
- some unfermented wort kept cold and sanitary from a previous brew day
- 70g of table sugar per 1L water (2.5 oz per 33 fluid ounces) – however, it is best to use malt sugar (wort / DME) whenever possible to reduce the chance of shocking the yeast with a different food source from starter to wort pitching
To rehydrate yeast
- Add yeast to approx. 10 times as much room temperature water as the weight of the yeast e.g. 10g yeast in 100 ml water (0.35 oz yeast in 3.5 fluid ounces water)
Step 7 – Fermentation
- Allow yeast to ferment over the next two weeks (approx.)
- If you have a temperature-controlled system keep the fermenter temperature to the recommended fermentation temperature for each yeast strain (stated in the yeast ingredients section above)
- Monitor the fermentation activity over the first 7-10 days by the bubbling of the blow-off tube/airlock of your fermenter, as the bubbling slows down (roughly around day 10-12) take a gravity reading. When the gravity reaches around 1.026 raise the temperature of your fermenter by 1-2 degrees for 2 days for a diacetyl rest (if you don’t have temperature control don’t worry about this step, it's not the end of the world!)
- At the same time as starting diacetyl rest you can now add the 60ml (2 oz) of Vanilla extract and strain and add the cacao-infused vodka to the fermenter
- On day 2 of the diacetyl rest (once gravity reaches roughly 1.024) & gravity is the same 3 days in a row move onto cold crashing! (If you can’t / don’t want to cold crash go straight to kegging/bottling your beer!)
Step 8 (optional) – Cold crashing
- begin cold crashing your fermenter (bring the temperature of your fermenter down to as close to 0°C (32°F) as possible, for 2 days to a week depending on how patient you are
- If you don’t have a temp-controlled fermenter, you can cold crash by putting your fermenter in a fridge or temp-controlled chest freezer
- After you have finished cold crashing it's time to keg/bottle your beer! If you are bottling your beer from the fermenter uncarbonated, remember to add about 5-7 grams (0.17 - 0.24 oz) of priming sugar to your bottles to carbonate your beer.
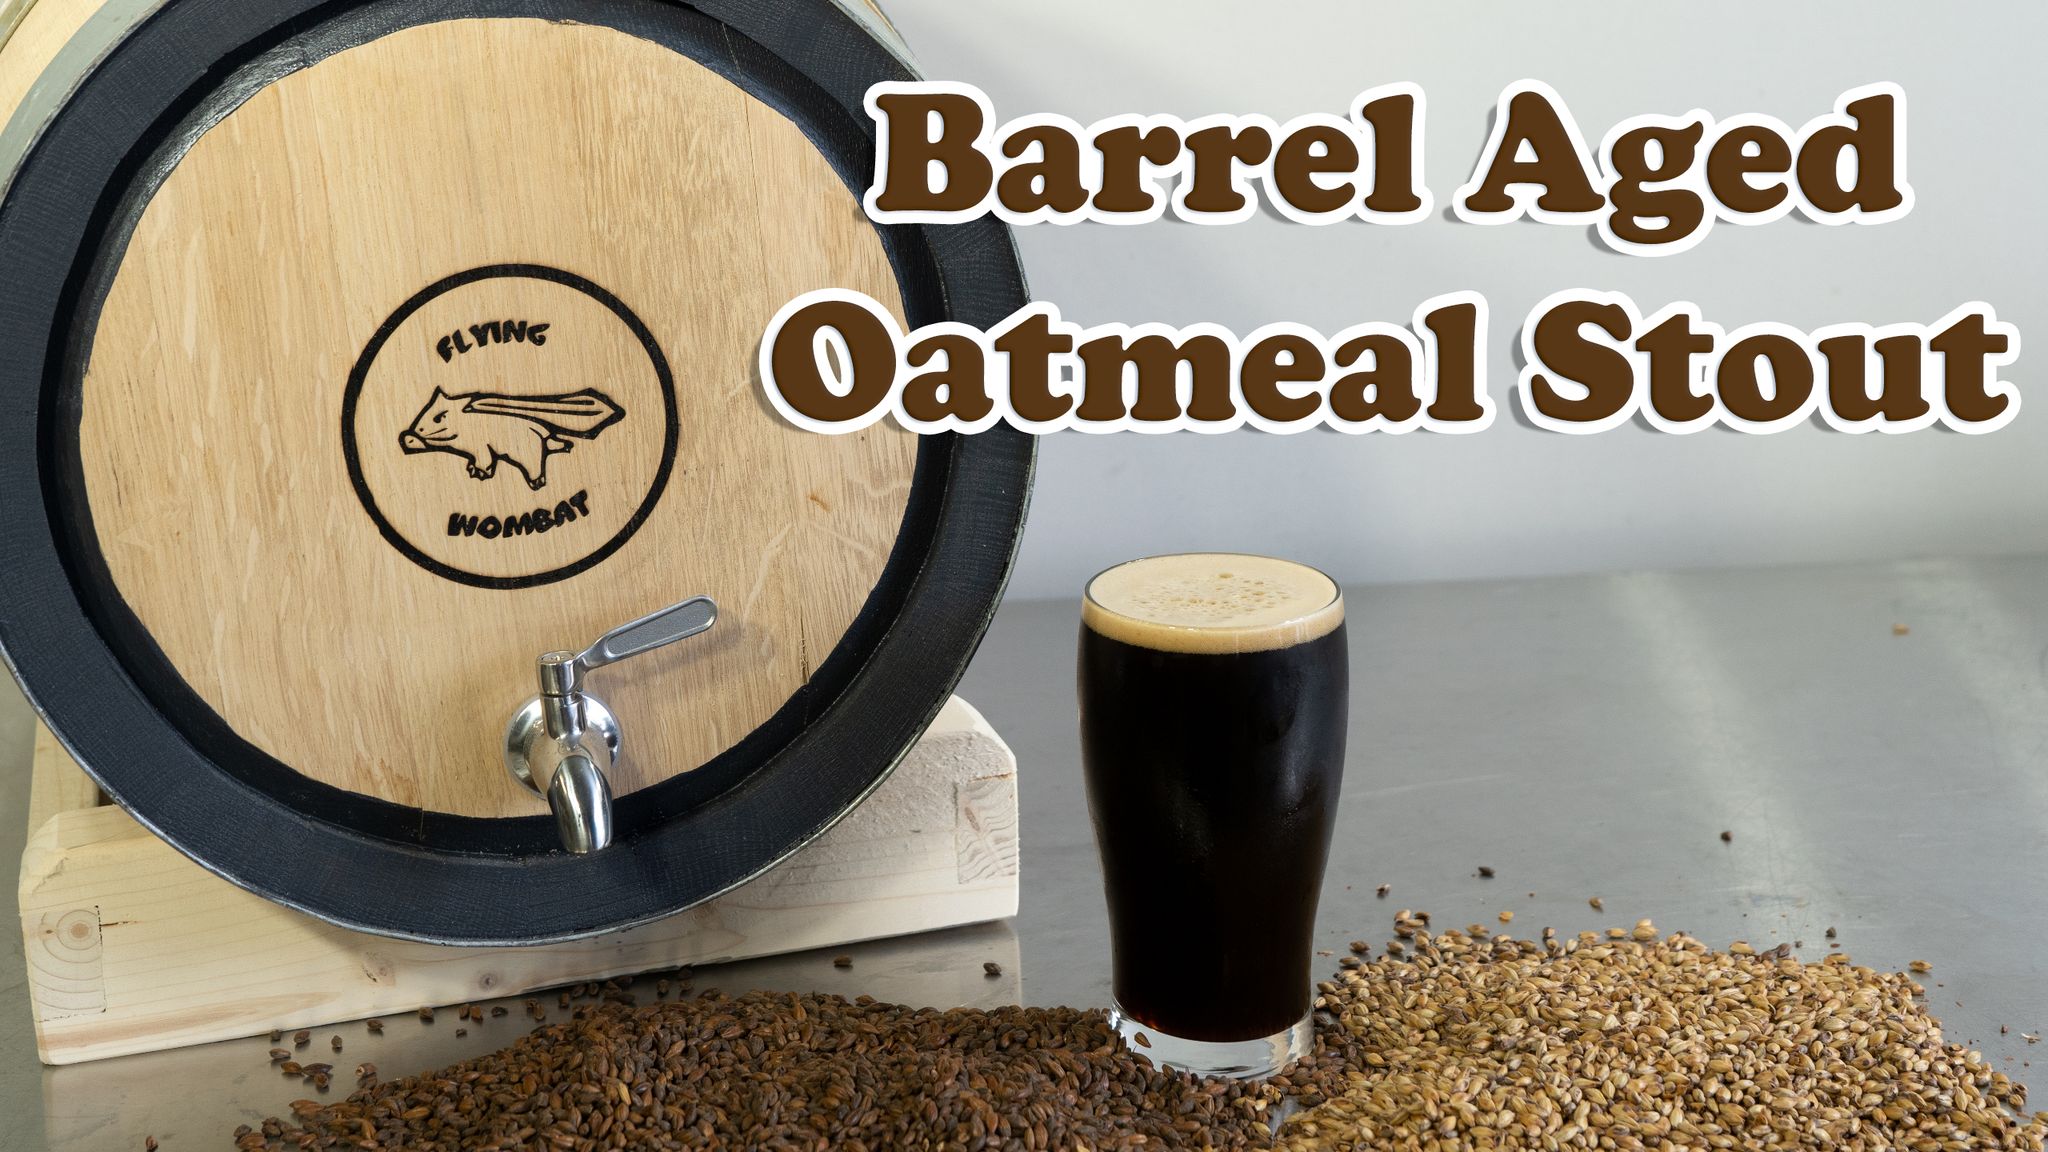
So... What is it?
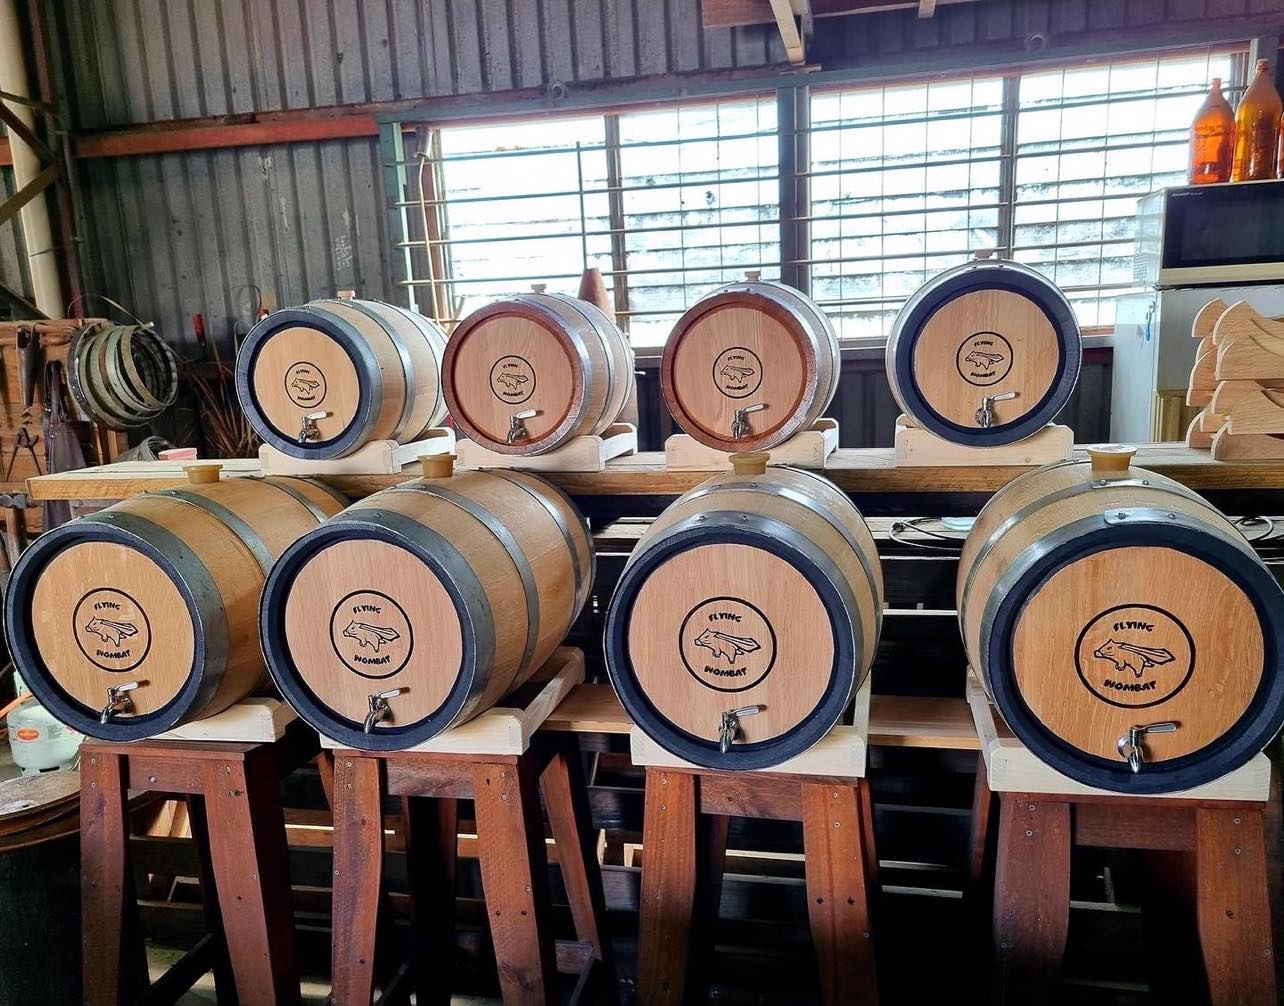
The Oatmeal Stout is a cousin of the classic Stout, the one major difference being a little obvious, oats! This gives the resulting beer more malty sweetness and a luxurious silky mouthfeel! Now add a barrel to the mix and Bam! you get a Barrel-aged oatmeal stout! Aging the beer for a period of time in a barrel allows the natural tannins and organic compounds in the oak to add additional layers of complexity to the Stout that you can't get in any other way, introducing layers of Vanilla, caramel, spiciness, and even Coconut!
What is ours like?
Here is our attempt at a winter classic! The mouthfeel is creamy, silky, and luxurious, the bitterness mild and in balance, as is the hops profile. The star of the show is the slightly sweet malty nutty character, with delicious flavours of freshly baked bread and espresso coffee-like flavours! Coming in at 6.3% its definitely not low abv but not the 10% target we had in mind! Finally, half this batch was thrown into a 20L Oak barrel that once held irish whiskey, contibuting further flavours of vanilla & oaky sweetness!
Batch Size & Stats
- 35L / 9.5 gal finished beer
- 51L (13.47 gal) wort
- Starting gravity – 1.066
- Final gravity 1.018
- ABV – 6.3%
What ingredients?
Water
With sparging
- 90 minutes, 30L (7.9 gal) Mash water 69°C (156.2°F) - use our calculator to determine strike water
- 42L (11 gal) sparge water at 78°C (172°F)
Without sparging
- 90 minutes, 65L (17.2 gal) strike water 69°C (156.2°F) mash - use our calculator to determine strike water
Malts
Total Grain Bill 14.2kg (31.3 lb) + 1kg (2.2 lb) rice hulls
- Light Munich – 5.74kg (12.65 lb) - (40.4%)
- Dark Munich - 1.96kg (4.32 lb) - (13.8%)
- Wheat malt – 1.94kg (4.27 lb) - (13.7%)
- Rolled Oats - 1.7kg (3.74 lb) - (12%)
- Dark Chocolate malt 980g (2.16 lb) + 200g (7 Oz) end of mash for colour - (8.3%)
- Medium Crystal Malt - 840g (1.85 lb) - (5.9%)
- Rice Hulls – 1kg (2.2 lb)
Adjuncts
Vanilla extract - 3 small vanilla beans, sliced down the middle & soaked in a small cup of bourbon
Hops & whirlfloc tablets
Northern Brewer
- 20g (0.7 oz) - 60 minutes left in the boil
- 50g (1.76 oz) 15 minutes left in the boil
Fuggles
- 50g (1.76 oz) 15 minutes left in the boil
Whirlfloc
- 1.5g (0.052 oz) / 2 tablets – 15 minutes left in the boil
Yeast options & fermentation temperatures
- US-05 – ferment at 20°C (68°F) 23g (0.81 oz) / (2 packets)
- AUS-05 – ferment at 20°C (68°F) 23g (0.81 oz) / (2 packets)
- S-04 – ferment at 18°C (64.4°F) 22g (0.81 oz) / (2 packets)
Step by step process
Step 1 – Milling
- Mill grains to medium crush (set mill rollers to a gap of approx. 1.00mm / 0.039 inches (credit card width)
- Just keep in mind roller gap settings are not universal so as you brew more batches you will find the ideal crush size for your setup
- Alternatively if you don’t have a grain mill you can order your grains crushed from most homebrew stores, both online and in person
Step 2 – Mashing
- Mash for 90 minutes at 69°C (156.2°F)
- Set your strike water to a few degrees above the target mash temperature
- ensure you mix in the grains thoroughly with a mash paddle to prevent dough balls from forming (big spoons, spatulas or whisks will also work)
- its easier to mash the grains and prevent dough balls if you add a little grain at a time, mix, add more grain, and repeat until all the grains are mixed
- if you don’t have a mash tun with heating then ensure after you have finished mixing the grains in to insulate your mash tun (thick neoprene or heavy blankets both work well)
Step 3 (optional) – Sparging
- if your setup has the capability to sparge then do so with 42L (11 gal) sparge water at 78°C (172°F)
- if you are not sparging and using a BIAB (brew in a bag) method then remove grains from mash tun and twist and squeeze the bag to get as much liquid out of the grains as possible
- as you start sparging (or straining your BIAB bag) begin raising the temperature of your wort to a boil
Step 4 – Boiling
- (Optional) - for this beer we wanted to bump up the starting gravity after our very efficient mash! so we boiled the wort for an extra hour BEFORE we added our 60min bittering hops when the “real” boil began!
- once your wort begins to boil start a timer for a 60-minute boil and add your bittering hops, 20g (0.7 oz) of Northern Brewer
- at 15 minutes left in the boil add 2 whirlfloc tablets (OR granulated whirlfloc 1.5g (0.053 oz)) and 50g (1.76 oz) each of Northern Brewer & Fuggles
Step 5 – Whirlpooling / cooling
- once wort has been boiling for 60 minutes in total turn off your heat source and begin chilling wort down to yeast pitching temperature
- once you’ve reached yeast pitching temperature take an original gravity reading of your wort
Step 6 – Yeast Pitching
- It is best to make a yeast starter before beginning your brew day (ideally 1 day before) to ensure your yeast are as active and healthy as possible before pitching, but not completely necessary – you could also just rehydrate yeast 30 minutes before pitching.
- Wort Aeration (Optional) if you have a paint mixer give your wort a quick blitz before pitching yeast to help add more dissolved oxygen into the wort to help the yeast have a healthier kick start into fermentation
- Now add your tincture of Vanilla extract! (or you can wait till end of fermentation if you prefer)
- Pitch yeast in wort a degree or two higher than the target fermentation temperature to help yeast take off more aggressively
- To make a yeast starter you can use either:
- DME (dry malt extract) at a ratio of approx. 100g per 1L water (3.5 oz per 33 fluid ounces) for gravity of approx. 1.040
- some unfermented wort kept cold and sanitary from a previous brew day
- 70g of table sugar per 1L water (2.5 oz per 33 fluid ounces) – however, it is best to use malt sugar (wort / DME) whenever possible to reduce the chance of shocking the yeast with a different food source from starter to wort pitching
- To rehydrate yeast
- Add yeast to approx. 10 times as much room temperature water as the weight of the yeast e.g. 10g yeast in 100 ml water (0.35 oz yeast in 3.5 fluid ounces water)
Step 7 – Fermentation
- Allow yeast to ferment over the next two weeks (approx.)
- If you have a temperature-controlled system keep the fermenter temperature to the recommended fermentation temperature for each yeast strain (stated in the yeast ingredients section above)
- Monitor the fermentation activity over the first 7-10 days by the bubbling of the blow-off tube/airlock of your fermenter, as the bubbling slows down (roughly around day 10-12) take a gravity reading. When the gravity reaches around 1.020 raise the temperature of your fermenter by 1-2 degrees for 2 days for a diacetyl rest (if you don’t have temperature control don’t worry about this step, it's not the end of the world!)
- On day 2 of the diacetyl rest (once gravity reaches roughly 1.018) & gravity is the same 3 days in a row move onto cold crashing! (If you can’t / don’t want to cold crash go straight to kegging/bottling your beer!)
Step 8 (optional) – Cold crashing
- begin cold crashing your fermenter (bring the temperature of your fermenter down to as close to 0°C (32°F) as possible, for 2 days to a week depending on how patient you are
- If you don’t have a temp-controlled fermenter, you can cold crash by putting your fermenter in a fridge or temp-controlled chest freezer
- After you have finished cold crashing it's time to keg/bottle your beer! If you are bottling your beer from the fermenter uncarbonated, remember to add about 5-7 grams (0.17 - 0.24 oz) of priming sugar to your bottles to carbonate your beer.