.png)
So... What is it?
The Berliner Weisse is a sour wheat beer from (you guessed it) Berlin, Germany! characterized by its slightly sour character and light abv (normally around 3-3.5%) it's a fantastic drop for summer in the beer garden, typically having a very light body, tartness on the tongue, and fresh fruity character. This also makes it a fantastic beer for fruit infusions!
What is ours like?
This doesn't feel like beer! This is an acai berry smoothie with booze! Its a cheat code to feeling healthy while you drink beer, because you arn't drinking, you're "detoxing"! The mouthfeel is slightly tart, the bitterness noticeable, and the hop character subdued, because the star of the show is the sweet medley of Blueberries, Strawberries, Blackberries, Raspberries and of course HEAPS of Acai Berries! Its sweet but less so than the Raspberry sour, leaning more towards an earthy resinous sweetness which actually makes it super refreshing and moreish! Coming in around 4.5-5% its an excellent thirst quencher for the "healthy" Brewer!
Batch size & ABV
- 25L / 5 gal finished beer
- 30L (6 gal) wort
- Starting gravity – 1.042
- Final gravity 1.008
- ABV – 4.5%
- Brewhouse Efficiency 88%
- IBU 9
- Pre Sour pH 5.8
- Post Sour pH 3.41
Ingredients
Water
With sparging
- 15.5L (4 gal) strike water, Mash at 65°C (149°F) for 60 mins, strike temp approx. 69°C (156°F) use our calculator for this
- 15.5L (4 gal) sparge water at 78°C (172°F)
Without sparging
- 28L (7.4 gal) strike water, Mash at 66°C (151°F) for 60 mins, strike temp approx. 65°C (149°F) use our calculator for this
Malts - 3.751kg (8.27 lb)
- Pilsner malt – 1.988kg (4.38 lb) - 53%
- Wheat malt – 1.763kg (3.9 lb) - 47%
- Rice Hulls – 170g (0.5 lb)
Fruit Addition
- 2 kg (4.4 lb) Acai Berry Puree (around 1.01 / 7 days)
- 1 kg (1.2 lb) Pureed Mixed Berries - Blueberries, Strawberries, Blackberries, Raspberries (around 1.01 / 7 days)
Hops & whirlfloc tablets
Hallertau Huell Melon
- 6g (0.21 oz) - 6 IBU's - 60 minutes left in the boil
Hallertau Huell Melon
- 15g (0.53 oz) - 2 IBU's - 5 minutes left in the boil
Whirlfloc Tablets
- 1 tablet – 15 minutes left in the toil OR granulated whirlfloc 0.7g (0.025 oz)
Yeast & Lactobacillus fermentation temperature
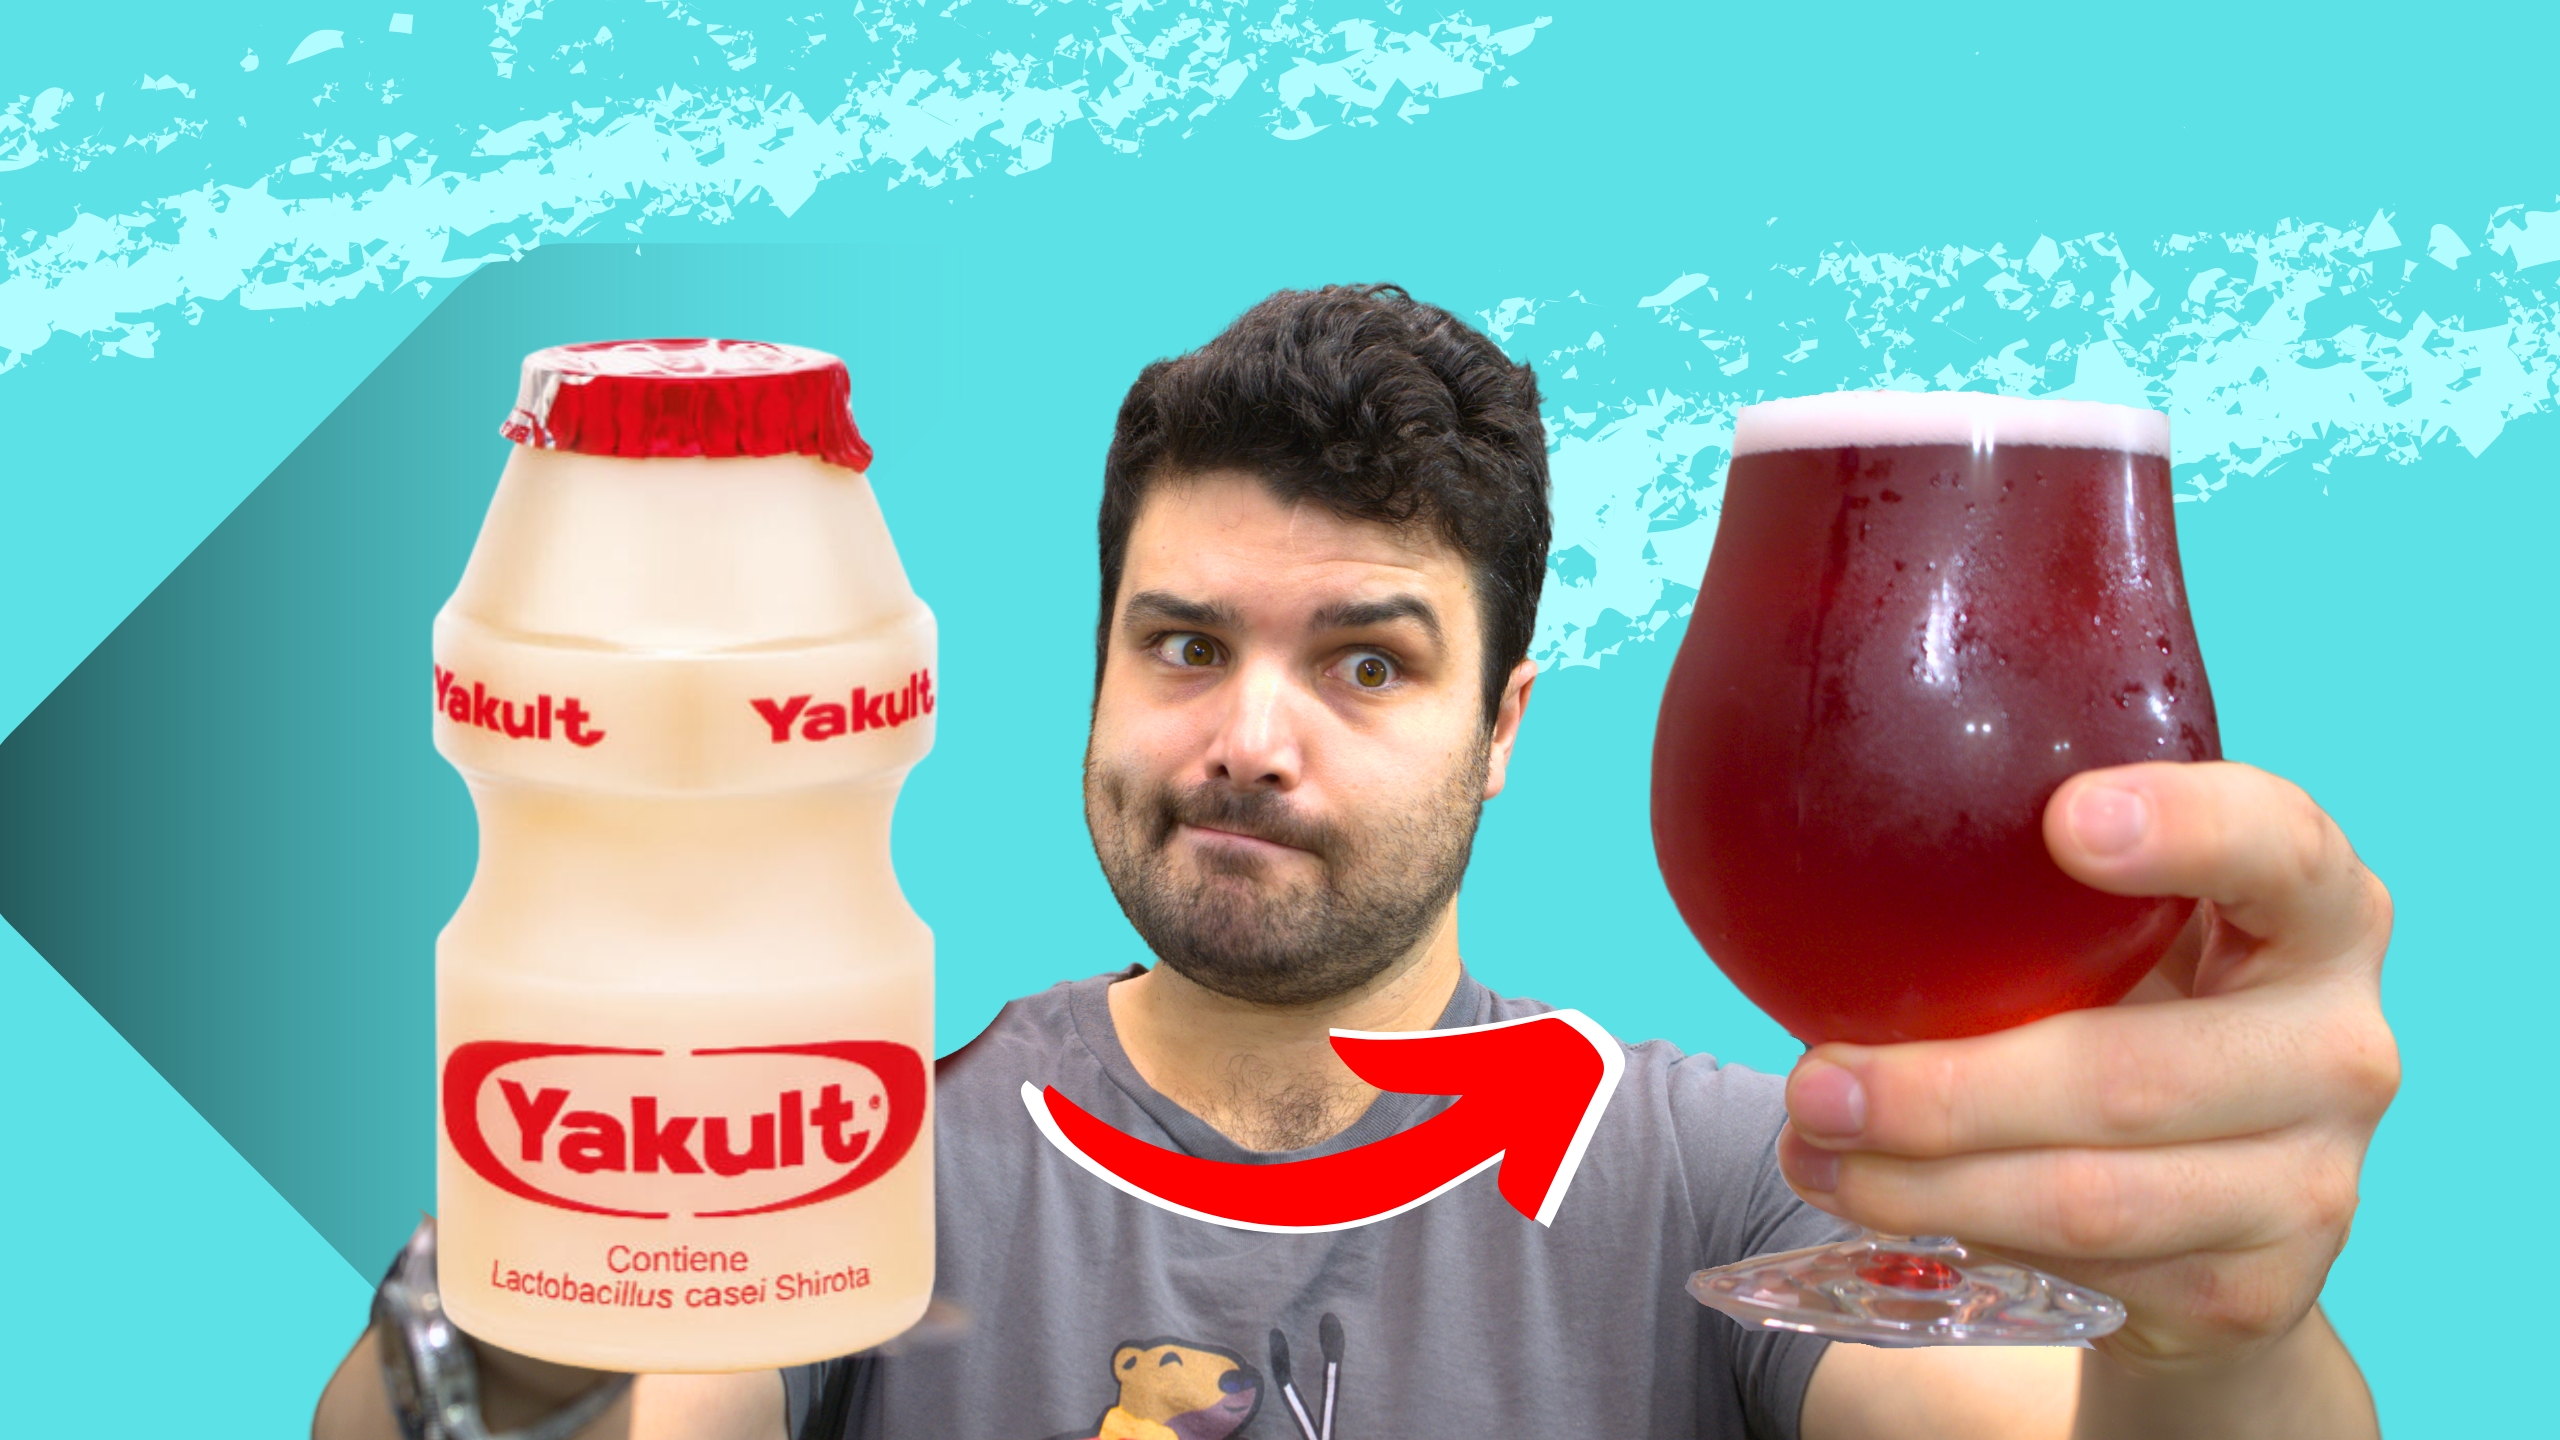
- For the kettle souring we pitched 6 bottles of Yakult and allowed it to sour for 24 hours to reach a pH of 3.41
- US-05 – ferment at 20°C (68°F) to 25°C (77°F) 22g (2 packets)
Water Profile
- Ca2+46
- Mg2+ 5
- Na+ 15
- Cl- 55
- SO42- 55
- HCO3- 57
Step by step process
Step 1 – Milling
- Mill grains to medium crush (set mill rollers to a gap of approx. 1.00mm / 0.039 inches)
- Just keep in mind roller gap settings are not universal so as you brew more batches you will find the ideal crush size for your setup
- Alternatively if you don’t have a grain mill you can order your grains crushed from most homebrew stores, both online and in person
Step 2 – Mashing
- Mash for 60 minutes at 65°C (149°F)
- Set your strike water to a few degrees above the target mash temperature, you can use our calculator to determine what your strike temperature should be
- ensure you mix in the grains thoroughly with a mash paddle to prevent dough balls from forming (big spoons, spatulas or whisks will also work)
- its easier to mash the grains and prevent dough balls if you add a little grain at a time, mix, add more grain and repeat until all the grains are mixed
- if you don’t have a mash tun with heating then ensure after you have finished mixing the grains in to insulate your mash tun (thick neoprene or heavy blankets both work well)
Step 3 (optional) – Sparging
- if your setup has the capability to sparge then do so with 15.5L (4 gal) sparge water at 78°C (172°F)
- if you are not sparging and using a BIAB (brew in a bag) method then remove grains from mash tun and twist and squeeze the bag to get as much liquid out of the grains as possible
- as you start sparging (or straining your BIAB bag) begin raising the temperature of your wort to a boil
Step 4 Souring!
- At this point allow your wort to cool down to 33°C (86-91.4°F) and then pitch 6 bottles (390mL / 13 oz) of Yakult into the wort, this will pitch around 390 billion cells!
- If you can keep the temp around 33°C (91.4°F) whilst it sours, and at this point you are at the mercy of the lacto!
- Check the pH using a pH meter every 6-12 hours until it reaches your desired level and then immediately move on to boiling!
- We allowed ours to reach 3.41, but aim for anywhere between 3.3 - 3.6
Step 5 – Boiling
- once your wort begins to boil start a timer for a 60-minute boil and add your bittering hops, 6g (0.21 oz) of Northern Brewer
- at 15 minutes left in the boil add 1 whirlfloc tablet (OR granulated whirlfloc 0.7g (0.025 oz)) and 15g (0.53 oz) of Hallertau Huell Melon
Step 6 – Whirlpooling / cooling
- once wort has been boiling for 60 minutes in total turn off your heat source and begin chilling wort down to yeast pitching temperature
- once you’ve reached yeast pitching temperature take an original gravity reading of your wort
Step 7 – Yeast Pitching
- It is best to make a yeast starter before beginning your brew day (ideally 1 day before) to ensure your yeast are as active and healthy as possible before pitching, but not completely necessary – you could also just rehydrate yeast 30 minutes before pitching.
- Wort Aeration (Optional) if you have a paint mixer give your wort a quick blitz before pitching yeast to help add more dissolved oxygen into the wort to help the yeast have a healthier kick start into fermentation
- Pitch yeast in wort a degree or two higher than the target fermentation temperature to help yeast take off more aggressively
- To make a yeast starter you can use either:
- DME (dry malt extract) at a ratio of approx. 100g per 1L water (3.5 oz per 33 fluid ounces) for gravity of approx. 1.040
- some unfermented wort kept cold and sanitary from a previous brew day
- 70g of table sugar per 1L water (2.5 oz per 33 fluid ounces) – however, it is best to use malt sugar (wort / DME) whenever possible to reduce the chance of shocking the yeast with a different food source from starter to wort pitching
- To rehydrate yeast
- Add yeast to approx. 10 times as much room temperature water as the weight of the yeast e.g. 10g yeast in 100 ml water (0.35 oz yeast in 3.5 fluid ounces water)
Step 8 – Fermentation & Fruit additions!
- Allow yeast to ferment over the next week (aprox)
- If you have a temperature-controlled system keep the fermenter temperature to the recommended fermentation temperature for each yeast strain (stated in the yeast ingredients section above)
- Monitor the fermentation activity over the first 7 days by the bubbling of the blow-off tube/airlock of your fermenter, as the bubbling slows down (roughly around day 5-7) take a gravity reading. When the gravity reaches around 1.012 raise the temperature of your fermenter by 1-2 degrees for 2 days for a diacetyl rest (if you don’t have temperature control don’t worry about this step, it's not the end of the world!)
Time to add FRUIT!
2 kg (4.4 lb) Acai Berry Puree (around 1.01 / 7 days)
1 kg (1.2 lb) Pureed Mixed Berries - Blueberries, Strawberries, Blackberries, Raspberries (around 1.01 / 7 days)
- It's important to note that fermentation times will vary based on your circumstances like temperature, amount of yeast pitched, the healthiness of yeast, the gravity of the wort, pH, etc. so don’t stress be patient and know that these times are just a rough guide
- On day 2 of the diacetyl rest (once gravity reaches roughly 1.008-1.01) & gravity is the same 3 days in a row move onto cold crashing! (If you can’t / don’t want to cold crash go straight to kegging/bottling your beer!)
Step 9 (optional) – Cold crashing
- begin cold crashing your fermenter (bring the temperature of your fermenter down to as close to 0°C (32°F) as possible, for 2 days to a week depending on how patient you are
- If you don’t have a temp-controlled fermenter, you can cold crash by putting your fermenter in a fridge or temp-controlled chest freezer
- After you have finished cold crashing it's time to keg/bottle your beer! If you are bottling your beer from the fermenter uncarbonated remember to add about 5-7grams (0.17 - 0.24 oz) of priming sugar to your bottles to carbonate your beer.


So... What is it?
A kettle sour is made by inoculated the wort after the mash step with a bacteria like Lactobacillus. It's then left to sour for a few hours to days until the pH reaches the desired level which is halted by immediately boiling the wort and carrying on with the brew-day and pitching yeast as you would with a normal beer!
The Berliner Weisse is a sour wheat beer from (you guessed it) Berlin, Germany! characterized by its slightly sour character and light abv (normally around 3-3.9%) it's a fantastic drop for summer in the beer garden, typically having a very light body, tartness on the tongue, and fresh fruity character. This also makes it a fantastic beer for fruit infusions!
What is ours like?
House Hightower, aka "the greens" are a prominent family in the world House of the Dragon & Game of Thrones, renowned for its wealth, influence, and strategic acumen. Known for their conniving and devious nature, the HighTower's navigate the intricate web of alliances and rivalries, manipulating events from the shadows to secure their power.
So what better way to symbolize house Hightower, than with a Sour! and of course because they are the "Greens" our beer must be too! So here is the Green apple skittles sour! Its tart, acidic and definitely sour, with a surprisingly sweet finish from the hefty addition of the green apple skittles! Its super smashable despite the 5.9% ABV which is definitely on the higher side for a sour, but every sip is packed full of the tart and acidic sweetness of a green apple, making it perfectly aligned with the personalities and personas of house Hightower!
Batch size & ABV
- 19L / 5 gal finished beer
- 23L (6 gal) wort
- Starting gravity – 1.042 (after skittles addition 1.053)
- Final gravity 1.01
- ABV – 5.9%
- Final pH - 3.64
- IBU - 11
- Skittles dissolved to 95%, so we added 693.5g of sugar to 23 litres of beer meaning we increased our gravity by 1.011!
- brewfather link
Ingredients
Water
With sparging
- 15.5L (4 gal) strike water, Mash at 65°C (149°F) for 60 mins, strike temp approx. 69°C (156°F) use our calculator for this
- 15.5L (4 gal) sparge water at 78°C (172°F)
Without sparging
- 30L (7.9 gal) strike water, Mash at 65°C (149°F) for 60 mins, strike temp approx. 66°C (151°F) use our calculator for this
Malts
- Pale ale malt – 1.75 kg (3.86 lb)
- Wheat malt – 1.55kg (3.4 lb)
- Rice Hulls – 150g (5.3 oz)
Fruit Addition
- 1 kg (2.2 lb) Green Apple Skittles (around 1.012 / 7 days)
Hops & whirlfloc tablets
Northern Brewer
- 6g (0.21 oz) - 60 minutes left in the boil
Hallertau Huell Melon
- 15g (0.53 oz) - 15 minutes left in the boil
Whirlfloc Tablets
- 1 tablet – 15 minutes left in the toil OR granulated whirlfloc 0.7g (0.025 oz)
Yeast & Lactobacillus fermentation temperature
- For the kettle souring we pitched 6 bottles of Yakult and allowed it to sour for 30 hours to reach a pH of 3.46
- US-05 – ferment at 20°C (68°F) to 25°C (77°F) 22g (2 packets)
Water Profile
- Ca2+46
- Mg2+ 5
- Na+ 15
- Cl- 55
- SO42- 55
- HCO3- 57
Step by step process
Step 1 – Milling
- Mill grains to medium crush (set mill rollers to a gap of approx. 1.00mm / 0.039 inches)
- Just keep in mind roller gap settings are not universal so as you brew more batches you will find the ideal crush size for your setup
- Alternatively if you don’t have a grain mill you can order your grains crushed from most homebrew stores, both online and in person
Step 2 – Mashing
- Mash for 60 minutes at 65°C (149°F)
- Set your strike water to a few degrees above the target mash temperature, you can use our calculator to determine what your strike temperature should be
- ensure you mix in the grains thoroughly with a mash paddle to prevent dough balls from forming (big spoons, spatulas or whisks will also work)
- its easier to mash the grains and prevent dough balls if you add a little grain at a time, mix, add more grain and repeat until all the grains are mixed
- if you don’t have a mash tun with heating then ensure after you have finished mixing the grains in to insulate your mash tun (thick neoprene or heavy blankets both work well)
Step 3 (optional) – Sparging
- if your setup has the capability to sparge then do so with 15.5L (4 gal) sparge water at 78°C (172°F)
- if you are not sparging and using a BIAB (brew in a bag) method then remove grains from mash tun and twist and squeeze the bag to get as much liquid out of the grains as possible
- as you start sparging (or straining your BIAB bag) begin raising the temperature of your wort to a boil
Step 4 Souring!
- At this point allow your wort to cool down to 30-33°C (86-91.4°F) and then pitch 6 bottles (390mL / 13 oz) of Yakult into the wort, this will pitch around 390 billion cells!
- If you can keep the temp around 30-33°C (86-91.4°F) whilst it sours, and at this point you are at the mercy of the lacto!
- Check the pH using a pH meter every 6-12 hours until it reaches your desired level and then immediately move on to boiling!
- We allowed ours to reach 3.46, but aim for anywhere between 3.3 - 3.6
Step 5 – Boiling
- once your wort begins to boil start a timer for a 60-minute boil and add your bittering hops, 6g (0.21 oz) of Northern Brewer
- at 15 minutes left in the boil add 1 whirlfloc tablet (OR granulated whirlfloc 0.7g (0.025 oz)) and 15g (0.53 oz) of Hallertau Huell Melon
Step 6 – Whirlpooling / cooling
- once wort has been boiling for 60 minutes in total turn off your heat source and begin chilling wort down to yeast pitching temperature
- once you’ve reached yeast pitching temperature take an original gravity reading of your wort
Step 7 – Yeast Pitching
- It is best to make a yeast starter before beginning your brew day (ideally 1 day before) to ensure your yeast are as active and healthy as possible before pitching, but not completely necessary – you could also just rehydrate yeast 30 minutes before pitching.
- Wort Aeration (Optional) if you have a paint mixer give your wort a quick blitz before pitching yeast to help add more dissolved oxygen into the wort to help the yeast have a healthier kick start into fermentation
- Pitch yeast in wort a degree or two higher than the target fermentation temperature to help yeast take off more aggressively
- To make a yeast starter you can use either:
- DME (dry malt extract) at a ratio of approx. 100g per 1L water (3.5 oz per 33 fluid ounces) for gravity of approx. 1.040
- some unfermented wort kept cold and sanitary from a previous brew day
- 70g of table sugar per 1L water (2.5 oz per 33 fluid ounces) – however, it is best to use malt sugar (wort / DME) whenever possible to reduce the chance of shocking the yeast with a different food source from starter to wort pitching
- To rehydrate yeast
- Add yeast to approx. 10 times as much room temperature water as the weight of the yeast e.g. 10g yeast in 100 ml water (0.35 oz yeast in 3.5 fluid ounces water)
Step 8 – Fermentation & Skittles additions!
- Allow yeast to ferment over the next two weeks (aprox)
- If you have a temperature-controlled system keep the fermenter temperature to the recommended fermentation temperature for each yeast strain (stated in the yeast ingredients section above)
- Monitor the fermentation activity over the first 7-10 days by the bubbling of the blow-off tube/airlock of your fermenter, as the bubbling slows down (roughly around day 10-12) take a gravity reading. When the gravity reaches around 1.015 raise the temperature of your fermenter by 1-2 degrees for 2 days for a diacetyl rest (if you don’t have temperature control don’t worry about this step, it's not the end of the world!)
- Time to add FAKE fruit! 1kg (2.2 lb) of green apple skittles to the fermenter
- It's important to note that fermentation times will vary based on your circumstances like temperature, amount of yeast pitched, the healthiness of yeast, the gravity of the wort, pH, etc. so don’t stress be patient and know that these times are just a rough guide
- On day 2 of the diacetyl rest (once gravity reaches roughly 1.008-1.01) & gravity is the same 3 days in a row move onto cold crashing! (If you can’t / don’t want to cold crash go straight to kegging/bottling your beer!)
Step 9 (optional) – Cold crashing
- begin cold crashing your fermenter (bring the temperature of your fermenter down to as close to 0°C (32°F) as possible, for 2 days to a week depending on how patient you are
- If you don’t have a temp-controlled fermenter, you can cold crash by putting your fermenter in a fridge or temp-controlled chest freezer
- After you have finished cold crashing it's time to keg/bottle your beer! If you are bottling your beer from the fermenter uncarbonated remember to add about 5-7grams (0.17 - 0.24 oz) of priming sugar to your bottles to carbonate your beer.
So... What is it?
A kettle sour is made by inoculated the wort after the mash step with a bacteria like Lactobacillus. It's then left to sour for a few hours to days until the pH reaches the desired level which is halted by immediately boiling the wort and carrying on with the brew-day and pitching yeast as you would with a normal beer!
The Berliner Weisse is a sour wheat beer from (you guessed it) Berlin, Germany! characterized by its slightly sour character and light abv (normally around 3-3.9%) it's a fantastic drop for summer in the beer garden, typically having a very light body, tartness on the tongue, and fresh fruity character. This also makes it a fantastic beer for fruit infusions!
What is ours like?
Ours is a "ch-ch-ch-cherry bomb!" and with this being our first kettle sour we stoked with how it turned out! The mouthfeel is a little tart, partly from the souring effect and partly from the cherries, bitterness & hop character very subdued to allow the star's of the show to shine! This Berliner clocked in at 4.7% which is slightly above what the style should be because we didn't account for the cherries sugar! But the cherries come through in spades, with the cherry tartness & subtle residual sweetness pairing beautifully with the sour acidity produced by lactobacillus, producing a gentle sour effect that feels more complex and complete than its philly sour cousin! Making this a super yum beer for sour lovers and the un-initiated alike!
Batch size & ABV
- 19L / 5 gal finished beer
- 20L (6 gal) wort
- Starting gravity – 1.04 (after cherry addition adjusted to 1.046)
- Final gravity 1.01
- ABV – 4.7%
- Final pH - 3.64
- IBU - 11
- we used this calculator to check our ABV after the cherry puree addition
- brewfather link
Ingredients
Water
With sparging
- 15.5L (4 gal) strike water, Mash at 65°C (149°F) for 60 mins, strike temp approx. 69°C (156°F) use our calculator for this
- 15.5L (4 gal) sparge water at 78°C (172°F)
Without sparging
- 30L (7.9 gal) strike water, Mash at 65°C (149°F) for 60 mins, strike temp approx. 66°C (151°F) use our calculator for this
Malts
- Pale ale malt – 1.75 kg (3.86 lb)
- Wheat malt – 1.55kg (3.4 lb)
- Rice Hulls – 150g (5.3 oz)
Fruit Addition
- 3.95 kg (8.7 lb) Puréed Cherries towards end of fermentation (around 1.012 / 7 days)
Hops & whirlfloc tablets
Northern Brewer
- 6g (0.21 oz) - 60 minutes left in the boil
Hallertau Huell Melon
- 15g (0.53 oz) - 15 minutes left in the boil
Whirlfloc Tablets
- 1 tablet – 15 minutes left in the toil OR granulated whirlfloc 0.7g (0.025 oz)
Yeast & Lactobacillus fermentation temperature
- For the kettle souring we pitched 5 bottles of Yakult and allowed it to sour for 28 hours to reach a pH of 3.61
- US-05 – ferment at 20°C (68°F) to 25°C (77°F) 22g (2 packets)
Water Profile
- Ca2+46
- Mg2+ 5
- Na+ 15
- Cl- 55
- SO42- 55
- HCO3- 57
Step by step process
Step 1 – Milling
- Mill grains to medium crush (set mill rollers to a gap of approx. 1.00mm / 0.039 inches)
- Just keep in mind roller gap settings are not universal so as you brew more batches you will find the ideal crush size for your setup
- Alternatively if you don’t have a grain mill you can order your grains crushed from most homebrew stores, both online and in person
Step 2 – Mashing
- Mash for 60 minutes at 65°C (149°F)
- Set your strike water to a few degrees above the target mash temperature, you can use our calculator to determine what your strike temperature should be
- ensure you mix in the grains thoroughly with a mash paddle to prevent dough balls from forming (big spoons, spatulas or whisks will also work)
- its easier to mash the grains and prevent dough balls if you add a little grain at a time, mix, add more grain and repeat until all the grains are mixed
- if you don’t have a mash tun with heating then ensure after you have finished mixing the grains in to insulate your mash tun (thick neoprene or heavy blankets both work well)
Step 3 (optional) – Sparging
- if your setup has the capability to sparge then do so with 15.5L (4 gal) sparge water at 78°C (172°F)
- if you are not sparging and using a BIAB (brew in a bag) method then remove grains from mash tun and twist and squeeze the bag to get as much liquid out of the grains as possible
- as you start sparging (or straining your BIAB bag) begin raising the temperature of your wort to a boil
Step 4 Souring!
- At this point allow your wort to cool down to 30-33°C (86-91.4°F) and then pitch 5 bottles (325mL / 11 oz) of Yakult into the wort, this will pitch around 325 billion cells!
- If you can keep the temp around 30-33°C (86-91.4°F) whilst it sours, and at this point you are at the mercy of the lacto!
- Check the pH using a pH meter every 6-12 hours until it reaches your desired level and then immediately move on to boiling!
- We allowed ours to reach 3.61, but aim for anywhere between 3.3 - 3.6
Step 5 – Boiling
- once your wort begins to boil start a timer for a 60-minute boil and add your bittering hops, 6g (0.21 oz) of Northern Brewer
- at 15 minutes left in the boil add 1 whirlfloc tablet (OR granulated whirlfloc 0.7g (0.025 oz)) and 15g (0.53 oz) of Hallertau Huell Melon
Step 6 – Whirlpooling / cooling
- once wort has been boiling for 60 minutes in total turn off your heat source and begin chilling wort down to yeast pitching temperature
- once you’ve reached yeast pitching temperature take an original gravity reading of your wort
Step 7 – Yeast Pitching
- It is best to make a yeast starter before beginning your brew day (ideally 1 day before) to ensure your yeast are as active and healthy as possible before pitching, but not completely necessary – you could also just rehydrate yeast 30 minutes before pitching.
- Wort Aeration (Optional) if you have a paint mixer give your wort a quick blitz before pitching yeast to help add more dissolved oxygen into the wort to help the yeast have a healthier kick start into fermentation
- Pitch yeast in wort a degree or two higher than the target fermentation temperature to help yeast take off more aggressively
- To make a yeast starter you can use either:
- DME (dry malt extract) at a ratio of approx. 100g per 1L water (3.5 oz per 33 fluid ounces) for gravity of approx. 1.040
- some unfermented wort kept cold and sanitary from a previous brew day
- 70g of table sugar per 1L water (2.5 oz per 33 fluid ounces) – however, it is best to use malt sugar (wort / DME) whenever possible to reduce the chance of shocking the yeast with a different food source from starter to wort pitching
- To rehydrate yeast
- Add yeast to approx. 10 times as much room temperature water as the weight of the yeast e.g. 10g yeast in 100 ml water (0.35 oz yeast in 3.5 fluid ounces water)
Step 8 – Fermentation & Fruit additions!
- Allow yeast to ferment over the next two weeks (aprox)
- If you have a temperature-controlled system keep the fermenter temperature to the recommended fermentation temperature for each yeast strain (stated in the yeast ingredients section above)
- Monitor the fermentation activity over the first 7-10 days by the bubbling of the blow-off tube/airlock of your fermenter, as the bubbling slows down (roughly around day 10-12) take a gravity reading. When the gravity reaches around 1.015 raise the temperature of your fermenter by 1-2 degrees for 2 days for a diacetyl rest (if you don’t have temperature control don’t worry about this step, it's not the end of the world!)
- Time to add fruit! purée 3.95 kg (8.7 lb) of Cherries and throw them all into the fermenter
- we used this calculator to check our ABV after the cherry puree addition
- It's important to note that fermentation times will vary based on your circumstances like temperature, amount of yeast pitched, the healthiness of yeast, the gravity of the wort, pH, etc. so don’t stress be patient and know that these times are just a rough guide
- On day 2 of the diacetyl rest (once gravity reaches roughly 1.008-1.01) & gravity is the same 3 days in a row move onto cold crashing! (If you can’t / don’t want to cold crash go straight to kegging/bottling your beer!)
Step 9 (optional) – Cold crashing
- begin cold crashing your fermenter (bring the temperature of your fermenter down to as close to 0°C (32°F) as possible, for 2 days to a week depending on how patient you are
- If you don’t have a temp-controlled fermenter, you can cold crash by putting your fermenter in a fridge or temp-controlled chest freezer
- After you have finished cold crashing it's time to keg/bottle your beer! If you are bottling your beer from the fermenter uncarbonated remember to add about 5-7grams (0.17 - 0.24 oz) of priming sugar to your bottles to carbonate your beer.

So... What is it?
The Berliner Weisse is a sour wheat beer from (you guessed it) Berlin, Germany! characterized by its slightly sour character and light abv (normally around 3-3.5%) it's a fantastic drop for summer in the beer garden, typically having a very light body, tartness on the tongue, and fresh fruity character. This also makes it a fantastic beer for fruit infusions!
What is ours like?
The mouthfeel is slightly tart, bitterness & hop character very subdued to allow the star's of the show to shine! Its all about the sour acidity and cherry bomb! This Berliner clocked in at a very easy 5% which is slightly above what the style should be because we didnt account for the cherries sugar! But the cherries come through in spades, with the cherry tartness pairing beautifully with the sour acidity produced by the Philly yeast. Its a sour, but only lightly sour, making this a super yum beer for sour lovers and the un-initiated alike!
Batch size & ABV
- 19L / 5 gal finished beer
- 20L (6 gal) wort
- Starting gravity – 1.04 (after cherry addition adjusted to 1.046)
- Final gravity 1.008
- ABV – 5%
- Final pH - 3.91
- IBU - 11
- we used this calculator to check our ABV after the cherry puree addition
- brewfather link
Ingredients
Water
With sparging
- 15.5L (4 gal) strike water, Mash at 65°C (149°F) for 60 mins, strike temp approx. 69°C (156°F) use our calculator for this
- 15.5L (4 gal) sparge water at 78°C (172°F)
Without sparging
- 30L (7.9 gal) strike water, Mash at 65°C (149°F) for 60 mins, strike temp approx. 66°C (151°F) use our calculator for this
Malts
- Pale ale malt – 1.75 kg (3.86 lb)
- Wheat malt – 1.55kg (3.4 lb)
- Rice Hulls – 150g (5.3 oz)
Fruit Addition
- 3.95 kg (8.7 lb) Puréed Cherries towards end of fermentation (around 1.012 / 7 days)
Hops & whirlfloc tablets
Northern Brewer
- 6g (0.21 oz) - 60 minutes left in the boil
Hallertau Huell Melon
- 15g (0.53 oz) - 15 minutes left in the boil
Whirlfloc Tablets
- 1 tablet – 15 minutes left in the toil OR granulated whirlfloc 0.7g (0.025 oz)
Yeast & fermentation temperature
- Wildbrew™ Philly Sour [Lallemand] – ferment at 20°C (68°F) to 25°C (77°F) 22g (2 packets)
Water Profile
- Ca2+46
- Mg2+ 5
- Na+ 15
- Cl- 55
- SO42- 55
- HCO3- 57
Step by step process
Step 1 – Milling
- Mill grains to medium crush (set mill rollers to a gap of approx. 1.00mm / 0.039 inches)
- Just keep in mind roller gap settings are not universal so as you brew more batches you will find the ideal crush size for your setup
- Alternatively if you don’t have a grain mill you can order your grains crushed from most homebrew stores, both online and in person
Step 2 – Mashing
- Mash for 60 minutes at 65°C (149°F)
- Set your strike water to a few degrees above the target mash temperature, you can use our calculator to determine what your strike temperature should be
- ensure you mix in the grains thoroughly with a mash paddle to prevent dough balls from forming (big spoons, spatulas or whisks will also work)
- its easier to mash the grains and prevent dough balls if you add a little grain at a time, mix, add more grain and repeat until all the grains are mixed
- if you don’t have a mash tun with heating then ensure after you have finished mixing the grains in to insulate your mash tun (thick neoprene or heavy blankets both work well)
Step 3 (optional) – Sparging
- if your setup has the capability to sparge then do so with 15.5L (4 gal) sparge water at 78°C (172°F)
- if you are not sparging and using a BIAB (brew in a bag) method then remove grains from mash tun and twist and squeeze the bag to get as much liquid out of the grains as possible
- as you start sparging (or straining your BIAB bag) begin raising the temperature of your wort to a boil
Step 4 – Boiling
- once your wort begins to boil start a timer for a 60-minute boil and add your bittering hops, 6g (0.21 oz) of Northern Brewer
- at 15 minutes left in the boil add 1 whirlfloc tablet (OR granulated whirlfloc 0.7g (0.025 oz)) and 15g (0.53 oz) of Hallertau Huell Melon
Step 5 – Whirlpooling / cooling
- once wort has been boiling for 60 minutes in total turn off your heat source and begin chilling wort down to yeast pitching temperature
- once you’ve reached yeast pitching temperature take an original gravity reading of your wort
Step 6 – Yeast Pitching
- It is best to make a yeast starter before beginning your brew day (ideally 1 day before) to ensure your yeast are as active and healthy as possible before pitching, but not completely necessary – you could also just rehydrate yeast 30 minutes before pitching.
- Wort Aeration (Optional) if you have a paint mixer give your wort a quick blitz before pitching yeast to help add more dissolved oxygen into the wort to help the yeast have a healthier kick start into fermentation
- Pitch yeast in wort a degree or two higher than the target fermentation temperature to help yeast take off more aggressively
- To make a yeast starter you can use either:
- DME (dry malt extract) at a ratio of approx. 100g per 1L water (3.5 oz per 33 fluid ounces) for gravity of approx. 1.040
- some unfermented wort kept cold and sanitary from a previous brew day
- 70g of table sugar per 1L water (2.5 oz per 33 fluid ounces) – however, it is best to use malt sugar (wort / DME) whenever possible to reduce the chance of shocking the yeast with a different food source from starter to wort pitching
- To rehydrate yeast
- Add yeast to approx. 10 times as much room temperature water as the weight of the yeast e.g. 10g yeast in 100 ml water (0.35 oz yeast in 3.5 fluid ounces water)
Step 7 – Fermentation & Fruit additions!
- Allow yeast to ferment over the next two weeks (aprox)
- If you have a temperature-controlled system keep the fermenter temperature to the recommended fermentation temperature for each yeast strain (stated in the yeast ingredients section above)
- Monitor the fermentation activity over the first 7-10 days by the bubbling of the blow-off tube/airlock of your fermenter, as the bubbling slows down (roughly around day 10-12) take a gravity reading. When the gravity reaches around 1.015 raise the temperature of your fermenter by 1-2 degrees for 2 days for a diacetyl rest (if you don’t have temperature control don’t worry about this step, it's not the end of the world!)
- Time to add fruit! purée 3.95 kg (8.7 lb) of Cherries and throw them all into the fermenter
- we used this calculator to check our ABV after the cherry puree addition
- It's important to note that fermentation times will vary based on your circumstances like temperature, amount of yeast pitched, the healthiness of yeast, the gravity of the wort, pH, etc. so don’t stress be patient and know that these times are just a rough guide
- On day 2 of the diacetyl rest (once gravity reaches roughly 1.008-1.01) & gravity is the same 3 days in a row move onto cold crashing! (If you can’t / don’t want to cold crash go straight to kegging/bottling your beer!)
Step 8 (optional) – Cold crashing
- begin cold crashing your fermenter (bring the temperature of your fermenter down to as close to 0°C (32°F) as possible, for 2 days to a week depending on how patient you are
- If you don’t have a temp-controlled fermenter, you can cold crash by putting your fermenter in a fridge or temp-controlled chest freezer
- After you have finished cold crashing it's time to keg/bottle your beer! If you are bottling your beer from the fermenter uncarbonated remember to add about 5-7grams (0.17 - 0.24 oz) of priming sugar to your bottles to carbonate your beer.

So... What is it?
The Berliner Weisse is a sour wheat beer from (you guessed it) Berlin, Germany! characterized by its slightly sour character and light abv (normally around 3-3.5%) it's a fantastic drop for summer in the beer garden, typically having a very light body, tartness on the tongue, and fresh fruity character. This also makes it a fantastic beer for fruit infusions!
What is ours like?
Well for starters... its Imperial baby! So unlike the traditional 3.5% ours comes in at a whopping 8.4% ABV and is absolutely packed full of the tart sweetness of freshly pureed raspberries!
The mouthfeel is slightly tart & dry, the bitterness leaning on the medium side of things (Perhaps a touch high for what we were going for, I'd reccomend reducing the bittering addition) and the hop character is quite subdued to allow the sour notes and raspberry flavour to shine! The colour is a vibrant fruity red thanks to the huge dump of Raspberry puree added during the end of fermentation which also carried through a load of fresh sweetness to round out the palate!
Batch size & ABV
- 35L / 9.2 gal finished beer
- 38L (10 gal) wort
- Starting gravity – 1.074
- Final gravity 1.01
- ABV – 8.4%
Ingredients
Water
With sparging
- 30L (7.9 gal) strike water, Mash at 66°C (151°F) for 60 mins, strike temp approx. 69°C (156°F) use our calculator for this
- 25L (7.9 gal) sparge water at 78°C (172°F)
Without sparging
- 52L (13.7 gal) strike water, Mash at 66°C (151°F) for 60 mins, strike temp approx. 66°C (151°F) use our calculator for this
Malts
- Pale ale malt – 6.6kg (14.5 lb)
- Wheat malt – 5.4kg (11.9 lb)
- Rice Hulls – 1kg (2.2 lb)
- Raspberry Pure - 6.5kg (14.3 lb) - (1kg (2.2 lb) per 7.3l (1.93 gal) wort)
Hops & whirlfloc tablets
- Northern Brewer - 30g (1 oz) - 60 minutes left in the boil
- Hallertau Huell Melon - 40g (1.4 oz) - 15 minutes left in the boil
- Whirlfloc Tablets - 1 tablet – 15 minutes left in the toil OR granulated whirlfloc 1.4g (0.049 oz)
Yeast options & fermentation temperatures
- Wildbrew™ Philly Sour [Lallemand] – ferment at 20°C (68°F) to 25°C (77°F) 22g (2 packets) (0.77 oz)

Step by step process
Step 1 – Milling
- Mill grains to medium crush (set mill rollers to a gap of approx. 1.00mm / 0.039 inches)
- Just keep in mind roller gap settings are not universal so as you brew more batches you will find the ideal crush size for your setup
- Alternatively if you don’t have a grain mill you can order your grains crushed from most homebrew stores, both online and in person
Step 2 – Mashing
- Mash for 60 minutes at 66°C (151°F)
- Set your strike water to a few degrees above the target mash temperature, you can use our calculator to determine what your strike temperature should be
- ensure you mix in the grains thoroughly with a mash paddle to prevent dough balls from forming (big spoons, spatulas or whisks will also work)
- its easier to mash the grains and prevent dough balls if you add a little grain at a time, mix, add more grain and repeat until all the grains are mixed
- if you don’t have a mash tun with heating then ensure after you have finished mixing the grains in to insulate your mash tun (thick neoprene or heavy blankets both work well)
Step 3 (optional) – Sparging
- if your setup has the capability to sparge then do so with 25L (7.9 gal) sparge water at 78°C (172°F)
- if you are not sparging and using a BIAB (brew in a bag) method then remove grains from mash tun and twist and squeeze the bag to get as much liquid out of the grains as possible
- as you start sparging (or straining your BIAB bag) begin raising the temperature of your wort to a boil
Step 4 – Boiling
- once your wort begins to boil start a timer for a 60-minute boil and add your bittering hops, 30g (1 oz) of Northern Brewer
- at 15 minutes left in the boil add 1 whirlfloc tablet (OR granulated whirlfloc 1.4g (0.049 oz)) and 40g (1.4 oz) of Hallertau Huell Melon
Step 5 – Whirlpooling / cooling
- once wort has been boiling for 60 minutes in total turn off your heat source and begin chilling wort down to yeast pitching temperature
- once you’ve reached yeast pitching temperature take an original gravity reading of your wort
Step 6 – Yeast Pitching
- It is best to make a yeast starter before beginning your brew day (ideally 1 day before) to ensure your yeast are as active and healthy as possible before pitching, but not completely necessary – you could also just rehydrate yeast 30 minutes before pitching.
- Wort Aeration (Optional) if you have a paint mixer give your wort a quick blitz before pitching yeast to help add more dissolved oxygen into the wort to help the yeast have a healthier kick start into fermentation
- Pitch yeast in wort a degree or two higher than the target fermentation temperature to help yeast take off more aggressively
- To make a yeast starter you can use either:
- DME (dry malt extract) at a ratio of approx. 100g per 1L water (3.5 oz per 33 fluid ounces) for gravity of approx. 1.040
- some unfermented wort kept cold and sanitary from a previous brew day
- 70g of table sugar per 1L water (2.5 oz per 33 fluid ounces) – however, it is best to use malt sugar (wort / DME) whenever possible to reduce the chance of shocking the yeast with a different food source from starter to wort pitching
- To rehydrate yeast
- Add yeast to approx. 10 times as much room temperature water as the weight of the yeast e.g. 10g yeast in 100 ml water (0.35 oz yeast in 3.5 fluid ounces water)
Step 7 – Fermentation & Fruit additions!
- Allow yeast to ferment over the next two weeks (aprox)
- If you have a temperature-controlled system keep the fermenter temperature to the recommended fermentation temperature for each yeast strain (stated in the yeast ingredients section above)
- Monitor the fermentation activity over the first 7-10 days by the bubbling of the blow-off tube/airlock of your fermenter, as the bubbling slows down (roughly around day 10-12) take a gravity reading. When the gravity reaches around 1.012 raise the temperature of your fermenter by 1-2 degrees for 2 days for a diacetyl rest (if you don’t have temperature control don’t worry about this step, it's not the end of the world!)
- Time to add fruit! purée 6.5kg (14.3 lb) of Raspberries and throw them all into the fermenter (we used frozen raspberries but if you have fresh raspberries even better!)
- It's important to note that fermentation times will vary based on your circumstances like temperature, amount of yeast pitched, the healthiness of yeast, the gravity of the wort, pH, etc. so don’t stress be patient and know that these times are just a rough guide
- On day 2 of the diacetyl rest (once gravity reaches roughly 1.01) & gravity is the same 3 days in a row move onto cold crashing! (If you can’t / don’t want to cold crash go straight to kegging/bottling your beer!)
Step 8 (optional) – Cold crashing
- begin cold crashing your fermenter (bring the temperature of your fermenter down to as close to 0°C (32°F) as possible, for 2 days to a week depending on how patient you are
- If you don’t have a temp-controlled fermenter, you can cold crash by putting your fermenter in a fridge or temp-controlled chest freezer
- After you have finished cold crashing it's time to keg/bottle your beer! If you are bottling your beer from the fermenter uncarbonated remember to add about 5-7grams (0.17 - 0.24 oz) of priming sugar to your bottles to carbonate your beer.
So... What is it?
The Berliner Weisse is a sour wheat beer from (you guessed it) Berlin, Germany! characterized by its slightly sour character and light abv (normally around 3-3.5%) it's a fantastic drop for summer in the beer garden, typically having a very light body, tartness on the tongue, and fresh fruity character. This also makes it a fantastic beer for fruit infusions!
What is ours like?
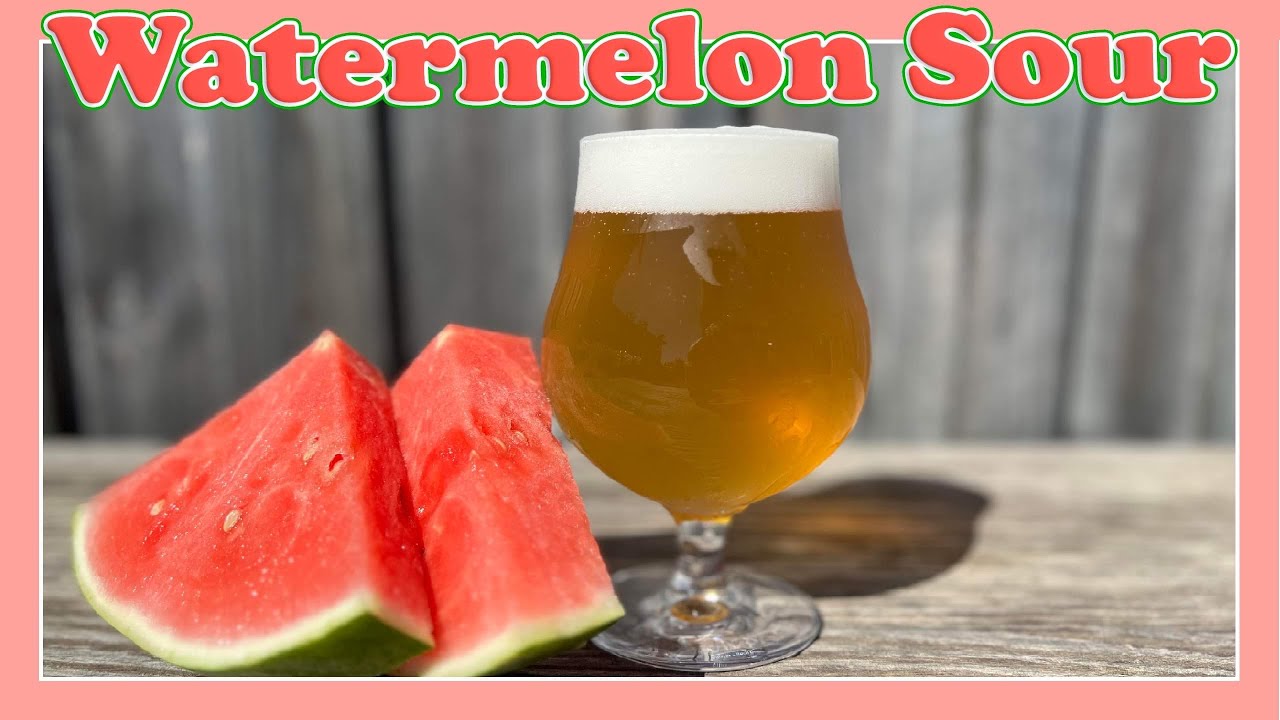
For our second crack at a sour we decided to get our watermelon sugar high on!
The mouthfeel is slightly tart, the bitterness soft & gentle, and hop character slightly fruity but all in moderation to allow the sour character and watermelon flavour to shine! Our Berliner clocked in at a moderate ABV of 3.8% and surprisingly didn't adopt the red hue of pineapple flesh but stayed a straw-like golden colour. Finally the water melon! Coming through with a suppressed presence, it doesn't hold the same weight of flavour as the raspberry sour, but instead tastes more like a traditional Berliner with a watermelon flavour closer to the rind of the fruit rather than the meaty flesh. However, in my opinion the lack of fruit forward sweetness makes it a much more sessional beer than its raspberry cousin, drink up and enjoy!
Batch size & ABV
- 25L / 5 gal finished beer
- 30L (6 gal) wort
- Starting gravity – 1.037
- Final gravity 1.008
- ABV – 3.8%
Ingredients
Water
With sparging
- 15L (3.9 gal) strike water, Mash at 66°C (151°F) for 60 mins, strike temp approx. 69°C (156°F) use our calculator for this
- 20L (5.2 gal) sparge water at 78°C (172°F)
Without sparging
- 30L (7.9 gal) strike water, Mash at 66°C (151°F) for 60 mins, strike temp approx. 66°C (151°F) use our calculator for this
Malts
- Pale ale malt – 2.25kg (5 lb)
- Wheat malt – 2.5kg (4.4 lb)
- Rice Hulls – 250g (0.5 lb)
Fruit Addition
- 3.65 kg (8 lb) Fresh Watermelonpurée towards end of fermentation (around 1.009 / 7 days)
Hops & whirlfloc tablets
Northern Brewer
- 8g (0.28 oz) - 60 minutes left in the boil
Hallertau Huell Melon
- 15g (0.53 oz) - 15 minutes left in the boil
Whirlfloc Tablets
- 1 tablet – 15 minutes left in the toil OR granulated whirlfloc 0.7g (0.025 oz)
Yeast options & fermentation temperatures
- Wildbrew™ Philly Sour [Lallemand] – ferment at 20°C (68°F) to 25°C (77°F) 22g (2 packets)
Step by step process
Step 1 – Milling
- Mill grains to medium crush (set mill rollers to a gap of approx. 1.00mm / 0.039 inches)
- Just keep in mind roller gap settings are not universal so as you brew more batches you will find the ideal crush size for your setup
- Alternatively if you don’t have a grain mill you can order your grains crushed from most homebrew stores, both online and in person
Step 2 – Mashing
- Mash for 60 minutes at 66°C (151°F)
- Set your strike water to a few degrees above the target mash temperature, you can use our calculator to determine what your strike temperature should be
- ensure you mix in the grains thoroughly with a mash paddle to prevent dough balls from forming (big spoons, spatulas or whisks will also work)
- its easier to mash the grains and prevent dough balls if you add a little grain at a time, mix, add more grain and repeat until all the grains are mixed
- if you don’t have a mash tun with heating then ensure after you have finished mixing the grains in to insulate your mash tun (thick neoprene or heavy blankets both work well)
Step 3 (optional) – Sparging
- if your setup has the capability to sparge then do so with 20L (5.2 gal) sparge water at 78°C (172°F)
- if you are not sparging and using a BIAB (brew in a bag) method then remove grains from mash tun and twist and squeeze the bag to get as much liquid out of the grains as possible
- as you start sparging (or straining your BIAB bag) begin raising the temperature of your wort to a boil
Step 4 – Boiling
- once your wort begins to boil start a timer for a 60-minute boil and add your bittering hops, 15g (0.53 oz) of Northern Brewer
- at 15 minutes left in the boil add 1 whirlfloc tablet (OR granulated whirlfloc 0.7g (0.025 oz)) and 15g (0.53 oz) of Hallertau Huell Melon
Step 5 – Whirlpooling / cooling
- once wort has been boiling for 60 minutes in total turn off your heat source and begin chilling wort down to yeast pitching temperature
- once you’ve reached yeast pitching temperature take an original gravity reading of your wort
Step 6 – Yeast Pitching
- It is best to make a yeast starter before beginning your brew day (ideally 1 day before) to ensure your yeast are as active and healthy as possible before pitching, but not completely necessary – you could also just rehydrate yeast 30 minutes before pitching.
- Wort Aeration (Optional) if you have a paint mixer give your wort a quick blitz before pitching yeast to help add more dissolved oxygen into the wort to help the yeast have a healthier kick start into fermentation
- Pitch yeast in wort a degree or two higher than the target fermentation temperature to help yeast take off more aggressively
- To make a yeast starter you can use either:
- DME (dry malt extract) at a ratio of approx. 100g per 1L water (3.5 oz per 33 fluid ounces) for gravity of approx. 1.040
- some unfermented wort kept cold and sanitary from a previous brew day
- 70g of table sugar per 1L water (2.5 oz per 33 fluid ounces) – however, it is best to use malt sugar (wort / DME) whenever possible to reduce the chance of shocking the yeast with a different food source from starter to wort pitching
- To rehydrate yeast
- Add yeast to approx. 10 times as much room temperature water as the weight of the yeast e.g. 10g yeast in 100 ml water (0.35 oz yeast in 3.5 fluid ounces water)
Step 7 – Fermentation & Fruit additions!
- Allow yeast to ferment over the next two weeks (aprox)
- If you have a temperature-controlled system keep the fermenter temperature to the recommended fermentation temperature for each yeast strain (stated in the yeast ingredients section above)
- Monitor the fermentation activity over the first 7-10 days by the bubbling of the blow-off tube/airlock of your fermenter, as the bubbling slows down (roughly around day 10-12) take a gravity reading. When the gravity reaches around 1.015 raise the temperature of your fermenter by 1-2 degrees for 2 days for a diacetyl rest (if you don’t have temperature control don’t worry about this step, it's not the end of the world!)
- Time to add fruit! purée 3.65kg (8 lb) of Watermelon and throw them all into the fermenter
- It's important to note that fermentation times will vary based on your circumstances like temperature, amount of yeast pitched, the healthiness of yeast, the gravity of the wort, pH, etc. so don’t stress be patient and know that these times are just a rough guide
- On day 2 of the diacetyl rest (once gravity reaches roughly 1.011) & gravity is the same 3 days in a row move onto cold crashing! (If you can’t / don’t want to cold crash go straight to kegging/bottling your beer!)
Step 8 (optional) – Cold crashing
- begin cold crashing your fermenter (bring the temperature of your fermenter down to as close to 0°C (32°F) as possible, for 2 days to a week depending on how patient you are
- If you don’t have a temp-controlled fermenter, you can cold crash by putting your fermenter in a fridge or temp-controlled chest freezer
- After you have finished cold crashing it's time to keg/bottle your beer! If you are bottling your beer from the fermenter uncarbonated remember to add about 5-7grams (0.17 - 0.24 oz) of priming sugar to your bottles to carbonate your beer.
So... What is it?
The Berliner Weisse is a sour wheat beer from (you guessed it) Berlin, Germany! characterized by its slightly sour character and light abv (normally around 3-3.5%) it's a fantastic drop for summer in the beer garden, typically having a very light body, tartness on the tongue, and fresh fruity character. This also makes it a fantastic beer for fruit infusions!
What is ours like?
Seeing as this is our first crack at a sour we figured there was no better place to start than with a Berliner! We are stoked to say our turned out brilliantly!
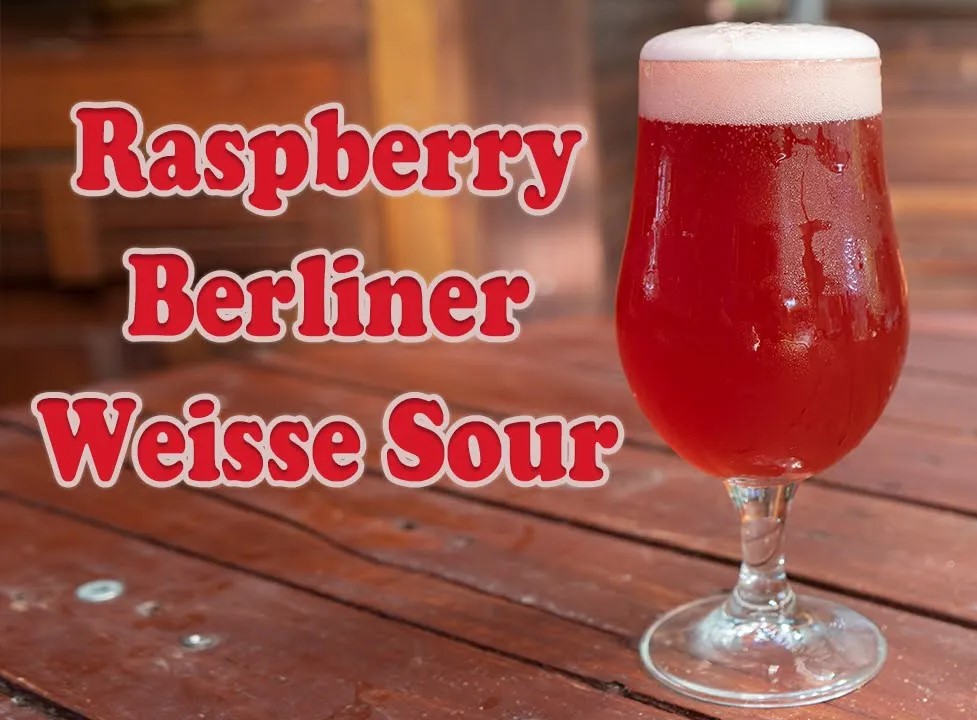
The mouthfeel is slightly tart, the bitterness very mild and hop character slightly fruity but all very subdued to allow the sour character and raspberry flavour to shine! Our Berliner clocked in pretty high on the ABV at 5.5% (but hey who's ever complained about a bit more booze!) and has a fantastic red colour thanks to the huge dump of Raspberry puree added during the end of fermentation, which also produced a brilliant fruity sweetness, complementing the sour acidity perfectly.
Batch size & ABV
- 19L / 5 gal finished beer
- 23L (6 gal) wort
- Starting gravity – 1.053
- Final gravity 1.011
- ABV – 5.5%
Ingredients
Water
With sparging
- 15L (3.9 gal) strike water, Mash at 66°C (151°F) for 60 mins, strike temp approx. 69°C (156°F) use our calculator for this
- 20L (5.2 gal) sparge water at 78°C (172°F)
Without sparging
- 30L (7.9 gal) strike water, Mash at 66°C (151°F) for 60 mins, strike temp approx. 66°C (151°F) use our calculator for this
Malts
- Pale ale malt – 3kg (6.6 lb)
- Wheat malt – 2.5kg (5.5 lb)
- Rice Hulls – 500g (1.1 lb)
Hops & whirlfloc tablets
- Northern Brewer
- 15g (0.53 oz) - 60 minutes left in the boil
- Hallertau Huell Melon
- 15g (0.53 oz) - 15 minutes left in the boil
- Whirlfloc Tablets
- 1 tablet – 15 minutes left in the toil OR granulated whirlfloc 0.7g (0.025 oz)
Yeast options & fermentation temperatures
- Wildbrew™ Philly Sour [Lallemand] – ferment at 20°C (68°F) to 25°C (77°F) 22g (2 packets)
Step by step process
Step 1 – Milling
- Mill grains to medium crush (set mill rollers to a gap of approx. 1.00mm / 0.039 inches)
- Just keep in mind roller gap settings are not universal so as you brew more batches you will find the ideal crush size for your setup
- Alternatively if you don’t have a grain mill you can order your grains crushed from most homebrew stores, both online and in person
Step 2 – Mashing
- Mash for 60 minutes at 66°C (151°F)
- Set your strike water to a few degrees above the target mash temperature, you can use our calculator to determine what your strike temperature should be
- ensure you mix in the grains thoroughly with a mash paddle to prevent dough balls from forming (big spoons, spatulas or whisks will also work)
- its easier to mash the grains and prevent dough balls if you add a little grain at a time, mix, add more grain and repeat until all the grains are mixed
- if you don’t have a mash tun with heating then ensure after you have finished mixing the grains in to insulate your mash tun (thick neoprene or heavy blankets both work well)
Step 3 (optional) – Sparging
- if your setup has the capability to sparge then do so with 20L (5.2 gal) sparge water at 78°C (172°F)
- if you are not sparging and using a BIAB (brew in a bag) method then remove grains from mash tun and twist and squeeze the bag to get as much liquid out of the grains as possible
- as you start sparging (or straining your BIAB bag) begin raising the temperature of your wort to a boil
Step 4 – Boiling
- once your wort begins to boil start a timer for a 60-minute boil and add your bittering hops, 15g (0.53 oz) of Northern Brewer
- at 15 minutes left in the boil add 1 whirlfloc tablet (OR granulated whirlfloc 0.7g (0.025 oz)) and 15g (0.53 oz) of Hallertau Huell Melon
Step 5 – Whirlpooling / cooling
- once wort has been boiling for 60 minutes in total turn off your heat source and begin chilling wort down to yeast pitching temperature
- once you’ve reached yeast pitching temperature take an original gravity reading of your wort
Step 6 – Yeast Pitching
- It is best to make a yeast starter before beginning your brew day (ideally 1 day before) to ensure your yeast are as active and healthy as possible before pitching, but not completely necessary – you could also just rehydrate yeast 30 minutes before pitching.
- Wort Aeration (Optional) if you have a paint mixer give your wort a quick blitz before pitching yeast to help add more dissolved oxygen into the wort to help the yeast have a healthier kick start into fermentation
- Pitch yeast in wort a degree or two higher than the target fermentation temperature to help yeast take off more aggressively
- To make a yeast starter you can use either:
- DME (dry malt extract) at a ratio of approx. 100g per 1L water (3.5 oz per 33 fluid ounces) for gravity of approx. 1.040
- some unfermented wort kept cold and sanitary from a previous brew day
- 70g of table sugar per 1L water (2.5 oz per 33 fluid ounces) – however, it is best to use malt sugar (wort / DME) whenever possible to reduce the chance of shocking the yeast with a different food source from starter to wort pitching
- To rehydrate yeast
- Add yeast to approx. 10 times as much room temperature water as the weight of the yeast e.g. 10g yeast in 100 ml water (0.35 oz yeast in 3.5 fluid ounces water)
Step 7 – Fermentation & Fruit additions!
- Allow yeast to ferment over the next two weeks (aprox)
- If you have a temperature-controlled system keep the fermenter temperature to the recommended fermentation temperature for each yeast strain (stated in the yeast ingredients section above)
- Monitor the fermentation activity over the first 7-10 days by the bubbling of the blow-off tube/airlock of your fermenter, as the bubbling slows down (roughly around day 10-12) take a gravity reading. When the gravity reaches around 1.015 raise the temperature of your fermenter by 1-2 degrees for 2 days for a diacetyl rest (if you don’t have temperature control don’t worry about this step, it's not the end of the world!)
- Time to add fruit! purée 3kg (6.6 lb) of Raspberries and throw them all into the fermenter (we used frozen raspberries but if you have fresh raspberries even better!)
- It's important to note that fermentation times will vary based on your circumstances like temperature, amount of yeast pitched, the healthiness of yeast, the gravity of the wort, pH, etc. so don’t stress be patient and know that these times are just a rough guide
- On day 2 of the diacetyl rest (once gravity reaches roughly 1.011) & gravity is the same 3 days in a row move onto cold crashing! (If you can’t / don’t want to cold crash go straight to kegging/bottling your beer!)
Step 8 (optional) – Cold crashing
- begin cold crashing your fermenter (bring the temperature of your fermenter down to as close to 0°C (32°F) as possible, for 2 days to a week depending on how patient you are
- If you don’t have a temp-controlled fermenter, you can cold crash by putting your fermenter in a fridge or temp-controlled chest freezer
- After you have finished cold crashing it's time to keg/bottle your beer! If you are bottling your beer from the fermenter uncarbonated remember to add about 5-7grams (0.17 - 0.24 oz) of priming sugar to your bottles to carbonate your beer.