Guides & Cheat Sheets
Come get your brew on! scroll through our growing library of recipes for your next batch!
.png)
How to Clone Beer at Home Like a Pro
So, you tried an amazing beer and thought, “Crikey, I wish I could brew this myself!” We’ve all been there, mate. Cloning a beer – basically reverse-engineering your favourite commercial brew – is one part detective work, one part brew-day skill, and all parts fun. In true Flying Wombat fashion, we’ll keep it no-fuss, witty, and downright helpful. (Prefer watching over reading? Check out our Flying Wombat YouTube channel for a video on cloning beers – we’ve got you covered there too.) Now, grab a cold one and let’s get into how to clone beer at home like a pro!
Step 1: Do Your Homework (Research the Beer)
Every great clone starts with sleuthing. The first step in replicating a beer at home is gathering as much info as possible about that brew. Hit up the brewery’s website – many breweries drop hints about their recipes (malts, hops, ABV, IBUs, you name it). The best ones even list factual details to help homebrewers formulate a recipe. Key intel to collect includes:
- Basic Stats: Original Gravity and Final Gravity (or just ABV), IBUs (bitterness level), and color if available.
- Ingredients: What malts and hops are mentioned? Any special yeast or adjuncts? For example, if the brewery says it’s brewed with “Cascade and Mosaic hops,” you know what hop varieties to grab. Some craft breweries even print ingredients on the can – score!
- Brewer’s Clues: Sometimes you’ll find tidbits in interviews or on forums. And if you can swing it, chat with the brewer – many started as homebrewers and are chuffed to share tips if you ask nicely over a pint. You’d be surprised how a little flattery (“Your beer is grouse, I want to make one just like it!”) can get them talking.
While you’re on the case, taste the beer again with your thinking cap on. Note the flavors and aromas: Do you get a toasty malt sweetness? Tropical hop aroma? That can guide your ingredient choices later.
Two Tips to Keep in Mind: Cloning isn’t about exact replication – there are many variables you just can’t copy at home (equipment, water source, etc.). As one seasoned brewer put it, a recipe alone doesn’t make great beer; skilled brewers do. So brew your best, and don’t stress if it’s not a perfect twin on the first go. Secondly, focus on the beer’s key characteristics. Nail the spirit and balance of the brew, and it’ll be close enough that your mates will say, “Strewth, that’s pretty damn similar!”
Step 2: Crack the Recipe (Malts, Hops, Yeast, Oh My!)
Time to channel your inner beer architect. Using your research, sketch out a recipe for your clone. Here’s how to break it down like a pro:
- Malt Bill: Keep it simple and true to style. Virtually all beers use around 80–100% base malt (Pale ale malt, Pilsner malt, etc.), with specialty malts making up the rest. So if your target beer uses pale, a bit of Munich, and a touch of crystal malt, you might go ~85-90% base malt and the rest split between Munich and crystal. This gets you in the ballpark for color and malt flavor. (Too much specialty malt and you’ve gone rogue – balance, mate!)
- Hops: Use the same varieties the brewery notes, if possible. No info given? No worries – think about the flavor profile. Citrusy and fruity notes might mean American or Aussie hop varieties (Galaxy, Citra, etc.), while spicy or earthy might point to noble hops or English varieties. Add the hops in similar timing as the pros: a dose for bitterness early in the boil and later additions for flavor/aroma. Aim to match the IBU target of the original beer with your hop schedule (brew software or online calculators help here).
- Yeast: Yeast can be the secret hero (or culprit) behind a beer’s character. Is it a crisp lager or a fruity ale? Choose a yeast strain that fits the profile. Many breweries use well-known strains – for instance, a West Coast IPA might just use a clean ale yeast like US-05, while that Belgian tripel definitely needs a Belgian ale yeast. If the brewery’s yeast is proprietary, find the closest equivalent from your homebrew shop. (Tip: Some breweries openly share their yeast info – e.g. Rogue’s famous Pacman yeast is available to homebrewers – otherwise, match the style).
Don’t forget to scale the recipe to your batch size and system. Commercial breweries often brew huge volumes with efficiencies we can only dream of. Use brewing software to adjust malt amounts so your homebrew OG matches the target (most of us get lower extraction efficiency than big breweries, so you might need a tad more grain to hit the same ABV. Likewise, adjust hop quantities based on alpha acids to hit the IBU. It’s like tuning a recipe until your numbers align with the commercial specs. Kinda science-y, but hugely satisfying when you get it right.
Step 3: Mind Your Water (and Other Pro Moves)
Water – the unsung hero of brewing. If you want to clone exactly, you might consider your water profile. Beer is mostly water, after all. Does the brewery source soft, pure water (looking at you, Pilsners), or do they boast about their town’s hard water giving the beer its character? Adjusting water chemistry can make a noticeable difference. For instance, a hoppy IPA might pop more with higher sulfate content, while a malty stout may shine with more chlorides. If you’re keen, treat your water to roughly match the style’s needs (gypsum, calcium chloride, etc. – your local homebrew shop can help here). But hey, if that’s too much fuss, at least use good clean water (carbon-filter your tap water to remove chlorine, for example).
Other pro moves to consider: fermentation and process tweaks. Does your target beer use any special process? For example, a wheat beer clone might need a ferulic acid rest if you’re chasing that clove flavor, or maybe that juicy NEIPA needs a hefty dry-hop during fermentation. Perhaps the beer is oak-aged or uses unusual ingredients (vanilla, coffee, fruit puree?). Plan to mimic those steps: add oak chips in secondary, split a vanilla bean into the fermenter, whatever floats your boat. These little details can take your clone from “good beer” to “wow, this is just like the original!”
Lastly, consider equipment differences. You likely don’t have the exact gear a commercial brewery has (their whirlpool, filtering, even how they carbonate can differ). That’s fine – just follow best practices on your home system. Oxygenate well, control your fermentation temperature diligently (temperature control can hugely impact flavor), and give the beer enough time to mature if needed (looking at you, lagers). Basically, do the normal things right so the clone recipe can shine.
Step 4: Brew Day – Time to Make Some Beer
You’ve got a plan – now execute it. Brew day for a clone is like any other brew day, just with extra focus. Mash those grains at the appropriate temperature (if the target beer has a full body, maybe mash a bit higher; if it’s crisp and dry, mash lower). Boil and add hops according to your recipe timings. Mind your sanitation and all that good stuff – a rogue infection will surely take your clone off course (and give you something the original brewery never intended!).
As you brew, take notes on everything: your mash temp, your pre-boil gravity, original gravity, hop addition times, how the wort smells, etc. Channel your inner mad scientist. This note-taking will be gold later when you taste and decide what to tweak. Also note any deviations: did you miss your OG by a mile? Did your volume come up short? Jot it down. And don’t forget to record fermentation details too – what yeast you pitched, ferment temp, how long until fermentation kicked off, when you dry-hopped if applicable, and so on.
Ferment and package the beer just like any other batch, following your usual procedures (primary, secondary if needed, then bottle or keg). By now, you’re probably antsy to compare it to the real deal. Patience, young grasshopper! Give your beer proper time to carbonate and condition. It’s all the sweeter when you finally crack open a bottle of your own replica brew.
Step 5: The Moment of Truth – Taste, Compare, Tweak
Now for the fun part: drinking beer! Crack open your clone and, if possible, a bottle of the original beer you’re emulating. Side-by-side tasting is the best way to spot differences. Invite a few mates for a blind taste test and see if they can guess which is which (or if they even notice a difference). As you sip, note how your version stacks up:
- Aroma: Did you nail the hop aroma or that roasty nose? More dry-hop or a specialty malt adjustment might be needed if it’s off.
- Flavor: Is something missing or more pronounced? Maybe your clone is sweeter, or the bitterness is slightly higher or lower. Jot it down.
- Body & Appearance: Is the color close? Mouthfeel similar (think about carbonation level, fullness, etc.)?
Don’t be too self-critical – even if it’s not an identical twin, it’s still beer, and likely a tasty one at that. Cloning is a learning process. Adjust your recipe based on these notes and give it another go in a future brew. Maybe the mash temp should be tweaked, or you’ll swap a hop variety, or use a different yeast next time. This iterative tweaking is how you really dial it in. In fact, it’s normal to repeat the recipe with minor changes a few times to get closer to the original. (Oh no, multiple rounds of brewing and tasting beer – what a tough life, right?)
Above all, remember that your goal isn’t to brew an inferior copy – you want a beer just as good as the commercial one, if not better. As one expert brewer wisely said: “Remember, you want your beer to be better than the one you are cloning!!”. So if your version turns out like a fresher, bolder take on the original, that’s a win in our book!
Final Thoughts (and a Cheers)
Cloning your favourite beer is equal parts art, science, and sheer drinking pleasure. It makes you a better brewer by pushing you to understand ingredients and process on a deeper level. Plus, there’s no feeling quite like handing a mate a glass and hearing, “Mate, this tastes just like [Insert Beer Name]!” – or maybe, “I reckon this is even better!”. So go on, give it a crack. Do the research, brew with care, and enjoy the journey (and the many beers along the way).
And if you’re keen to see cloning in action, don’t forget to check out our Flying Wombat TV YouTube video on this topic (for all you legend visual learners). Until next time – cheers, and happy cloning!
How to Backsweeten Your Homebrew Without Bottle Bombs
Backsweetening is the handy trick of adding sweetness to a fully fermented homebrew so it isn’t bone-dry. Whether you’ve got a tart young cider or a mead that fermented all the honey out, a touch of sweetness can make it shine. The key is doing it safely – if you just dump sugar in, the yeast will wake up and throw a wild after-party, possibly ending in bottle explosions (the dreaded “bottle bombs”!) But fear not, we’ll walk through how to sweeten your brew without unintended fermentation.
Why Backsweetening? (And Why It’s Tricky)
Fermentation is like a hungry little beast – yeast gobbles up sugars and turns them into alcohol, often leaving your brew bone-dry. Backsweetening means adding sweetness back in after fermentation is done. The catch? Yeast will try to party on any new sugars you add, potentially fermenting again (hello, volcano bottles!). To avoid that, we need a strategy.
Safe Backsweetening Methods
There are a few ways to backsweeten while keeping those yeasts in check. Let’s break down your options in a light, no-fuss way:
- Stabilize with Camden & Sorbate: This is a classic winemaker’s trick. Once fermentation is finished, you add Campden tablets (which release sulfites) and potassium sorbate. The Campden knocks down any wild microbes and the sorbate basically tells the yeast, “No more kids for you!” – meaning it prevents yeast from reproducing. After adding these and waiting a day or two, you can stir in your sugar, honey, fruit juice, etc. Result: the brew stays sweet, and yeast are too tuckered out (or inhibited) to ferment it. (Tip: Use the recommended doses on the packages. Overdoing sulfites can give a “chemical” taste, and nobody wants that.)
- Pasteurize Your Bottles: If adding chemicals isn’t your style, you can backsweeten and then pasteurize the brew. This means bottling your sweetened cider/mead and then gently heating the bottles in hot water to kill off yeast. For example, some cider makers sweeten, bottle, let the bottles carbonate just a tad for a day or two, then put them in ~70°C (158°F) water for about 10-15 minutes to pasteurize. Result: the yeast get zapped, so they can't ferment the new sugars. This way you lock in the sweetness and some fizz without bombs. (Safety note: Use a big pot and watch the temp – too hot and bottles can crack. Always remove from heat after 10-15 min and let cool.)
- Use Non-Fermentable Sweeteners: An easy cheat code: add a sugar that yeast can’t ferment. Common ones are lactose (milk sugar), xylitol, or artificial sweeteners. Lactose is popular in milk stouts and some ciders – it adds a mild sweetness and body, and yeast ignore it (they can’t digest lactose). Xylitol or stevia can also sweeten without fermentation restarting. The upside: no extra steps needed, just stir in to taste. The downside? The flavor can sometimes be different (lactose isn’t super sweet, and artificial sweeteners have their own taste). But it’s absolutely a viable option to sweeten your brew with zero bottle bomb risk.
- Keg It & Keep It Chilled: If you’re one of those fancy homebrewers with a keg setup, backsweetening is a breeze. Transfer your fermented dry brew to a keg, add your honey or sugar to sweeten, then keep it refrigerated and force-carbonate with CO2. Cold temperatures put yeast to sleep. As long as the keg stays cold (and you drink it within a reasonable time), the yeast won’t wake up to ferment the added sugar. Result: sweet, carbonated cider/mead on tap, no chemicals needed. (This method isn’t for bottling though – it’s for draft pouring only, since once it warms up or if transferred to bottles, fermentation could resume.)
- Brew to High ABV (Yeast Killer Strength): This one is more of a pre-plan than an afterthought. Some brewers make a mead or wine so strong in alcohol that the yeast basically give up (yeast have their limits!). For example, certain wine yeasts die off around 14-18% ABV. If your brew exceeds that, you can then add more honey or sugar and the remaining yeast are too drunk (or dead) to ferment it. Result: naturally sweet high-alcohol brew. However, this can be tricky to execute, and you still might want to stabilize or pasteurize to be safe. Plus, you end up with a boozier drink than maybe intended. Fun for dessert wines, not so much for a session cider.
Light and Tasty Final Tips
- Always make sure primary fermentation is completely finished before backsweetening. Check that gravity and ensure it’s stable over a few days – we want the yeast dormant or done.
- Backsweeten to taste. It’s best to dissolve your sugar/honey in a bit of water or take out a sample of your brew and experiment with small additions, to avoid accidentally turning your cider into syrup. Add a bit, stir gently, taste, repeat until it’s Goldilocks “just right.”
- If using chemicals (Campden/sorbate), remember they don’t kill yeast outright; they just inhibit them. So don’t skip the sorbate if you’ve added more sugar – sorbate is key to prevent refermentation. And give the brew a day after adding them before sweetening, to let the magic work.
- Sanitize everything as usual. Even though you’re adding stuff post-ferment, you don’t want to introduce any new wild critters.
- Bottle condition before pasteurizing (if you want some fizz): For the pasteurization method, it’s common to let the yeast eat just a little of the new sugar in the bottle (maybe 1-2 days at room temp) so you get carbonation, then heat-pasteurize to stop them. Timing is key – too long and pressure builds too high; too short and you get flat sweet cider. Keep an eye (and maybe sacrifice a tester bottle to open and gauge carbonation).
Finally, backsweetening is as much an art as a science. Take notes on what method you tried and how it turned out. With a bit of practice, you’ll dial in the perfect sweetness that suits your taste buds.
Now go forth and sweeten that brew to liquid perfection! Cheers, and happy brewing! 🍻

Immersion Chillers vs. Plate Chillers vs. Counterflow Chillers
Crafting your own beer is a thrilling journey, but every brewer knows that achieving the perfect temperature during the chilling process is crucial for a successful batch. When it comes to chilling wort, homebrewers have several options at their disposal, each with its own set of advantages and drawbacks. In this guide, we'll explore three popular chilling methods: immersion chillers, plate chillers, and counterflow chillers, highlighting their pros and cons, putting their cooling power to the test with an experiment, and telling you which is best (in our modest opinion) for homebrewing beer!
Introducing the Contestants!
Immersion Chillers:
Pros:
- Simple Design: Immersion chillers are perhaps the most straightforward option. They consist of a coiled copper or stainless steel tube that is submerged directly into the wort.
- Ease of Use: Operating an immersion chiller requires minimal setup and can be easily used by brewers of all experience levels.
- Affordability: Compared to other chilling methods, immersion chillers are typically more budget-friendly, making them an attractive option for beginners or those on a tight budget.
Cons:
- Slower Cooling: Typically immersion chillers can take longer to cool the wort compared to other methods, especially if the tap water temperature is high.
- Limited Efficiency: Since immersion chillers rely solely on the surrounding liquid (usually tap water) for cooling, their efficiency can be affected by factors such as water temperature and flow rate.
- Sanitation Concerns: Ensuring the cleanliness of the immersion chiller can be challenging, as it is exposed to the wort throughout the chilling process.
Plate Chillers:
Pros:
- Efficiency: Plate chillers are highly efficient at rapidly reducing the temperature of wort due to their large surface area and counterflow design.
- Compact Size: Plate chillers are typically smaller and more portable than other options, making them ideal for brewers with limited space.
- Temperature Control: Plate chillers allow for precise temperature control, enabling brewers to achieve their desired pitching temperature quickly and consistently.
Cons:
- Cleaning Challenges: Plate chillers have intricate internal channels that can be difficult to clean thoroughly, increasing the risk of contamination and off-flavors if not maintained properly.
- Potential Clogging: The narrow channels of plate chillers are prone to clogging from hop debris and other particulates present in the wort, requiring regular maintenance and cleaning to prevent issues.
- Higher Cost: Plate chillers tend to be more expensive upfront compared to immersion chillers, which may deter budget-conscious brewers.
Counterflow Chillers:
Pros:
- Efficient Cooling: Counterflow chillers combine the rapid cooling of plate chillers with the simplicity of immersion chillers, offering excellent efficiency and performance.
- Minimal Wort Exposure: Unlike immersion chillers, counterflow chillers minimize the exposure of wort to potential contaminants, enhancing the overall quality and stability of the beer.
- Versatility: Counterflow chillers can handle varying flow rates and temperatures, providing brewers with greater flexibility and control over the chilling process.
Cons:
- Complex Design: Counterflow chillers have a more intricate design compared to immersion chillers, which may require additional setup and maintenance.
- Risk of Clogging: Similar to plate chillers, counterflow chillers can be susceptible to clogging from hop debris and other solids, necessitating regular cleaning and maintenance.
- Higher Cost: Counterflow chillers are typically more expensive than immersion chillers, making them a significant investment for homebrewers, particularly those on a tight budget.
The Experiment
To assess the cooling power of each unit we filled a brewzilla with 45L (11.9 gal) of water and heated it to 80°C (176°F), from here we gave each chiller 10 minutes to cool down the water as much as it could (obviously separately, and reheating the water between each test). Before taking a temperature reading (using both the base thermometer of the brewzilla and a separate thermometer) we gave the water a big mix using a mash paddle and allowed it to whirlpool for 10 seconds before measuring the temp, this helped to ensure an equal distribution of heat throughout the water, so that we weren't measuring hot or cold spots in the liquid that had yet to reach homeostasis.
The Results
This may seem a rudimentary experiment, but often in science it is best to use Occam's razor to find an an answer, the problem-solving principle that recommends searching for explanations constructed with the smallest possible set of elements, and the same logic can be applied to finding the best way to construct an experiment. The least amount of variables possible to still find a definitive answer will yield the clearest results! Make sense? So, with all that said lets take a look at the results below!

I was pretty surprised! I entirely expected the plate chiller to come out on top, but in actuality the immersion chiller managed to cool the water 5°C (10.1%) more than the plate chiller, and a whopping 12.2°C (21.4%) more than the counterflow chiller!
But Does Size Matter!?
Now with all this said and done, yes it is important to concede size does matter (sorry gents!), the more surface area contact with the liquid being cooled that a chiller has, the greater cooling power it will posses, so whilst this experiment is great at telling us which is "best" at cooling between these very commonly available homebrewing chillers, it must be remembered that if you used a much smaller immersion chiller, it would not have any where near the cooling power of the chiller we were using in this experiment. So if you take anything away from this at all, please just make sure you use a chiller that is of an appropriate size to your brewing system! and when in doubt, bigger is better!
So Which Chiller is The BEST?
When it comes down to it, this is entirely a personal preference for each brewer, each chilling method has its own set of advantages and drawbacks, and the best choice ultimately depends on your brewing setup, preferences, and budget. Immersion chillers offer simplicity and affordability, while plate chillers excel in efficiency and temperature control. Counterflow chillers strike a balance between the two, offering excellent performance with minimal wort exposure. Whichever option you choose, proper maintenance and sanitation are essential to ensure consistent and high-quality brews. Cheers to your next successful batch!
Which is my Favourite?
So whilst I cant say which is the definitive best, I will say which is my personal favourite to use. The Plate Chiller! There is a reason it is the most commonly used design amongst commercial brewers! As long as its used correctly and you have adequate filtering before wort enters, you should have minimal issues with blockages, its incredibly compact which makes it the most space efficient of the 3, and you can clean the bejesus out of the thing! By using powerful caustics and acids you can make it an incredibly sterile environment before your fresh wort enters, making it my personal favorite chiller. Despite the fact it only took out the silver metal in my little experiment, I believe its pro's out whey its small performance deficient against my immersion chiller, so it still holds the gold in my heart!

Guide to Beer Brewing Water Chemistry
Water chemistry is often seen as the final frontier for a lot of home-brewers, sort of like the last thing you can master after understanding all the different elements of the brewing process, and can truly make an average beer a good beer, and a good beer a great beer! But for some reason something about water chemistry seems a little daunting and scary to learn and understand, but there are great tools and calculators (such as brewfather) that calculate salt additions for you, and here we have written up this quick guide to give you an idea of the basics so you can start dipping your toes into the world of brewing chemistry!
1. Water Sources:
Choose a water source with characteristics suitable for brewing. If using tap water, be aware of its mineral content, as it varies by location. You may need to adjust your water profile to match the beer style you're brewing.
Test your water to determine its baseline characteristics, including pH, hardness, alkalinity, and mineral content. This information is crucial for making precise adjustments in subsequent steps. If you are using tap water you can generally request a water chemistry report from your local council.
Tap Water:
Pros:
- Convenient and readily available.
- Contains minerals that can contribute to the brewing process.
Cons:
- Inconsistent mineral content based on location.
- May require testing and adjustments to meet brewing needs.
RO (Reverse Osmosis) Water:
Pros:
- Highly customizable, as it starts with a blank slate.
- Allows precise control over mineral content.
Cons:
- Stripped of minerals, which must be added back for brewing.
- Initial setup cost for an RO system.
Spring Water:
Pros:
- Contains natural minerals that can enhance flavor.
- Often free from chlorine or chloramine.
Cons:
- Variability in mineral content based on the source.
- Potential for contamination, requiring testing.
Well Water:
Pros:
- Unique mineral profiles can impart distinct flavors.
- Generally free from chlorine or chloramine.
Cons:
- Requires testing due to variable mineral content.
- Risk of contamination, especially in unregulated wells.
Distilled Water:
Pros:
- Completely devoid of minerals, providing a clean slate.
- Ideal for starting from scratch in mineral adjustments.
Cons:
- Lacks beneficial minerals, necessitating careful additions.
- May lack some elements important for yeast health.
2. pH Adjustment:
- General pH Range: The pH of your brewing water should ideally be between 5.2 and 5.6
- Acid Addition: Use food-grade acids like lactic acid or phosphoric acid to lower pH if needed.
- Alkalinity Reduction: Reduce alkalinity with acid or dilution for light-colored beers.
3. Calcium and Magnesium:
- Calcium (Ca): Essential for enzyme activity during mashing. Aim for 50-150 ppm.
- Magnesium (Mg): Contributes to yeast health. Target 5-20 ppm.
4. Sulfate and Chloride:
Sulfate (SO4): Enhances hop bitterness and dryness. Adjust based on beer style (e.g., high for hoppy beers).
- Typically you want to keep this in the ranges of 50-150 ppm for enhanced hop bitterness depending on the beer style
Chloride (Cl): Enhances malt sweetness and fullness. Adjust based on beer style (e.g., high for malty beers).
- Typically you want to keep this in the ranges of 0-250 ppm for increased malt sweetness
Sulfate to Chloride Ratios:
The balance between sulfate and chloride in your brewing water can significantly impact the perception of bitterness, sweetness, and overall beer character. Consider the following sulfate to chloride ratios for different beer profiles:
Malty Beers and New England IPA's (NEIPA):
- Ratio: 0.5 (Sulfate:Chloride)
- Description: A higher chloride content contributes to a fuller mouthfeel and enhances malt sweetness, which complements malty beer styles and hazy IPAs like NEIPAs.
Balanced Beer Profile:
- Ratio: 1:1 (Sulfate:Chloride)
- Description: A balanced sulfate to chloride ratio is suitable for a wide range of beer styles, providing a harmonious interplay between hop bitterness and malt sweetness. This is a versatile choice for many classic beer styles.
Hop-Forward Beers (e.g., West Coast IPA):
- Ratio: 2:1 (Sulfate:Chloride)
- Description: A higher sulfate content accentuates hop bitterness and dryness, providing a crisp and refreshing character. This ratio is well-suited for hop-forward styles like the classic West Coast IPA, where a clean bitterness and fresh hop character are desired.
Important Considerations:
- Impact on Perception: The sulfate to chloride ratio affects the perceived balance between hop bitterness and malt sweetness. Experiment within these ratios to achieve the desired flavor profile for your specific beer style.
- Adjustment Method: Use brewing salts such as gypsum (calcium sulfate) for sulfate additions and calcium chloride for chloride additions. Gradually adjust the levels while monitoring the impact on flavor.
- Style Guidelines: Refer to style guidelines for specific recommendations on sulfate to chloride ratios, especially when brewing to match a particular beer style.
Understanding and manipulating sulfate to chloride ratios allows you to tailor your water chemistry to the unique requirements of different beer styles, enhancing the overall quality and enjoyment of your homebrewed beers.
5. Sodium:
- Sodium (Na): Usually kept low (below 50 ppm) to avoid off-flavors. Adjust based on beer style.
6. Hardness and Alkalinity:
- Hardness: Reflects the concentration of calcium and magnesium. Aim for a balanced profile.
- Alkalinity: Affects mash pH stability. Adjust to control pH during mashing.
7. Mineral Additions:
- Use brewing salts like gypsum, calcium chloride, Epsom salt & Slaked Lime to adjust specific ions in your water.
- Follow water chemistry calculators or software to determine precise additions, such as brewfather.
8. Batch or Continuous Adjustment:
- Batch Adjustment: Add minerals to the entire brewing water volume.
- Continuous Adjustment: Add minerals to the mash or boil kettle separately for more control.
9. Record Keeping:
Keep detailed records of water adjustments, brewing process, and the resulting beer. This helps you refine your process over time.
10. Experimentation:
- Don’t be afraid to experiment with different water profiles for various beer styles.
- Small adjustments can have a significant impact, so start with conservative changes.
11. Monitoring and Adaptation:
Regularly test and monitor your water characteristics, and adjust your process accordingly. Water chemistry can vary, so adapt to changes in your water source.
By paying attention to water chemistry, you can fine-tune your brewing process and produce beers with well-balanced flavors that align with your intended style. Experiment, learn from each batch, and refine your approach to create exceptional homebrewed beer.
How to Make a Yeast Starter!
Here's our guide to how and why you should make yeast starters for your brews, but if you'd also like to learn how to culture yeast from previous batches check out our 2 part series on culturing yeast. Part one is here for you below!
Why should I make a yeast starter?
Yeast starter's are a super valuable tool in the brewing (and baking) world that helps ensure a strong, healthy yeast population, faster fermentation, and improved overall quality and consistency in your final product. It's particularly beneficial for more challenging recipes and high-gravity beers and top prevent the chance of other wild yeasts, bacteria or even fungi from infecting your batch!
More than that here's a few great reasons to make a start for your beer.
- Ensure Adequate Yeast Population: A yeast starter helps you increase the population of active and healthy yeast cells before adding them to your main batch. This is especially important when brewing high-alcohol or complex beers where a larger yeast population is needed to ferment the sugars effectively.
- Faster Fermentation: With a well-prepared yeast starter, the fermentation process can begin more quickly. This reduces the lag time between pitching the yeast and the start of fermentation in your primary batch, which can help prevent potential contamination issues.
- Reduced Risk of Off-Flavors: A yeast starter allows the yeast to undergo a growth phase, promoting a healthy yeast population. Healthy yeast is less likely to produce unwanted off-flavors or aromas, contributing to a cleaner, more consistent final product.
- Consistency: Making a yeast starter ensures consistency in your brewing or baking process. By using a known quantity of yeast cells, you can more accurately predict the fermentation time and results.
- Improved Attenuation: Yeast starters can help improve the yeast's ability to ferment the available sugars to completion, resulting in a beer with better attenuation and a drier finish, or bread with a better rise and crumb structure.
- Yeast Viability: Yeast starters allow you to assess the viability of your yeast before pitching it into your main batch. If the yeast does not ferment in the starter, you can replace it with fresh yeast rather than risking your entire batch.
- Economical / Stretching the Budget!: Making a yeast starter from a smaller initial packet of yeast can save you money in the long run, as you can stretch your yeast supply across multiple batches.
- Adaptation to Brewing Goals: A yeast starter gives you the flexibility to tailor the yeast's characteristics to your specific brewing goals. You can adjust the starter's size, temperature, and other factors to influence yeast growth and flavor profiles.
- Better Flavor Profiles: For certain beer styles, like lagers and Belgian ales, yeast starters can help promote the development of desirable flavor compounds and esters that contribute to the style's unique character.
- Worry-Free Pitching: Using a yeast starter can give you peace of mind, knowing that you've taken steps to ensure a healthy and active yeast population in your batch, reducing the risk of stuck fermentations or other fermentation issues.
So How do we make one?
Step by Step Process
- DME (dry malt extract) at a ratio of approx. 100g per 1L water (3.5 oz per 33 fluid ounces) for gravity of approx. 1.040 some unfermented wort kept cold and sanitary from a previous brew day
- 70g of table sugar per 1L water (2.5 oz per 33 fluid ounces) – however, it is best to use malt sugar (wort / DME) whenever possible to reduce the chance of shocking the yeast with a different food source from starter to wort pitching
- if you are using DME (dried malt extract) it is best to boil the starter for 10-15 minutes to kill any microbes that may be present in the powder from the factory or packaging
- after boiling the starter cool it down quickly in an ice/water bath until it reaches approximately 25°C (77°F)
- once the starter is cooled to pitching temperature add your yeast
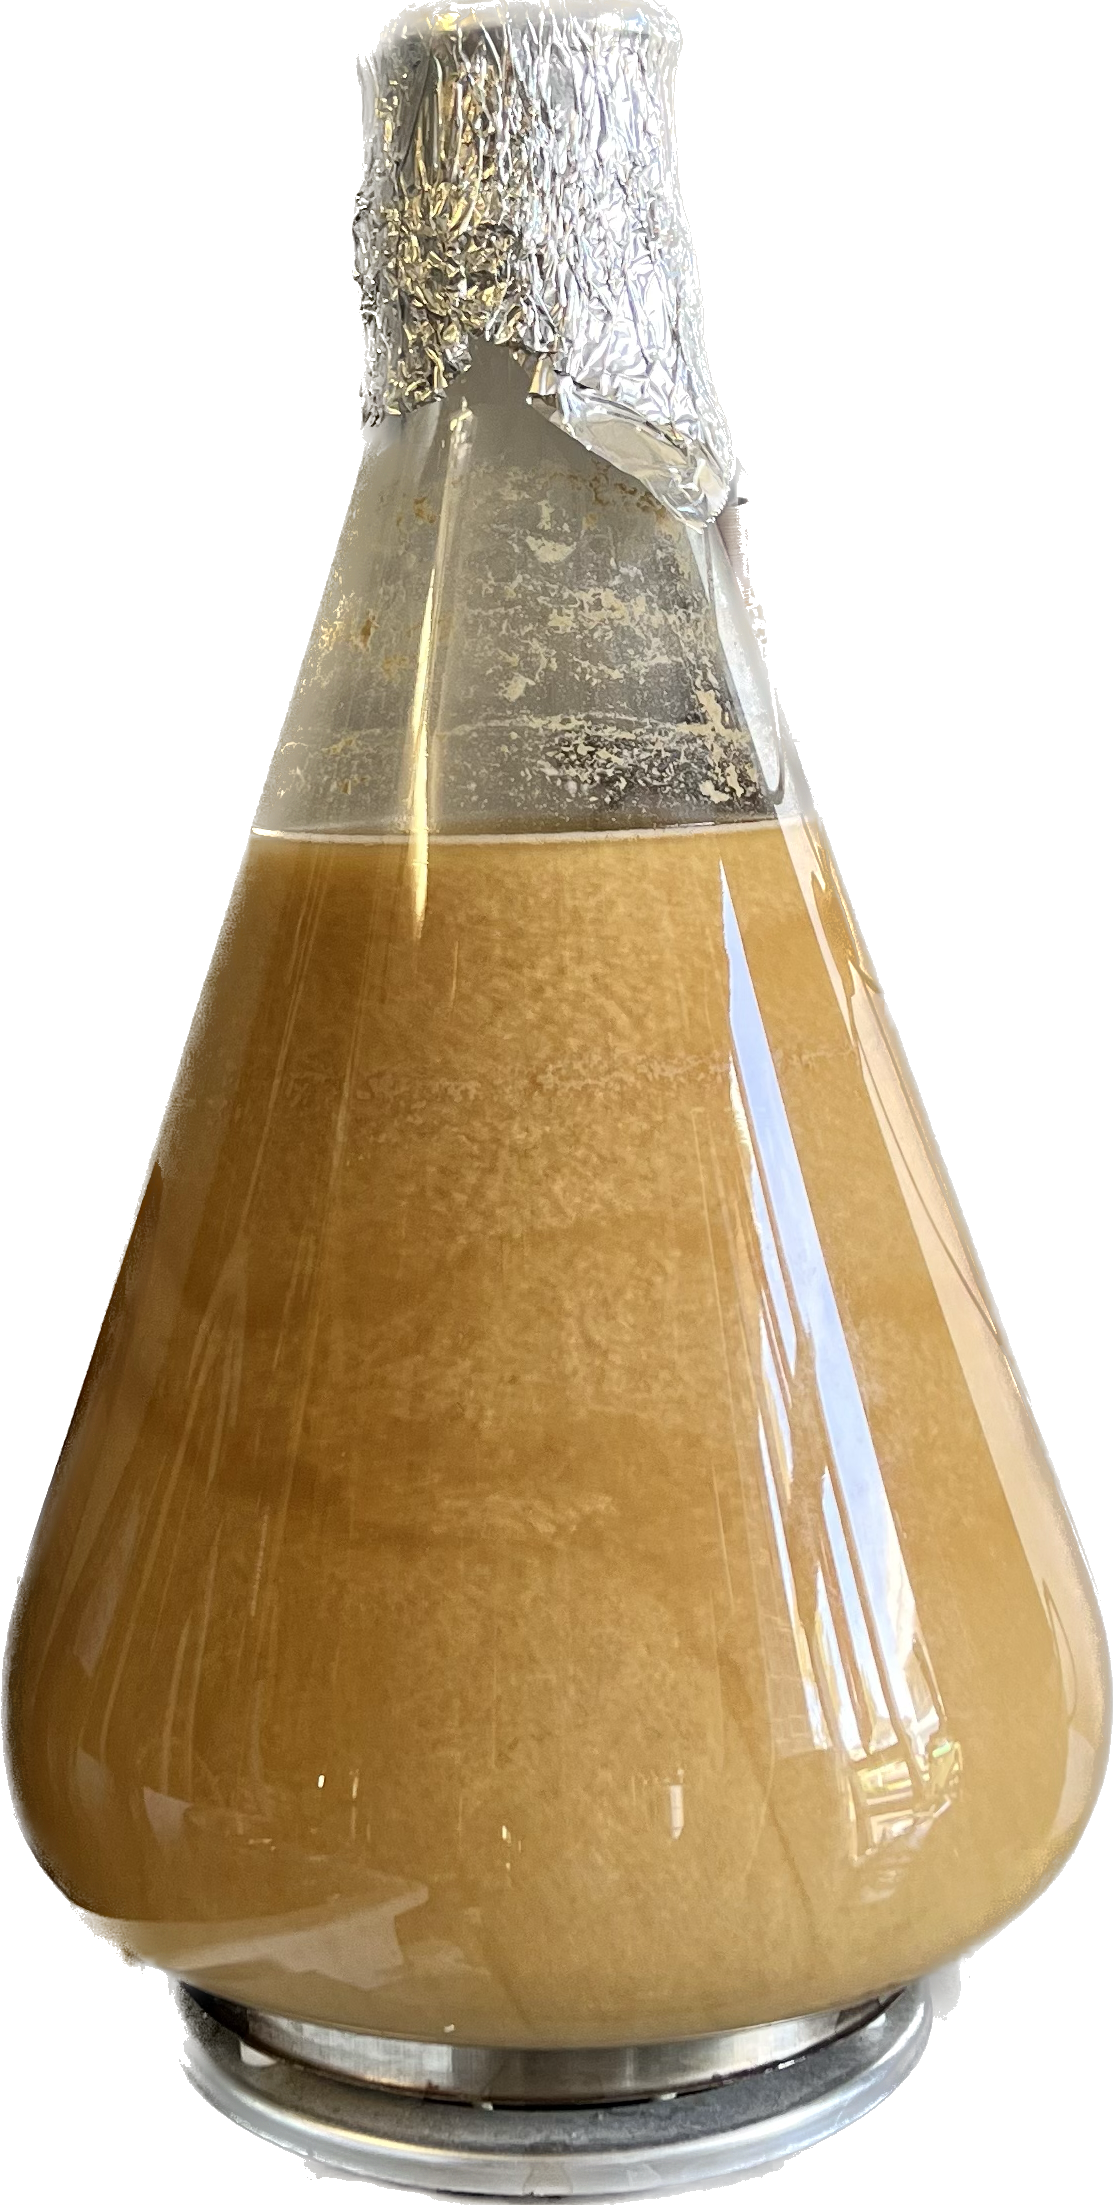
- cover the vessel with some tin foil, or a foam bung/stopper, you don't want the vessel to be airtight, it still needs oxygen to promote healthy yeast growth, it just needs to be covered to prevent bugs or other things in the air from infecting your starter!
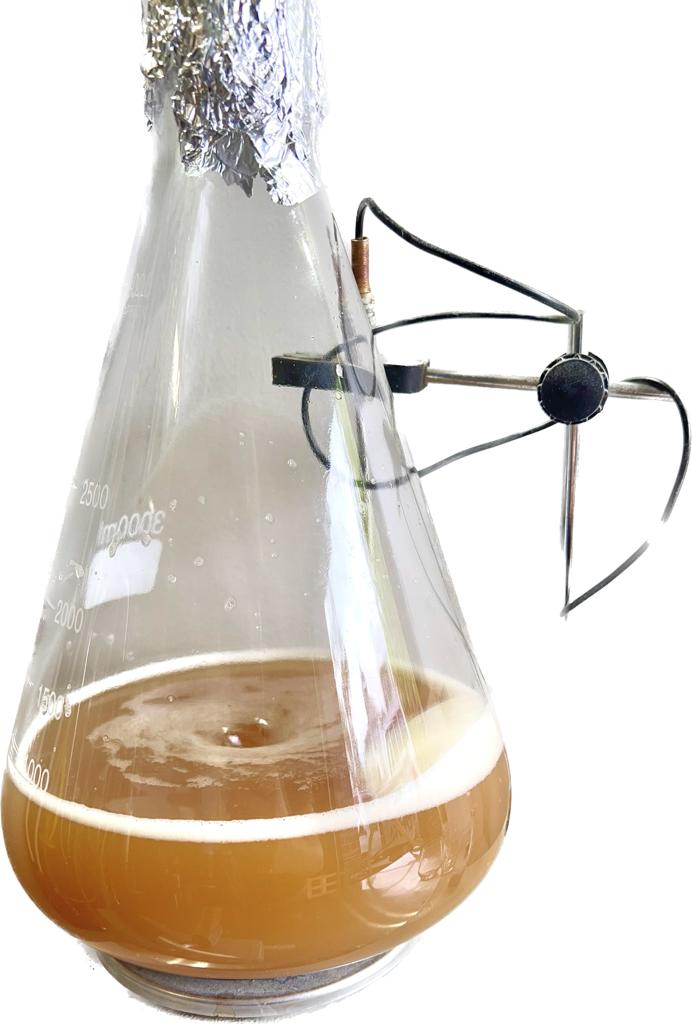
- If you have a stir plate, set the starter on it a day before you brew with the stir plate mixing the start with a light whirlpool (it doesn't need to be too aggressive!) to help keep yeast active and oxygen getting pooled into the starter
- if you dont have a stir plate just give the jar/vessel a gentle swirl every now and then over the next 24 hours to keep the yeast active and in suspension
Don't want to make a starter? Try yeast re-hydration
To simply rehydrate yeast (not a starter) Add yeast to approx. 10 times as much room temperature water as the weight of the yeast e.g. 10g yeast in 100 ml water (0.35 oz yeast in 3.5 fluid ounces water)
Beer Off-Flavours Cheat Sheet!
Why Does my beer taste bad?
That is the million dollar question and one of the most googled searches from homebrewers! Well there could be a lot of causes, but there is always common factor, something has gone wrong and its made an "off-flavour!" so here we have compiled our off-flavours cheat sheet to help you self diagnose what is going wrong with your latest homebrew! It also helps if you take heaps of notes when you brew so you can go back later to figure out what mightve gone wrong!
Step 1
Try and figure out what flavour / aroma it is that you are getting in your beer that doesnt seem right.
Step 2
Go through the list of off flavours below to identify the potential causes for that compound being formed in your beer, and use the process of elimination to identify what went wrong with your batch so that you can fix it for next time!
No. 1 Acetaldehyde
Cause
- Produced during the early stages of fermentation when yeast is in its logarithmic phase and rapidly multiplying·
- it can also be caused by too much or too little dissolved oxygen being present in the beer during early fermentation·
- can also be produced by beer sitting on yeast cake for too long, when yeast health is poor they can burst open and release copious amounts of the chemical into the beer
Flavour / Aroma
- Fresh Paint
- Unripe green apples
- Freshly cut pumpkin
- Faintly cidery
How to prevent / Fix it
- Keep yeast healthy – don’t stress them out e.g.
- Pitch a sufficient quantity of yeast (don’t under or over pitch)
- Do not under or over aerate wort (no more than 1 min with a paint mixer is good)
- Keep temperature steady
- Do not rush fermentation allow it to completely finish
- Dump trub and yeast when needed, don’t let it sit on yeast cake for too long
No. 2 Alcoholic
Cause
- Higher weight fusel alcohols produced from fermentation when yeast is under too much stress
- Hot fermentation, typically in excess of 27 °C / 80 °F (unless it’s a yeast designed for hot fermentation e.g. Kviek)
- Very high gravity wort, especially when large amounts of sucrose or unrefined sugar is added
Flavour / Aroma
- Hot prickly alcohol, similar to the taste and smell of a cheap tequila
How to prevent / Fix it
- Keep fermentation within the appropriate temperature range for your yeast
- When adding adjuncts to brewing try not to increase the gravity too much with unrefined sugar
- Use a yeast starter where possible to build a healthy yeast culture and acclimatise yeast to wort before pitching
No. 3 Diacetyl
Cause
- A compound that is naturally formed during the fermentation process from diacetyl precursors, however in excess quantities it becomes apparent as an off flavour
Flavour / Aroma
- Butter
- Butterscotch
- Buttery microwave popcorn
How to prevent / Fix it
- Keep yeast happy and healthy by
- Not over or under aerating wort before pitching (no more than 1 min with a paint mixer is good)
- Ferment in the appropriate temperature range for your wort
- Do not rush fermentation
- Pitch a sufficient quantity of yeast (don’t under or over pitch)
- You can also help clean up diacetyl before bottling/canning/kegging beer by raising the temperature of your fermentation by 2-3 degrees for 2-3 days before packaging, this helps the yeast eat the last remaining sugars and absorb the diacetyl back into their cell walls
No. 4 Astringency
Cause
- Polyphenols (tannins) which react with the proteins in your mouth forming a “haze” coating your tongue, these polyphenols can come from:
- Over hopping with too many low alpha acid hops
- Over dry hopping
- Over sparging and/or sparging with water that’s too hot (above 80 °C / 176 °F)
- High mash pH and/or too
Flavour / Aroma
- Similar to bitterness
- Powdery / dry feeling
- Similar to sucking on a used black tea bag
How to prevent / Fix it
- Keep dry hop quantities to a reasonable level and reduce contact time between hops and fermenting beer (no more than 2-3 days) this can be done by trub dumping, or using a hop sock to remove hops after a set time
- Keep sparge temp to about 78-80 °C / 172-176 °F
- Stop sparging after sparge water is showing a gravity of 1.01
- Especially for stouts and dark beers check pH isn’t too high
No. 5 Estery / Fruitiness
Cause
- Either Isoamyl Acetate or Ethyl Acetate (depending on the fermentation) that is desirable in some beer styles but not all, resulting from excess Acetyle-Co A which is a compound yeast produce to convert nutrients (like fatty acids and sterols) into cellular building blocks during the logarithmic growth phase
Flavour / Aroma
- Banana
- Canned Fruit salad
- Nail polish remover (aroma)
How to prevent / Fix it
- Reduce factors that encourage excessive yeast growth and stress
- Ferment on the cooler side of the recommended temperature range for your yeast
- Aerate wort sufficiently before pitching yeast
- Pitch a sufficient quantity of yeast (don’t under or over pitch)
No. 6 Medicinal
Cause
- Can be from either
- Use of Chlorine or Iodine based cleaning chemicals that are not thoroughly rinsed out of equipment
Or
- Yeast being used too many times – resulting in a strain that has changed and mutated over usage, as well as likely been infected by wild yeasts, bacteria or fungi
Flavour / Aroma
- Band-aids (plastic strips for cuts an wounds
- Hot plastic
- Cloves (cooking spice)
How to prevent / Fix it
- Thoroughly rinse and clean out equipment after using chlorine or iodine based chemicals
- Check that your city water isn’t too high in chlorine, if so use a known water source that doesn’t (e.g. RO water (reverse osmosis water))
- Don’t re-use yeast for too many generations (no more than 10!)